Money Piece Highlights 101: Looks, Tips, and What to Expect
I have a very specific memory from my salon-assistant days in Austin. A client came in holding her phone screen-out toward the stylist, pointing at a celebrity photo and saying, “I want this, but I don’t even know what to call it.” The stylist looked at it for half a second and said, “That’s a money piece. Easy.” The client had been working up the nerve to ask for it for months.
That moment has never left me, because I meet that person in my inbox constantly. She has saved the photo. She has studied it. She just needs someone to tell her what it is, whether it will work on her, and whether she is going to regret it. That is exactly what this article is for.
Let’s talk through everything, including what money piece highlights actually are, what the different looks involve, how to pick the right shade and contrast for your specific hair and face, what the process really costs and takes, and how to keep them looking great after you walk out of the salon.
What Exactly Is a Money Piece?
A money piece is a concentrated highlight placed on the front-framing sections of your hair, the pieces that run along your hairline from your part down toward your cheekbones and collarbone. These front sections are the “money” sections because they are the ones showing in every photo, every video call, every mirror glance. All of the highlight impact goes exactly where you see it most.
What makes a money piece different from regular highlights is the concentration. Traditional highlights scatter dimension through the whole head. A money piece puts all that brightness right at the face, where it brightens your complexion, catches light, and makes your whole look feel elevated. The rest of your hair can stay completely untouched, which is a big part of why this look has exploded in popularity.

It is lower commitment, lower maintenance, and lower cost than a full head of highlights, and yet the visual impact often outshines them.
A few things people mix up: a money piece is bolder and more concentrated than face-framing highlights. Face-framing highlights use multiple fine pieces spread around the hairline for a softer, more blended brightening effect. Babylights are even more diffused, scattered through the entire head for an all-over natural-looking glow. A money piece is a statement. Face-framing highlights are a suggestion. Babylights are a whisper. None of these is objectively better. They just produce different results, and the one that is right for you depends entirely on how much contrast and brightness you are going for.
The 2026 Shift: Soft and Blended vs. Bold and Graphic
Here is something worth knowing before you save your inspo photos. The money piece has evolved a lot since it first went viral. The original trending version, the one you probably saw on everyone a few years ago, was chunky, high-contrast, and obvious. Bright blonde or platinum panels against a darker base, no blending, clear defined edges. Very editorial, very graphic.
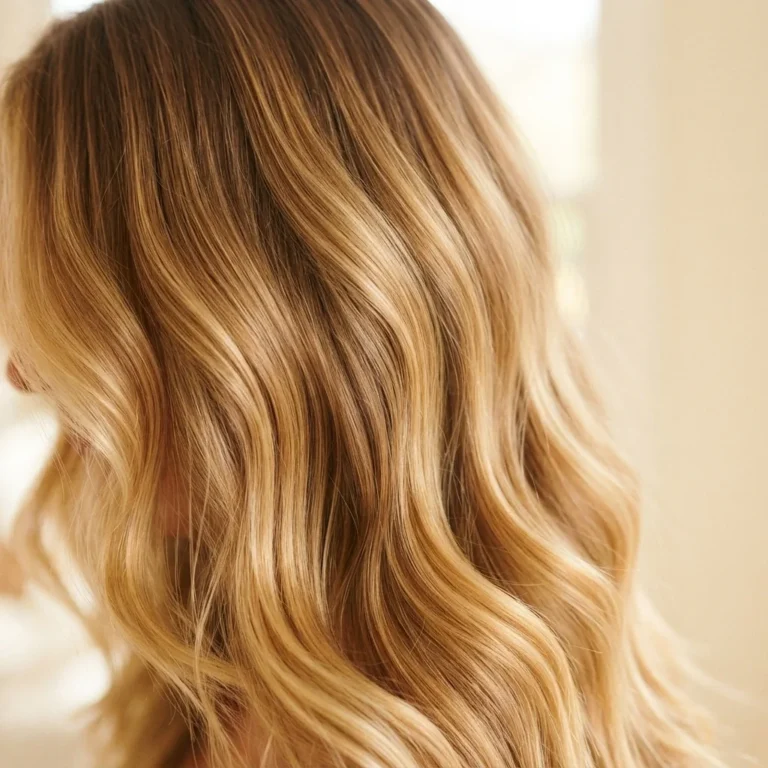
In 2026, the trend has shifted toward something softer. According to professional colorists and current salon data, the most-requested money piece looks right now feature a gradient melt where the lightened section eases into the base color rather than making a sharp line. The pieces are still visible and intentional, but they look like they grew that way. According to the Wella Professionals face-framing highlights guide, using smaller weave sections and starting the lightener further down the strand (rather than right at the root) is what creates this more natural, sun-kissed effect versus a bold graphic panel. Both approaches are valid in 2026.

The bold version is still having a major moment for people who want that high-contrast, editorial look. The soft version is just more of a default than it was before.
This matters because it means you have more options than you might think. You are not locked into one version of this look.
15 Money Piece Highlight Looks to Inspire You
These are organized by hair color, contrast level, and texture so you can actually find yourself in this list.
Brunette and Dark Brown Hair
1. Honey Blonde on Medium Brown. Two to three levels of lift, warm golden tones. This is the “I want something noticeable but not scary” version. Incredibly flattering on warm and neutral skin tones and beautifully low-maintenance because the warmth of the honey blends naturally with your base as it grows out.
2. Caramel on Dark Chocolate Brown. A slightly deeper lift than honey, with rich caramel tones that lean golden-amber. Works brilliantly on warm skin undertones, especially medium and olive complexions. Think of it as a sun-kissed version of a money piece without any brassiness risk because caramel already reads warm.
3. High-Contrast Platinum on Dark Brown. This is the bold, editorial version. Very bright, very graphic. Requires more lifting and likely a toner to knock out warmth and land on an icy or cool blonde. Striking and intentional. Not the place to DIY if you are starting from dark hair.
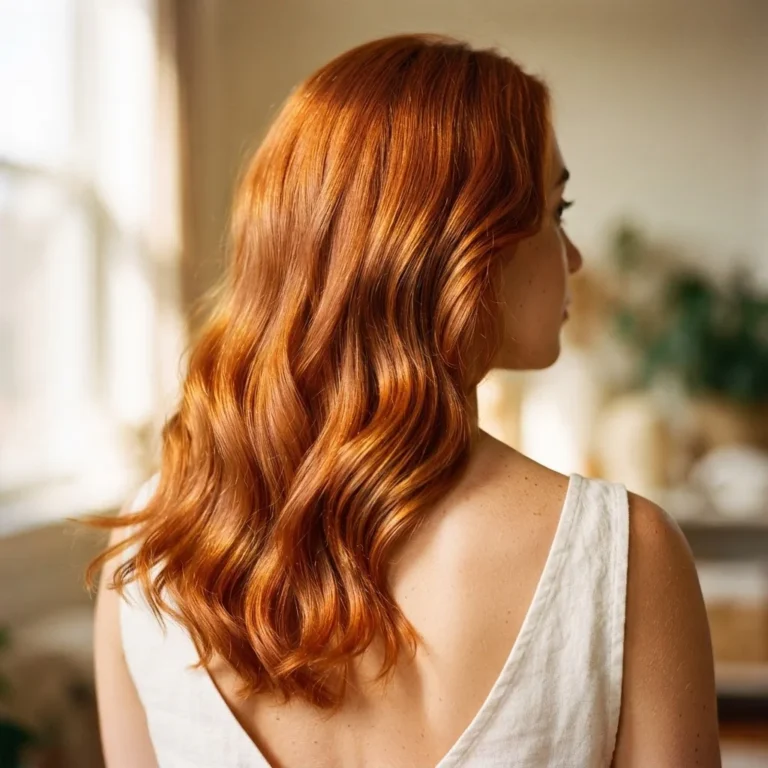
4. Copper and Cinnamon on Espresso. A warmer, creative alternative that looks red-gold against a dark base. On deep skin tones this is particularly stunning. It also avoids the potential brassiness issue of an extreme lift because the target shade is warm anyway.
5. Soft Butterscotch Blend. A newer variation where the money piece is not a defined panel but more of a soft, melted warmth around the hairline. No harsh edges. Achieves a “did she or didn’t she” effect that reads as natural.
Black Hair and Deep Dark Bases
6. Platinum Pop on Black Hair. The highest-contrast version of this look. Requires multiple lift stages and very likely two sessions if your hair is virgin natural black. But when done well it is genuinely jaw-dropping, especially on deep skin tones where the contrast between the bright panel and the dark base is maximum. As colorists have noted, this is one of the most flattering high-impact color services available for dark-haired clients precisely because the contrast is already built into the canvas.
7. Warm Gold on Black. A more forgiving lift target for very dark bases. Instead of pushing to platinum, the colorist lifts to a bright golden yellow stage and tones to a warm gold rather than cool. Easier to achieve safely in one session for many clients.
8. Navy or Deep Blue on Natural Black. If you want dimension without lightening, a vivid cool-toned direct dye in navy or deep blue applied to the front sections creates a money piece effect that catches light differently than traditional highlights. Less damage, no bleach required, but it does fade over time.
Blonde and Lighter Hair
9. Platinum Money Piece on Dark Blonde. A classic. From a dark blonde base, reaching platinum on the front sections takes one clean session for most clients, especially with bond-building lightener formulas. Bright, clean, crisp.
10. Icy Silver or Pearl Tone. Trending heavily right now. The front sections are lifted to a very light level, then toned with a lavender or pearl toner for an almost iridescent finish. Especially popular for natural brunettes going lighter and for grey-hair embracers.
11. Rose Gold on Blonde. The front sections are lightened if needed then toned with a pink-copper deposit. Bright, feminine, and trend-forward. Requires more frequent toning refreshes (every four to six weeks) to keep the rose-gold pop vivid.
Curly, Wavy, and Coily Hair
12. Honey Money Piece on Type 3 Curls. On wavy and curly hair, the lightened pieces pick up light differently because each wave or curl catches it at its own angle. The result is dimension that looks like it comes from within the hair, not painted on.

Warm honey tones on type 3 curls are particularly beautiful.
13. Caramel Money Piece on 4A or 4B Natural Hair. Yes, money piece highlights absolutely work on coily natural hair. The key is that a colorist experienced with natural hair textures handles the lightening process, since type 4 hair requires a careful approach to bleach application and timing to avoid damage. The reward is genuine dimension that enhances curl definition and brightens the face beautifully.
14. Bold Blonde on Curly Hair. Higher contrast works especially well on curly and coily hair because the individual curl shapes create a more diffused, organic-looking result than straight hair would. What reads as a sharp panel on straight hair reads as dimensional sunlight on curls.
Short Hair and Bobs
15. Money Piece on a Bob or Lob. Shorter haircuts are not excluded from this trend at all. On a bob, the money piece frames the jaw and cheekbones, which creates a contouring effect that is actually more pronounced than on long hair because there is less hair competing for attention. Subtle caramel or golden tones on a bob are some of the most wearable, elegant looks this technique produces.
Picking Your Shade and Contrast Level: A Real Guide
One of the biggest beginner questions I get is “how light should I go?” and the honest answer is that it depends on three things: your skin undertone, your natural base color, and how much maintenance you want.
For skin undertones, the general framework is this. If your skin leans pink, rosy, or cool (blue undertone), ashy, cool-toned money pieces in platinum, icy blonde, or cool caramel tend to work most harmoniously because they do not compete with the skin’s natural coolness. If your skin leans golden, peachy, or warm (yellow undertone), honey, caramel, copper, and warm gold money pieces will look like they were made for your face. Neutral undertones get the most flexibility.

Both cool and warm money pieces can work beautifully.
For contrast level, the rule of thumb used by colorists is that a subtle money piece sits two to three levels above your base, a noticeable money piece sits four levels above, and a bold or editorial money piece sits five or more levels above. If you are nervous about going too dramatic, start in the two-to-three-level range. You can always go lighter at the next appointment. Going back darker once you have lightened is a whole different process.
For face shape, here is what I saw stylists do again and again in the salon: on round faces, the pieces are kept narrow and pulled slightly toward the part rather than wide toward the temples, which creates an elongating effect. On square faces, the pieces are kept a little softer and wispy to avoid drawing attention to sharp jawlines. On heart-shaped faces, keeping the pieces at roughly cheekbone length rather than going all the way down softens the forehead without emphasizing a narrow chin. On oval and oblong faces, you have the most freedom because both wide and narrow placements tend to look balanced.
The Honest Conversation About Bleach and Safety
Let me be straight with you here because this is where too many articles are either vague or misleading. Most money piece looks, especially on dark hair, require lightener (bleach). There is not a way around that if you want bright blonde or platinum pieces on a dark base. Understanding what is actually happening matters.
Lightener works by breaking down the melanin in your hair shaft to reveal a lighter underlying tone. As the melanin breaks down, your hair travels through stages: red, then orange, then gold, then pale yellow, and finally the very light stage needed for platinum or icy tones. The colorist (or you, if you are attempting this yourself) needs to catch the lightener at the right stage before overprocessing, which damages the hair’s structure, causes breakage, and can even affect the scalp.
This is exactly why developer volume matters. A 10-volume developer lifts minimally. A 20-volume developer lifts one to two levels. A 30-volume developer is often used for dark hair that needs significant lifting. A 40-volume developer is the most aggressive and is generally not recommended at home because the risk of scalp irritation and structural damage is higher with less precision application. The Cleveland Clinic notes that bleaching products “strip away the protective coating of the hair fibers,” making lightened sections more fragile over time, which is why bond-building additives have become a standard part of professional lightening services. A peer-reviewed 2022 study published on PubMed Central outlines the chemistry behind hair dye ingredients and confirms that the structural changes involved in lightening are real and worth understanding before you commit.
The ingredient conversation also matters for anyone doing color at home. Most permanent hair dyes, including lighteners mixed with developers, contain paraphenylenediamine (PPDA), which is one of the most common contact allergens in cosmetic products. The Cleveland Clinic’s dermatologists specifically recommend a patch test before every color application, even if you have colored your hair before, because sensitivities can develop over time. A patch test means applying a small amount of the mixed product to the inside of your elbow or behind your ear, waiting 24 to 48 hours, and checking for any redness, itching, or swelling before putting it anywhere near your hairline. This is not an optional step. Allergic reactions to hair dye can range from mild irritation to severe contact dermatitis, and the AAD’s guidance on coloring and chemical processing is unambiguous: patch test, wear gloves, and do not leave product on longer than the instructions state.
If you have any current scalp issues, a sensitivity history with chemical products, or are pregnant, please talk to a dermatologist before any lightening service. Your colorist should also know your history.
My honest take on DIY money pieces: If you are starting from a light to medium blonde or a dark blonde base, a boxed lightening kit on the front sections is something many people do themselves with decent results, provided they do the patch test, read every instruction, and do not go in expecting salon-quality precision from the first attempt. If you are starting from dark brown or black hair, please see a professional. The lift process is technical, the risk of uneven results and breakage is real, and the cost of fixing a DIY gone wrong almost always exceeds the cost of doing it right the first time.
What Happens at a Money Piece Salon Appointment
If you have never gotten a color service before, here is what to expect so nothing surprises you.
The appointment starts with a consultation where your colorist looks at your natural base, your skin undertone, and the inspo photos you have brought (bring photos, please, always bring photos). They will set realistic expectations about what is achievable in one session versus what might take two. For many clients with very dark hair aiming for a platinum money piece, the honest answer is two sessions, not because your colorist is being cautious for no reason, but because pushing too hard in one sitting is genuinely damaging to the hair.
Then comes the application. The colorist sections off the two front panels, applies lightener with either a freehand balayage technique or foils depending on the level of control they want, and lets the lightener develop while checking progress every ten minutes or so. Bond-building additives mixed directly into the lightener (the Wella Professionals technique guide confirms this as standard practice) protect the hair’s structure during this stage.
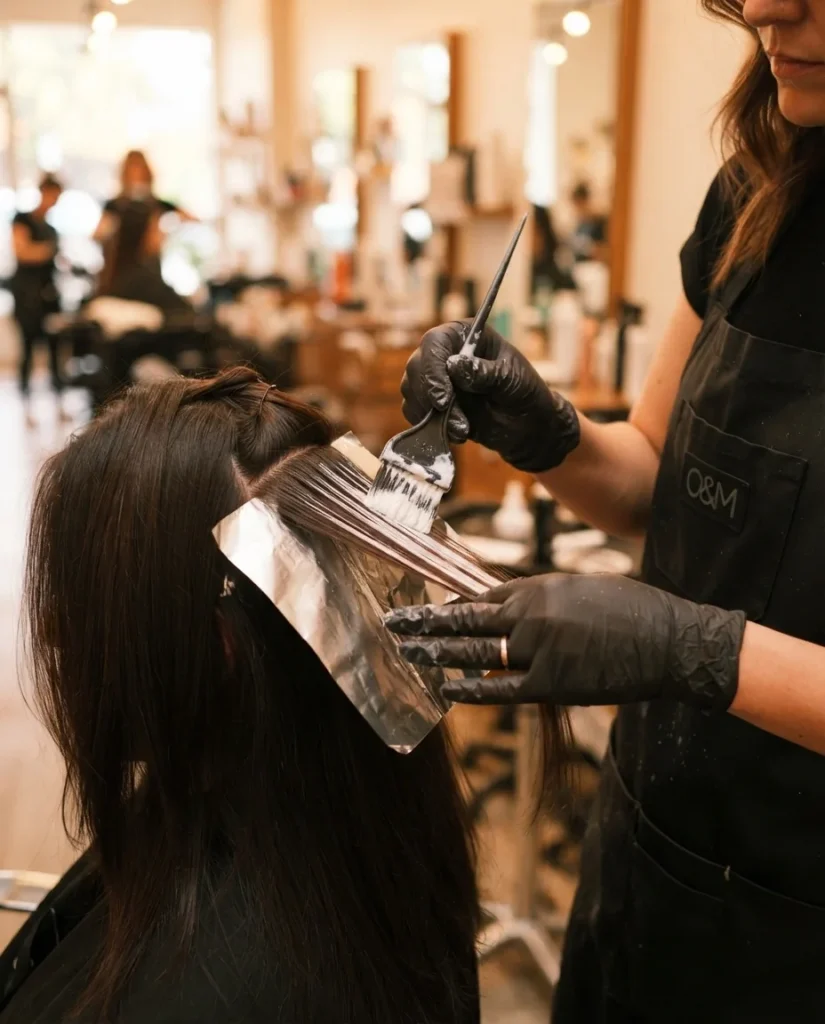
After rinsing, a toner is applied to bring the lightened pieces to the final shade, the toner is rinsed, and the hair is finished.
Total appointment time is typically 60 to 90 minutes, which is one of the biggest selling points of this service. That is significantly shorter than a full balayage, which takes 2.5 to 4 hours, and much easier on both your schedule and your budget.
Cost reality: Based on current salon data and community discussions, a money piece service generally runs less than a full balayage. For face-framing highlight services, costs in most US markets start around $100 to $150 and can go higher depending on your location, the salon’s pricing structure, and how much work your starting color requires. Touch-ups every 8 to 12 weeks are typically less expensive than the initial service because the colorist is working with what is already there.
Maintaining Your Money Piece: The Real Routine
Here is where most people underestimate the commitment, and then wonder why their money piece looks brassy and dull two months in. Maintenance is not optional.
The first thing you need is a color-protecting, sulfate-free shampoo for your regular wash days. Sulfates strip color from the hair shaft faster than anything, and your lightened pieces will go brassy much sooner without this one swap.
If your money piece is in the cool blonde, silver, or platinum range, a purple shampoo used once or twice a week is essential. Purple tones on the color wheel neutralize yellow and brassy tones, keeping your money piece looking clean and cool rather than golden and faded. If your base is darker (brunette or dark brown) and your money pieces are caramel or copper, purple shampoo is not what you need. Blue shampoo is better for brunette-based highlights because it neutralizes orange rather than yellow.
Bond-building treatments at home are genuinely worth adding to your routine. These are not just another marketing product. Lightened hair has had its internal bonds disrupted by the lifting process. Bond-repairing treatments used weekly help maintain the structural strength of the lightened sections, which means less breakage and more longevity. Heat protectant before any hot tool use is also non-negotiable on lightened sections, because they are more porous and more vulnerable to heat damage than untouched hair.
A silk or satin pillowcase is one of those small upgrades that makes a real difference over time, especially for the front pieces that sit right against your face all night. Less friction means less frizz and less mechanical breakage on the sections you are working hardest to protect.
Touch up your money piece every 8 to 12 weeks depending on how fast your hair grows and how much contrast you want to maintain. Between those appointments, a toner gloss refresh at the salon (usually quicker and cheaper than a full appointment) keeps the tone vibrant when you notice the warmth creeping back in.
When It Starts Going Brassy (And What to Do)
Orange or brassy money pieces are the number one complaint after an at-home lightening job and a common frustration even after a professional service. Here is why it happens: when you lift dark hair, the underlying warm pigments (red, orange, gold) come to the surface. Toner neutralizes those warm tones to create the final shade. But toner is semi-permanent, which means it fades over time, and as it fades the underlying warmth reappears.
The fix for mild brassiness at home is consistent use of purple or blue toning shampoo depending on your tone, as described above. The fix for more significant brassiness, or for money pieces that were never quite the right tone to begin with, is a toner appointment at the salon. A stand-alone toner gloss is usually a short service and a fraction of the cost of a color appointment. Going in to refresh your toner every six to eight weeks rather than waiting until the brassiness is dramatic makes the entire maintenance process much more manageable.
If your at-home lightening resulted in a very uneven or orange tone that toning shampoo is not touching, please do not try to fix it with another round of bleach without professional guidance. Overlapping bleach on hair that is already lifted and compromised dramatically increases the risk of breakage. That is a situation for a color correction appointment, not another box.
A Few Questions I Get All the Time
“Can I do this at home?” Maybe, with real caveats. If you are starting from a light base and doing a subtle brightening, a box lightener applied carefully to the front sections is something many people manage at home. Always patch test first. If you have dark or previously colored hair, or you are aiming for anything close to platinum, please go to a salon.
“Does the money piece work on curly or coily hair?” Yes, genuinely. On curly and coily textures, lightened pieces look especially dimensional because of how the curl shape interacts with light. The application process needs to be adjusted for texture and density, which is why a colorist experienced with your hair type matters here. Community discussions on Reddit and Instagram from people with 4A and 4B natural hair who have gotten this look confirm it can be stunning when done by someone who knows what they are doing.
“How long does it last?” The lightened pieces themselves don’t fade away. They grow out. The toner fades, and the regrowth comes in, but the actual lightened sections are permanent changes to those strands. Most people refresh their money piece every 8 to 12 weeks. The look grows out gracefully because the placement follows the natural hairline, so you are not looking at a harsh horizontal root line.
“What if I hate it?” This is the question people are too afraid to ask. If your money pieces are too light or the tone is wrong, a colorist can tone them darker or add a gloss over the top to soften the contrast. If you want to go back completely, that is a color-correction service (adding color back over lightened hair), which is doable but more involved. It is worth having a very clear conversation with your colorist before the appointment about what you want and what your “I would be unhappy if…” boundaries are.
Pairing Your Money Piece with Other Looks
A money piece works beautifully as a standalone service, but it also pairs well with a few other things. If you wear or are considering curtain bangs, a money piece and curtain bangs share exactly the same front section of hair, and the combination is one of the most-searched pairings in hair content right now. The highlighted pieces fall directly into the bangs and amplify the face-framing effect of both.
If you want to build more dimension over time, a money piece is a natural first step that can later have balayage or face-framing highlights added around it. Many colorists recommend starting with a money piece and seeing what you love before committing to a fuller highlighting service. It gives you a preview of lighter color around your face without the full investment.