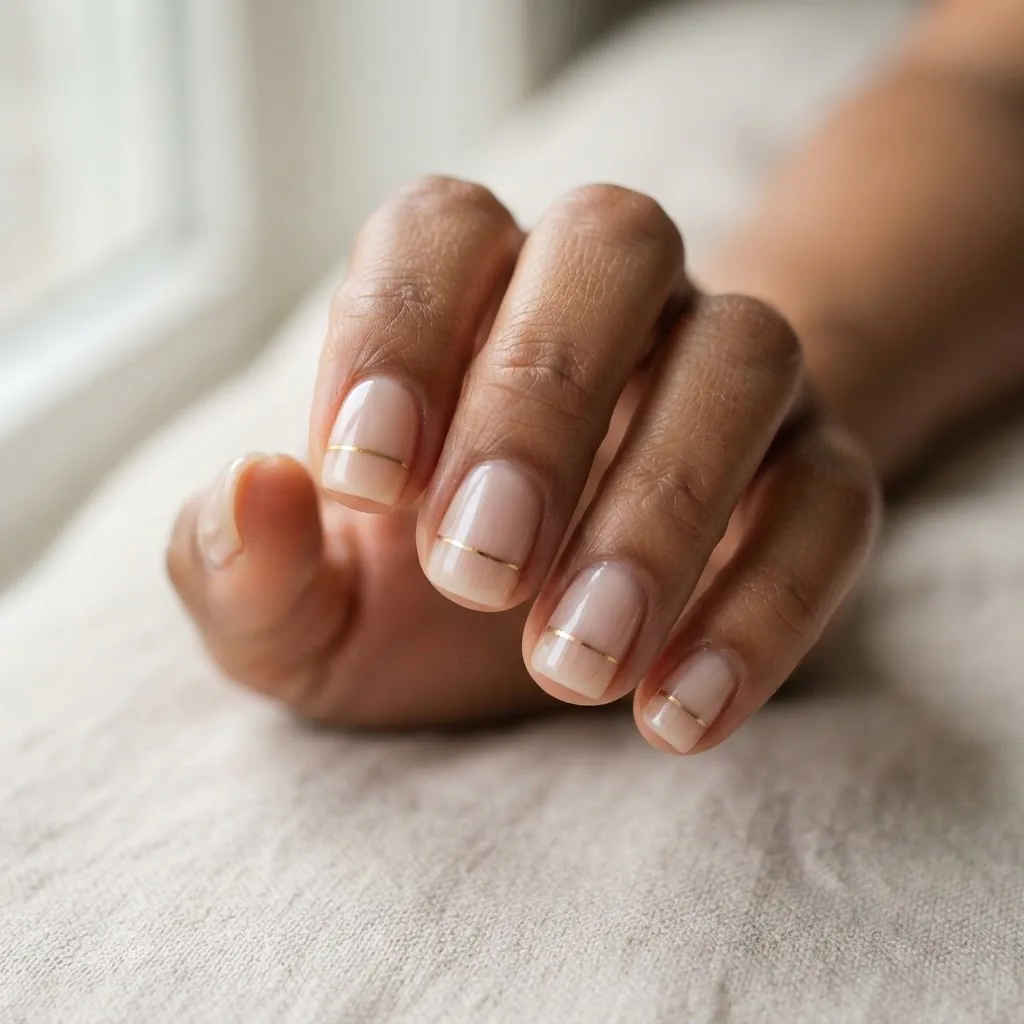
20 Minimalist Nail Art Ideas That Actually Work on Short Nails
Let me tell you something I wish someone had told me the first time I opened Pinterest and immediately closed my phone in defeat: short nails are not the problem. I spent so long convinced that beautiful nail art was a length thing, like the canvas was too small and anything I tried would just look squished and sad. Then I taught myself nail art one wobbly dot at a time, on my own short, unspectacular nails, during a brain-melting corporate internship. And I figured out something that changed everything for me.
Minimalist designs do not just work on short nails. In a lot of ways, they work better. Short nails give small, deliberate details a natural frame.
A single fine line, two tiny dots, a barely-there French curve, a whisper of negative space — these things look intentional and chic on a short nail in a way that can get lost on a long one. You are not working with less canvas. You are working with a focused one.
This guide covers 20 minimalist nail art ideas that I have personally practiced and worked through, from the first terrified attempt to the “oh, I actually like this” moment. For each one, I will tell you exactly how to do it, what tools you actually need (and what they actually cost), where beginners go wrong, and which short nail shapes they look best on. No talent required. Wobbly first attempts welcome.
What We Mean by Minimalist Nails (and Why the Style Is Having Such a Long Moment)
Minimalist nail art is not the same as “no nail art.” It is the intentional use of one or two simple elements, usually clean lines, small shapes, negative space, or soft color, to create something that looks polished and put-together without being fussy or overworked. Think a single thin stripe along the cuticle line. Two dots of gold on an otherwise bare nail. A micro-thin French tip in nude instead of white. A sheer glassy pink with nothing else. These looks photograph beautifully, they grow out gracefully (a genuine practical bonus), and they do not require a steady hand trained by years of practice.
The style has been dominating Pinterest, runways, and the feeds of every nail account I follow for the better part of two years, and it shows no sign of slowing down. Byrdie’s roundup of minimalist nail art ideas captures exactly why: the clean-girl aesthetic has merged with a real desire for nail art that does not require a full appointment or a professional’s tools. People want pretty and possible at the same time. That is kind of our whole thing here at Prettovia.
Before You Pick a Design: The Prep That Makes Everything Easier
I know, I know. You want to skip straight to the designs. I would too. But here is the thing: minimalist nail art is less forgiving of bad prep than busy designs, because there is nowhere to hide. A ridge, an oily nail plate, a lifted edge — you will see it. Spend five minutes on this and your results will improve dramatically.
Start by removing any old polish with a non-acetone remover for regular polish, or pure acetone (applied with a cotton pad, not soaked for longer than needed) for gel. Wash your hands and let your nails dry completely. File your nails in one direction, not back and forth like a saw — that back-and-forth motion creates micro-tears in the nail edge that lead to peeling and breaks over time. The American Academy of Dermatology’s nail care guidance is worth bookmarking: their dermatologist tips for healthy nails include exactly this filing advice alongside other fundamentals that will protect your natural nail as you get into a regular nail art routine.
Buff the surface lightly with a fine-grit buffer (not aggressively, just enough to smooth any ridges), then swipe each nail with a lint-free pad dampened with isopropyl alcohol or a nail dehydrator. This removes the last of the oil and is genuinely the step that prevents lifting. Apply a thin base coat, let it dry, and now your canvas is ready.
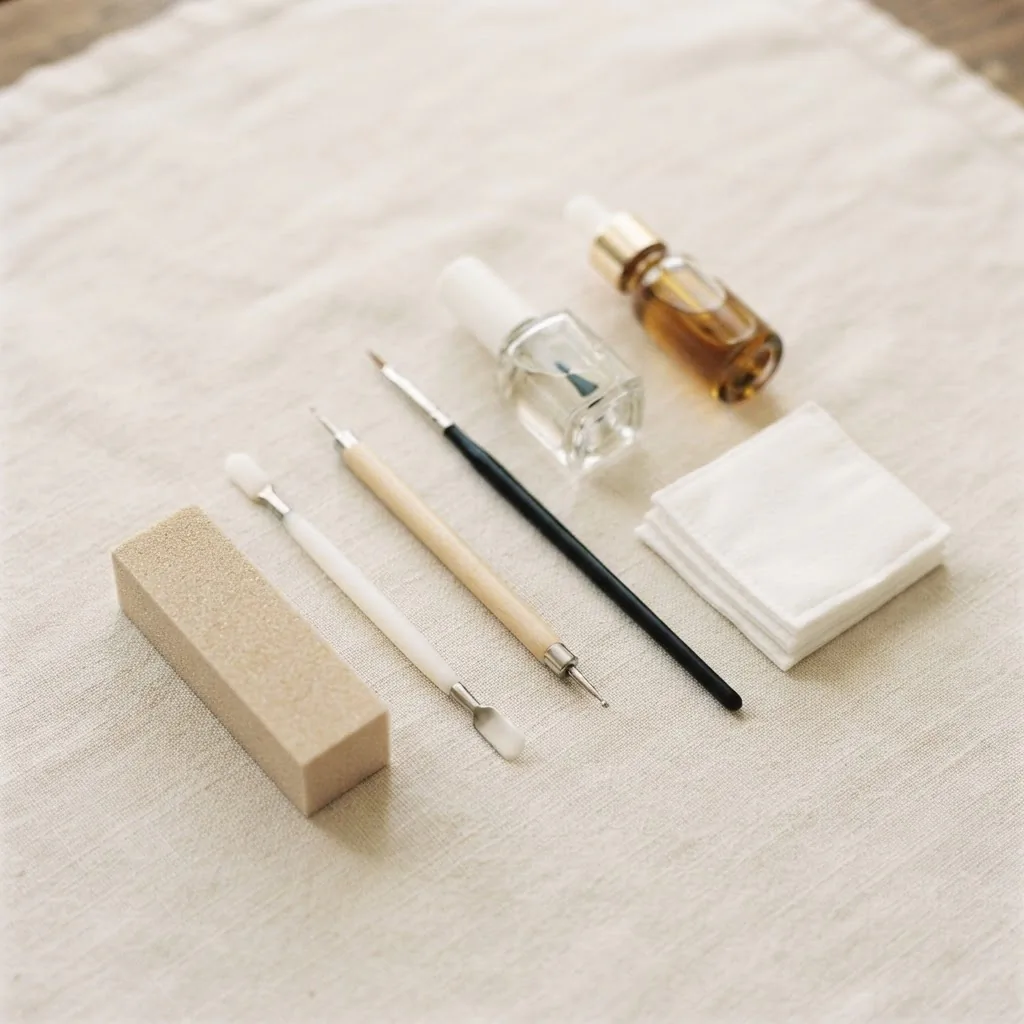
That is really it.
A quick note on cuticles: push them back gently with a rubber-tipped cuticle pusher or an orange stick after a warm shower when they are soft, but do not cut them. The cuticle acts as a seal keeping bacteria and fungi away from your nail matrix. Removing it breaks that seal and opens you up to infections. Push, don’t cut, and follow up with a drop of cuticle oil afterward.
The 20 Designs (With Full How-To for Each)
Design 1: Glazed Nude Single-Color
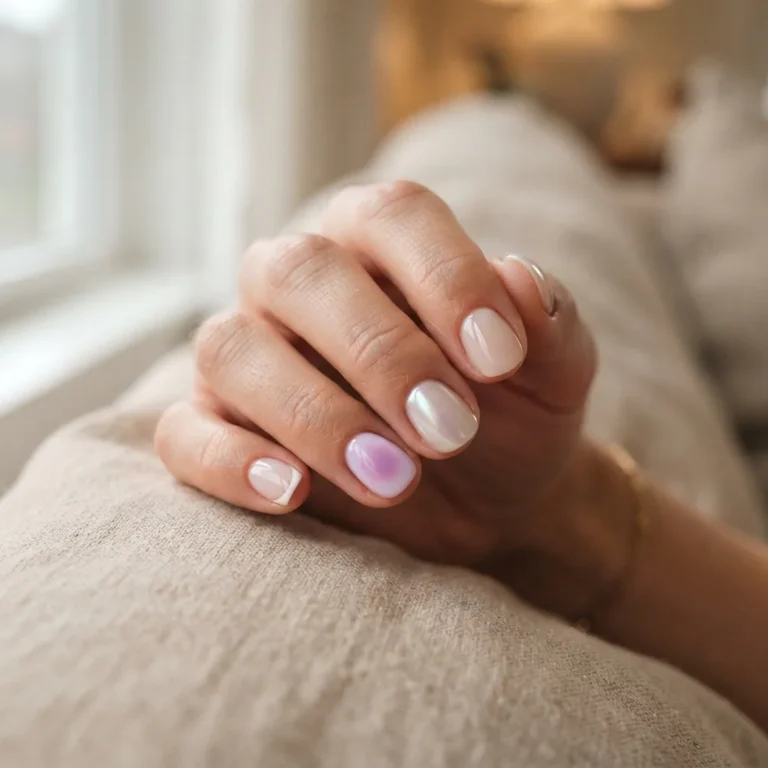
This is the foundation of the minimalist playbook and it is more intentional than it sounds. Choose a sheer, milky, or skin-matching nude and apply two thin coats over a ridge-filling base coat. The finish matters here: a gel-formula regular polish or a sheer jelly shade gives a glassy, “your nails but better” effect. Seal with a high-shine top coat. The secret is thin coats. One thick coat will look gloopy and uneven. Two thin ones will look like glass. Best on: all short shapes. Easiest entry point in this entire list.
Design 2: Micro French Tip
The classic French tip, but the white band is as thin as you can make it. No thick blocky white. A thin sliver of off-white, pale pink, or even nude-on-nude. Use a thin striper brush dipped in white or pale tip polish and draw one stroke across the free edge. If your free edge is very short, this still works — the thinner the stripe, the more modern it reads. Baby-step tip: try it on your pinky first, where a small error is least visible. Seal immediately with top coat before the tip stripe dries fully, which helps prevent chipping at the edge.
Design 3: Single Dot Accent
This was genuinely the first design I ever practiced, back at that internship desk with a cheap dotting tool and a lot of nervous energy, and it is still one of my favorites. One single dot, placed in the center of the nail near the base, in a contrasting color or metallic against a nude base. That is the whole design. Use the wider end of a dotting tool for a round, clean dot. No dotting tool? A bobby pin, a toothpick with a slightly rounded tip, or even the rounded end of a hairpin all work. Press straight down, lift straight up. Do not drag or swipe. A dot is a press and lift.
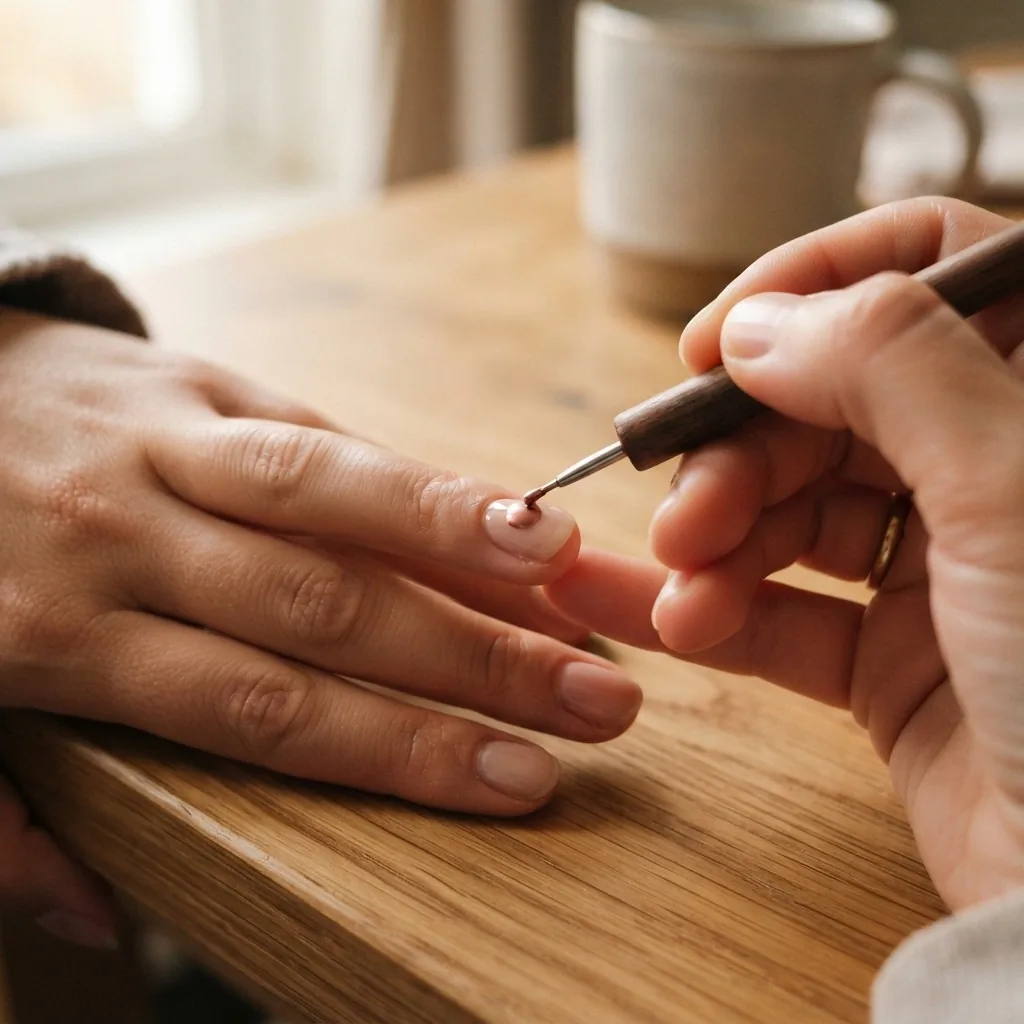
Beginner mistake: pressing too hard and squishing the dot into an oval. Light pressure is all you need.
Design 4: Two-Dot Diagonal
The same dot technique, but two dots placed diagonally on the nail for visual interest without any extra complexity. Try one large dot at the base and one smaller dot near the tip, slightly offset. Or two matching dots at the lower corners of the nail plate. This looks especially good on square and squoval shapes because the geometry of the nail reinforces the geometry of the dots.
Design 5: Single Thin Line (Horizontal)
A horizontal stripe across the lower third of the nail, sitting just above the cuticle line, in a contrasting color. This is where a nail striper brush or liner brush earns its place in your kit. A basic nail art brush set with a liner runs between $5 and $12 at most drugstores or on Amazon, and that tool is responsible for probably half the designs in this list. Load the brush minimally (wipe one side on the bottle rim), rest your painting hand on the table, and draw the line in one smooth motion. If it wiggles, that is fine. The first three will wiggle. The fourth one usually doesn’t. Practice on a piece of paper or a nail wheel before going to your actual nails.
Design 6: Single Thin Line (Vertical)
The same striper brush, but drawn from the base to the tip in a single straight line down the center of the nail. This design has a very editorial, graphic feel and looks unexpectedly chic on short nails because it creates the optical illusion of length. Try it in a dark color (deep burgundy, midnight navy, black) against a sheer or nude base.
Design 7: Negative Space Half-Moon (Lunula Art)
Negative space nail art uses the natural bare nail as part of the design, rather than covering it entirely. The half-moon or lunula design leaves the curved area at the base of the nail bare (or covers only that area with color) to create a clean graphic shape. You can achieve this with a round reinforcement sticker (the white hole-punch stickers used in office supplies, which cost about a dollar) placed over the moon of the nail while you paint the tip, then peeled off. For a full collection of negative space ideas that translate beautifully to shorter lengths, Byrdie’s negative space manicure roundup is a great visual reference. The concept looks far more technical than it is.
Design 8: Negative Space French
Rather than a solid base with a tip, this version uses sheer or bare nail as the “base” and paints only the free edge with an opaque or shimmery color. The effect is that the natural nail shows through the body while the tip pops. Works beautifully on square-cut short nails. Beginner tip: use striping tape along the smile line to get a clean curve, then peel it off while the polish is still slightly wet.
Design 9: Tonal Monochrome
Pick one color family and apply different finishes or shades of it across your nails. Matte blush on two nails, shiny rose on two, a hint of dusty pink on the accent nail. No lines, no dots, just tonal layering. This is the most genuinely zero-skill design in this list because the “art” is in the color selection, not the application. It photographs beautifully and the slight variation nail-to-nail looks deliberate and thoughtful.
Design 10: Sheer Jelly with Glitter Tips
A sheer, glass-like base (one or two coats of a jelly polish) with a tiny dusting of fine glitter pressed just onto the tip with a sponge or your finger. Not chunky glitter. Micro-fine shimmer. The result is almost holographic at the edge and looks salon-quality while requiring about as much precision as a kindergarten art project. Seal with a fast-dry top coat immediately to lock in the glitter.
Design 11: Micro Floral (Single Petal)
A tiny, imprecise flower made from five small dots arranged in a circle with a different colored center dot. No brush skills required, only the dotting tool. The beauty of tiny floral dots on a minimalist base is that even wonky petals read as “organic and handmade” rather than “beginner mistake.” Honestly the asymmetry can make them look more charming. White petals on a nude base with a yellow center dot is the classic. Try placing the flower in the lower corner of the nail rather than the center for a more sophisticated placement.
Design 12: Abstract Single Stroke
Dip your striper brush into a contrasting color and drag one fluid, slightly curved or angled stroke across the nail, not trying to make it straight or symmetrical. The whole point is that it is painterly and loose. This is the design where imperfection is the aesthetic. Try terracotta on nude, sage on ivory, or dusty lilac on white. These work especially well with a matte top coat.
Design 13: Outlined Nail (No Fill)
Paint only the perimeter of the nail with a fine liner brush in a contrasting color, leaving the center of the nail bare or lightly colored. Think of it like drawing a rectangular or oval frame directly on your nail. This sounds tricky but it is actually quite forgiving because you are making four short strokes (two sides, a base, and a tip line) rather than one long continuous one. Try it in gold or black against a sheer nude base.
Design 14: Double Line at the Tip
Two parallel thin lines at the free edge instead of one. Just repeat the micro-French technique twice, leaving a narrow gap between the two lines. The gap is what makes it look expensive. Try a nude base with two lines of silver chrome or deep nude-on-nude.
Design 15: Color-Block Accent Nail
Keep eight nails identical (a clean nude or sheer) and do one accent nail in a solid contrasting color with no art at all. The contrast is the design. This is the easiest “nail art” in existence and it genuinely looks intentional, especially when the accent nail shade is a close relative of the base (soft brown on beige, dusty rose on ivory) rather than a jarring clash.
Design 16: Sticker / Decal Minimalism
Not a cheat — this is a legitimate technique. Nail stickers and decals have gotten very good, and a single tiny botanical, star, or geometric sticker placed carefully on a clean base coat and sealed under top coat looks just as intentional as any hand-drawn design. The key is placement (centered and upright, not crooked) and thorough sealing. Run top coat over and around the edges of the sticker, not just the surface, to prevent lifting. Kits with tiny minimalist decals run about $3 to $8.
Design 17: Pearl Dot Accent
Press a single small pearl-finish nail gem or a tiny white bead dot onto a still-tacky top coat near the base of the nail. Seal again with another layer of top coat over the gem. The built-in pearl trend is everywhere right now and this is genuinely the easiest way to access it. One pearl per nail is more impactful than five. Restraint is the whole style.
Design 18: Barely-There Chrome
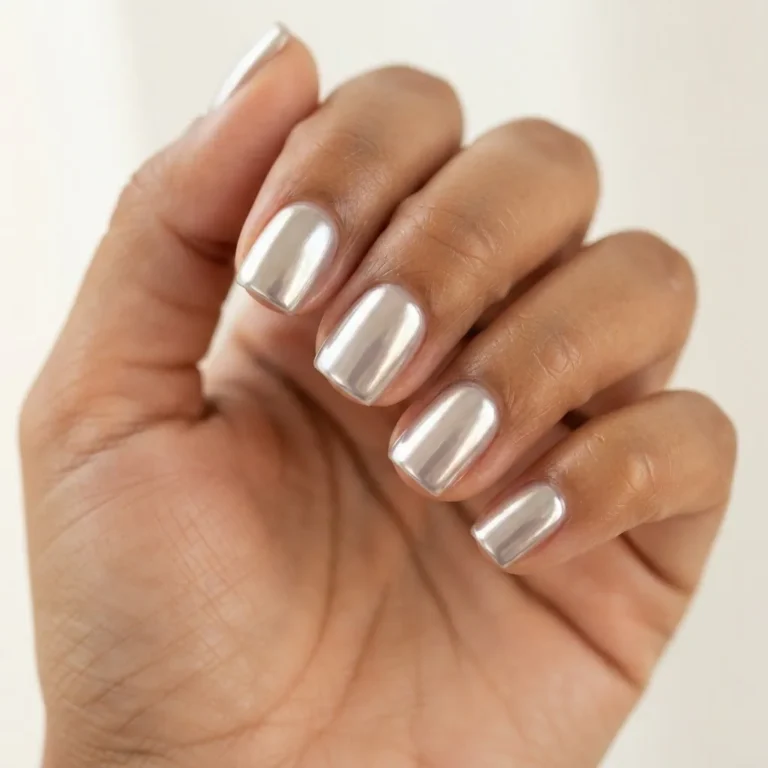
Apply a chrome powder to a fully cured gel top coat (or a specially formulated air-dry chrome top coat for regular polish) by buffing it gently with a small eyeshadow applicator or the foam applicator that usually comes with chrome kits. On a short nail, chrome reads as a clean, glassy shimmer rather than a mirror-ball effect. The result looks very editorial. Rose gold and silver chrome powders are the most versatile for minimalist color palettes.
Design 19: Floating French (Negative Space Tip)
Paint only the very tip of the nail in color, but do not let the color touch the sides of the free edge. Leave a tiny gap of bare nail on each side of the tip, so the colored band seems to float in the center. This is exactly as approachable as it sounds and it looks like it required a salon visit.
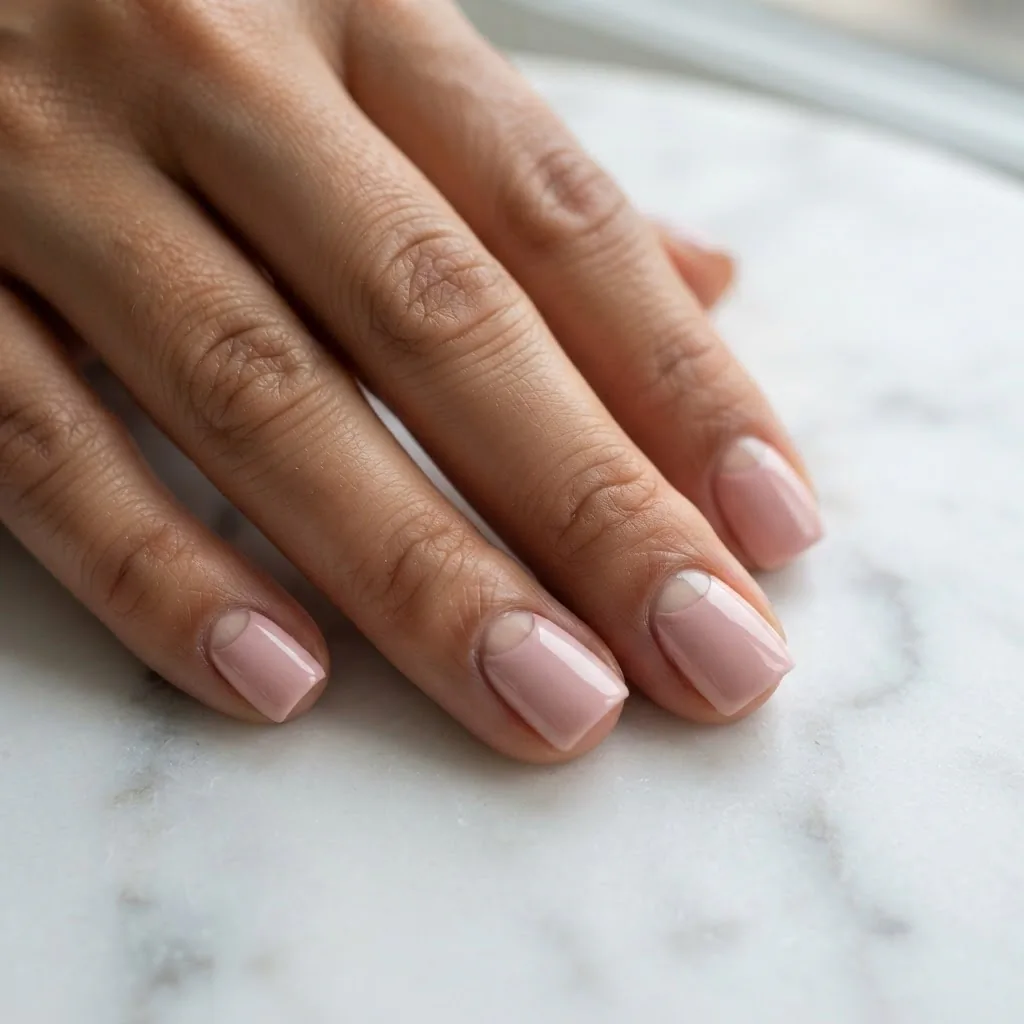
Design 20: Clean Cuticle Line Art
Using a super-fine liner brush, trace a thin colored line that follows the natural curve of your cuticle line, sitting about one millimeter above it on the nail plate. This creates a graphic border effect that frames the nail at the base rather than the tip. Try it in black on a soft blush base, or white on a deeper nude. The trick is to work in tiny segments rather than one long sweep — stop, lift, restart. The overall arc comes together naturally.
Choosing the Right Shape for Your Short Nails
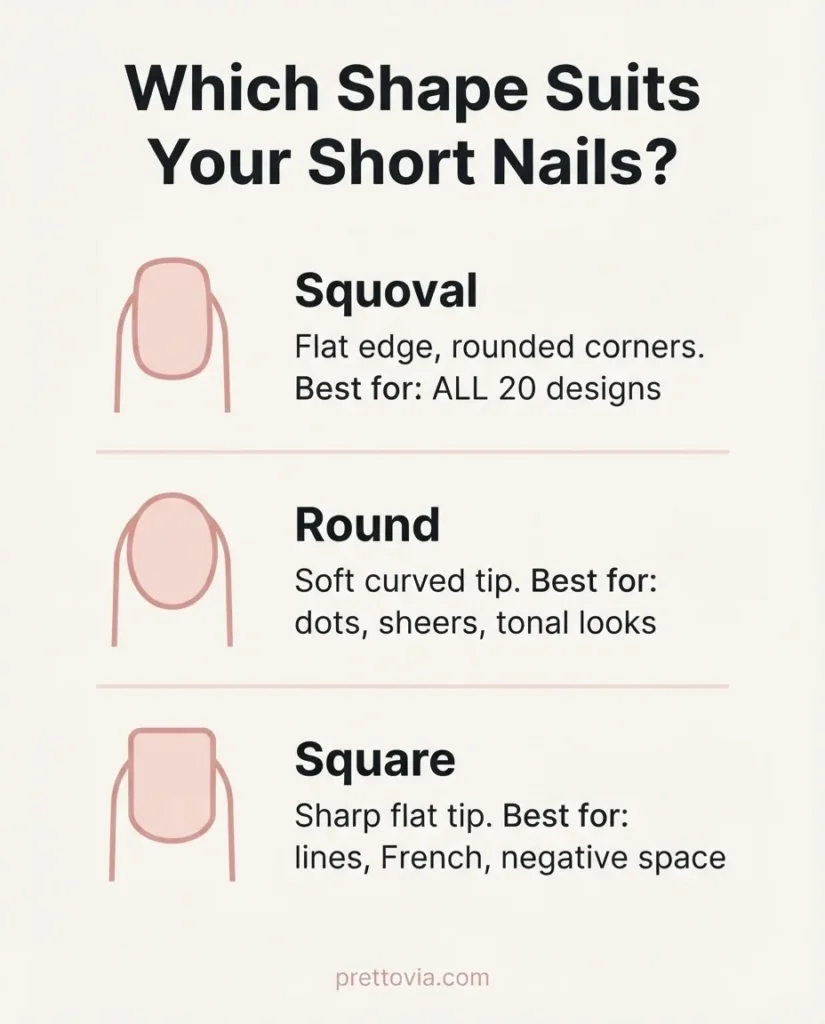
Shape matters more for minimalist designs than most people realize because the outline of the nail is part of the visual. For the designs above, squoval (square with softly rounded corners) is the most versatile and forgiving shape for short nails. It provides a flat edge for French-style designs and enough width for dots and lines. Round is the kindest shape for nails that are not quite long enough for any visible free edge. Square works beautifully for graphic, line-based designs but requires clean, flat filing and tends to snag more easily on short lengths. Avoid sharp stiletto or coffin shapes on short nails — they require real length to read correctly and on a short nail they simply look unfinished.
Gel Polish vs. Regular Polish for Minimalist Designs at Home
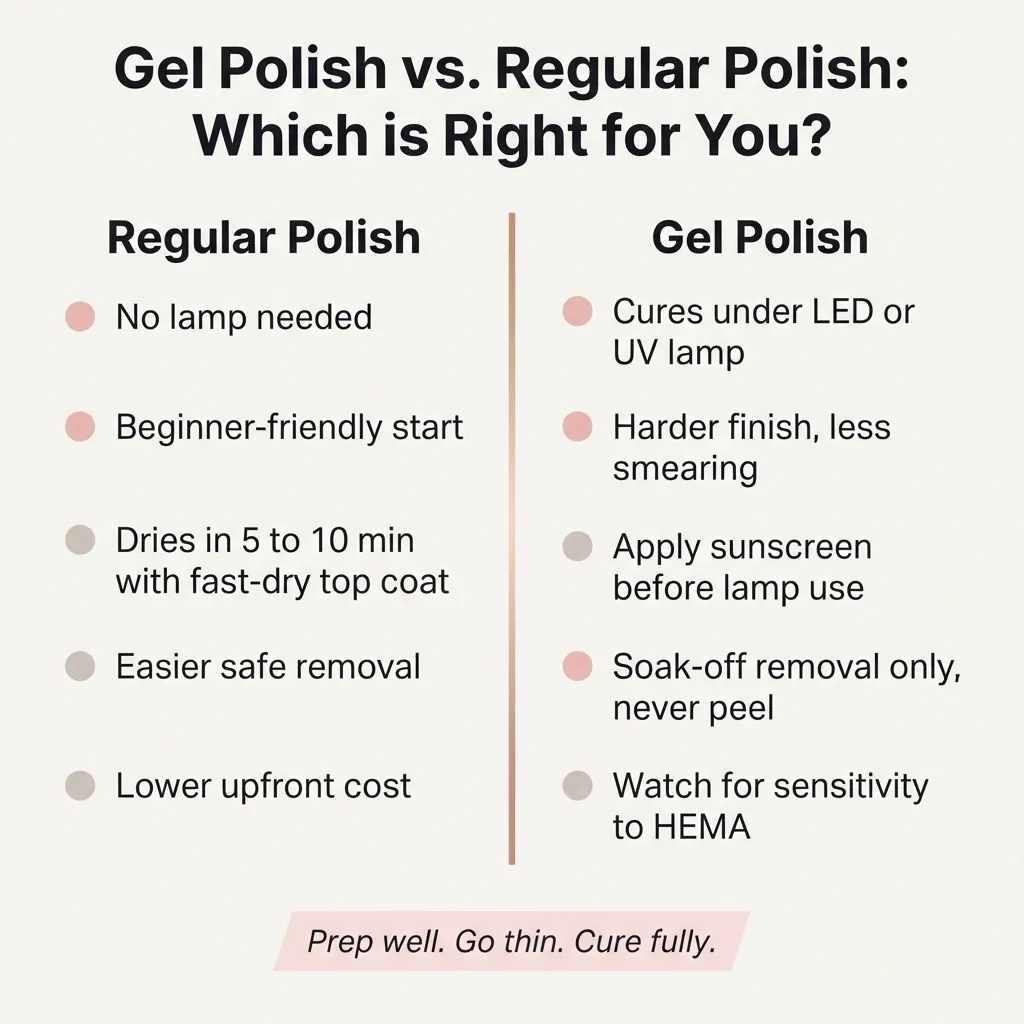
This comes up constantly and the honest answer is: both work, with different tradeoffs. Regular polish dries on its own, requires no lamp, and is the lower-commitment starting point for beginners. The limitation is that fine lines and dot details can smear if touched before the polish is fully cured, so patience is important. A fast-dry top coat helps significantly.
Gel polish gives a harder, more durable finish that is less likely to smear once cured, which makes fine-line designs like the single-line art and outlined nails a little more forgiving. However, gel requires a UV or LED curing lamp and involves some additional safety considerations worth knowing. According to the American Academy of Dermatology, gel manicures can cause nail brittleness, peeling, and cracking with repeated use, and the AAD recommends applying a broad-spectrum sunscreen to the hands before using a UV/LED lamp as a precaution against UVA exposure. If you are new to gel, keep an eye on how your nails respond, take breaks between gel sets to let your natural nails recover, and remove gel properly with soak-off rather than picking or peeling (which strips layers of the nail plate).
One ingredient worth knowing about is HEMA (2-hydroxyethyl methacrylate), which is a common component in gel polish that can cause allergic contact sensitization with repeated skin exposure. The key protective measure is making sure gel polish does not touch your skin or flood your cuticles during application, and curing it fully under the lamp. If you ever notice persistent itching, redness, or swelling around your nails after gel application, stop using gel and consult a dermatologist before continuing. The FDA’s page on nail care products covers the regulatory framework for cosmetic nail products and is a useful resource for understanding what is and is not required to be disclosed on product labels.
For most beginners starting with minimalist designs, I genuinely recommend starting with a quality regular polish and a fast-dry top coat.
Master the hand steadiness and the design first. Layer in gel once you are confident with the technique.
The Starter Tool Kit (And What It Actually Costs)
You do not need a professional kit to do any of the designs in this list. Here is what you genuinely need for the full 20:
A thin striper or liner brush is the single most useful tool for minimalist nail art. Basic nail art brush sets with a liner, detailer, and fan brush run about $5 to $12 at most drugstores (look for the Sally Hansen Nail Salon Pro Tool Kit at Walmart as a solid entry-level option) or on Amazon. A dotting tool with two sizes (one end larger, one smaller) usually costs under $5 on its own, and many brush kits include one. For the pearl accents, a toothpick is just as effective as a specialty tool. Office-supply reinforcement stickers (the little hole-punch rings) are about $1 for 200 and are genuinely useful for the negative space designs. Total cost to start: under $15, and probably less.
Troubleshooting the Most Common Beginner Problems
Flooded cuticles are the most frequent beginner issue, and they happen when the brush is overloaded with product. The fix is simple: wipe one side of the brush on the bottle rim before each stroke, and load less than you think you need. You can always add a second stroke. You cannot uncross a flooded cuticle without a cleanup brush dipped in acetone, so go thin first.
Wobbly lines are normal for the first ten or so attempts. They happen because the brush tip is dragging against tension rather than gliding. The fix is resting your dominant hand on the table (or bracing your pinky on the opposite hand) and pulling the brush toward you in one motion rather than pushing it away. Also, make sure the base polish is completely dry before attempting any line work.
Bubbling usually means you applied your color coat too thick, shook the bottle vigorously before use, or applied before the previous layer was fully dry. Thin coats, rolling the bottle between your palms rather than shaking, and real patience between layers fix most bubbling problems.
A Note on Natural Nail Health Underneath
Nail art, even simple regular polish, works best when the nails underneath are healthy and in good condition. Beyond the prep steps I mentioned earlier, keeping your nails regularly moisturized with a cuticle oil makes a real difference in how well polish adheres and how healthy the nail feels over time. The AAD’s broader nail care basics resource is a genuinely helpful, no-nonsense reference for ongoing nail care that goes beyond just prep, covering what changes in the nail can signal and when to see a doctor.
If you ever notice a nail becoming discolored under polish, developing a greenish or dark tinge, or experiencing pain or swelling at the nail fold, remove the polish, keep the nail clean and dry, and see a dermatologist or doctor. These can be signs of a fungal infection or other issue that needs professional attention, not a new coat of polish. Most of the time, nails are perfectly happy under regular art. But knowing what to watch for means you can catch any problem early.
Color Pairings That Work Especially Well for Minimalist Designs on Short Nails
Color is doing a lot of work in a minimalist look because the design itself is restrained. The palette matters. For lighter and medium skin tones, a blush or soft rose nude base pairs beautifully with white, gold, or deep burgundy accents. For deeper skin tones, a warm caramel or terracotta nude reads far more naturally than a pink-biased nude, and works stunningly with black, bronze, or ivory accent work. Milky whites and glazed sheers are genuinely flattering across all skin tones because they add a soft glow rather than sitting on top of the skin as an obvious color contrast.
For seasonal freshness: sage and terracotta for autumn, ice blue and silver for winter, lavender and white for spring, coral and nude for summer. But really, minimalist nail art is one of the most seasonless aesthetics in the nail world. A nude base with a fine black line looks right in January and July alike.
The Grows-Out Graciously Factor (A Real Practical Bonus)
One thing nobody talks about enough: minimalist designs have a longer grace period as your nails grow out. A solid red or a full glitter nail shows a visible gap at the base within a week. A sheer nude with a small dot or a fine tip line stays looking intentional for almost two full weeks because the natural nail underneath already matches the aesthetic. This is a genuine, practical advantage for people who do not want to redo their nails every week. If longevity matters to you, lean toward glazed nudes, sheers, and tone-on-tone designs. They reward you with extra days of looking put-together.
If I Can Do It, So Can You (For Real)
I do not say that as a motivational poster thing. I say it because I genuinely have the shakiest mornings of anyone I know, I have done this after 10-hour work days when my hands were not exactly steady, and I have produced designs I was actually proud of by following exactly the approach in this guide. Start with Design 1, the glazed nude. Then try Design 3, the single dot. Do those two on actual nails before you try anything involving a brush. Build the muscle memory in the smallest possible steps.
Every design in this list is on Pinterest right now under “minimalist nails” with thousands of saves. Every single one was done, at least the first time, by someone who was not sure they could. According to MD Anderson’s cancer care guidance, the key to doing gel manicures safely at home is informed, careful technique — which is exactly what this guide is built around. Whether you go gel or regular polish, prep well, go thin, troubleshoot with patience, and let each layer dry properly.
Your short nails are not the limitation. They are the feature. Go do something pretty with them.