Halloween Nails That Look Hard But Are Secretly So Simple
Every October I open Pinterest and feel that familiar rush. Spiderweb tips. Tiny ghosts on a dark shimmer base. Chrome-black nails with an orange accent. Pumpkin art so delicate it looks like it belongs in a museum. And then, for about fifteen seconds, I feel intimidated, which is funny given that I have been painting my own nails since I was stress-dotting patterns during a boring internship with a $3 tool I found on a whim.
Here is the thing about Halloween nails specifically: they are one of the most forgiving categories in all of nail art. The whole aesthetic is a little chaotic, a little imperfect, gloriously moody and over-the-top. A slightly wobbly spiderweb reads as “handmade and spooky” in a way that a slightly wobbly floral never would. This is your season. This is the one time of year where your beginner wobbles actually add character.
So I pulled together 12 designs, from the simplest matte black moment to stamped bat art and chrome-dipped drama, and I am going to walk you through every single one. I’ll tell you what tools you actually need, what you can substitute with household items, how to adapt every look for short nails, where beginners usually go wrong, and how to take it all off safely when November hits. Let’s do this.
Before You Start: A Quick Note on Prep (This Is the Part Everyone Skips)
I know you want to skip straight to the spiderweb tutorial. I get it. But prep is the single biggest reason Halloween nail art falls apart by day two, and I am not going to let that happen to you.
Start by removing any existing polish completely and washing your hands. Then gently push back your cuticles with a rubber cuticle pusher, but please do not cut them. Cutting cuticles creates tiny openings that can allow bacteria or fungi in, and the American Academy of Dermatology recommends against cutting cuticles as part of their guidance on keeping natural nails healthy during manicures. A light buff across the nail plate with a fine-grit buffer removes shine and helps your base coat grip, but do not go heavy with the file. You want just enough texture for adhesion, not a paper-thin nail.
Apply a base coat, always, even if you are just doing regular polish over it. A base coat protects your nail from staining (black and oxblood polish will absolutely turn your nails orange without one) and helps everything last longer.
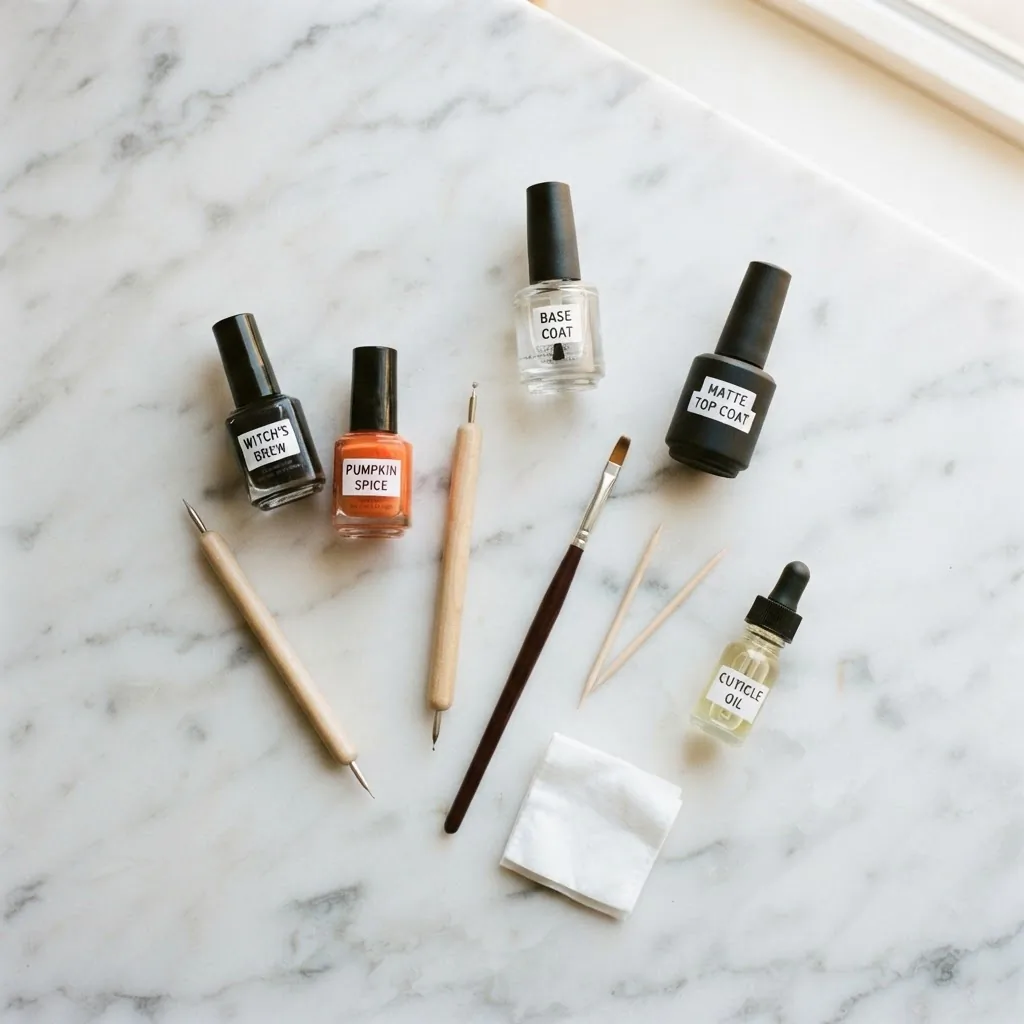
Let it dry fully, which takes about two minutes, before you apply color.
For gel users: cap your free edge on every layer. This means dragging the brush across the very tip of the nail before you cure. It seals the edge and is the number-one thing that prevents lifting at the tip.
What tools do you actually need?
You do not need a professional nail art kit for any design in this list. Here is a realistic starter setup: a fine detail brush or striping brush (available at most dollar stores or beauty supply shops for under $5), a dotting tool (a bobby pin or the blunt end of a bobby pin works almost perfectly), and a toothpick for drag techniques. If you want to do any of the stamped designs like the bat art or detailed spiderweb, a basic stamping kit with a clear jelly stamper and a Halloween plate runs about $8 to $15 on most budget beauty sites. That’s the honest toolkit. Nothing fancy required.
Design 1: Matte Black Minimalist
Difficulty: 1/5 | Tools: Just polish and a top coat
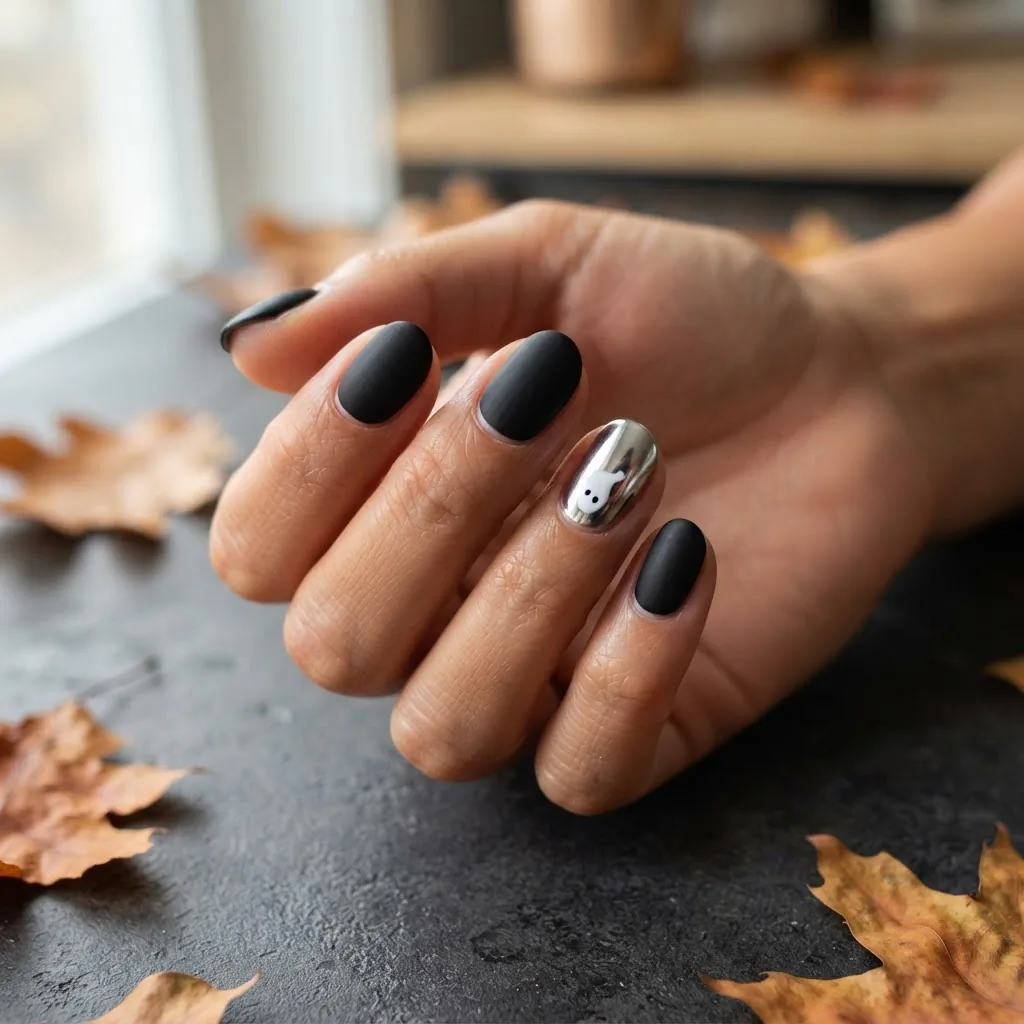
This is the design I point every single beginner toward first, because it requires exactly zero nail art skill and looks genuinely stunning. You paint your nails with two coats of a rich black polish, let it dry, and then seal it with a matte top coat instead of a glossy one. That matte finish is what elevates it from basic to fashion-forward. It reads as intentional and chic rather than “she just painted her nails black.”
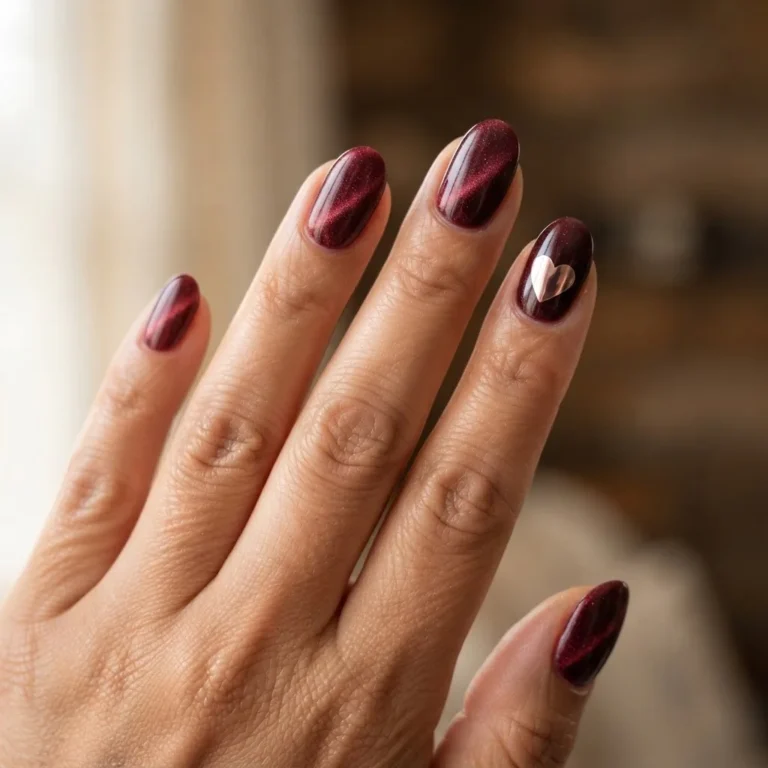
For short nails, this is arguably your best Halloween look. Short square or squoval nails in matte black with a single nail painted in a deep oxblood burgundy as an accent are having a serious moment right now. You can scroll through galleries on Allure’s Halloween nail roundup for mood-board inspiration before you start, and then come back here for the how-to.
Where beginners go wrong: Applying matte top coat over polish that has not fully dried. The matte coat can drag and create streaks or bubbles if the layer underneath is still tacky. Wait a full five minutes after your color coat before applying matte top coat, even if the color coat feels dry to the touch.
Short nail note: Matte black looks just as intentional on a 5mm nail bed as it does on a long almond. Do not let nail length talk you out of this one.
Design 2: Classic Spiderweb
Difficulty: 2/5 | Tools: Toothpick or thin brush
The spiderweb is the quintessential Halloween nail design, and it is significantly easier than it looks. Here is the technique step by step.
Paint your nails with a light base, white, pale gray, soft lilac, or even a sheer nude, and let it dry fully. Then, using black polish and a toothpick or the end of a thin striping brush, draw three or four lines radiating out from a central point near the center or corner of the nail. These are your web spokes. They do not need to be perfectly even. Then connect the spokes with a series of curved “smile” lines, working from the center outward, each arc sitting slightly farther from the center than the last. The curve does the work of making it look like a web. Finish with a tiny spider (two dots of black with eight short legs, drawn with the toothpick) hanging off one of the spokes.
The whole thing, once you have practiced once on a piece of paper first (which I always recommend before touching your actual nail), takes about three minutes per nail.
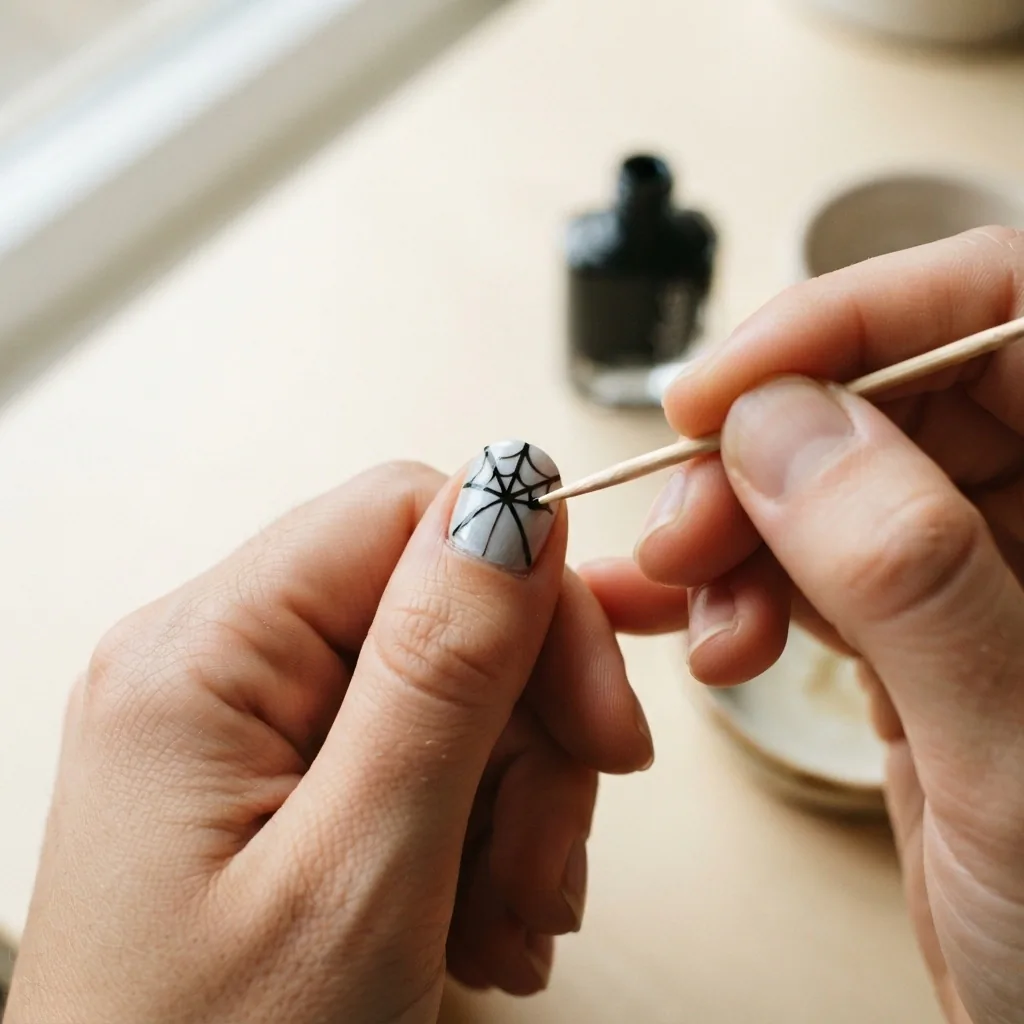
Where beginners go wrong: Loading too much polish onto the toothpick and creating blobs at line intersections. Dip the toothpick into black polish, wipe most of it off on the bottle rim, and use the very tip. Less polish, more control.
Short nail note: Place the web in one corner of the nail rather than centered, so you get the full effect even with limited real estate. A corner spiderweb on a short square nail is adorable.
Design 3: Ghost Accent Nail
Difficulty: 2/5 | Tools: Dotting tool or toothpick, thin brush
The cute little ghost nail is everywhere right now and for good reason: it is charming, it is beginner-friendly, and it looks genuinely intentional when you do the rest of your nails in a simple dark color and let one nail be the star.
Paint four nails in a dark shade, navy, charcoal, deep purple, or matte black. On your ring finger, paint a white base coat and let it dry. Then, using a medium-sized dotting tool or the round end of a bobby pin dipped in white polish, press a teardrop-ish oval shape in the center of the nail. While that is still slightly wet, use a thin toothpick to drag the bottom edges into small wavy curves, which creates the flowy ghost body. Once dry, add two tiny black dots for eyes using the pointed end of a toothpick.
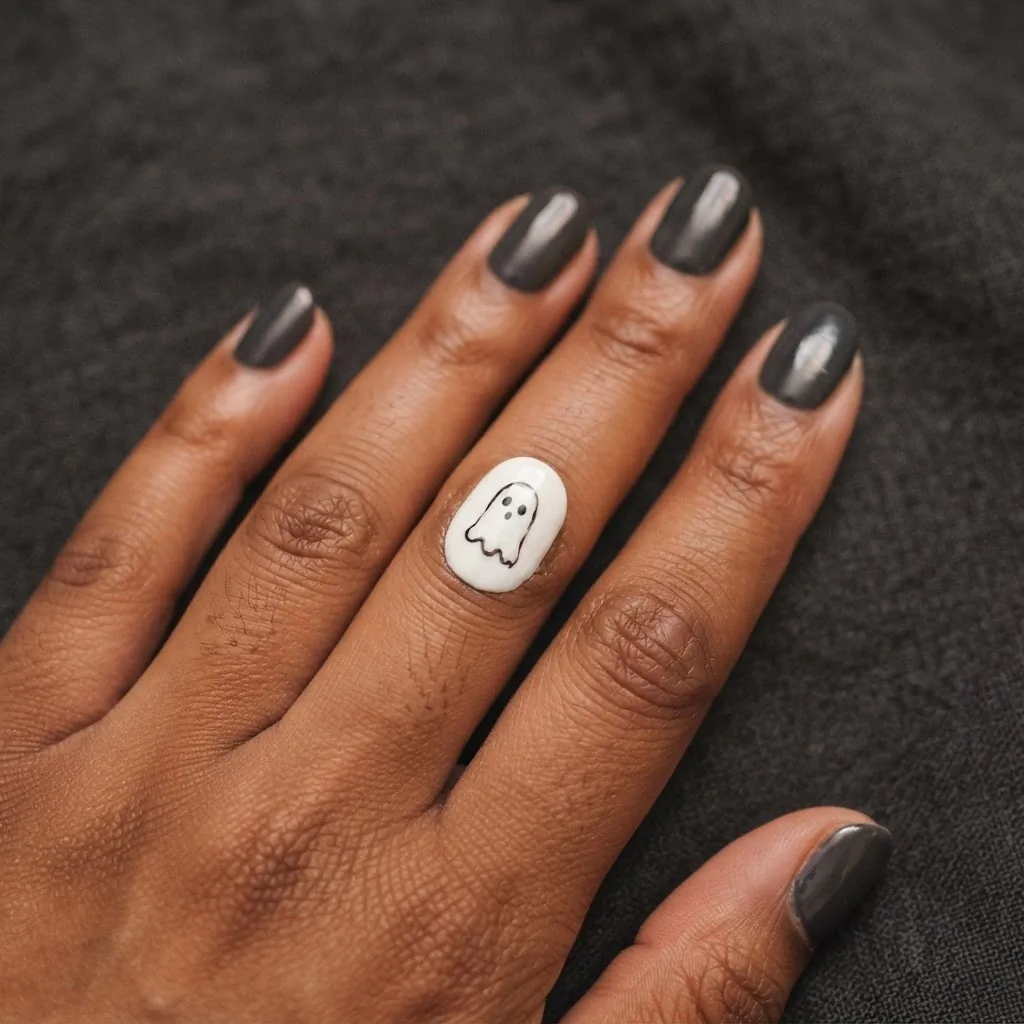
That is the whole ghost.
If you want to add personality, add a tiny black smile, a little tongue, or give your ghost a miniature orange pumpkin using the same dotting-tool technique in orange and black.
Where beginners go wrong: Making the ghost too large. Keep it small enough that you can see dark nail around all four edges. A ghost that fills the entire nail loses the contrast that makes it look intentional.
Design 4: Blood Drip French Tips
Difficulty: 3/5 | Tools: Thin brush or nail art liner
This is the design that gets the most dramatic reaction for the least artistic effort once you understand the geometry. You start with a regular French tip, that white or nude-white tip across the nail, and then you add drips of red polish hanging down from the tip line.
To do the drips, dip a thin striping brush or a toothpick into a deep red or crimson polish and touch it to the tip line. Let a small drop form and then drag it downward slowly, creating a narrow, tapered drip. Vary the lengths. Some drips should be short, some long, one or two can have a round dot at the base. Seal with a glossy top coat, and the red becomes almost luminous.
On short nails, do the drips closer together and shorter in length. The design still reads perfectly on a short square nail.
Where beginners go wrong: Using a red that is too bright or too opaque. A deep crimson or oxblood red, something with a slightly vampy undertone, looks far more realistic and elegant than a bright tomato red. If your only red is light, add one tiny drop of black polish into the bottle cap and mix before dipping your brush.
Design 5: Pumpkin Accent Nail
Difficulty: 2.5/5 | Tools: Dotting tool, thin brush, toothpick
A pumpkin accent nail is one of those designs that looks like it belongs in a salon photo and is actually built almost entirely from circles.
Paint four nails in black or dark brown. On your accent nail, apply two coats of a warm orange and let it dry. Using a thin brush and black polish, paint a loose “W” shape across the top of the nail to create the pumpkin ridges, essentially three vertical lines and curved connectors. Add a short dark green vertical stroke at the top for the stem. Then, with a toothpick and black polish, add the classic triangle eyes and a jagged smile in the bottom half of the nail.
Do not overthink the symmetry. Jack-o-lanterns are supposed to look hand-carved and uneven. That is what makes them charming.
Short nail note: Skip the face details and just do the orange ridged pumpkin body with a green stem. On a short nail, the minimal version looks cleaner and just as festive.
Design 6: Chrome Black “Gothic Glam”
Difficulty: 2/5 for application, 3/5 for gel users | Tools: Chrome powder and applicator sponge
Chrome nails have dominated beauty content for the past two years, and the mirror-black version for Halloween is one of the most stunning things you can do with minimal artistic skill. The technique involves applying a dark base (usually black or a very deep navy), curing or drying it fully, and then rubbing chrome powder over the nail with a small silicone or foam applicator using small circular buffing motions.
Chrome powder works best over gel because gel creates the smooth, tacky surface the powder needs to adhere. Over regular polish, you can use a chrome-effect top coat instead (several brands make a single-coat “mirror” top coat specifically for this purpose), which simplifies the process considerably.
The result is a deeply reflective, almost liquid-metal surface. On Halloween, pair three chrome-black nails with two matte-black nails for a mixed-finish set that looks genuinely editorial.
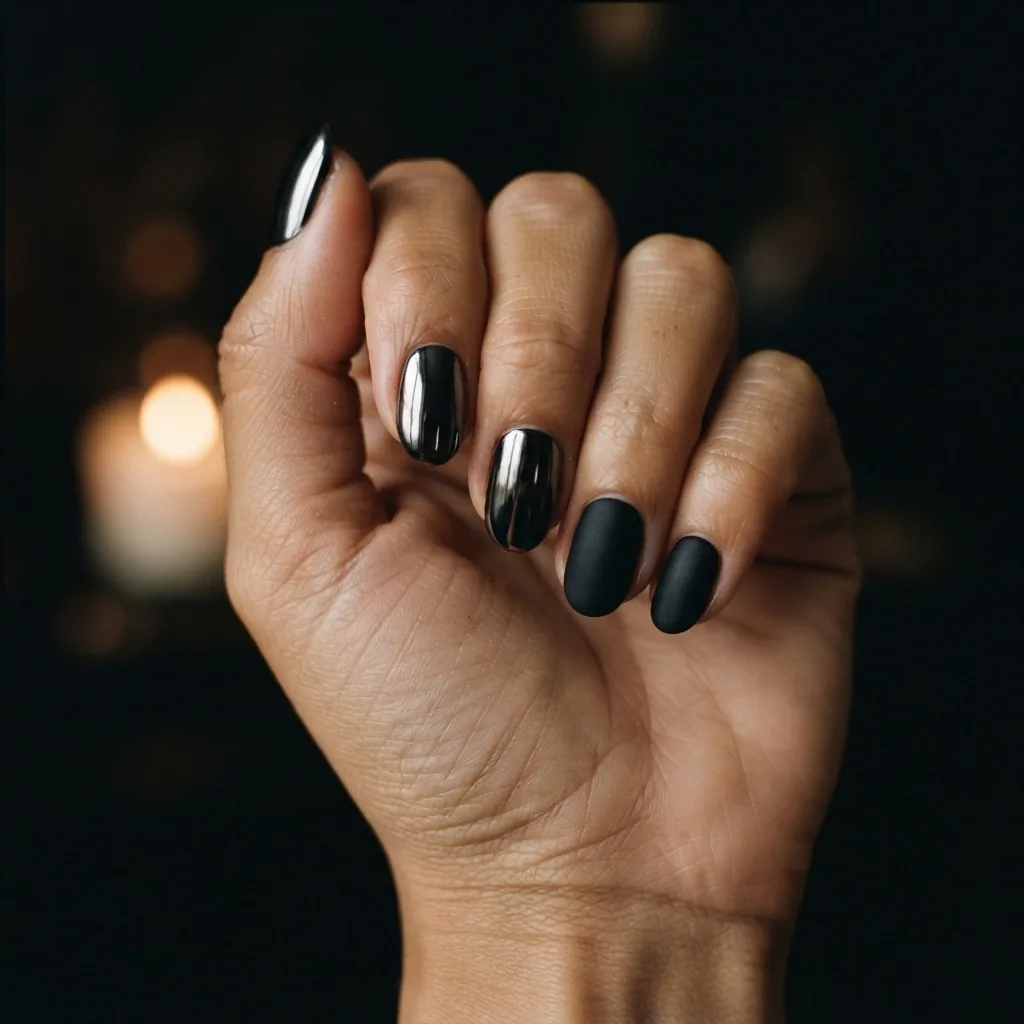
A note on gel and UV lamps: If you are doing your chrome nails over gel, you will be using a UV or LED curing lamp, and that is completely fine for most people. Research published in a 2023 peer-reviewed study in Scientific Reports found that a standard four-minute UV nail lamp exposure does not significantly reduce the viability of skin cells in laboratory conditions. That said, the ongoing science is nuanced, and the AAD suggests applying a broad-spectrum sunscreen to your hands before curing as a simple precautionary habit, which costs you nothing and takes about thirty seconds. It is just a smart thing to build into your routine.
Design 7: Stamped Bat Nails
Difficulty: 1.5/5 with a stamping kit | Tools: Halloween stamping plate, jelly stamper, scraper
If freehand nail art genuinely feels out of reach right now, nail stamping is the secret tool that changes everything. A stamping plate is a thin metal plate engraved with designs (including detailed bat, skull, and spiderweb images) that you transfer directly onto the nail using a silicone stamping tool. The result looks like professional nail art. The process is much closer to using a rubber stamp than anything that requires a steady hand.
Here is the basic process: apply your base color and let it dry completely. Load a small amount of stamping polish (which is more opaque and pigmented than regular polish) onto the bat or Halloween design on your plate. Scrape the excess off with the included scraper so only the engraved design holds polish. Roll the jelly stamper head across the design to pick it up, then roll it onto your nail. Peel away the stamper and clean the edges with a cleanup brush dipped in acetone. Seal with a non-smearing top coat.
Budget Halloween stamping plates are widely available for $8 to $15 and typically include multiple designs: bats, webs, pumpkins, haunted houses, black cats. Brands like Bundle Monster and Maniology are well-reviewed in the nail art community for both quality and price. A basic starter set means one purchase unlocks multiple designs across multiple Halloweens.
Design 8: Black Cat Silhouette
Difficulty: 3/5 | Tools: Thin brush or toothpick
A black cat nail is a slightly more advanced freehand design, but it is completely achievable if you approach it the right way. The key is to think in silhouette, not in detail. You are not painting a realistic cat. You are painting a simple shadow shape.
On a nude or light base, use black polish and a thin brush to paint a small sitting cat silhouette: a rounded body, two pointed ears, a curved tail wrapping around the front, and two tiny dot eyes in a slightly lighter color. Look at a reference image before you start, and practice the shape once or twice on paper. The cat does not need to be anatomically correct. It needs to read as “cat” from arm’s length.
If freehand feels too intimidating, black cat designs are also widely available on Halloween stamping plates.
Where beginners go wrong: Starting with too much detail. Whiskers, fur texture, shading. None of that. Just the outline, two eyes, done.
Design 9: Mummy Wrap Nails
Difficulty: 2.5/5 | Tools: Striping tape or thin brush
This design is one of my absolute favorites for texture and visual interest with minimal effort. Paint your nails in a pale, slightly warm white or cream. Once dry, use narrow nail art striping tape (or very thin strips you cut yourself from regular tape) applied in overlapping diagonal and horizontal patterns across the nail, leaving gaps between the strips. These gaps represent the mummy bandage wraps.
If you are using a brush instead of tape: use a thin striping brush loaded with a slightly darker cream or warm beige and paint irregular horizontal lines across the nail, crossing them with diagonal strokes. Vary the pressure so some lines are thicker. The imperfect quality actually makes this design look more realistic.
Add two tiny red dots peeping out from between the wraps on one nail for the mummy’s eyes. Seal with a matte top coat to take away the shine and make it look more fabric-like.
Design 10: Aura Halloween Gradient
Difficulty: 3/5 | Tools: Makeup sponge
Aura nails, where color blooms in a soft cloud from the center or edges of the nail, had a massive moment over the last couple of years, and they translate beautifully into Halloween. Think deep purple fading into black at the edges with a shimmer of orange in the center, or midnight blue with a green neon glow bleeding through the middle.
The technique uses a small piece of makeup sponge. Paint two or three colors in overlapping stripes directly onto the sponge (not the nail), then press and dab the sponge onto your nail. Layer this two or three times, cleaning up the edges with an acetone brush. The sponging naturally creates that blurred, hazy gradient that looks intentional and ethereal.
The messier the colors blend on the sponge, the more beautiful the aura effect. This is genuinely a case where being slightly imprecise produces a better result.
For short nails: Use just two colors and let the gradient be smaller. Even a short nail holds an aura effect beautifully because the technique is about color, not shape.
Design 11: Negative Space Web
Difficulty: 3/5 | Tools: Striping tape, thin brush
Negative space designs, where the bare nail or base coat becomes part of the design, are some of the most impressive-looking nails in any trend gallery. The Halloween version uses the natural nail as the “silver” thread of a spiderweb, with black polish painting only the spaces between.
Apply a clear base coat. Once dry, use very thin strips of nail art tape arranged in the spoke pattern of a spiderweb across the nail. Then paint the spaces between the spokes with black polish. Once dry, carefully peel the tape away to reveal the bare nail forming the web lines. The contrast between natural nail and black is beautiful and genuinely looks like something from Glamour’s Halloween nail gallery.
This technique requires patience when removing the tape (do it while the polish is still slightly wet to avoid chips) but the result is well worth the extra care.
Design 12: Glitter Galaxy Halloween
Difficulty: 1/5 | Tools: Just polish
Ending with the easiest save-it-when-everything-else-goes-wrong design in my kit: a black base with chunky holographic or iridescent glitter on one or two accent nails. This is the design you reach for at 10pm the night before Halloween when every other attempt has been a partial disaster. It takes ten minutes. It looks festive and beautiful. It requires zero artistic skill.
Apply two coats of black. While still wet on one or two nails, press loose nail glitter or a chunky glitter polish over the surface. Seal with a thicker top coat to smooth the texture. Done. The glitter catches every light source in the room and reads as magical rather than chaotic.
Budget glitter polishes in Halloween-appropriate holographic and purple-green shift colors are available at most drugstores and Sally Beauty for $3 to $8.
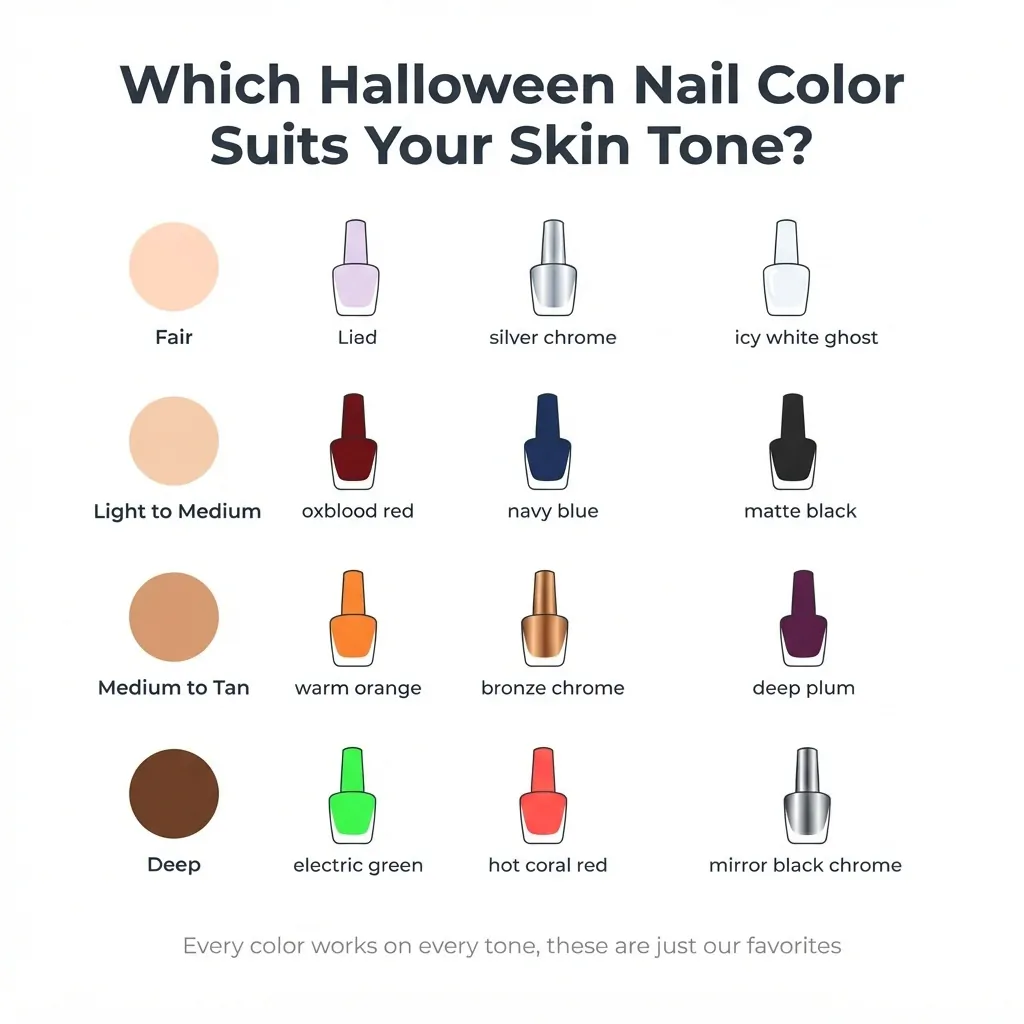
You do not need to spend more than that.
Troubleshooting: When Things Go Sideways
Every beginner hits these moments. Here is the honest rundown.
Flooded cuticles: If your polish floods the cuticle, do not panic and wipe it immediately (you’ll smear the design). Let it dry slightly, then use a fine-point cleanup brush dipped in pure acetone to trace along the cuticle line and lift the excess cleanly. This is faster and tidier than wiping.
Smeared nail art: If you smear a design by accident, cap it immediately with your top coat, let it dry, and then touch up the smear with a thin brush of the same color. The top coat seals the damage and gives you a fresh surface to correct on top.
Lifting at the edges: This almost always comes back to prep. If you are doing gel and getting lift at the tips within a day or two, go back to basics: buff lightly, wipe with a lint-free pad and isopropyl alcohol, and cap your free edge on every single layer.
Lines that won’t stay thin: Let the polish on your brush or toothpick get just slightly tacky before drawing the line. Wet polish spreads; slightly dried polish stays where you put it.
Taking It All Off: Safe Removal After Halloween
This section matters more than most articles admit. Pulling or peeling Halloween nail art off, especially dark or glitter polish, takes the top layers of your natural nail with it and can leave your nails thin, ridged, and peeling for weeks afterward.
For regular polish, soak a cotton ball in acetone-based remover and hold it against the nail for 15 to 20 seconds before wiping. Do not scrub back and forth. The solvent needs time to work. Follow up with a nourishing cuticle oil because acetone is very drying.
For gel Halloween nails, the AAD’s manicure safety guidelines are clear: buff the top coat surface lightly to break the seal, soak cotton pads in pure acetone, wrap each nail in foil, and wait 10 to 15 minutes before gently sliding the softened gel off with a wooden cuticle stick. Never force it.
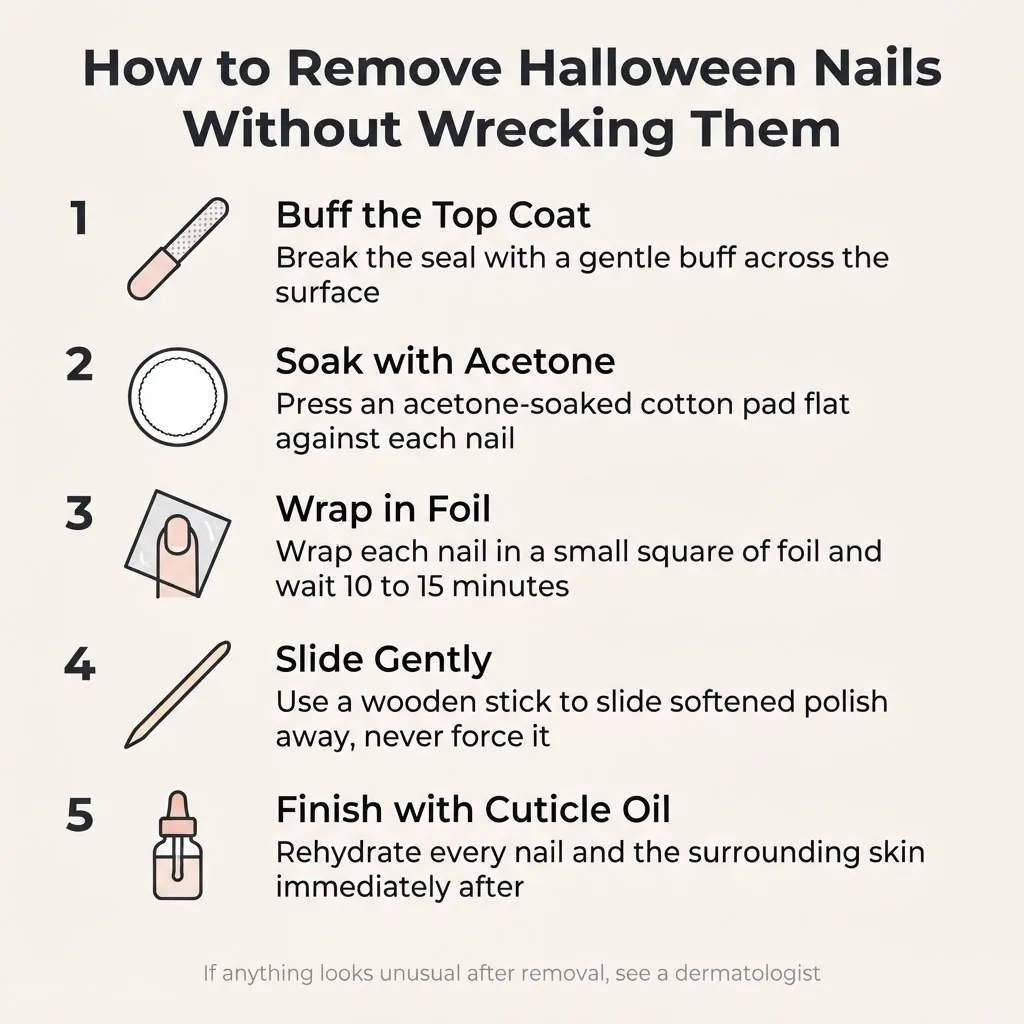
If it does not come off with gentle pressure, rewrap and soak longer. After removal, apply a nail strengthener and give your nails a break from color for a few days if they feel thin.
If you notice any unusual redness, swelling, itching around the nail fold, or lifting with discoloration underneath the nail after using gel products, those are signs worth mentioning to a dermatologist. The FDA’s nail care product safety page is a useful reference if you want to understand more about how cosmetic nail products are regulated and what ingredients to be aware of. Reactions to gel acrylates, including a compound called HEMA (hydroxyethyl methacrylate), do occur and are worth knowing about. If you have ever had a skin reaction to gel nails, mention it to a dermatologist before your next gel manicure.
Final Thoughts From My Nail Lab
Halloween nail art gave me some of my favorite creative moments, not because my first attempts were flawless (they were absolutely not), but because the whole aesthetic is designed to embrace the imperfect, the wobbly, the delightfully crooked. My first spiderweb looked more like a cracked egg than a web. I redid it, liked it slightly more, and by the third attempt it looked genuinely cool.
If you can do it after a ten-hour workday with a dotting tool and a toothpick, so can you. Pick two or three designs from this list that feel right for your skill level, practice one nail on each hand before committing, and remember: nobody is looking at your ring finger under a microscope. They are looking at the whole effect. And the effect, even at beginner level, is completely, genuinely spooky-season magic.
Happy Halloween. Go make something you’re proud of.