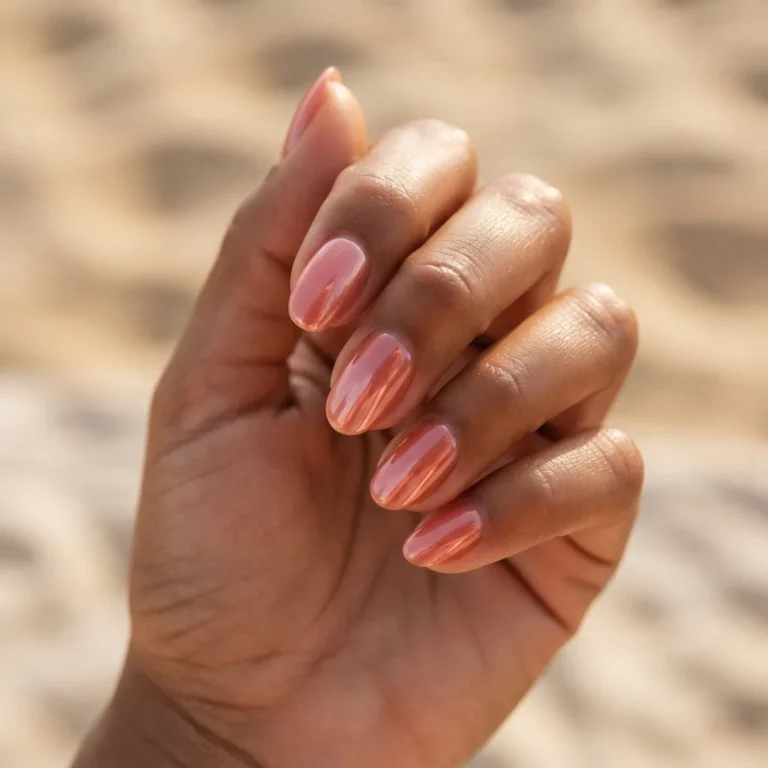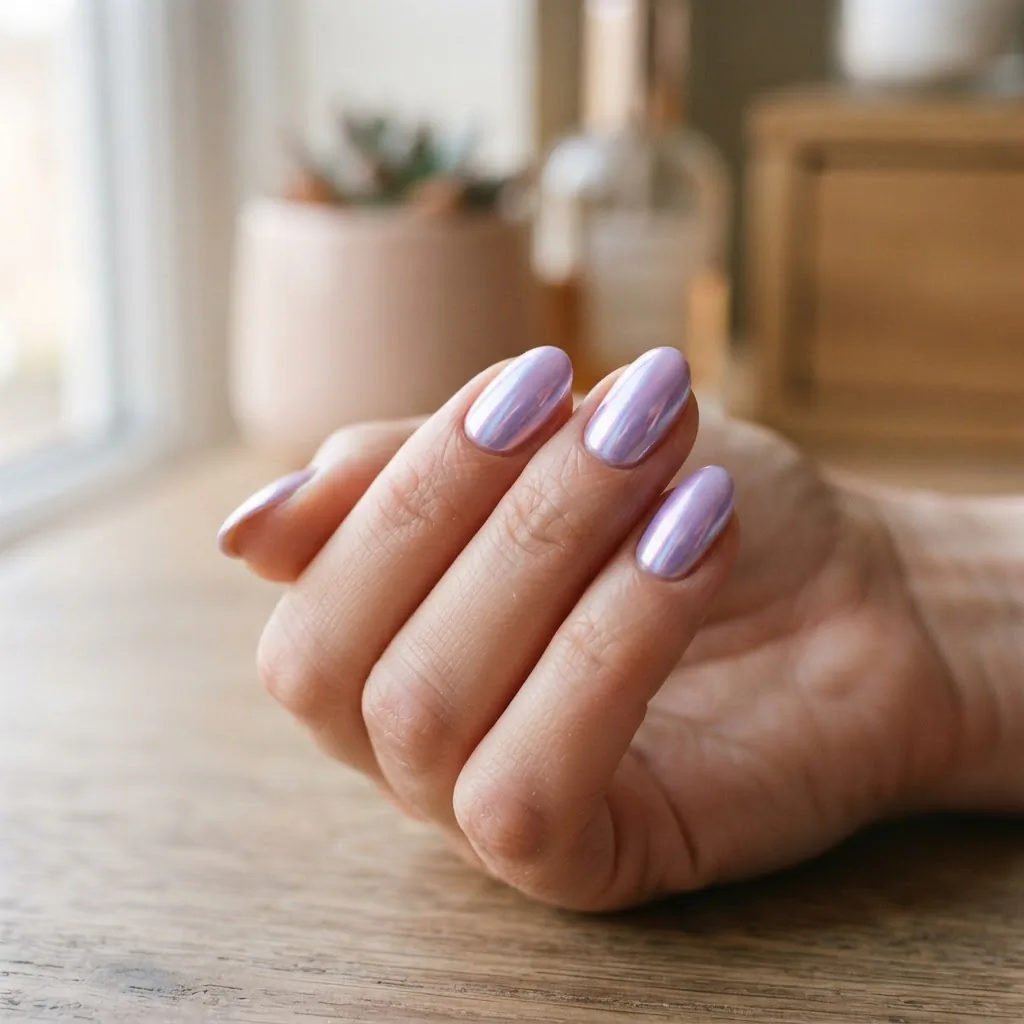
10 Easy Spring Nail Ideas That Look Way Harder Than They Are
Every spring, my Pinterest feed turns into the most beautiful, most overwhelming thing imaginable. Butter yellow tips. Soft blush aura blends. Chrome finishes that catch the light like something from another dimension. I save them all, and then I sit down at my kitchen table in Chicago and figure out which ones I can actually teach you to do without a nail tech degree, a ring light, and four free hours.
The answer, honestly, is most of them.
I know the “I’m not artistic enough” feeling well. I was the person doing wobbly dots on her break at a boring internship just to have something to do with my hands. If I had seen some of the designs in this list back then, I would have scrolled right past them. But here we are, and I can promise you that the gap between “I could never” and “look what I just did” is mostly a matter of knowing which tool to use and where beginners usually go wrong.
So here are the 10 spring nail designs I am most excited about right now, why each one is more beginner-accessible than it looks, and exactly how to get started. Short nails included. Budget tools included. Honest warnings about what takes a little practice, included too.
Before You Pick a Design: Let’s Talk Prep
I know you want to skip straight to the good stuff, but I would genuinely be failing you if I did not spend two minutes on this. Prep is the single most impactful thing you can do to make any spring nail design last, whether you are using regular polish, gel, or dip. Chips, lifting, and that sad three-day peel almost always trace back to skipped steps, not a bad color choice or a bad brush hand.
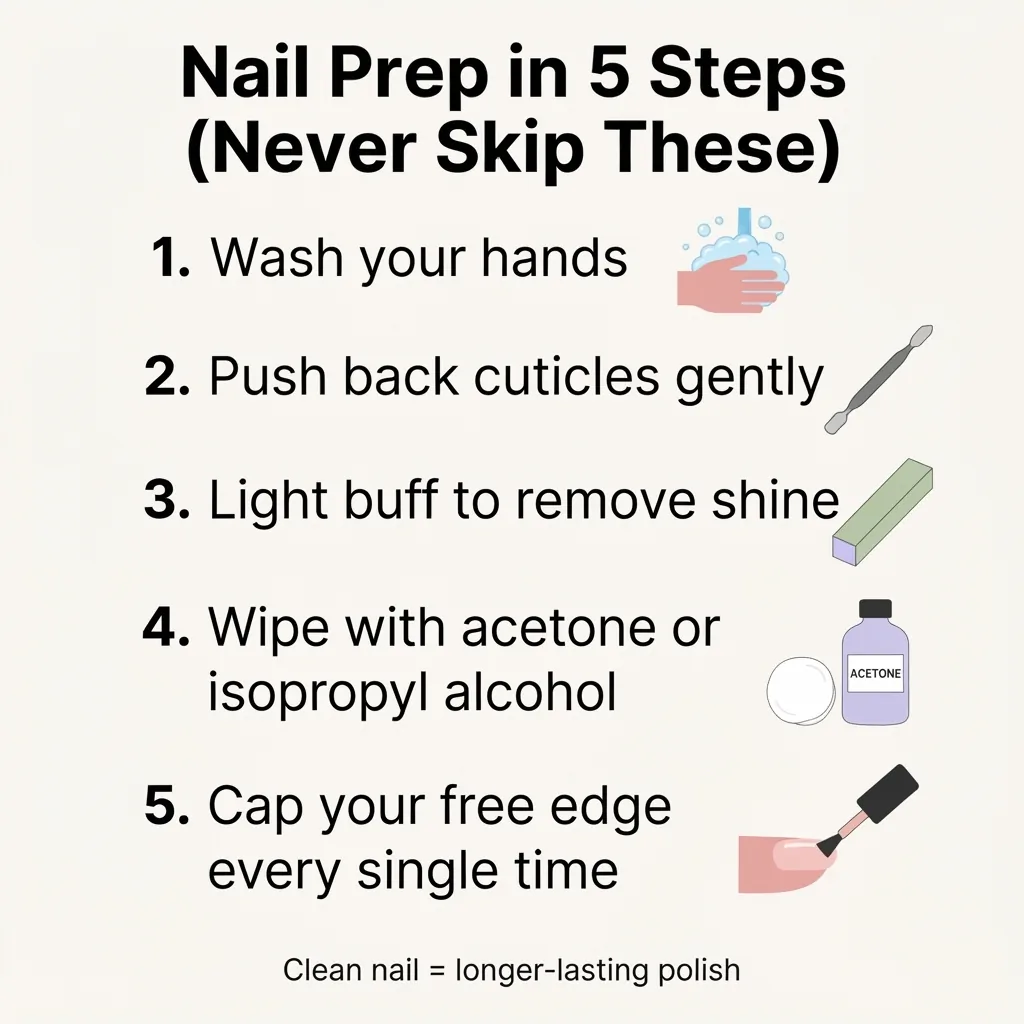
Here is what “doing your nails” actually starts with: wash your hands, push back your cuticles gently with a rubber-tipped pusher (never cut them, the AAD is very clear on this), give your nail plate a very light buff to remove shine, and wipe each nail with a little acetone or isopropyl alcohol to remove oils. That is it. No oils, no moisturizer, no lotion on your hands right before you paint. A clean, slightly dehydrated nail plate is a sticky nail plate, and sticky is exactly what you want before base coat goes on.
The AAD’s dermatologist-approved nail care tips are worth bookmarking for this, because proper prep is genuinely as much about nail health as it is about longevity.
One more thing while we are here: always cap your free edge. That means dragging your base coat, your color, and your top coat slightly over the very tip of the nail. It seals the edge and stops water, soap, and life from sneaking underneath your polish. It takes about two extra seconds and adds days to your manicure. Do it every time.
Now let’s get to the fun part.
1. Butter Yellow Nails
If there is one color that defines spring 2026, it is butter yellow. Not the punchy, saturated yellow of highlighters. This is softer, warmer, and creamier, somewhere between a pale lemon curd and actual fresh butter. Vogue has called the butter nails trend one of the most-requested manicure looks of the season, and honestly, looking at it, I completely understand why.
The best part for beginners is that butter yellow is a one-color design. You do not need art skills. You need a good formula and a little patience.
Pick a polish with a semi-opaque or buildable cream finish, because fully sheer yellows can look patchy and uneven, and true neons read too bright for this aesthetic. Two thin coats is almost always better than one thick one. Thick coats take longer to dry, bubble more easily, and shrink away from the edges. Think of it like painting a wall: thin and even beats thick and fast every single time.
For short nails, butter yellow is actually one of the most flattering options out there. The soft, light tone elongates the finger visually, and a rounded or oval shape leans beautifully into the buttery softness of the color. If your nails are very short and wide, consider a subtle almond shape with a nail file before you start.
Where beginners go wrong: going in with one thick coat to “save time.” Do two thin coats. Finish with a glossy top coat to pop that creamy, almost-three-dimensional butter look.
2. Glazed Donut Nails (Chrome Powder)
Yes, these are still trending. No, they have not peaked yet. What has changed is that they have evolved from the straight silver glaze Hailey Bieber made famous to a whole family of glazed finishes: pearl, rose gold, champagne, and now the spring 2026 update, pastel chrome (more on that in a moment).
At-home chrome powder is genuinely one of those things that sounds intimidating and is actually not that difficult once you understand the mechanism. Chrome powder works because it is ultrafine metallic pigment that physically bonds to a slightly tacky surface. If your gel top coat has fully cured and hardened, the chrome will not stick properly and you will get a dull, patchy result. The sweet spot is a gel finish that has cured but still has that sticky inhibition layer on top, or using a dedicated chrome bonder. You apply the powder with a foam eyeshadow applicator (literally a cheap little bullet-shaped sponge, usually $1 to $3 at any drugstore cosmetics section), rub it in small circular motions, and the mirror finish builds up in seconds.
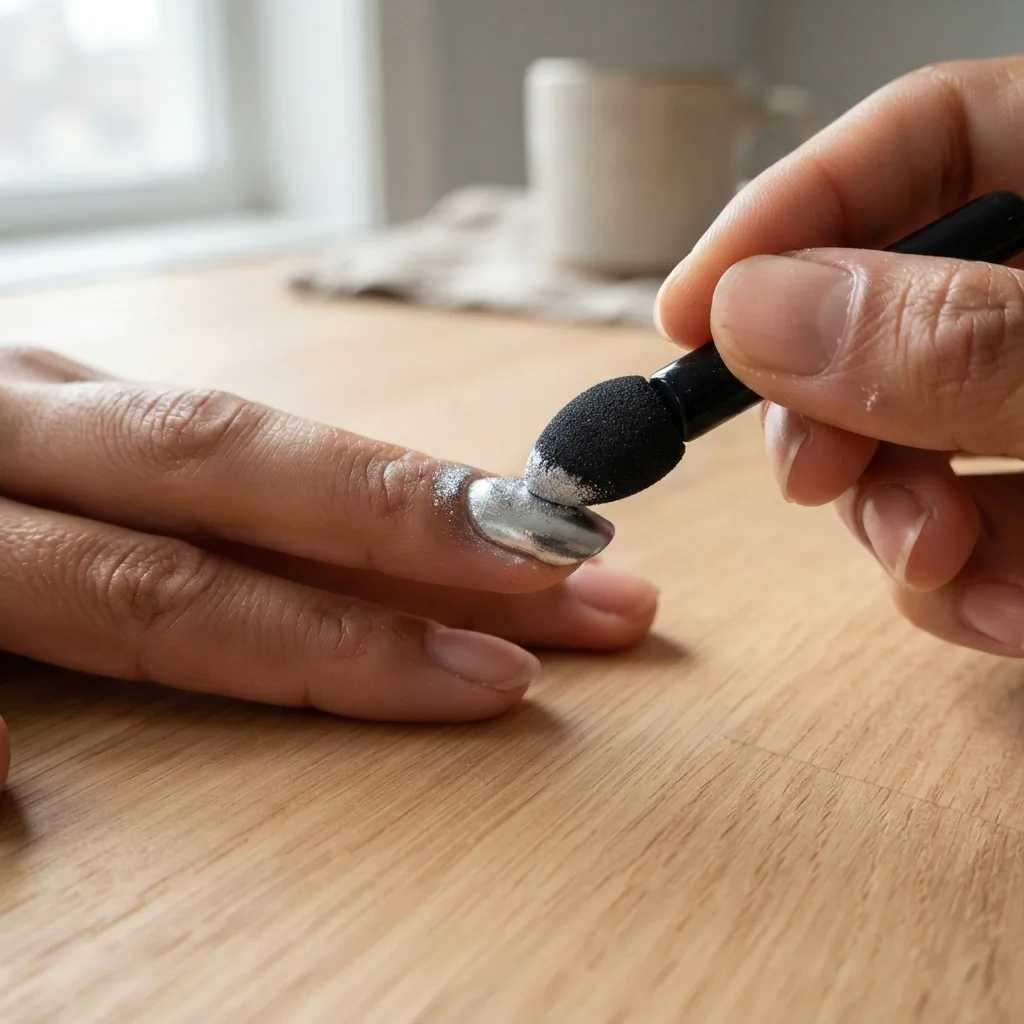
The order: base coat, cure, gel color coat, cure, gel top coat, cure for about 30 seconds to leave that sticky layer, apply chrome with foam applicator, then seal with a no-wipe top coat or gel top coat and cure again fully. That final seal step is important because chrome powder without a seal will dull down and transfer onto everything you touch.
For short nails: glazed chrome is actually gorgeous on short nails. The sheer reflective finish makes short nails look clean, polished, and intentional rather than unfinished.
3. Aura Nails
Aura nails are that soft, blended, halo-like design where a contrasting color sits in the center or at the edges of the nail, blurred into the base so it looks almost like a watercolor glow. They look like something a professional did very carefully. They are actually done with a makeup sponge.
That is the whole trick. A small piece of a torn makeup wedge sponge, dabbed with your second color, stippled and blended over the nail. The irregular, porous texture of the sponge creates that soft, diffused edge automatically. You do not need to blend with a brush or have any particular skill. You just dab, check, dab again, and stop when it looks good.
Great spring combinations for aura nails: a sheer white base with a soft lavender center, a pale pink base with a peach or coral center, a milky nude base with a mint edge. The key is keeping both shades in the same tonal family. Stark, high-contrast combinations (like a white base and a hot pink center) can read more graphic than dreamy, which is a totally valid choice, just a different aesthetic.
Short nail adjustment: keep the aura smaller and more centered. On a short nail, a huge blended halo can overwhelm the nail bed. A smaller, more focused glow looks more intentional and elegant.
Where beginners go wrong: using too much product on the sponge. Blot your sponge on a paper towel first so it has just a thin, almost dry layer of color. A dry sponge gives you control.
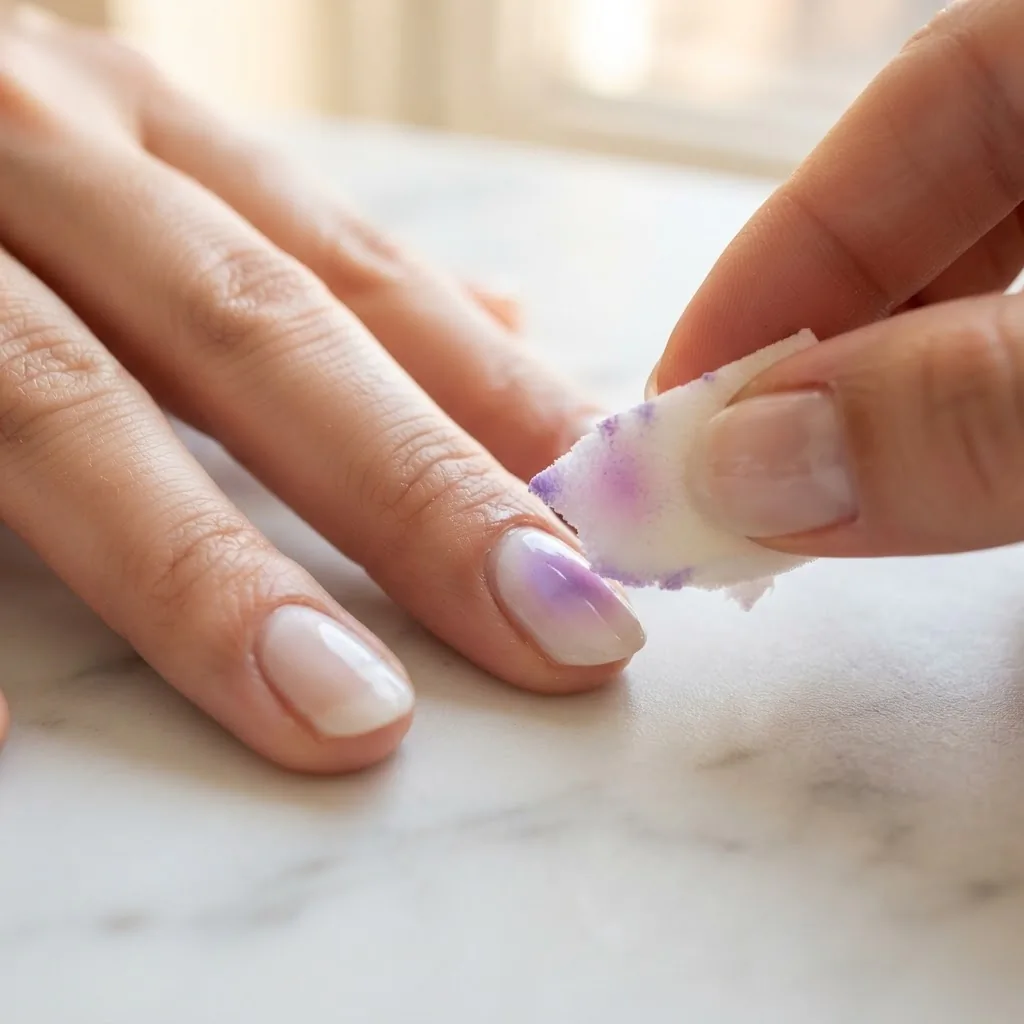
A wet sponge gives you a smear.
4. Milky Sheer Nails
Sometimes the easiest design is the most beautiful one. Milky sheer nails, which means a polish that is semi-translucent and slightly pearlescent, like the inside of a seashell, have been everywhere this season for a reason. They are quiet and sophisticated, they work on every nail length, and they take approximately five minutes.
The look you are chasing is a translucent cream or white-toned polish, not a full opaque white. Look for descriptors like “sheer,” “milky,” “glass,” or “jelly” on the bottle. Two thin coats over a clean base coat gets you there. You will still see a hint of your natural nail through the color, and that is intentional. It gives the finish that alive, skin-like quality that separates it from a regular opaque white.
Finish with a high-shine top coat. The gloss is what creates the “glass nail” effect. Matte top coat flattens the whole look, so unless you are going for a frosted-glass version intentionally, stick with glossy.
This design is a genuinely perfect starting point if you are new to doing your own nails. There is no art involved, there is very little margin for error, and the result looks pulled-together and intentional.
5. Modern French Tip (Colored or Thin Line)
The French manicure has been fully reinvented, and I personally love where it ended up. The thick, opaque, stark-white classic tip has been replaced by two updates that are easier to pull off at home than the original.
The first is the thin line French: a very narrow band of color at the tip, painted with a thin striping brush rather than a wide brush stroke. This is more forgiving than a traditional thick tip because slight wobbles read as “artsy” rather than “messy.” Spring colors for this look: soft sage green, pale lavender, baby pink, warm peach, or a barely-there nude. The thinner the line, the more modern it reads.
The second is the colored tip French: same shape as a classic French, but in a tinted or unexpected color instead of white. A butter yellow tip on a milky base is a genuinely stunning spring combination. A pastel mint tip on a sheer nude base is fresh and easy to adapt for any nail length.
For both versions, a nail tip guide sticker or a steady striping brush is your best friend. Tip guides stick to the nail and give you a clean line to paint up to. You can find them in most nail art tool sets for around $3 to $5. Peel them off while the polish is still slightly wet, not fully dry, to avoid dragging the color.
Short nail version: a very thin colored line at the tip actually looks proportionally perfect on short nails. Keep the line narrow and the base sheer, and this is one of the cleanest, most flattering spring looks you can do.
6. Micro Floral Nail Art (Dotting Tool Flowers)
Flowers on nails are a spring tradition, but micro florals, tiny, minimalist dot-made flowers scattered across one or two accent nails, are specifically a beginner-friendly version of that tradition. These are not the elaborate hand-painted roses you see in salon photos. These are five small dots arranged in a circle, with a sixth dot in the center. That is a flower.
This design is how I actually started doing nail art, sitting at that internship desk with a cheap dotting tool and a lot of nervous energy. A basic five-dot flower with a center dot is the first thing I ever practiced, one wobbly bloom at a time.
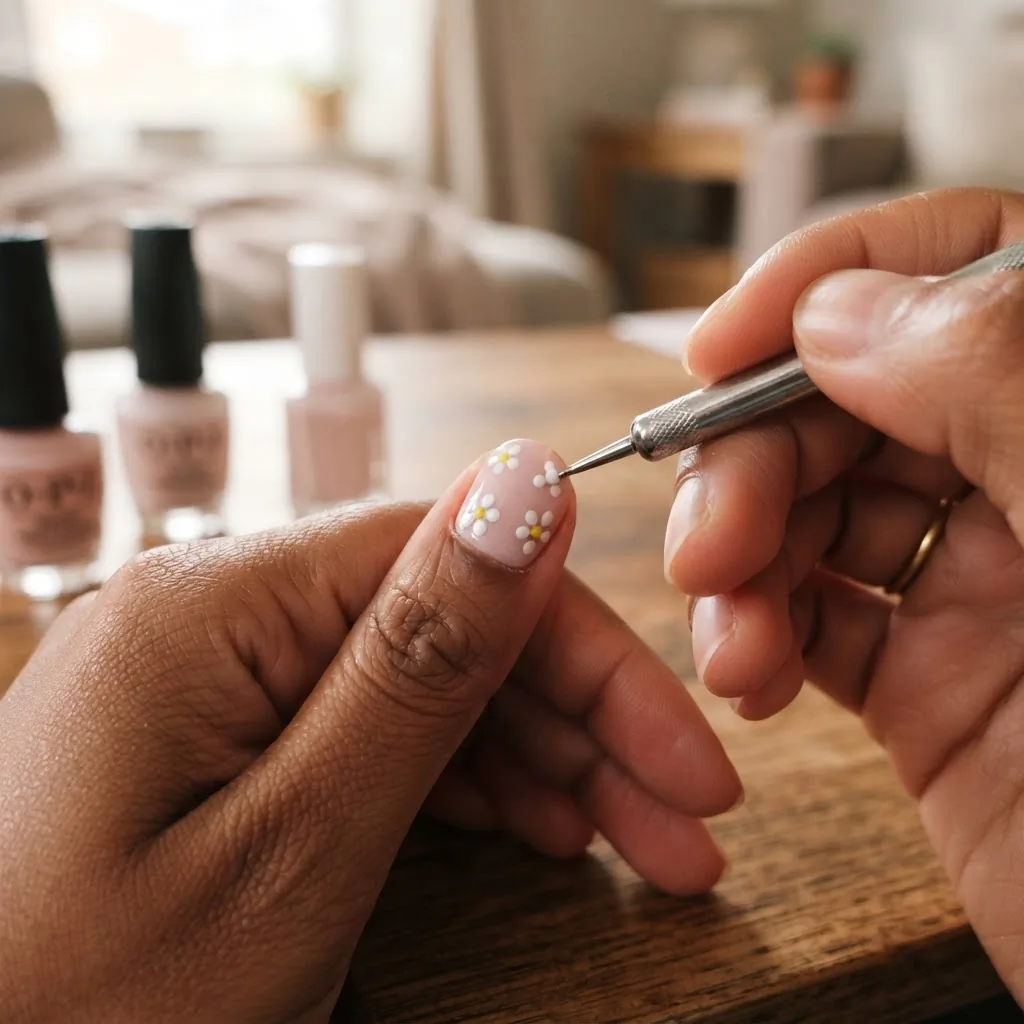
The slight imperfections are genuinely part of the charm.
You need a dotting tool (a basic double-ended metal set costs about $3 to $5) and two colors. Do your base color first and let it dry fully. Then use the larger end of the dotting tool, dip it in your second color, and place five dots in a loose circle. Use the smaller end with a third color or a light glitter for the center dot. A little contrasting color for the leaves, if you are feeling ambitious, is just two diagonal strokes with a thin liner brush.
Placement strategy for beginners: do micro florals on just one accent nail, usually the ring finger, and keep the rest of the nails a solid color. It looks intentional, it limits the number of flowers you have to make, and it lets your best one be the star.
Short nail version: two or three small flowers in the lower half of the nail, leaving the upper portion clean. This creates a sense of space and does not crowd a shorter nail bed.
7. Cat-Eye Magnetic Nails
Cat-eye gel nails use polish that contains ultrafine magnetic particles. When you pass a magnet over the freshly applied, uncured gel, those particles pull toward the magnet and create a sleek, shifting line of light running through the color, like the eye of a cat, or honestly, like a gemstone. It sounds very technical. It is not.
The key detail that most beginners miss is timing. You apply your cat-eye gel color, and before you cure it, you hold a strip magnet or cat-eye magnet over the nail for about 8 to 15 seconds. The uncured gel needs that time for the particles to fully migrate and align. Then you cure without moving the nail. Do one nail at a time so you never accidentally cure before the magnet effect has set.
Spring-appropriate cat-eye shades: dusty rose, lilac, teal, and forest green are all stunning. The metallic shimmer inside the gel gives even soft, pastel-adjacent colors a depth that photographs beautifully.
You do need a starter kit that includes a magnetic gel and a matching magnet for this design. Kits run roughly $20 to $40 for a beginner set with the lamp, gel, and magnet included. It is one of the few spring designs that does require gel specifically. It cannot be replicated with regular polish.
If you are using gel at home, this is also a good moment to mention: keep your lamp on your designated nails only during curing, and you might consider applying a broad-spectrum SPF to the backs of your hands beforehand as a simple precaution. The Skin Cancer Foundation notes that nail UV lamps present only a moderate UV risk, far lower than tanning beds, but it is a sensible and easy habit to build.
8. Pastel Chrome (The Spring 2026 Update)
This is glazed donut’s more colorful younger sibling, and it is having a genuine moment right now. Pastel chrome means applying a lavender, mint, peach, or baby pink chrome powder over a milky or white gel base, giving you a finish that looks like a pearl dipped in soft spring light. It is that quality of shimmer that makes people stop and ask “what is on your nails?”
The technique is identical to the silver glazed donut method described above: gel base, cure, gel color coat (a sheer or milky version of your chosen pastel), cure, slightly tacky top coat, foam applicator with chrome powder, no-wipe top coat, final cure. The difference is choosing a colored chrome powder instead of silver or gold. Colored chrome sets are widely available online and in beauty supply stores for around $8 to $18 for a full kit of shades.
If you are new to chrome and want to test the waters before investing, a pearlescent silver chrome applied over a sheer lavender gel base gives you that pastel chrome look with tools you may already have from a standard glazed donut attempt. It is a good bridge step.
9. Polka Dot Nails
Polka dots are having a real renaissance this spring, partially because cottagecore and dopamine dressing aesthetics keep feeding each other on Pinterest, and partially because polka dot nails are just joyful. There is nothing complicated about them, but there are a few things that separate a clean, intentional polka dot mani from a result that looks like you dropped something on your nails.
The first thing is sizing consistency. Use your dotting tool rather than a toothpick. The round tip of a dotting tool deposits a consistent circle every time. A toothpick gives you inconsistent blobs. The medium-sized end of a basic dotting set is perfect for standard polka dots. Press straight down, lift straight up, and do not swirl or drag.
The second thing is spacing. Work out your layout first by lightly placing the dots mentally or sketching on paper. A common beginner mistake is starting in one corner and running out of space before finishing the pattern. For a classic polka dot mani, I like the pattern of one row across the center of the nail, or a scattered random placement where you vary the distances slightly for an organic feel.
Spring color combinations: white dots on a butter yellow base, black dots on a sheer white base for a mod look, or matching tonal dots (pale pink on a slightly deeper pink) for something more subtle and sophisticated.
10. Soft Blush Sheer Nails with a Glitter Tip
I am ending on this one because it is my personal spring opener, the design I come back to when I want something pretty and low-stakes and I’m doing my nails after a long workday. A sheer, peachy-pink base with a fine glitter dust applied just at the tip, either free-handed or with a sponge, looks like the inside of a rose, and it takes about fifteen minutes from start to finish.
The glitter tip technique is just the French tip concept with fine glitter polish instead of a solid color. Apply your sheer base, let it dry, then load up a thin striping brush or the tip of a sponge wedge with a fine-particle glitter polish (not chunky glitter, you want the micro-shimmer kind) and swipe it lightly across the tip. One pass, maybe two. The sheer base lets the glitter fade naturally into the nail without a harsh line, which means slight unevenness reads as intentional.
This design is genuinely perfect for short nails, for people who are not comfortable with straight lines, and for anyone who just wants something that feels festive and wearable at the same time.
Taking Care of Your Natural Nails Through All of This
Here is the honest part that I will always include, because I care too much about your nails to skip it.
If you are doing at-home gel regularly, please take it off properly. No peeling, no picking, no prying. Soak cotton pads in acetone, place them on each nail, wrap in foil or use clip-off remover caps, and give it 10 to 15 minutes before gently pushing the softened gel off with an orangewood stick. The AAD’s guidance on reducing artificial nail damage is specific and clear on this: peeling or picking gel off mechanically removes layers of your natural nail plate along with it, and that is where brittleness, peeling, and thinning come from.
If you develop itching, redness, or swelling around the nail or on your fingertips during or after gel use, take it seriously. Research published in 2025 confirms that allergic contact dermatitis is the most common adverse reaction to gel manicures, with methacrylate compounds including HEMA identified as the primary sensitizers. If you suspect a reaction, stop using the product, let your nails breathe, and see a dermatologist. Many brands now offer HEMA-free gel formulas if you have been advised to avoid HEMA specifically.
The FDA’s nail care product guidance also notes that many nail products contain ingredients that are safe when used as directed but require that “as directed” part to actually happen. That means thin coats, proper cure times, ventilation in your workspace, and not eating snacks while the polish is still wet. Basic stuff, but worth saying.
Take a break between gel sets when you can.
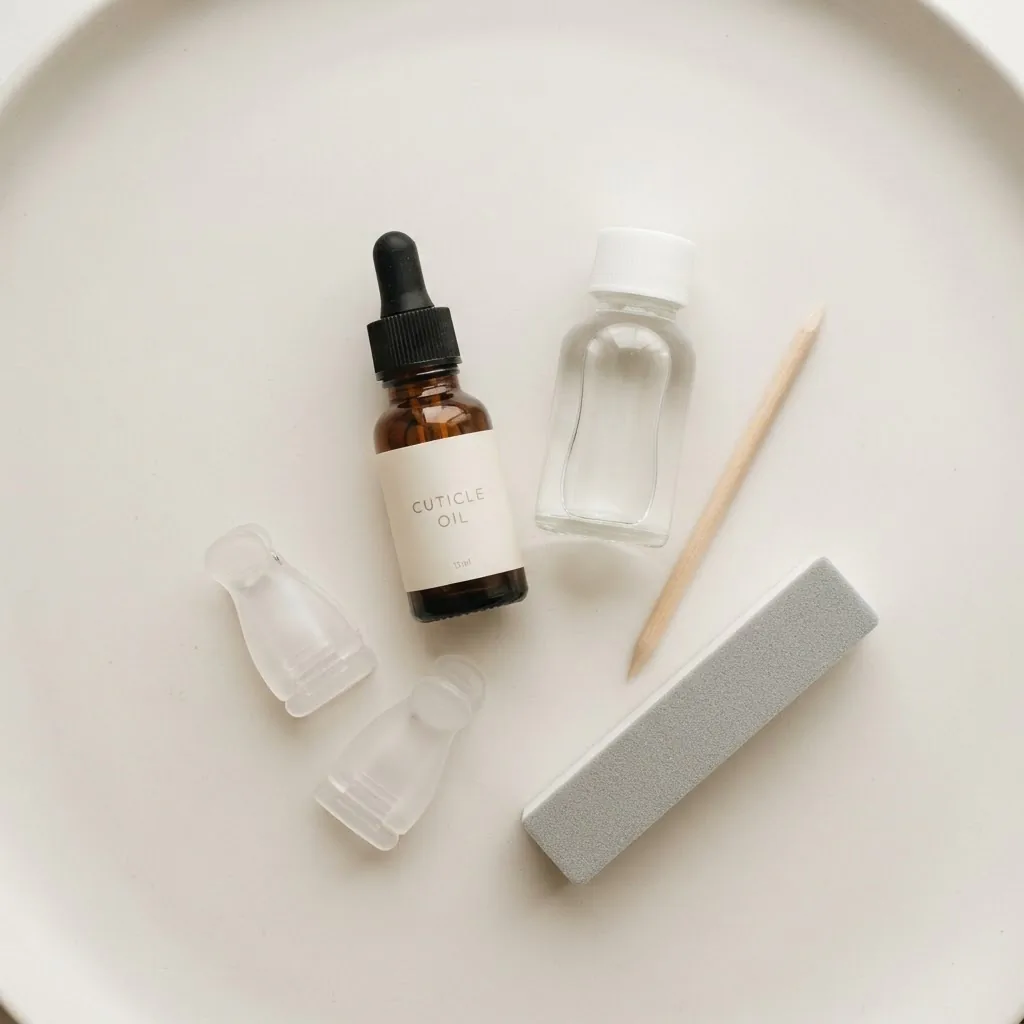
Let your natural nails breathe for a week between applications, use cuticle oil daily, and if your nails feel thin or bendy after gel removal, give them a real rest before going back in.
Your natural nails are the foundation of every single design on this list. Protect them and they will always be there to play with.
Your Spring Nails Are Closer Than You Think
When I look back at those first wobbly dots I made at a boring internship, the gap between that and cat-eye gel on my ring finger feels enormous. But it happened one design at a time, each one teaching me something the last one did not. None of the ten designs on this list require talent. They require the right tool, a little patience, and the willingness to practice once or twice before expecting the Pinterest result.
Start with butter yellow or milky sheer if you want something low-risk and gorgeous immediately. Graduate to chrome or cat-eye when you are ready for a project. And do the micro florals on a Sunday afternoon with a good playlist, because they are worth the ten minutes of practice it takes to make them yours.
Spring is the best season to try something new on your nails. The colors are forgiving, the vibes are generous, and honestly, if it goes sideways, nail polish remover is a dollar ninety-nine.
You’ve got this.