12 Y2K Hairstyles Making a Comeback (And How to Try Them)
Okay, so Pinterest finally figured out that it’s 2025 and also, apparently, 2003 at the same time. My feed is absolutely full of butterfly clips, space buns, crimped ends, and those iconic zigzag parts that make you feel like you should be wearing a flip phone and a Von Dutch hat. Honestly? I’m not complaining even a little bit.
Y2K hairstyles are having a real, legitimate comeback right now, not just as ironic throwbacks but as genuinely wearable, cool looks that celebrities and everyday people are pulling off on TikTok, Instagram, and the red carpet. Dua Lipa showed up to a film premiere with freshly crimped hair. Olivia Rodrigo brought butterfly clips back into mainstream conversation. Millie Bobby Brown rocked asymmetrical space buns at a press conference earlier this year. The early 2000s are clearly having their moment, and I want you to be ready for it.
Here’s the thing I love about this particular trend wave: most Y2K hairstyles are genuinely beginner-friendly. A lot of them were created by teenagers in the early 2000s with drugstore clips and a basic flat iron, and that accessibility is part of what makes them so fun to revisit. You don’t need a professional toolkit. You mostly need the right information, a little patience, and maybe a pack of tiny butterfly clips from the clearance bin.
So let’s go through the 12 looks that are actually trending right now, what they look like in their 2025 form versus their original 2000s version, how to do each one, and who they work best for by hair type. I’ll also be honest about which ones take a little practice and which ones you can nail in under five minutes.
The Y2K Hair Revival: What’s Actually Back and Why It Looks Different Now
Before we dive in, I want to clear up one thing. The 2025 version of Y2K hair is not a carbon copy of the early 2000s. It’s a remix. The original era could get a bit extreme, think mega-crunchy gel spikes, super tight crimped sections that frizzed out by noon, and highlights that were so chunky they had their own zip code. The modern take is more relaxed, a little more intentional, and honestly a lot more flattering.
Think of it this way: the 2000s version was maximal and earnest. The 2025 version keeps the fun energy but softens the execution. Spiky buns have a looser, more artful quality. Crimped hair now often refers to wider, mermaid-style waves rather than the tight zigzag pattern of the original crimpers. Chunky highlights are back but blended a bit at the roots instead of hard-lined. You get all the nostalgia with a little more polish. And editors over at InStyle have noted that this is exactly why the revival feels so wearable, because it borrows the spirit without demanding you replicate the look down to the last spiky detail.
With that framing in mind, here are your 12 looks.
1. Space Buns
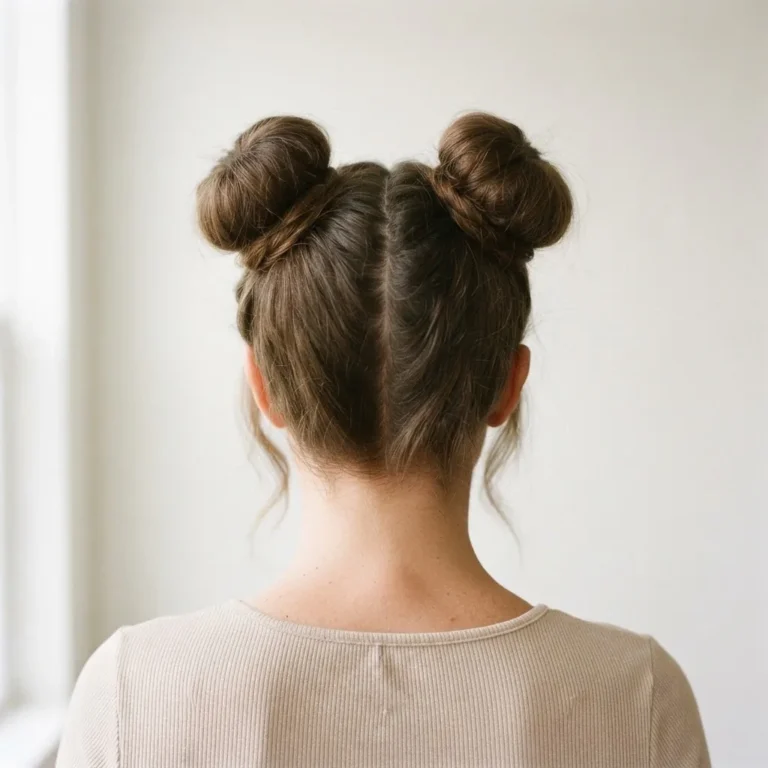
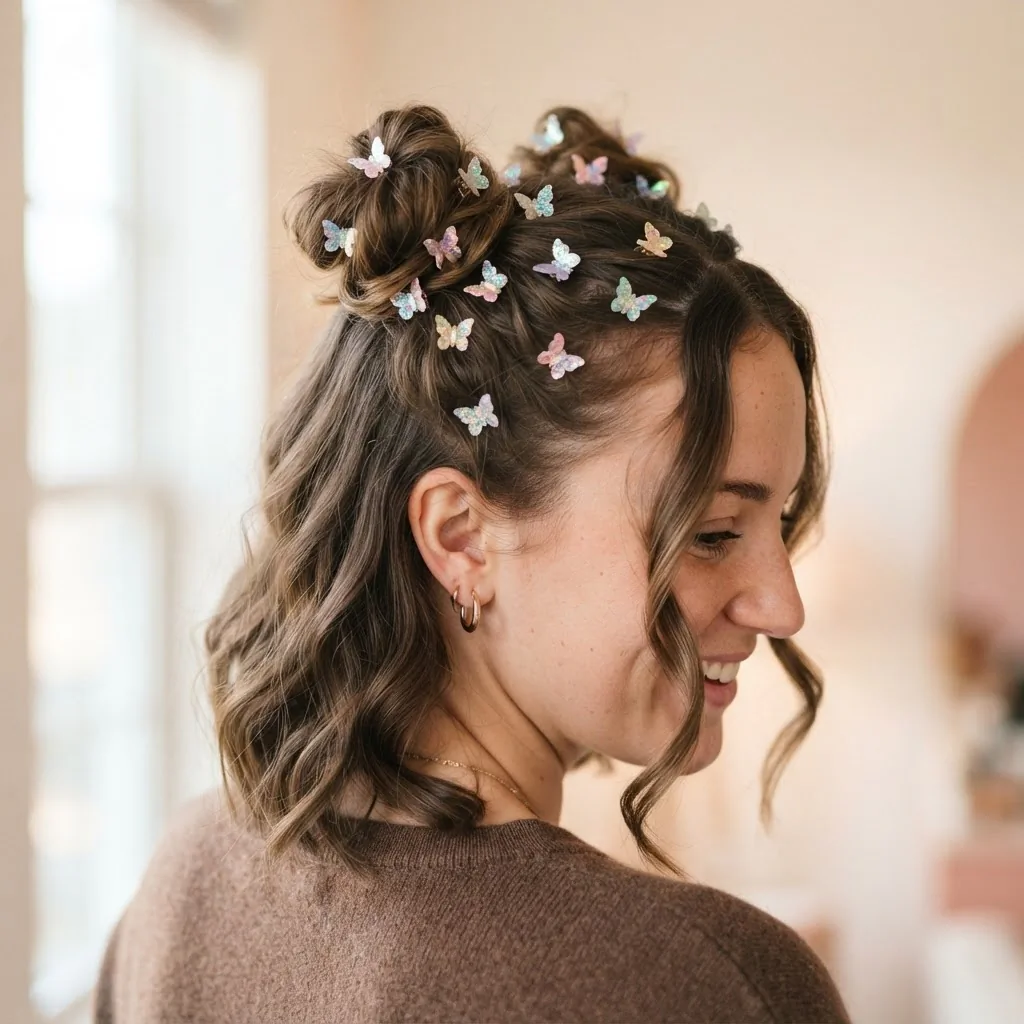
What they are and why they’re back: Space buns are two buns positioned on either side of the top of the head. They were everywhere from the late 90s through the early 2000s, worn by everyone from Spice Girls fans to Britney Spears on magazine covers. The 2025 version comes in several forms: the classic symmetrical pair, the asymmetrical version (one higher than the other, very editorial), the messy and loosely wound version, and the spiky version where you leave ends poking out instead of tucking them in.
How to do it: Section your hair down the middle from front to back. Gather one side into a high ponytail and secure it. Then twist the ponytail around its own base and wrap it into a bun, using bobby pins or a second elastic to hold it in place. Repeat on the other side. If you want the spiky version, don’t tuck the ends in fully. Pull the tail through the elastic one more time but don’t pull it all the way through, leaving a loop with ends sticking out, then fan those ends out a bit with your fingers.
Hair type notes: Fine hair should use clear elastics and not over-tease, since teasing already-fine hair can cause more breakage than it’s worth. For extra oomph, a light volumizing spray or dry shampoo at the roots before styling helps. Thick hair might need two bobby pins per bun to keep things secure. Curly hair honestly looks incredible in space buns because the natural volume and texture gives them that effortless, full look. If you have curly hair, skip the brush and use your fingers to gather each section to avoid frizz.
Beginner rating: Easy. This is genuinely one of the most approachable looks on this list.
What you need: 2 clear elastics, 4 to 6 bobby pins, optional dry shampoo or volumizing spray.
2. Butterfly Clips
What they are and why they’re back: Butterfly clips, those small plastic claw-style clips shaped like butterfly wings, are one of the most recognizable Y2K accessories ever made. In the 2000s, they were used to pin back half-up sections, clip loose pieces away from the face, or arrange a whole head of hair in a seemingly random cascade of colorful clips. They’re back now in a big way, and the modern version leans into the “more is more” philosophy with iridescent, glittery, and jewel-toned clips scattered strategically through the hair.
How to do it: The simplest version is to clip back two small sections from the front of your hair on each side (like a half-up look) using one or two clips per side. For the more editorial multi-clip approach, loosely gather sections of hair from different spots and clip them back at different angles. Letting some clips sit flat, some at an angle, and some near the crown gives that effortlessly thrown-together look.
Hair type notes: This works on literally every hair type. Thicker hair may need to use slightly larger butterfly clips or two small ones together to grip all the hair properly. Fine hair looks beautiful with the delicate mini clips because even small amounts of hair fill them perfectly.
Beginner rating: Easy. Possibly the easiest look on this entire list.
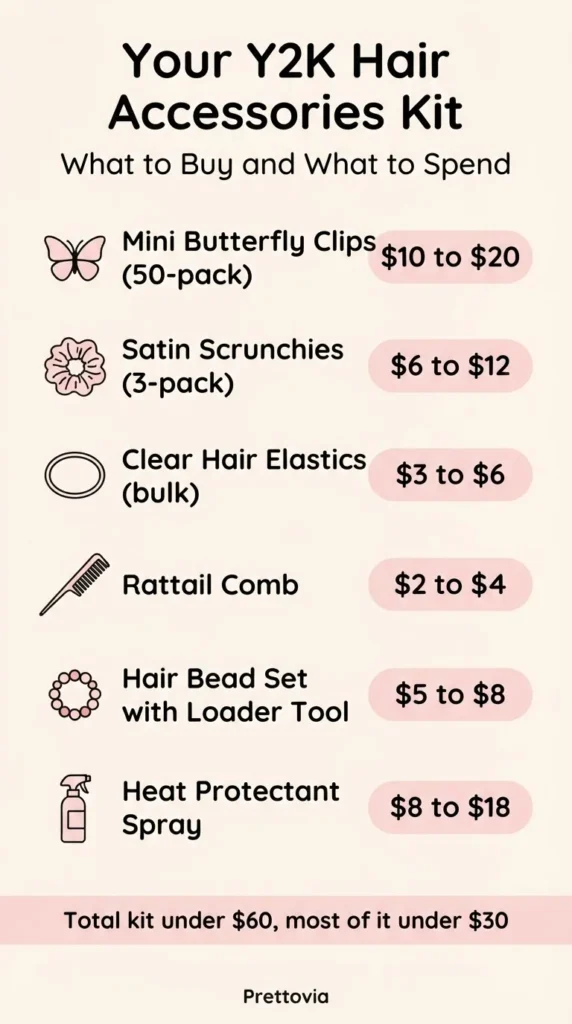
Budget tip: You can find sets of 50 mini butterfly clips in assorted colors and finishes for around $10 to $20 at drugstores, Target, and online retailers. There is no reason to spend more than that.
What you need: A pack of mini butterfly clips in your preferred colors or a mix.
3. The Zigzag Part
What it is and why it’s back: Instead of a straight center or side part, the zigzag part creates a lightning bolt pattern through the hair. It was huge in the late 90s and early 2000s, especially paired with pigtails, cornrows, or a simple half-up. It’s fully back now, showing up on everyone from Charli D’Amelio to everyday TikTok creators who are pairing it with space buns, updos, and sleek ponytails.
How to do it: This requires a rattail comb, specifically the pointed end. For best control, do this when your hair is slightly damp, not soaking wet. Start at your natural hairline at the front of your head. Use the tip of the comb to draw a small diagonal line to one side, then reverse direction and draw a diagonal the other way, then reverse again. Continue this alternating pattern all the way to the back of your head. Let each section fall naturally to its side as you go. Use a little edge gel or pomade to define the part and keep it in place. L’Oreal Paris has a step-by-step guide on exactly how to create this part that’s worth bookmarking if you want to see it mapped out visually.
Hair type notes: Fine hair should do this on slightly damp hair for maximum control. Coarser or thicker textures may need a bit of edge gel to keep the part clean and defined. Natural and curly textures are gorgeous with a zigzag part because the volume on either side of the part really makes the pattern pop.
Beginner rating: Moderate. It takes a little practice to get the zigzags even and consistent, but it’s totally learnable in a couple of tries.
What you need: Rattail comb, optional edge gel or light pomade.
4. Crimped Hair
What it is and why it’s back: Crimping is the technique of creating a repeating angular wave pattern throughout the hair, achieved either with a crimping iron (a specialized tool with a rippled plate) or by braiding the hair overnight and releasing it to reveal a natural wave pattern. The original 2000s version featured very tight, grid-like crimps from root to tip. The 2025 version tends to be softer, with slightly wider waves that read more as “textured” than “corrugated cardboard.” Dua Lipa, Billie Eilish, and multiple runway shows have brought this back into the spotlight.
How to do it (heat method): Section clean, dry hair. Always, always apply a heat protectant before using any heated styling tool. Work in sections no wider than about an inch. Press the crimper onto each section for two to three seconds, moving down the hair shaft. For a modern, relaxed version, skip the root area and start about two inches down from the scalp so it reads as textured rather than fully crimped. Finish with a light hold spray.
How to do it (heatless method): Wash your hair the night before. While it’s damp but not dripping, braid your entire head into multiple tight three-strand braids. The smaller and tighter the braids, the more defined the crimp pattern. Sleep in the braids, then release them in the morning and gently separate the waves with your fingers. Spritz with a little hair spray to set.
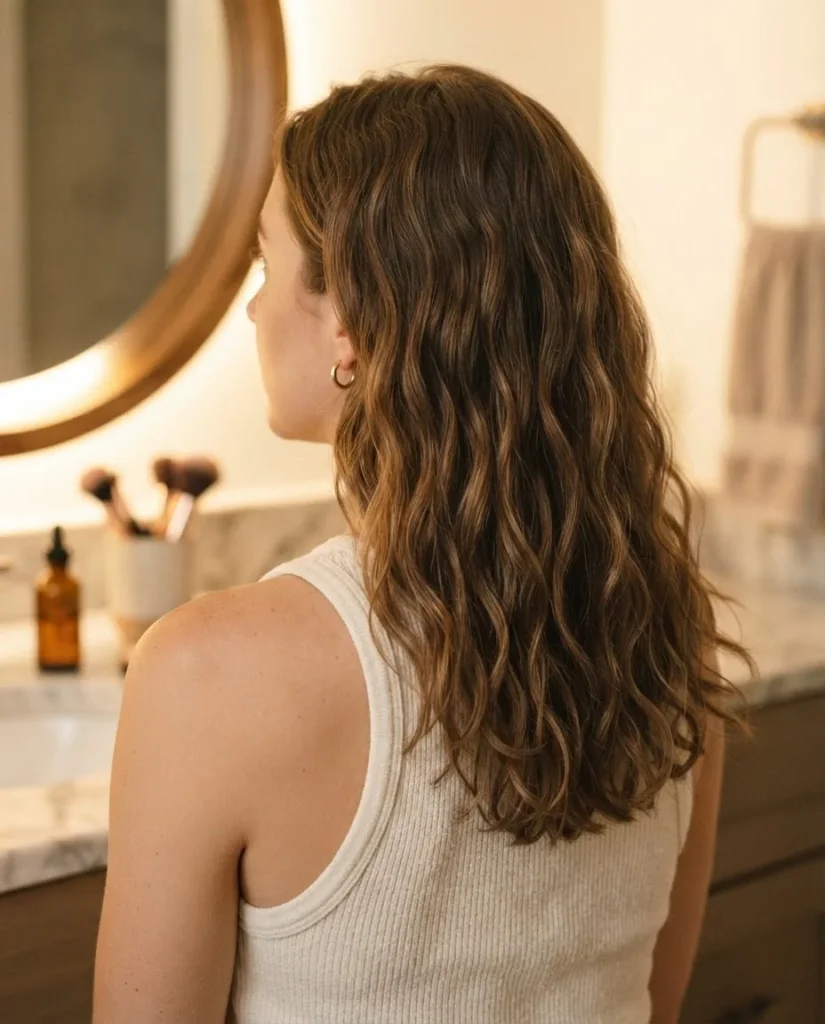
Bustle documented this exact no-heat braiding technique and found the results genuinely cute, and I love recommending it for anyone who doesn’t have a crimper or wants to protect their hair from heat.
A note on heat and your hair: If you’re reaching for a crimping iron or any heat tool frequently, please use a heat protectant every single time without exception. Research published in the NIH’s open-access PMC library confirms that heat-induced damage to the hair cuticle increases with temperature and with repeated use, so frequent high-heat styling without protection can genuinely degrade your hair’s surface over time. Lower heat settings and keeping the tool moving (rather than pressing and holding in one spot) help a lot. If your hair is already damaged or chemically processed, I’d strongly lean toward the heatless method.
Hair type notes: Fine hair should use the lowest effective heat setting and avoid root-to-tip crimping, since full crimping can make fine hair look frizzy rather than textured. Curly hair already has natural wave, so a light mist of water plus the braid method overnight creates a gorgeous result without any heat at all. Coarse or thick hair takes to the heat crimper beautifully.
Beginner rating: Moderate for the heat method (technique matters), Easy for the heatless braid method.
What you need: Crimping iron or tight braiding supplies, heat protectant spray, light hold spray.
5. The High Sleek Ponytail
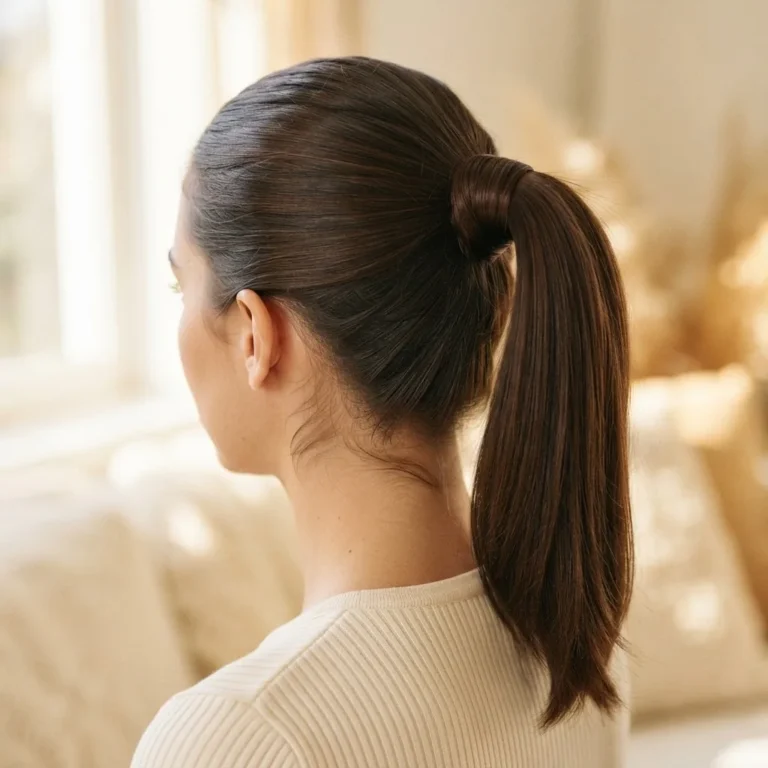
What it is and why it’s back: The super-high, glass-smooth ponytail is one of the most powerful Y2K looks, worn in the 2000s by icons like Jennifer Lopez, Beyoncé, and Brandy. It’s back now with even more polish, and Keke Palmer, Ariana Grande, and Zendaya have all been spotted wearing it. This look is about smoothness, height, and tension.
How to do it: Brush all hair upward toward the crown of your head. Use a boar bristle brush if possible, as it helps smooth the surface without creating static. Apply a small amount of gel or edge cream along the hairline and brush it down smoothly before securing everything with a strong elastic at the very top of your head. To wrap the base, take a small thin section of hair from the underneath of your ponytail, wrap it around the elastic, and pin it underneath with a bobby pin. This hides the elastic and makes the style look salon-polished.
Hair type notes: Straight and wavy hair achieve this look most easily. If you have natural or curly texture and want a sleek finish, the AAD recommends using a light moisturizer or styling cream and working in sections to smooth hair before gathering it up, which reduces the tension on individual strands that can come from forcing the hair into a sleek style against its natural texture. It’s worth knowing that the American Academy of Dermatology notes that styles kept very tight against the scalp repeatedly can contribute to traction-related hair stress over time, so if you love this look, alternating it with gentler styles is smart for long-term hair health.
Beginner rating: Moderate. The technique is simple but getting the surface glass-smooth takes a little practice.
What you need: Boar bristle brush, strong hold elastic, edge gel or smoothing cream, a few bobby pins.
6. Baby Braids and Face-Framing Braids
What they are and why they’re back: Baby braids are tiny thin braids placed at the temples or along the hairline, often worn as a frame for the face while the rest of the hair is worn loose or in a ponytail. The 2025 version leans into the delicate, artisanal quality of them. Margot Robbie, Hailey Bieber, and Zendaya have all worn variations of this style recently.
How to do it: Part off a thin section of hair at the temple, about a pencil-width is right. Split it into three even strands and braid normally to the end, securing with a tiny clear elastic or small bead. Repeat on the other side. The braid should be snug but not super tight. You can leave it alone, tuck the end behind the ear, or add a small butterfly clip at the end for extra Y2K energy.
Hair type notes: This works on almost every texture. If you have natural or coily hair, moisturize the section first and use a light edge cream to smooth the braid. Fine hair should use extra-small sections because thin braids from thin hair can look even more delicate and beautiful than on thick hair.
Beginner rating: Moderate. Basic braiding skill required, but if you can do a three-strand braid, you can do this.
What you need: 2 tiny clear elastics or small beads, optional butterfly clips.
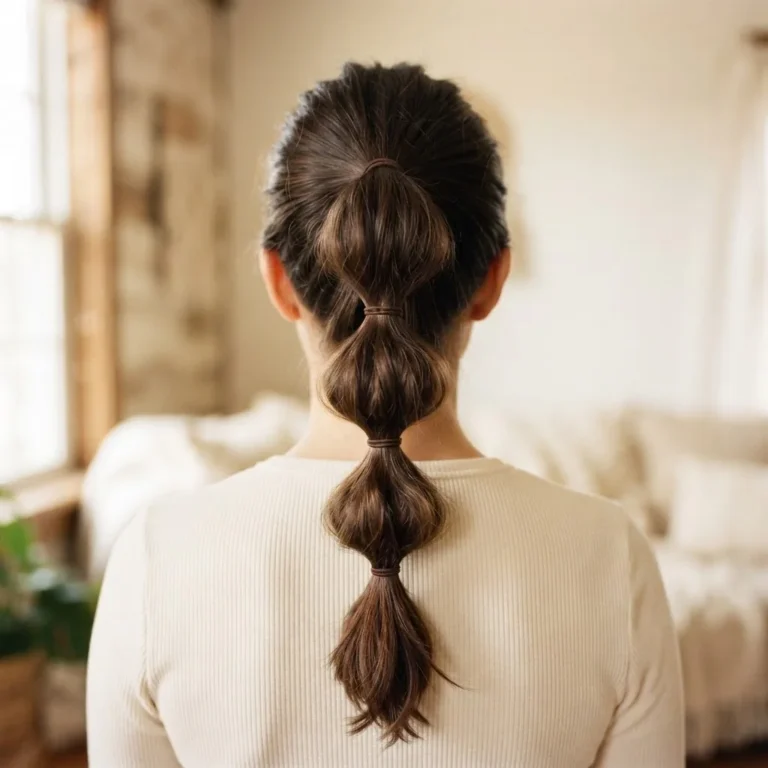
7. Bubble Ponytail and Bubble Braids
What they are and why they’re back: The bubble ponytail was a playful Y2K staple. You create a regular ponytail, then add elastics spaced a few inches apart down the length of the tail, and gently pull each “bubble” section out wider with your fingertips so it puffs up between each elastic. The bubble braid is the same idea applied to a three-strand braid, where you puff out each section after braiding. Both are all over TikTok and Pinterest right now, and Allure’s hairstylists have featured them as one of the easiest Y2K-inspired styles to recreate at home for beginners.
How to do it (bubble ponytail): Pull your hair into a regular ponytail and secure. Then take clear elastics and place them down the ponytail every 2 to 3 inches. After each elastic is in place, use both hands to gently pull the hair above that elastic outward and down, making the section puff out like a bubble.
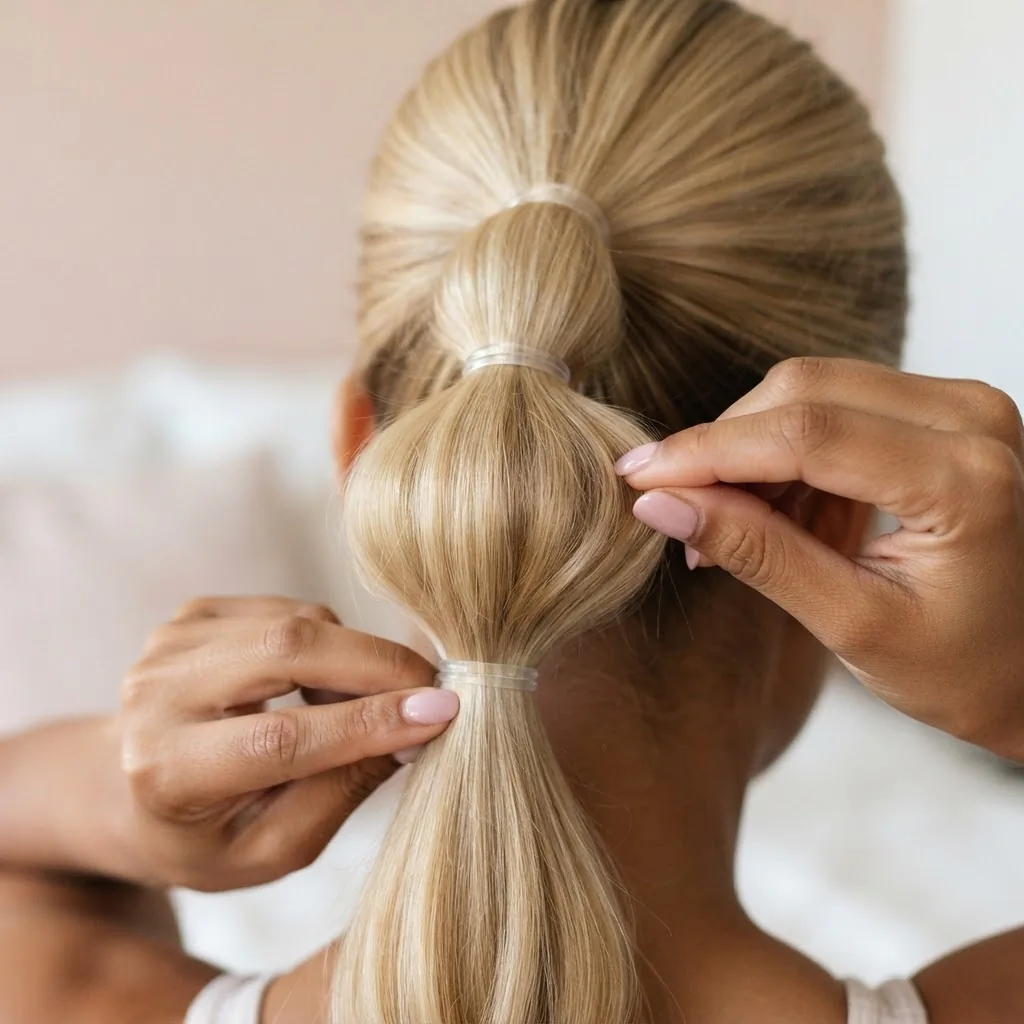
Repeat until you reach the end.
Hair type notes: Thicker hair creates the most dramatic bubbles naturally. Fine hair can use light dry shampoo or texturizing spray along the ponytail before adding the elastics to create some grip and puff. Curly hair gets incredible volume in the bubble sections, which looks amazing.
Beginner rating: Very easy. Honestly one of the easiest looks here, and the payoff is huge.
What you need: 5 to 8 clear hair elastics, optional texturizing spray for fine hair.
8. Butterfly Clip Updo (The Multi-Clip Effect)
What it is and why it’s back: This is the evolved version of the single butterfly clip. The multi-clip updo involves gathering sections of hair in a loose, almost random-looking arrangement and pinning them with multiple butterfly clips at different angles across the back and sides of the head. Think of it like pinning up a loose chignon but using butterfly clips instead of pins. It’s part style, part accessory moment.
How to do it: Gather most of your hair loosely at the back of your head. Twist it loosely once or twice and use two or three butterfly clips to secure it at different angles. Pull a few face-framing pieces out at the front. The intentionally imperfect, slightly undone quality is exactly the point.
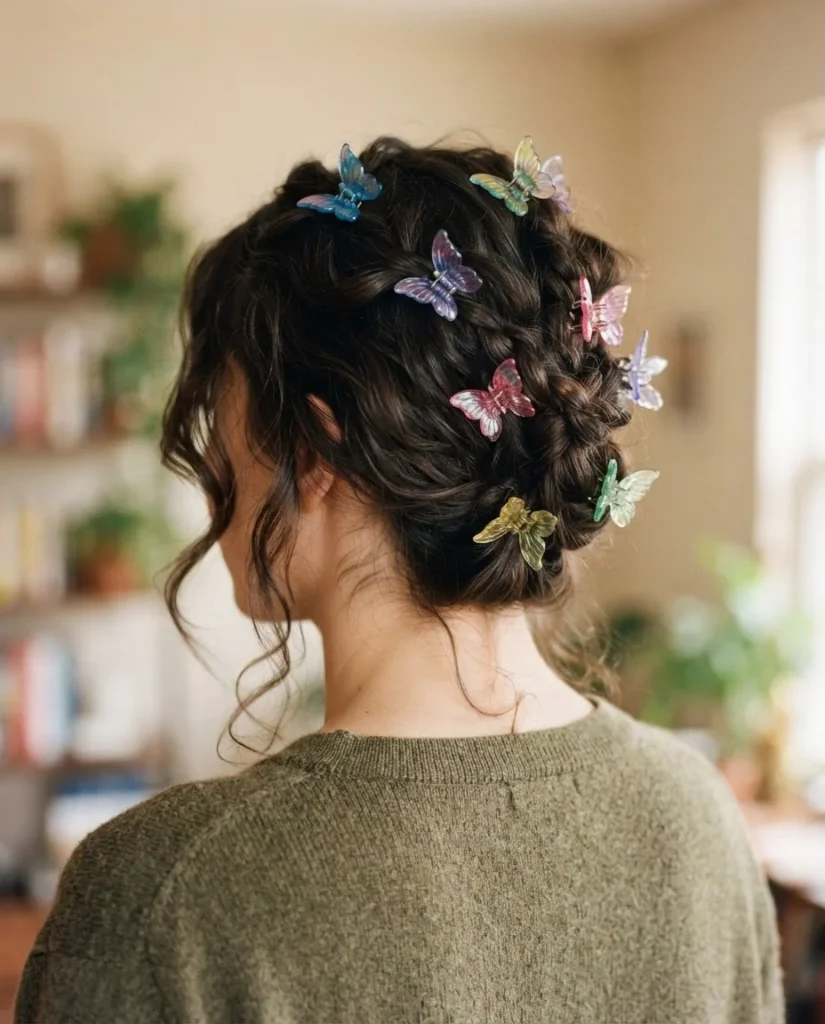
Hair type notes: Every hair type works. The thicker the hair, the larger the butterfly clips should be to maintain grip. Fine hair can layer several small clips in the same spot for a more secure hold.
Beginner rating: Very easy. There is no wrong way to do this.
9. Beaded Braids
What they are and why they’re back: Beaded braids place small decorative beads along the length of one or more braids, traditionally associated with protective styling in Black hair culture and worn by icons like Alicia Keys, Brandy, and Venus Williams throughout the 2000s. They’ve seen a genuine resurgence, worn by both celebrities and creators with a wide range of hair types.
How to do it: Create your braid first, whether that’s one or two face-framing braids or a longer braid. Before you secure the end, thread small hair beads one at a time along the braid, pushing them up toward the base. You can use a bead loader tool (a small flexible wire loop, often included in bead packs and available for under $5) to thread each bead onto the braid section easily. Space them evenly or cluster them, both look beautiful. Finish with a small elastic and a final bead at the tip.
Hair type notes: While this style has deep roots in Black hair traditions and looks incredible on natural, coily, and kinky textures, it’s also been adapted across hair types. Finer hair benefits from using smaller, lighter beads so they don’t slip. Thicker or coarser hair can support larger beads beautifully.
Beginner rating: Moderate. The braiding itself is straightforward, but threading beads takes a little patience.
What you need: Hair beads in your preferred style and size, a bead loader tool, small elastics.
10. Flipped Ends
What they are and why they’re back: The flipped end is exactly what it sounds like: instead of letting the ends of your hair fall straight or with an inward curl, you curl them outward so they flip up and away from the face. It was a signature look of the early 2000s, a little retro, a little preppy, and very intentional. The modern version is less about a rigid uniform flip and more about a soft, outward curl at the ends that gives the hair movement.
How to do it: Work with dry hair. Take a section of hair, wrap it around a large-barrel curling iron (1.5 inch or larger) with the ends directed away from your face, so the hair wraps outward rather than inward. Hold for 8 to 10 seconds and release. After curling all sections, run a paddle brush very lightly through the mid-lengths to smooth without disturbing the flipped ends. Finish with a light hold spray.
Hair type notes: Straight hair holds this beautifully with a curling iron. Wavy hair can sometimes get this effect naturally with a little round brushing while blow-drying. Curly or coily hair can achieve a beautiful outward flip by stretching and setting the ends with a curl-defining cream and letting them air dry over a round brush.
Beginner rating: Moderate. Curling outward rather than inward can feel counterintuitive at first because we tend to reach for inward curls automatically, but once you’ve done it a couple of times it becomes second nature.
What you need: Curling iron with a 1.5-inch barrel, heat protectant, light hold spray.
11. The Spiky Bun
What it is and why it’s back: The spiky bun, also known as the spiky updo, is one of the most distinctly Y2K silhouettes. Instead of a smooth, tucked bun, you pull the hair up and let the ends jut out in different directions, creating a jagged, almost starburst-shaped updo. Doja Cat wore a version of this at the 2022 Grammy Awards and the internet lost its mind in the best possible way.
How to do it: Pull your hair into a high ponytail. Secure it with a strong elastic. Twist the ponytail once or twice around the base, but rather than tucking all the ends under, pull the ponytail through the elastic loop only partway, leaving a loop of hair and a bunch of wild ends pointing outward. Use your fingers to fan those ends out around the bun and secure with a few bobby pins to keep the shape. A little gel or pomade on the ends helps them stay pointed and defined if that’s the look you’re going for.
Hair type notes: This is one of the best Y2K styles for thick hair, because the volume and weight of thick hair creates a truly dramatic spiky effect. Fine hair can layer hair over itself and backcomb lightly at the base before creating the bun to add some grip and bulk. Curly hair creates a naturally wild, textured spiky bun that often requires minimal product.
Beginner rating: Easy. The messier, the more it works.
What you need: Strong elastic, a few bobby pins, optional gel or pomade.
12. Chunky Highlights and Money Pieces
What they are and why they’re back: Chunky highlights, bold stripes of a lighter shade running through the hair, were THE color trend of the early 2000s. Frosted tips, thick blonde panels against dark hair, high-contrast color pops at the face. They are very much back, but the 2025 version is smarter about placement and blending. Instead of hard, stark stripes, you’re seeing thicker highlight panels that are slightly blended at the root so they grow out more gracefully. The “money piece,” a pair of bold highlights framing the face at the front, is a wearable gateway version of this trend. As Who What Wear reported, the hashtag for chunky highlights alone has over 200 million views on TikTok, which tells you everything you need to know about how hard this trend is running.
The most important thing I need to say here: This is the one Y2K style on this list where I’m going to pump the brakes hard on the DIY approach, at least for the full chunky highlight version. Bleaching or lightening hair at home carries real risks: uneven results, accidental overlap onto already-bleached hair, scalp irritation, and significant damage if the developer strength is wrong or the timing is off. This is genuinely a “see a professional colorist” situation, especially if you have dark hair, previously colored hair, or any kind of chemical service history. A professional can assess your hair’s condition, use the right developer strength, and place the highlights in a way that actually flatters your face shape.
If you want to dip your toe in at home, the money piece (just the front two face-framing sections) with a gentle, pre-formulated highlighting kit is lower-risk than a full head because it’s a small, contained area. Always, always do a strand test first, read all the instructions completely before you open anything, and watch the timing carefully. If you have any scalp sensitivity or a history of reactions to hair color products, do a patch test 48 hours before as well.
Hair type notes: Chunky highlights can be adapted to any hair type and color, though the contrast reads differently depending on your base. Dark brown or black hair gives the most dramatic, Y2K-authentic contrast. Lighter brunettes might go for a honey or caramel chunk for a warmer, subtler version of the trend.
Beginner rating for DIY: Hard. Please see a professional for a full application. Easy-to-moderate for a pre-done money piece kit on natural hair.
The Accessories That Pull Everything Together
Half the magic of Y2K hair is actually in the accessories, and this is where the budget-friendly angle really shines. Here’s a quick rundown of what you actually need:
Mini butterfly clips in assorted colors and finishes are the essential starter purchase. Sets of 50 run $10 to $25 depending on where you shop. Scrunchies are making a full comeback too, especially velvet and satin finishes, which are both kinder to your hair than traditional elastics. Clear mini elastics in bulk are non-negotiable for bubble ponytails and baby braids. If you’re going for beaded braids, a pack of hair beads with a bead loader tool is usually under $8. A rattail comb for the zigzag part costs a dollar or two at any beauty supply store. And if you’re planning to crimp, a heat protectant spray should be in your toolkit before you plug anything in.
A Word About Your Hair’s Health While You’re Having Fun
Y2K hairstyles are almost all totally compatible with maintaining healthy hair if you approach them thoughtfully. The biggest risk areas on this list are the heat-heavy ones (crimping, flipped ends, the sleek high pony if you’re using a lot of heat to smooth it) and the tight styles (very high ponytails worn every single day). Giving your hair breaks from heat and from tight styles matters more than most people realize. Some of the best Y2K looks are also the most hair-friendly ones: butterfly clips, space buns, bubble ponytails, and baby braids all work with your hair rather than against it. And the heatless crimping method? Total win on all fronts.