10 Cute Ponytail Ideas Beginners Can Pull Off in Minutes
Let me be honest with you about something. For years, I thought there were two kinds of ponytails in the world: the sad, elastic-wrapped bun I threw together before I left the house, and the glossy, gravity-defying kind that existed only on Pinterest and in music videos. I did not understand what was different about them. Same concept, totally different result. It felt like a secret I was not in on.
Working in a salon in Austin changed that for me. I spent months watching clients walk in with a photo of some elevated pony and walk out actually looking like the photo. And once I started paying attention to what the stylists were doing, I realized the gap between “basic ponytail” and “cute ponytail” is not talent or expensive tools. It is about four or five small decisions you probably have never been taught, and once you know them, you cannot unknow them.
This whole post is me passing those along to you. We are covering ten genuinely versatile styles, from sleek and polished to bubbly and playful, with real technique notes, hair-type adjustments, and honest takes on what is easy, what takes a little practice, and what products are actually worth buying (and what drugstore versions work just as well).
Before You Touch Your Hair: The Foundation Stuff That Actually Matters
I know you want to jump straight into the styles, and we will get there, I promise. But skipping this part is why most ponytails fall flat within two hours or never look quite right to begin with. Give me two minutes here and it will change everything that follows.
Second-Day Hair Is Your Best Friend
This is one of the first things that clicked for me in the salon environment, and stylists will tell you the same thing consistently. Freshly washed hair is actually the hardest to work with for ponytails. It is slippery, it lacks grip, and it falls out of styles faster. Second or even third-day hair has natural texture and oils that help everything hold. If your hair is freshly washed and you need to do a pony today, a few spritzes of dry shampoo or a texturizing spray at the roots before you start gives you that same grippy texture artificially. This is one of those things that sounds like it should not matter and absolutely does.
Choosing Your Height Based on Your Face Shape
Ponytail height does a lot more work than most people realize. A high ponytail, sitting at the very crown of your head, lifts the face and looks youthful and energetic. A mid-height ponytail, roughly at the occipital bone, reads effortless and versatile. A low ponytail, at the nape of the neck or just above it, tends to look the most polished and fashion-forward, but it also needs the cleanest prep to look intentional rather than just tired. As a general guide: if you have a round face shape, a higher placement with a little height at the crown tends to elongate. If you have a longer face shape, a low or mid ponytail balances things out. If you have an oval or heart-shaped face, you can genuinely wear any height and it tends to look great. These are guidelines, not rules.
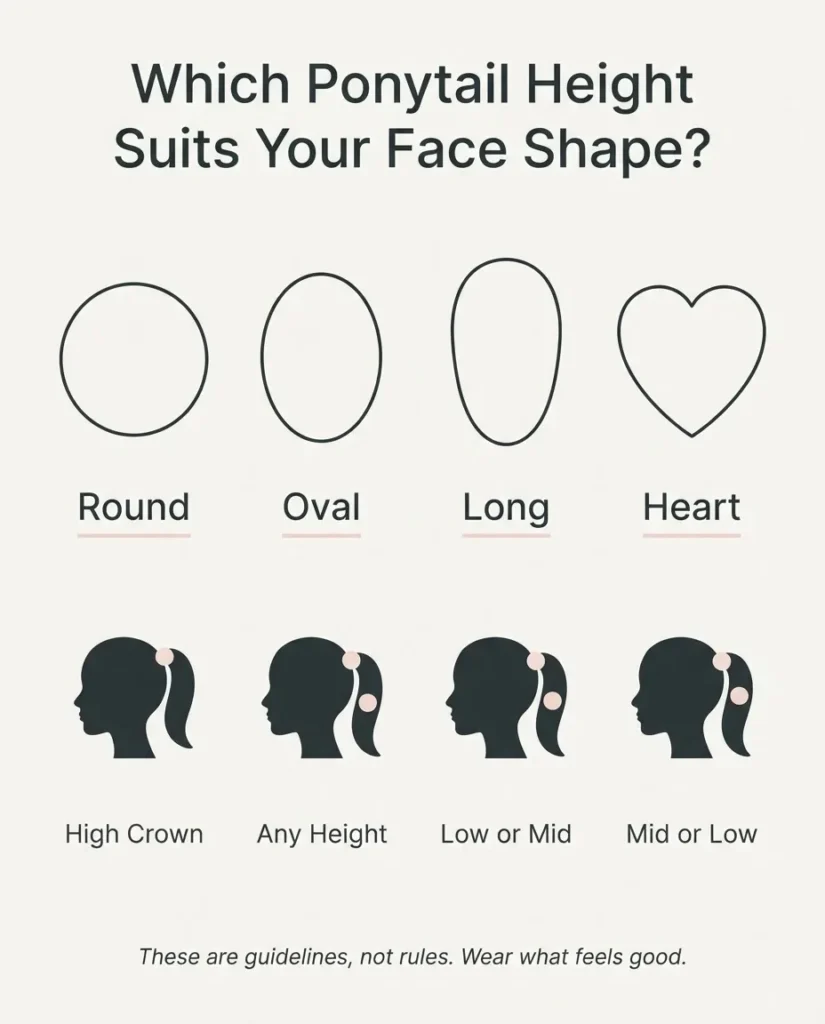
Wear what makes you feel good.
The Right Hair Tie Changes Everything
Please, I am begging you, stop using the metal-clasp elastics from the grocery store checkout line. Those little metal crimps snag and break your hair every single time you use them. The hair ties consistently recommended by stylists, and backed by hair health guidance, are seamless or fabric-covered elastics, satin scrunchies, or spiral hair ties. They hold without creating that harsh crease, and they are dramatically gentler on your hair over time. The American Academy of Dermatology specifically recommends replacing rubber bands with covered elastic ties to reduce tension-related breakage and the long-term hair thinning that can come from repeated pulling. Budget-friendly options include brands like Kitsch and Goody Ouchless. For a splurge, Slip satin scrunchies are beautiful and genuinely protective.
Now, the Styles
1. The Sleek High Ponytail
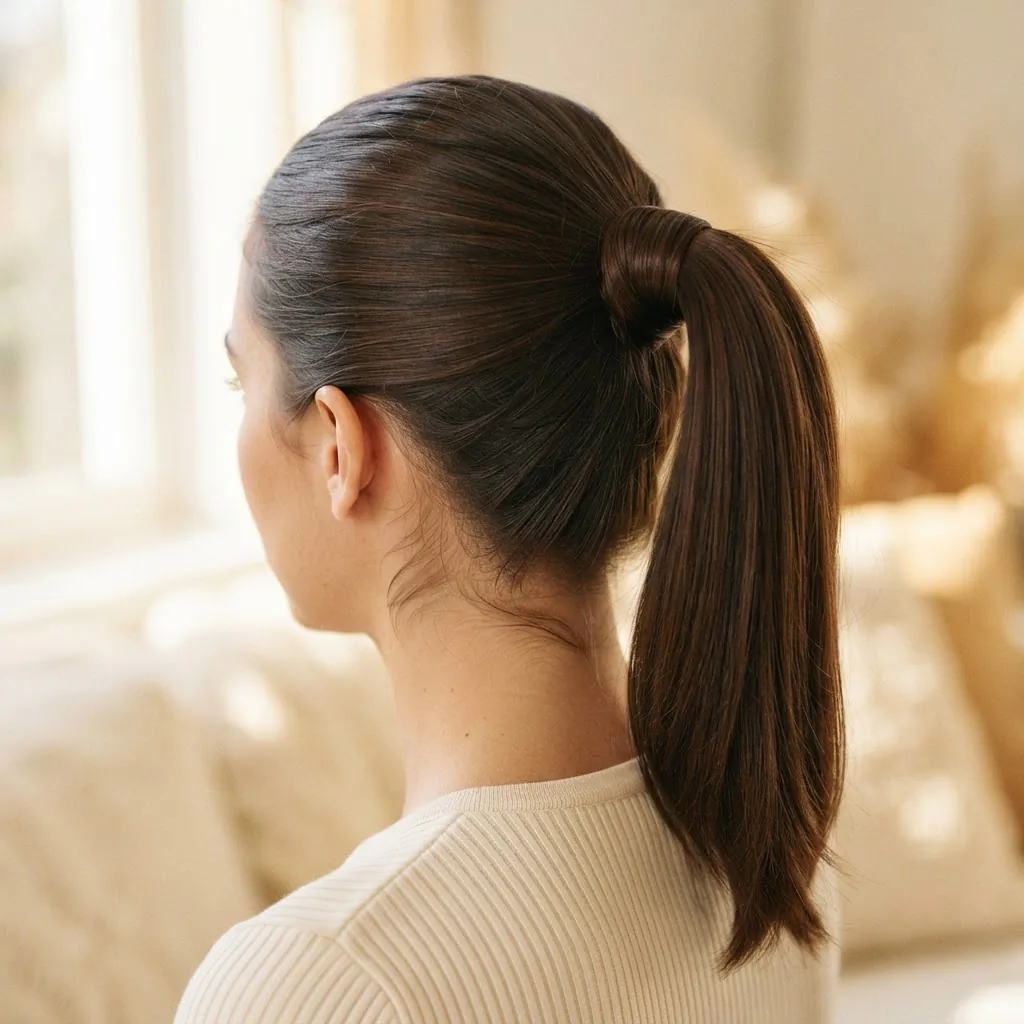
This is the one that looks like it costs a lot of money and requires a team of people. It does not, but it does require a specific process, and the process matters.
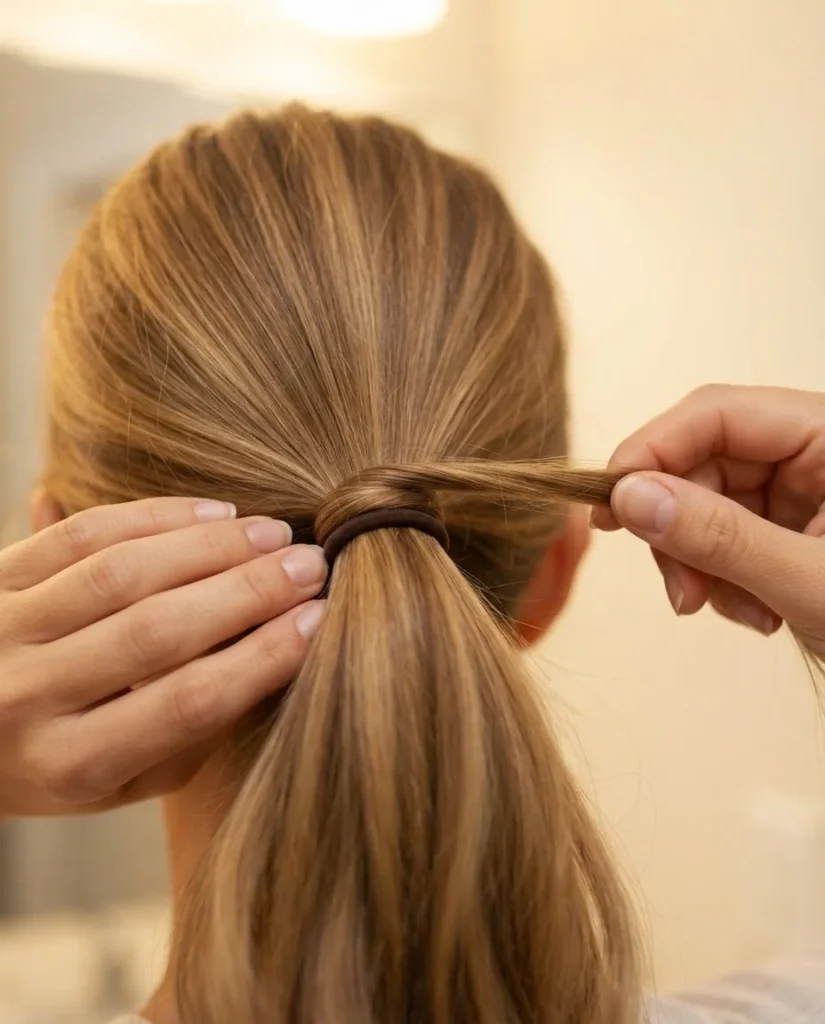
Start with smooth, brushed-out hair. Use a soft bristle boar brush to slick everything back from the front hairline toward the crown, holding the gathered hair taut with one hand as you work. The key to the sleek finish is a small amount of a pomade stick or wax stick applied along the hairline to catch any baby hairs or flyaways before they ruin the look. You do not need a lot, a thin pass along the edges and over any frizzies is plenty. Some people also lightly smooth a flat iron along the top layer before pulling it up, which helps the shine factor significantly. Once your hair is gathered at the crown and secured, take a small one-inch section of hair from the underside of your ponytail and wrap it around the hair tie, pinning the end underneath with a bobby pin. This single move is what takes a ponytail from “I ran out of time” to “I did this on purpose.”
For fine hair: backcomb or tease the body of the ponytail itself lightly after securing it to add volume. The outside will still look smooth; you are just building structure underneath.
For thick hair: a strong elastic is your friend. You may also want to use two layers of ponytail holders for extra security.
For curly or natural hair: if you want a sleek look without excessive tension, rely on a light hold gel and a satin scarf to press the hair down and set it before securing, rather than pulling tightly. This approach is gentler on your edges.
2. The Wrap-Around Ponytail (The Easiest Upgrade You Are Not Doing)
I mentioned this above but it deserves its own entry because it is genuinely the number one thing that makes a ponytail look intentional and polished. Once you start doing it, you will never go back.
After securing your ponytail, take a thin section of hair, maybe half an inch wide, from underneath the base. Wrap it firmly around the hair tie in a clean spiral until the elastic is completely hidden. Pin the end underneath with a bobby pin, angling it slightly upward into the base of the ponytail so it stays put. That is it. That one move turns any style into a finished look. Luxy Hair’s tutorial guide on different ways to wear a ponytail shows this technique as a base step for several of their elevated styles, and it is for good reason. It requires zero skill and takes about twenty seconds.
3. The Bubble Ponytail
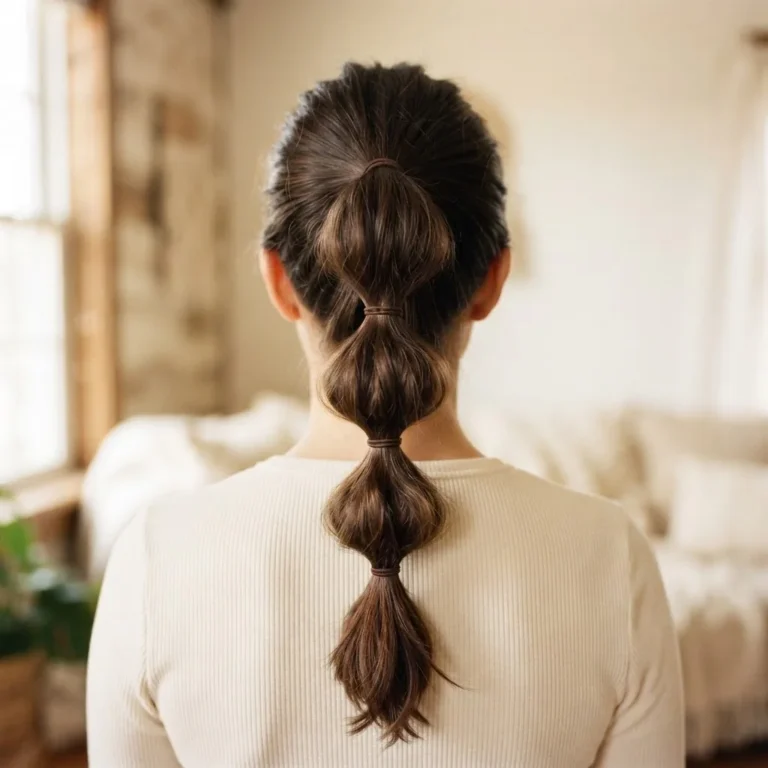
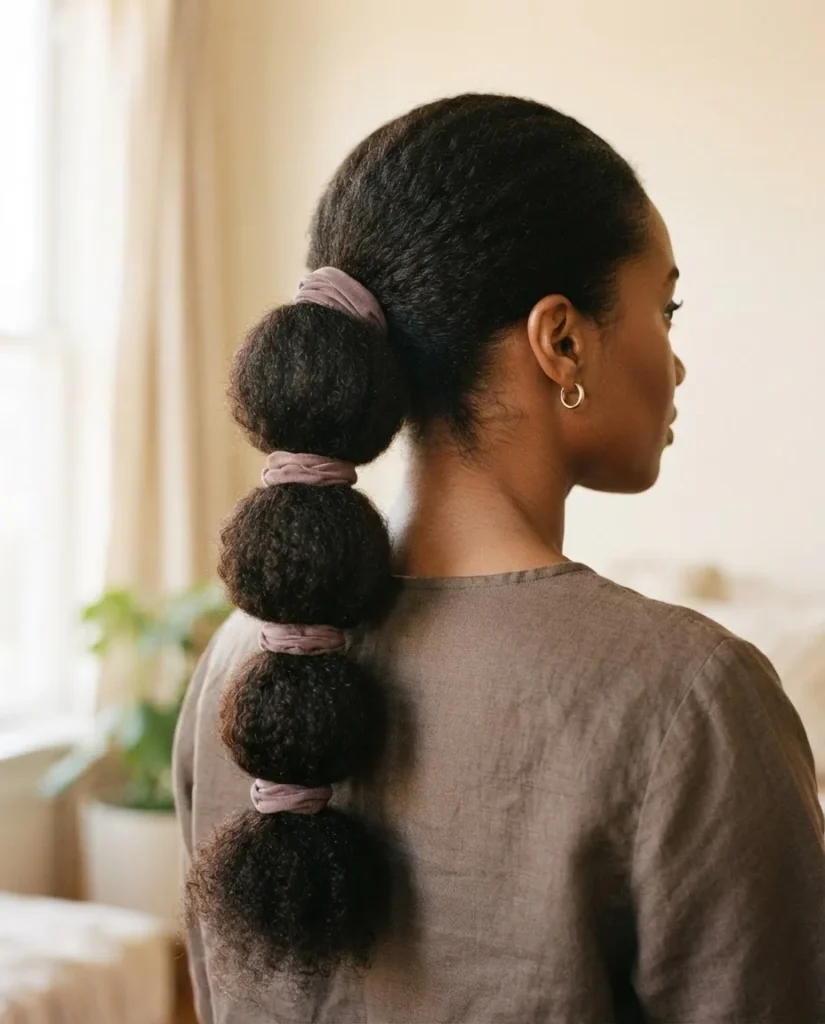
The bubble ponytail has been everywhere on Pinterest and TikTok for a while now, and for good reason. It is one of those styles that looks complicated and is actually just a series of hair ties placed at intervals down your ponytail, with the sections puffed out between them.
Here is the actual process. Secure your hair in a normal ponytail at your chosen height. Then take a second hair tie and place it roughly two to three inches below the first one. Take your fingers and gently pull the hair between the two ties outward on both sides to create that rounded bubble shape. Repeat this all the way down the length of your hair, spacing each tie about two to two and a half inches apart. You will need three to five hair ties total depending on your hair length. Use matching satin or fabric ties so they look intentional.
The bubble ponytail works beautifully on straight hair, wavy hair, and can look spectacular on natural hair with texture, as the coils naturally puff outward to create an even more dramatic shape.
For fine hair: this style can make your ponytail look fuller than it actually is, because puffing each section creates the illusion of more volume.
For short hair: even if your ponytail is only six to eight inches long, you can get two or three bubbles in there. Fewer sections, same idea.
4. The Wispy Low Ponytail
This one is my personal favorite for days when I want to look like I tried without actually trying. It is effortlessly pretty and it photographs beautifully. Vogue recently featured the wispy low ponytail as one of the most on-trend pony styles right now, and you can see exactly why when you look at their current ponytail guide, which covers this style as a minimal-tension option with a floaty, romantic finish.
To create it, loosely gather your hair at the nape of your neck or just above it. You are not slicking anything back tightly here. Pull a few pieces loose at the front to frame your face, ideally wispy sections near your temples and some around your ears. Use a fabric or satin tie and leave the pony itself a little loose rather than pulled drum-tight. A small amount of curl cream or a spritz of finishing mist adds a little definition and sheen without making things stiff. Leave it imperfect. The imperfection is the point.
This style is especially flattering with curtain bangs, because the bangs frame the face and the low pony keeps the focus there. It is also one of the gentler styles in terms of tension, which makes it a great everyday option.
5. The Textured or Tousled Ponytail
This is the antidote to the flat, lifeless ponytail that plagues people with second-day hair. Instead of fighting the texture, you are leaning all the way into it.
Prep is most of the work here. Apply a texturizing spray or dry shampoo throughout the hair before you start, then scrunch and tousle to build some body. Pull everything back into a mid-height ponytail, but do it loosely with your hands rather than brushing everything smooth first. Let a few layers fall at the front. Once it is secured, use your fingers to gently pull random sections of the ponytail outward to create volume and a slightly undone finish. A light pass of flexible hold hairspray locks it without making it crunchy. This style is endlessly forgiving and works on wavy and curly hair particularly well.
6. The Half-Up Ponytail
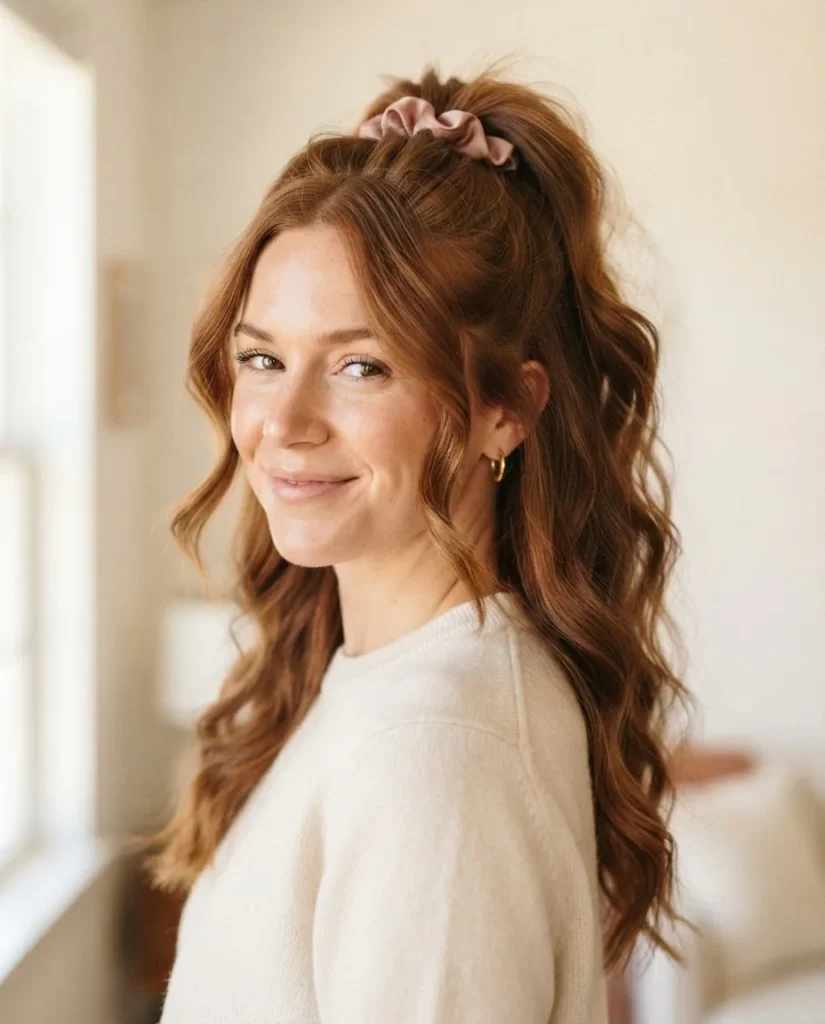
The half-up pony is one of the most Pinterest-popular styles right now, and it makes sense. It gives you the tidiness of an updo at the crown without sacrificing the length and movement you spent time growing. It also genuinely works on every hair texture and length, which puts it in a short list of truly universal styles.
Take the top section of your hair, from the temples and up, and gather it at the crown of your head. Secure it with a satin tie or a fabric-wrapped elastic. Leave the rest of your hair down. For extra elevation, try gently tugging the secured section upward slightly after tying it to create a small poof or loft at the crown rather than a flat, pulled-down look. You can also use a fine-tooth rattail comb to lightly tease the gathered section before securing it, which creates volume that holds throughout the day.
For curly hair: just pull the top half back and let your curls do the work below. Do not fight your texture here. Define your curls with a cream or gel beforehand and let them be the star.
7. The Sleek Low Ponytail
While the high pony gets most of the attention, the low ponytail is arguably more sophisticated and more wearable for work, events, and situations where you want to look pulled-together without it being too much. Southern Living’s current roundup of ponytail hairstyles highlights the polished low ponytail as one of the standout styles right now, and it has shown up on practically every red carpet in the last two years.
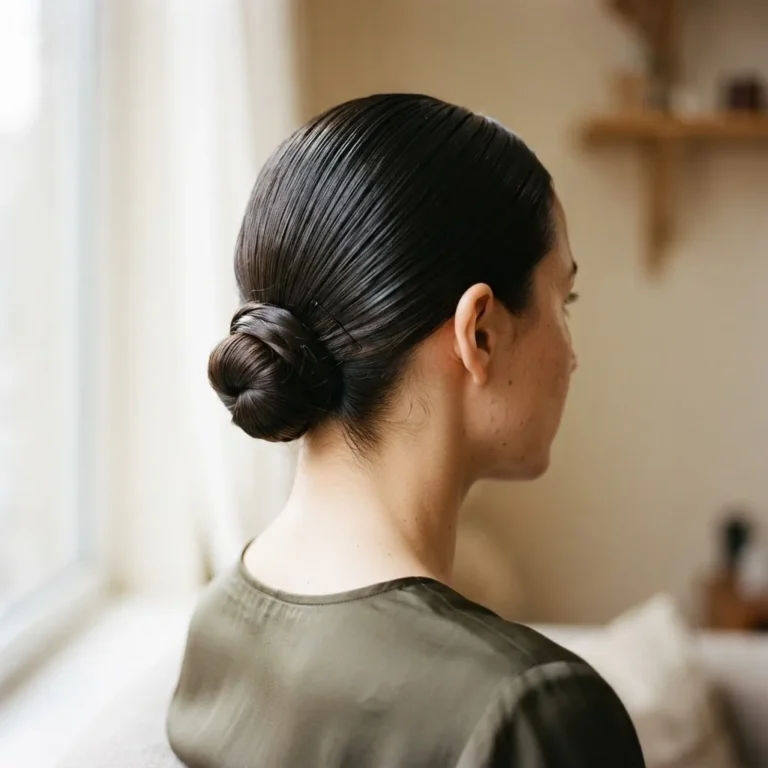
The technique for a truly polished low pony comes down to prep and smoothness. Brush all your hair back with a soft boar-bristle brush, using your free hand to hold everything taut as you go. A light application of pomade or wax stick along the part and hairline catches any flyaways that would break the clean silhouette. Secure at the nape of the neck with a strong elastic, then do the wrap-around trick. For extra finish, a light hairspray hold spray over the whole style seals it. The result looks incredibly expensive and takes about eight minutes once you have practiced it a few times.
8. The Braided Ponytail
This one has a little more technique involved, but it is nowhere near as hard as it looks, and the payoff is enormous. There are two easy versions: a ponytail with a braid replacing the wraparound, and a ponytail where the body of the pony itself is braided.
For the first version, pull your hair into any height ponytail. Take a thin section from the pony, braid it (a simple three-strand braid works perfectly and is not complicated), and wrap that braid around the base to hide the hair tie instead of a plain hair section. Pin underneath. Done.
For the second version, pull the pony back and secure it, then take the full tail and braid it from the base downward into one long braid, securing the end with a small elastic. For extra effect, pancake the braid by gently pulling each stitch outward to widen and flatten it. This creates a full, textured braid that looks like it belongs on a red carpet and takes about three minutes.
Braided ponytails are especially on-trend right now according to multiple style sources, and work beautifully across hair types. For curly and natural hair, a Dutch braid or cornrow-based ponytail can be a gorgeous protective-style-adjacent option.
9. The Piecey or Curtain-Bang Ponytail
This one is less about the ponytail itself and more about what you do in front of it. Piecey face-framing sections pulled loose at the temples and around the ears completely transform the look of any basic ponytail, making it feel more romantic, more intentional, and frankly more photogenic. If you have curtain bangs, even better: let those fall forward and your ponytail suddenly looks ten times more deliberate.
Pull your hair back into a low or mid ponytail, then take a thin section on each side of your face and pull it out from the ponytail. Use a small barrel curling iron or even a flat iron to add a soft wave or curl to those face-framing pieces. Alternatively, if you do not want to use heat, wrap them around your finger while they are slightly damp and let them air dry before you pull the pony back. A tiny bit of lightweight serum or curl cream on those pieces adds shine and definition without weighing them down.
This style works especially well for rounder face shapes, where the vertical framing of loose front pieces helps elongate the face.
10. The Twin Ponytails (Two Ponies, Way More Fun)
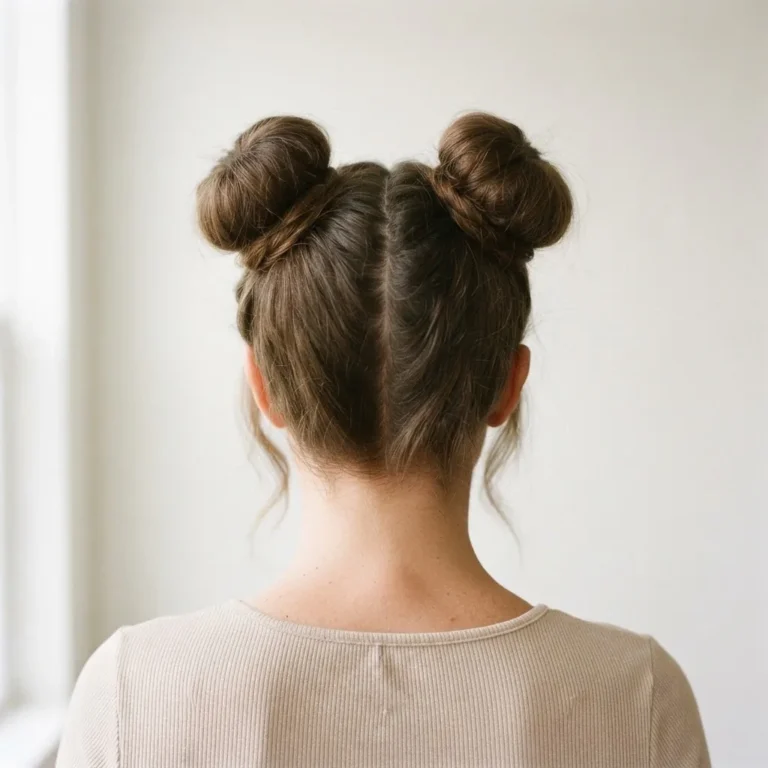
Two ponytails have been having an absolute moment, and they are much more wearable than they sound. This is not the pigtails of your elementary school days. When done with modern placement, fun hair accessories, and a slightly tousled finish, they look playful and intentional rather than childish.
Part your hair down the center and create two sections. Gather each one into a low ponytail that sits just below the earlobes, or slightly higher depending on the look you want. Use matching satin scrunchies, ribbon ties, or even jeweled hair accessories for the elevated version. The key is keeping the placement even on both sides. A quick tip: use a tail comb to draw a clean part, then secure each side with the same number of wraps on your hair tie so the tension feels even. Lightly tousle or puff each ponytail for a modern finish.
A Note on Keeping Your Hair Healthy While Wearing Ponytails
This section matters, and I want to be real with you about it rather than dropping it in as a scary disclaimer. Ponytails are great, but wearing them in exactly the same spot every single day, pulled tight, with a harsh elastic, over a long period of time is genuinely hard on your hair. Repeated tension in the same area can lead to breakage at the ponytail line over time, and in more serious cases, to a condition called traction alopecia, which is gradual hair loss caused by ongoing pulling on the follicle. A published dermatology review in the National Library of Medicine notes that tight ponytails and buns are among the highest-risk hairstyles for traction alopecia, particularly when combined with chemically processed hair.
You do not need to stop wearing ponytails. You just need to be a little smart about it. Here is what stylists and dermatologists consistently recommend:
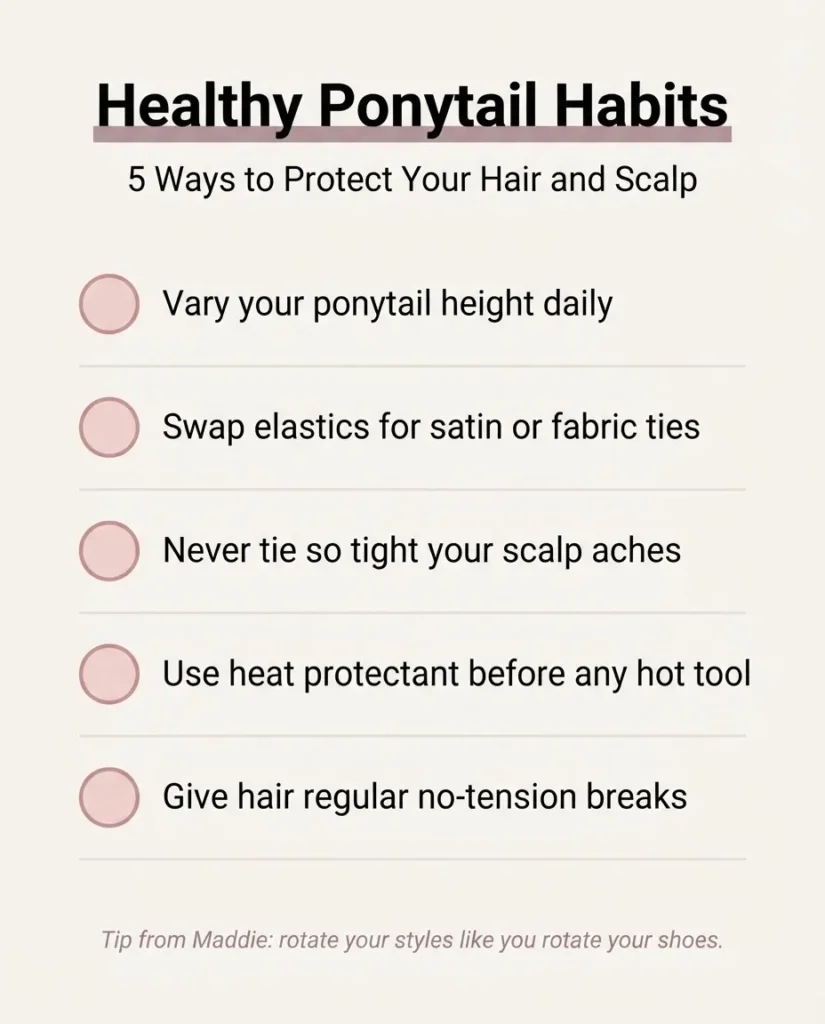
Vary your ponytail placement. High one day, low the next. This distributes tension across different parts of your scalp instead of concentrating it in one spot. Swap your elastic for a satin or fabric-covered tie. Never wear a ponytail so tight that your scalp hurts or you feel pulling tension at your hairline after taking it out. If your scalp hurts after styling, that is your cue to loosen up. Give your hair regular breaks with styles that involve no tension at all, like a loose braid, a bun with no tight wrapping, or just wearing it down. And if you use heat tools to smooth or prep your ponytail, use a heat protectant every single time without exception. The healthier your hair is overall, the better every style looks on it.
The AAD also recommends avoiding continuously wearing ponytails in the same position as part of their general hair-health guidance. Think of it as rotating your styles the way you rotate your shoes.
Your hair and your scalp will thank you. If you notice thinning at your temples or hairline edges that seems to be getting worse rather than better, it is worth talking to a dermatologist, because catching traction-related changes early makes a real difference.
For hair-type specific care adjustments, Healthline’s guide to hair types and how to style and care for them is a helpful reference if you are still figuring out where your hair falls on the texture spectrum and what it needs.
Quick-Reference Tool and Product List
You do not need to spend a lot to do any of these styles well. Here is what actually matters:
A soft boar-bristle or mixed-bristle brush for smoothing (widely available from $8 to $25). Satin or fabric-covered hair ties, a multipack for $8 to $14 (Kitsch, Goody Ouchless, or similar). A pomade stick or wax stick for flyaway control, $6 to $12 from drugstore brands like Got2B or Tgin, or $18 to $30 for salon options like R+Co. Dry shampoo or texturizing spray for grip and prep, $6 to $10 for drugstore options like Batiste or Dove. Bobby pins in a shade matching your hair. A strong-hold hairspray for anything that needs to last all day. And a heat protectant if you are using any hot tools at all.
The expensive versions of these products are not dramatically better for a beginner.
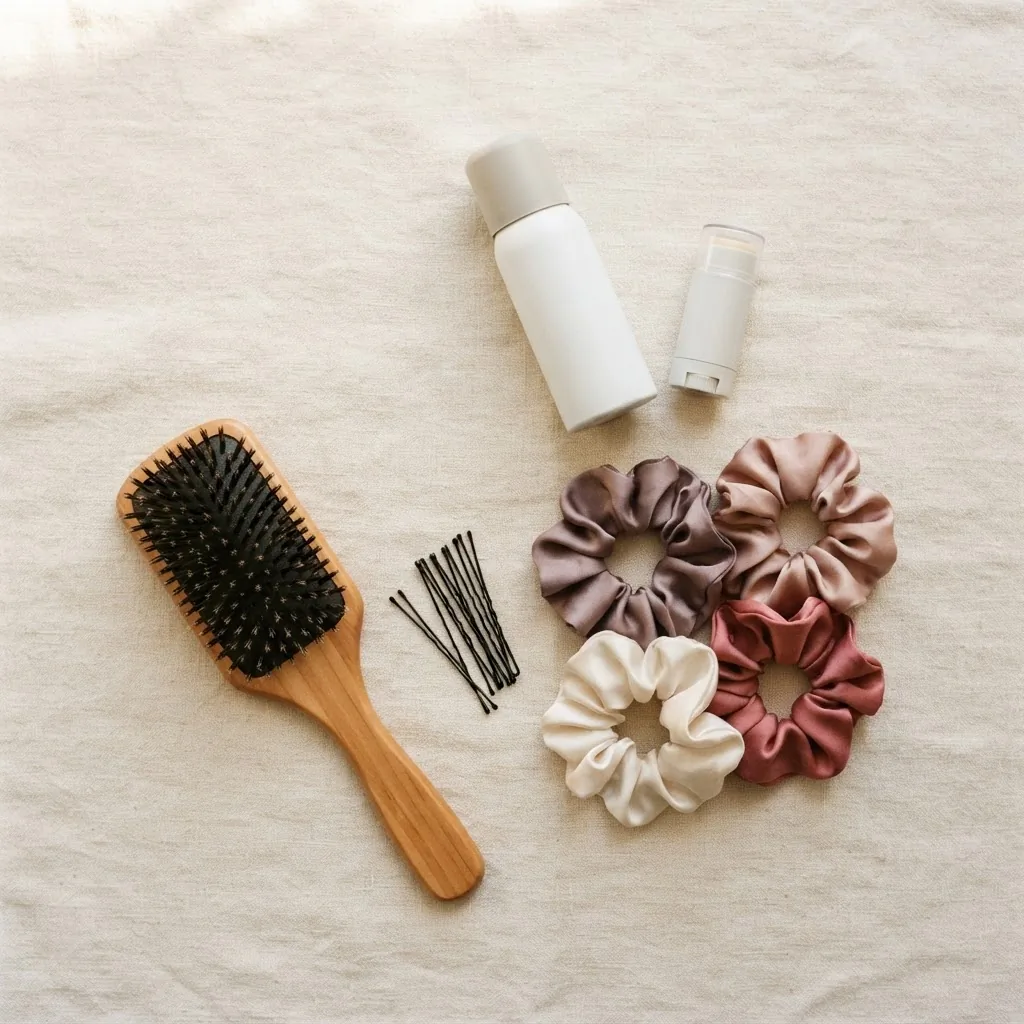
Start with the drugstore options, get your technique down first, and upgrade later if you want to.
Final Thought
The thing that nobody tells you about cute ponytails is that the difference between an average one and an elevated one is almost never about having better hair. It is about knowing where to place it, how to prep it, how to hide the elastic, and how to add one or two small finishing details that make it look deliberate. Every single style in this list is genuinely within reach, even if you are starting from zero.
Save the ones that catch your eye, try one this week, and let me know which one becomes your new go-to.