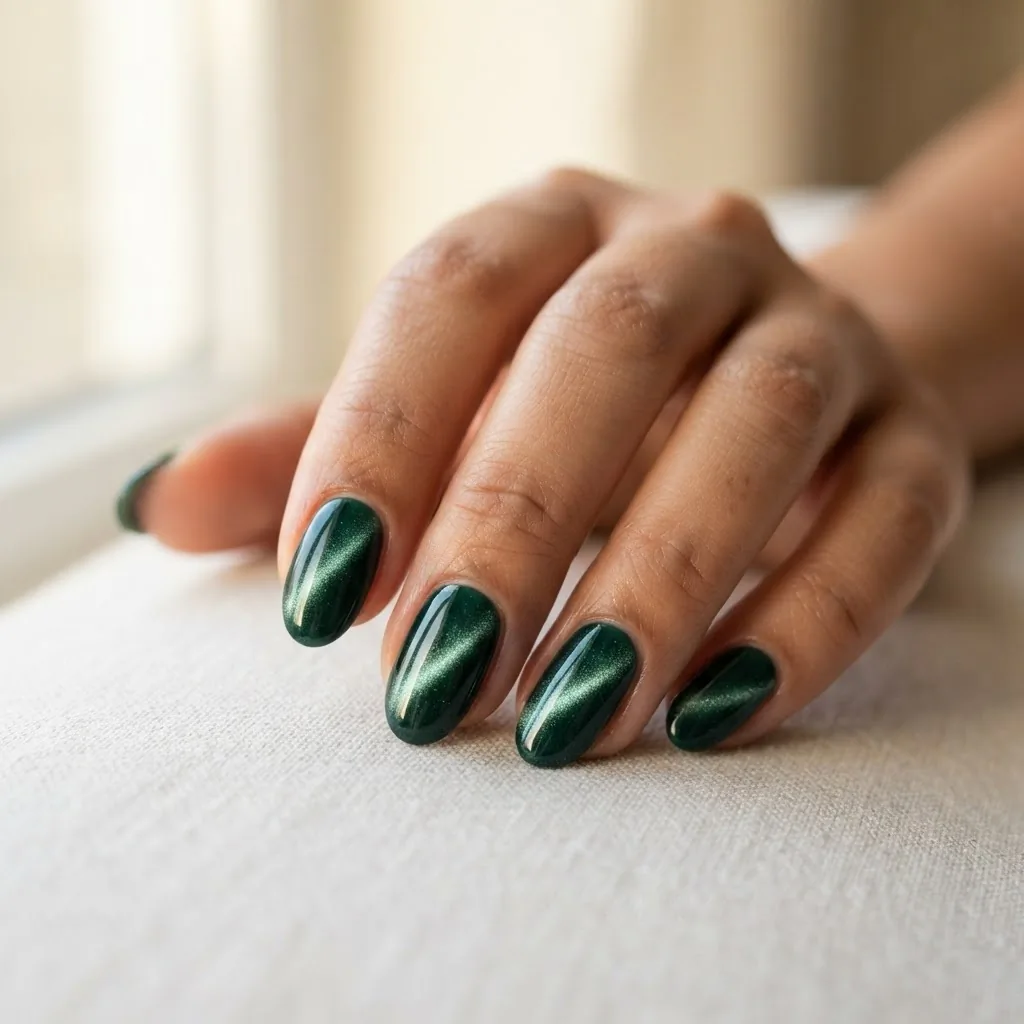
Cat Eye Nails Explained: Designs, Colors, and DIY Tips
I have a very distinct memory of the first time I saw a proper cat eye manicure in person. A woman at a coffee shop was holding her cup and her nails caught the light and did this thing, this deep, shifting shimmer that moved like a living thing as she turned her hand. I leaned forward in my seat. I thought she had some kind of gemstone embedded in her nail. She did not. She had magnetic gel polish and a $3 magnet.
That is the whole magic of cat eye nails. They look like they cost something significant and required a level of skill most of us have spent years convincing ourselves we do not possess. In reality, the technique is one of the most beginner-forgiving things I have encountered in nail art. There is no brush control involved. There are no tiny lines to paint. The design is created entirely by physics: a magnet held over wet gel polish pulls metallic particles into a precise, glittering pattern before you cure it in place. If your first attempt looks weak or faint, the fix is not steadier hands. It is almost always a thicker coat and a closer magnet. I will explain all of that.
This is the complete guide to cat eye nails, covering what they actually are, how the technique works step by step, twelve design variations from beginner to more adventurous, how to choose colors that work beautifully for your skin tone, and how to remove them without wrecking your natural nails.
What Are Cat Eye Nails, and Why Is Everyone Obsessed Right Now?
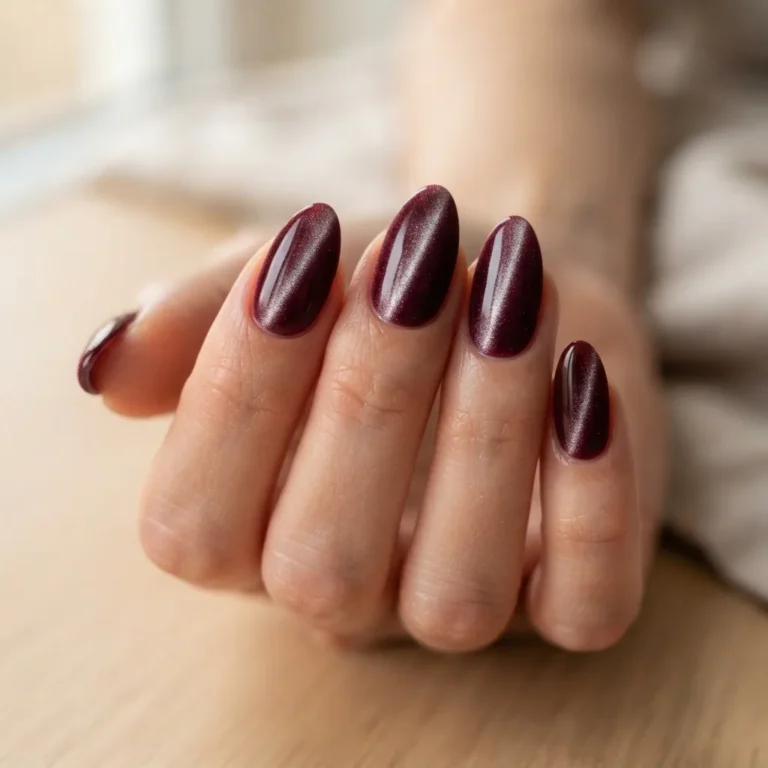
Cat eye nails (sometimes also called velvet nails or magnetic nails) are a gel manicure effect created using a polish that contains metallic iron oxide particles suspended in the gel formula. On their own, those particles create a uniform shimmer. But when you hold a magnet close to the surface of the wet polish before curing, the particles align along the magnetic field, pulling into a sharp, concentrated line or pattern. The result looks almost three-dimensional, like the slit pupil of a cat’s eye, or like a dark gemstone that catches light from the inside.
The trend has been building steadily since Korean nail brands started releasing soft, jewel-toned magnetic gels around 2020, but the mainstream explosion happened across 2024 and 2025. Glamour called it “the hypnotic nail trend taking over 2025”, and honestly, looking at how many pins, saves, and TikTok duets this look generates every week, that description still holds. What makes it endure where other trends fade is that it is infinitely customizable. The same technique produces a completely different result depending on the color you choose, the magnet angle you use, and whether you layer it over a contrasting base. You can make it minimal and ethereal or bold and editorial.
The Full Tool List (And What You Actually Need vs. What You Can Skip)
Before we get into designs, let’s talk tools, because this is where beginners get confused and sometimes buy the wrong things.
You need cat eye gel polish specifically. This is not the same as regular gel polish. Regular gel does not contain the metallic particles that respond to a magnet, so holding a magnet over regular gel will do absolutely nothing. Cat eye gel polish is labeled as magnetic, cat eye, or velvet gel, and prices range from around $8 to $20 per bottle for individual bottles, or $20 to $50 for a starter kit that includes a magnet. There are genuinely good budget options in the $10 to $15 range per bottle, and the affordable end of the market has improved a lot in recent years.
You need a magnet, and this matters more than beginners usually expect. The magnet included in the cap of some polishes is often weak and creates a faint or muddy effect. A dedicated nail art magnet, ideally an N52-grade neodymium magnet in a bar or dual-ended shape, gives you a sharper, stronger result. Dual-ended magnets with a bar on one side and a circle or arch on the other are particularly versatile because each end creates a different pattern. You can find these for around $5 to $12 from nail supply stores.
You need a base coat, a gel top coat, and a working LED or UV lamp. Cat eye gel must be cured to lock the design in place, and the curing step is also what differentiates a design that stays from one that smears. If you already do gel manicures at home, you likely have everything you need except the magnetic polish and the magnet itself.
A contrasting base color is optional but makes a dramatic difference.

Applying your cat eye gel over a deep, complementary color underneath (say, a deep plum under a rose gold cat eye, or a rich black under an emerald green) makes the effect look much richer and more dimensional than cat eye gel applied over bare nail or a pale neutral base.
How the Magnet Technique Actually Works
This is the part that clicks everything into place, so I am going to be genuinely thorough here because every piece of content I have seen either breezes past this or explains it vaguely.
Magnetic gel polish contains metallic particles that are responsive to a magnetic field. When the gel is wet and uncured, those particles are free to move. Holding a magnet close to the surface pulls them into alignment along the field lines. Where the magnet concentrates the field, the particles cluster, creating a bright, reflective stripe or pattern. The surrounding area, where fewer particles remain, shows the base color and creates the contrast that gives the cat eye its depth. Once you cure the gel under your lamp, the gel hardens around the particles exactly where they are, locking the design in permanently.
The four things that determine how sharp and dramatic your cat eye looks are coat thickness (thin coats have too few particles to create a strong effect), magnet distance (hold it 2 to 5mm above the nail, not touching, and not hovering from 2 centimeters away), hover time (hold for 5 to 10 seconds while watching the particles pull together), and magnet angle.
Angle is where the real creative control lives.

A linear bar magnet held parallel to the nail lengthwise creates the classic sharp central stripe. Tilt that same magnet to a 45-degree angle and the stripe runs diagonally. Hold the circular or arch end over the center of the nail and lift straight up, and the particles pull outward from the center, creating a “framed” bull’s-eye or halo effect. For a broader, more diffuse aurora shimmer, use a fan-shaped magnet or hold the magnet slightly further away and sweep it slowly across the surface.
The rule that makes everything easier: work one nail at a time, always.

Apply cat eye gel to one nail, magnetize it, cure it fully, then move to the next. If you apply gel to all ten nails and then go back to magnetize, the gel on the earlier nails will have begun to set slightly, and the particles will not move freely. You will get weak, uneven results and wonder what went wrong. One nail at a time is the single most important rule for beginners, and the professional nail educator guides I researched while building this article are consistent on exactly this point. The good news is that before you cure, you can restart as many times as you like. If the pattern looks off, wipe the wet gel away with a lint-free wipe and start that nail again.
12 Cat Eye Nail Designs, From the Simplest to the Showstopper
Here are twelve designs organized roughly from beginner-approachable to more advanced, with notes on what makes each one work and how to adapt for short nails.
Design 1: The Classic Single Stripe
This is the foundational cat eye look and the right place for everyone to start. You apply one generous coat of magnetic gel, hold a linear bar magnet lengthwise down the center of the nail for 5 to 8 seconds, and cure. The result is a single glittering stripe running down the nail with the base color showing on either side. On short nails this looks incredibly clean and modern. On a round or squoval shape it mimics the look of a polished gemstone.
Design 2: The Diagonal Stripe
Everything about this is the same as the classic stripe, but you hold the magnet at a 45-degree angle. That is the only change. The resulting diagonal line looks more editorial, slightly more complex, and works especially well on almond and coffin shapes. Honestly, it takes about four seconds more than the classic stripe and looks twice as deliberate.
Design 3: The Framed (Bull’s-Eye or Halo)
Use the circular or arch end of a dual-ended magnet. Place it over the center of the nail, hover it for 5 to 8 seconds, and then lift straight up without moving the magnet sideways. The particles pull away from the center toward the edges, leaving a bright ring of shimmer around a slightly darker center. This is a stunning effect on oval and round nails. On short nails it creates a beautiful gemstone illusion that makes nails look longer.
Design 4: The Double Cat Eye
This is where 5D or “double cat eye” gel formulas come in. These polishes contain a denser or multi-directional blend of particles, and some respond to being magnetized twice: once before a brief flash cure (about 5 seconds) and once more immediately before the full cure. The result has two layered shimmer lines or a richer, more dimensional depth than standard cat eye gel. It reads almost like a 3D effect on the nail.
Design 5: The Aurora / Holographic Cat Eye
Aurora or 5D gel formulas contain particles that shift across multiple colors under light, similar in spirit to a holographic chrome but with the magnetic depth of cat eye. These are more advanced territory, but only slightly. The application is the same. What changes is that color shifts (from purple to blue to green, from rose to copper to gold, depending on the formula) make the result look incredibly complex for minimal extra effort. A linear stripe in aurora gel looks like a tiny galaxy running down your nail.
Design 6: The French Cat Eye
Apply a deep, highly pigmented color as your base (black, deep forest green, or dark plum all work beautifully). Over the nail tips only, apply a thick coat of cat eye gel, then use your linear magnet to sweep the particles toward the free edge, creating a shimmery French-tip line. The contrast between the dark base and the metallic tip is striking. This one looks genuinely salon-professional with practice and it is a great excuse to revisit French techniques you might already feel comfortable with.
Design 7: The Layered Color Cat Eye
Apply and cure a base coat of cat eye gel with your magnet effect. Then over the top, apply a sheer, tinted gel in a complementary or contrasting color and cure without magnetizing. The magnetic effect shows through the translucent overlay, but with a color shift. A silver cat eye under a sheer rose gel reads as a blush-pink shimmer with depth. A green cat eye under a sheer amber reads almost amber-toned but with an unusual inner glow. This is a technique that rewards experimentation.
Design 8: The Heart Cat Eye
Some dual-ended magnets include a heart-shaped end. Hold it flat over the nail and lift straight up for a heart of concentrated shimmer surrounded by a softer glow. This is a cute and very Pinterest-friendly variation on the framed effect. If your magnet does not have a heart end, some nail artists create the silhouette by masking off a heart shape with tape, magnetizing, and then removing the tape before curing.
Design 9: Swirl or Circular Sweep
Hold a linear bar magnet and slowly move it in a small circular motion over the nail while the gel is wet. Instead of a sharp stripe, this creates a swirling, almost liquid shimmer effect. The result looks less defined than a classic cat eye but more otherworldly. It is forgiving to do because there is no one precise angle to hit. Move the magnet slowly and see what happens.
Design 10: Minimalist Nude Cat Eye
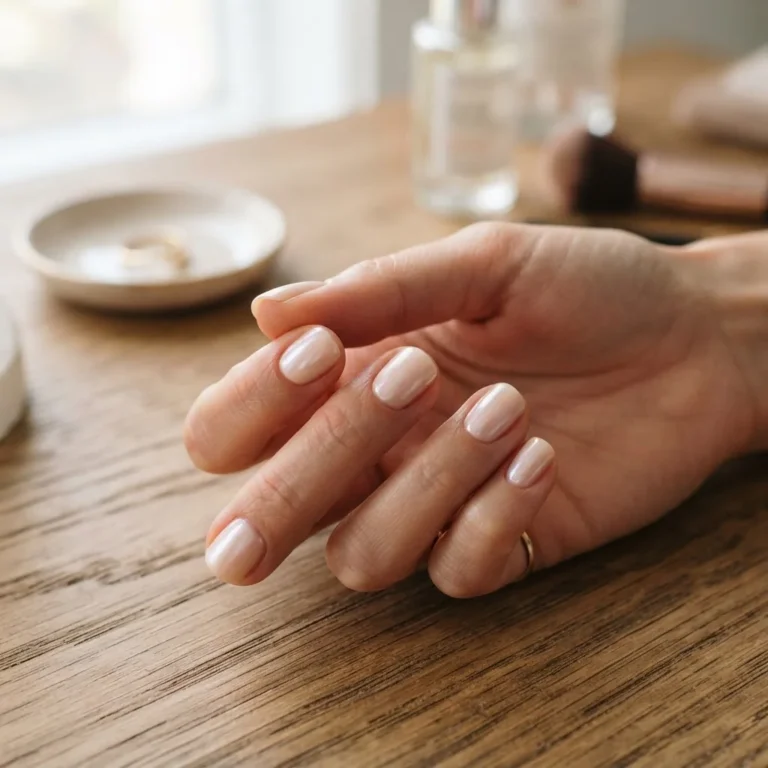
This one is for the people who want to wear cat eye nails to work on a Tuesday without fielding ten minutes of questions from colleagues. A warm taupe, dusty rose, or champagne magnetic gel applied over a nude base creates a shimmer so subtle it almost looks like your natural nail with an impossible glow. The cat eye effect is visible in direct light and almost invisible in shade. It is genuinely one of my favorite everyday wearable looks.
Design 11: Jewel Tone Statement Set
Deep emerald, sapphire blue, amethyst purple, or rich burgundy cat eye gels are where the design really becomes a fashion statement. Over a matching or slightly darker base color, a single classic stripe in any of these shades looks like wearable jewelry. These colors photograph beautifully on all skin tones and they are timeless enough to wear for a special occasion without feeling trendy-dated in six months.
Design 12: Mixed Pattern Set
Once you are comfortable with the basic technique, try using a different pattern on different nails in the same set. Classic stripe on the ring finger, framed effect on the index finger, and a diagonal on the rest. This looks intentional and designer-y, not messy, because all the nails share the same polish color. The variety of light-reflection patterns catches the eye from every angle.
Choosing Colors by Skin Tone
Cat eye polishes come in almost every color imaginable, but some combinations work with particular skin tones in a way that feels elevated rather than muddy. These are general starting-point suggestions, not hard rules, and I think the most important thing is wearing what makes you happy.

But if you are staring at a rack of options with no idea where to start, here is what tends to work beautifully.
For fair to light skin tones, the contrast of a deep jewel tone like sapphire, emerald, or burgundy is striking and makes the metallic shimmer pop dramatically. Champagne and rose gold also work especially well because the warm shimmer complements cool or warm undertones without washing anything out.
For medium skin tones with warm undertones, copper, rose gold, burnt amber, and warm bronze magnetic gels look genuinely stunning. Deep wine, olive green, and navy are also excellent choices. The warmth in the shimmer picks up the warmth in the skin beautifully.
For deep and rich skin tones, the full-contrast drama of a midnight black base with a platinum or silver cat eye is breathtaking. Vivid jewel tones like electric blue, deep green, and rich violet also look extraordinary. The shimmer reads against deeper skin with incredible clarity because there is natural contrast that makes every glint visible.
For those with neutral or olive undertones, taupe, dusty mauve, and muted sage cat eye polishes are surprisingly flattering. They are not the flashiest options, but on olive skin they create an effortlessly sophisticated everyday look.
Do Cat Eye Nails Work on Short Nails?
Yes, and I want to be emphatic about this because the assumption that you need long nails for this effect stops a lot of people from trying it. Cat eye nails do not depend on nail length at all. The magnetic effect works on the surface area of any nail plate, and on short nails, the framed (bull’s-eye) effect and the classic single stripe are particularly flattering because they create the optical illusion of depth and length even on a short, rounded shape.
Short almond shapes and squoval shapes both photograph beautifully with a cat eye effect. The shimmer draws the eye into the nail rather than to the edge, which paradoxically makes short nails look longer and more polished. Round shapes work especially well with the framed halo effect. If your nails are very short and you are worried about a stripe looking stubby, try a diagonal instead, angling from the lower-left to the upper-right creates a lengthening effect visually.
Why Your Cat Eye Effect Looks Faint (And How to Fix Every Common Mistake)
This is the troubleshooting section I wish existed when I first started working with magnetic gel, because the failure points are genuinely specific and once you know them, they are all fixable.
The most common problem by far is a weak or barely-visible stripe. The cause is almost always one or both of the following: the gel coat was too thin, or the magnet was held too far away. Cat eye gel needs to be applied generously, more generously than you would apply a standard gel coat. A thin coat does not have enough particles to create a strong visible effect. If the stripe looks faint even when you hold the magnet correctly, apply a second coat of cat eye gel over the first (without curing the first), then magnetize and cure together.
The second most common problem is the effect disappearing or weakening after curing. This happens when the gel was partially set before the final magnetizing step, either because it sat in ambient light for too long, or because it was accidentally flash-cured during a practice attempt. The solution is to make sure you are doing the magnetizing step immediately before the full cure, with the gel still completely wet, and that you are in a room without direct strong sunlight on the nail.
Flooding the cuticle is a standard gel issue but it is worth mentioning here because with cat eye gel the thick application needed for a good effect makes flooding more likely. Apply the gel carefully from the cuticle line forward, leaving a small clean margin around the edges and cuticle. Gel that floods the cuticle and skin does not just look untidy; it is also where uncured gel on skin becomes a concern (more on this in the safety section below).
Uneven patterns happen when the magnet is moved or tilted during the hover. Once you place the magnet over the nail, hold it completely still for the full 5 to 10 seconds. Even small movements will shift the particles mid-alignment and create a blurry or forked effect. If this happens, remember: you can wipe the wet gel away before curing and start again, as many times as you need.
For a helpful visual on fixing these mistakes, Glamour’s guide to DIY cat eye nails covers some useful application tips from professional nail artists that are worth bookmarking alongside this post.
A Word on Gel Safety (Because This Stuff Matters)
I want to talk about this because I care about your nails and your health, and a lot of content in this space either ignores it or wraps it in such vague disclaimers that it is useless. Here is what you actually need to know.
Gel polish, including cat eye gel, contains acrylate compounds that are safe when the product is fully and correctly cured. The risk arises from skin contact with uncured gel. A 2025 peer-reviewed study published in the journal Dermatology Research and Practice documented that allergic contact dermatitis is the most common adverse outcome associated with gel manicures, and that HEMA (2-hydroxyethyl methacrylate) is the primary sensitizer, involved in a very high proportion of confirmed acrylate allergy cases. You can find that research published on PubMed Central if you want to read the full context. The important practical takeaway is that avoiding skin contact with uncured gel, always capping the free edge, and ensuring your lamp is actually curing the gel properly (using the wattage and time recommended by your polish brand) dramatically reduces the risk. If you have ever had an itchy, inflamed reaction around your nails after a gel manicure, that is worth taking seriously and worth mentioning to a dermatologist, because sensitization to acrylates can worsen with continued exposure.
On the topic of UV and LED lamps, a 2021 study published in Photodermatology, Photoimmunology and Photochemology measured UV radiation from nail curing devices and noted that the FDA suggests protective measures such as using sunscreen on the hands or wearing UV-protective fingerless gloves during curing. You can read that study at this PMC link. This is particularly worth considering if you are doing your nails frequently. Using a broad-spectrum SPF on your hands before each session is a simple and effective precaution.
The American Academy of Dermatology notes clearly that gel manicures can cause nail brittleness, peeling, and cracking with repeated use, and they strongly advise against picking or peeling off gel. Their tips for reducing artificial nail damage are worth a read if you are a regular gel wearer. None of this means you should avoid cat eye nails. It means you should do them thoughtfully.
How to Remove Cat Eye Gel Safely at Home
The single biggest cause of nail damage from gel is not the gel itself, it is aggressive removal. Filing through the gel, peeling it off, or scraping it with a metal tool all cause damage to the nail plate. Soak-off removal done correctly leaves nails mostly intact.
The method that works: file the very top of the gel lightly with a fine-grit file (180 to 240 grit) to break the seal coat. Do not file down to the nail, just scratch the surface. Soak a small piece of cotton in 100% acetone, place it directly on the nail, and wrap each fingertip in a small square of foil. Leave this in place for 10 to 15 minutes. When you unwrap, the gel should be loosened and lifting. Gently push any remaining gel away with an orangewood stick using zero pressure. If there is resistance, resoak for another 5 minutes rather than forcing it. After removal, wash your hands, apply cuticle oil, and follow with a rich hand cream. Your nails will benefit from a week or two of being left alone to breathe between gel sets.
The AAD’s guidance on manicure and pedicure safety also notes that you should never cut or forcefully push back cuticles, as this can lead to inflammation and infection. This is true during prep as well as during removal. Your cuticle is a seal that protects the nail matrix.

Push it back gently with an orangewood stick after a warm shower if needed, but do not cut it.
If after removal you notice any nail discoloration, pain, persistent peeling in layers, or any skin reaction like redness, swelling, or itching that does not resolve, please see a dermatologist or your doctor. These can be signs of damage, infection, or an allergic reaction that deserve professional attention rather than a second coat of polish over the top.
A Note on Going HEMA-Free
If you have sensitive skin or have experienced reactions to gel products before, it is worth looking into HEMA-free magnetic gel formulas. HEMA-free gel polishes use different acrylate compounds and are marketed as lower-risk for sensitization, though it is important to know they are not zero-risk; some people still react to alternative acrylates. If you have any known acrylate sensitivity, please speak with a dermatologist before using any gel system, HEMA-containing or not.
The Short Version: What You Need to Get Started
If you want to try cat eye nails this weekend with minimal investment, here is the starter setup. Buy one cat eye gel polish in a color you love and one dedicated nail magnet (look for a dual-ended N52 neodymium magnet in the $5 to $12 range). Use a base coat you already have. Practice the classic single stripe on one or two nails before committing to a full set. Cure each nail individually before moving on. Apply the gel generously. Hold the magnet still, close, and for the full count. Everything else is refinement from there.
The wobbles are part of it. My first cat eye attempt had a stripe that veered left, landed closer to the cuticle than the center, and had a faint patch where I had applied the gel too thinly. My second attempt was better. My fifth was genuinely something I photographed. If I could figure it out after a full day of work, one bad magnet, and zero initial patience for technique, so can you.