20 Valentine’s Day Nail Ideas That Actually Work for Beginners
Every February, my Pinterest feed turns into the most beautiful pressure cooker imaginable. Heart accents, cherry-red glazed nails, magnetic shimmer, rose chrome, little bow details. I save them all and I feel genuinely giddy. And then, for years, I closed the app and went to the salon because I assumed I couldn’t pull any of it off at home.
I was wrong. And if you’ve been doing the same thing, so are you.
I want this post to feel different from the usual Valentine’s Day nail roundup. You won’t just get pretty pictures and vague captions that say “heart nail art” with zero technique. What you’ll actually get is 20 real, doable designs, organized from the simplest-possible to the satisfyingly-impressive, with honest notes on what each one requires, what you can swap out, and how to make it work on shorter nails. Because that’s the whole point of being here: pretty is possible, on your hands, at your kitchen table, the night before.
Let’s get into it.
Before You Start: The Prep That Makes Everything Easier
I know, I know. You want to skip to the fun part. But I promise that five minutes of prep is the difference between a mani that lasts and one that chips off by Valentine’s Day morning.
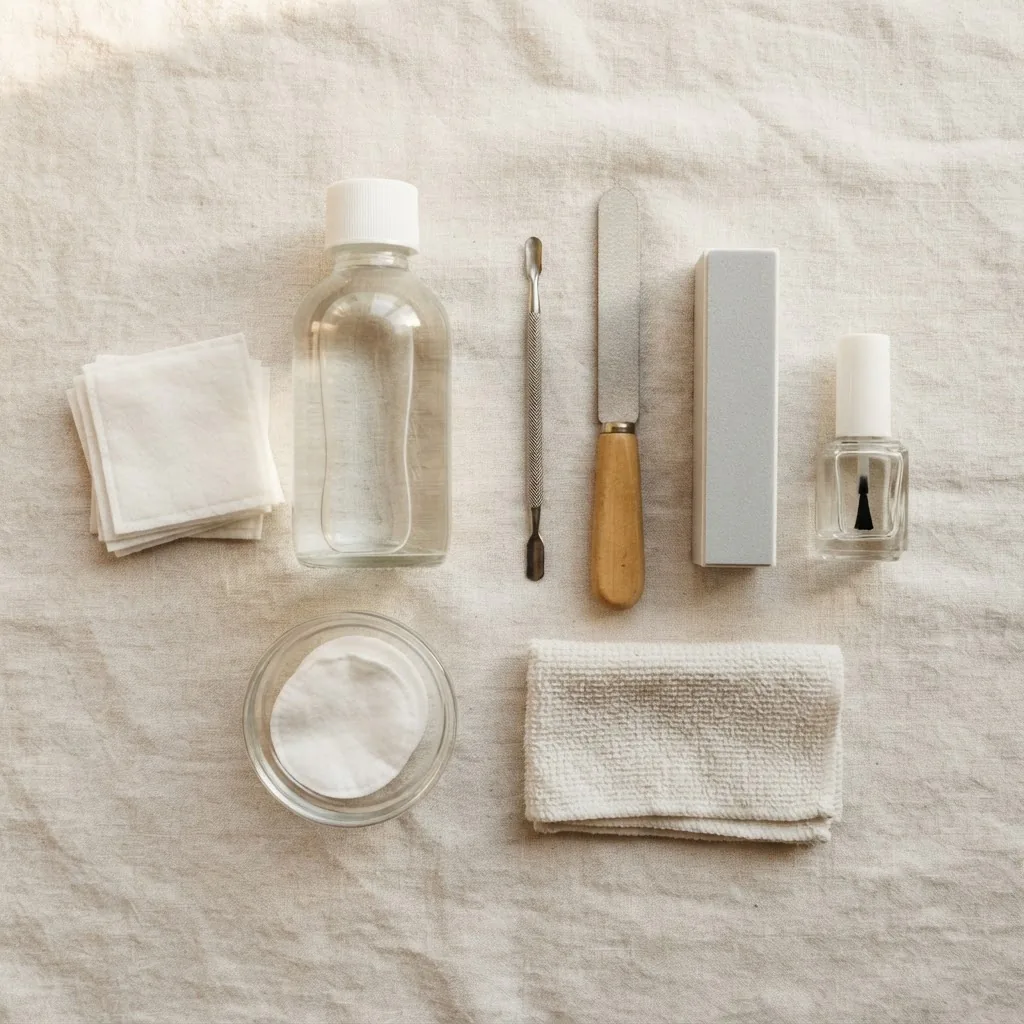
Start with clean, dry nails. Remove any old polish, wash your hands, and then wipe each nail with a lint-free pad soaked in acetone or nail prep solution. This removes the oil film that lives on your nail plate and is the single biggest reason polish lifts prematurely. Do not moisturize your hands before you start, save the hand cream for after.
Push back your cuticles gently with a rubber-tipped cuticle pusher. Do not cut your cuticles at home. I say this with love and zero judgment, but cutting live tissue at home without proper training creates tiny open pathways for bacteria. Dermatologists at the AAD are clear that you should avoid cutting your cuticles and choose soak-off gel over acrylic to reduce nail damage, and I think that guidance is sound for home nail care generally.
If you’re shaping your nails, now is the time. File in one direction, not back-and-forth sawing, to avoid micro-tears at the nail edge. The most beginner-friendly shapes for nail art are round and oval, because the curved edge is more forgiving when you’re painting near the cuticle.
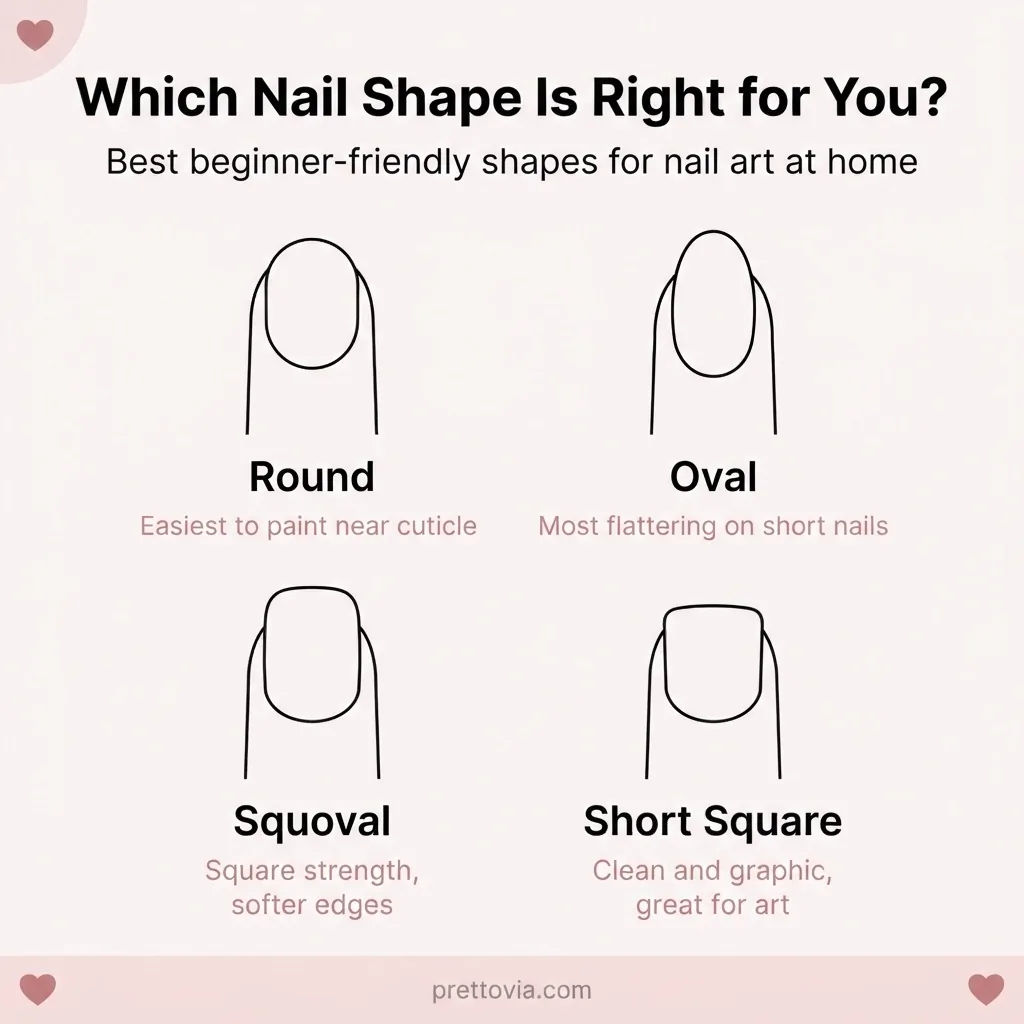
If you want to know which shape works best for your hand proportions, essie has a solid visual nail shape guide that’s worth bookmarking. For short nails specifically, I always say round or squoval (that’s square with slightly rounded corners) keeps designs looking intentional rather than cramped.
Apply one thin base coat. Always. It protects your natural nail, helps color adhere, and is the reason a $4 drugstore polish can last five days instead of two.
Now, let’s do some nails.
Tier One: Zero Skills Required (Seriously)
1. The Classic Red
Hear me out before you scroll past. A perfect, glossy, deeply pigmented red is one of the hardest looks to master and one of the most confident things you can wear on Valentine’s Day. The trick is thin coats. Two thin coats beat one thick coat every single time. Thick coats bubble, smear, and take forever to dry. Thin coats dry quickly, layer cleanly, and give you a rich, salon-quality finish. Finish with a fast-dry top coat and call it a day. If you flood the cuticle line, dip a small flat brush in pure acetone and clean the edge. That’s it. That is the whole tip.
2. Sheer Milky Pink (the “glazed donut” base)
Mix a sheer, milky pinkish-white with a high-shine top coat and you’ve got the foundational “glazed donut” look that’s been everywhere for years now and still looks incredible. The sheerness of a milky polish means small imperfections at the cuticle line just don’t show up the same way. This is genuinely one of the most forgiving finishes you can paint at home, and it looks expensive and intentional on every nail length and skin tone.
3. Solid Dusty Rose with Glossy Top Coat
Dusty rose is one of those colors that photographs beautifully on darker and deeper skin tones where very pale pinks can wash out. A solid dusty rose with a thick, glassy top coat looks polished and intentional with almost no effort at all. No art needed, just clean application.
4. Press-Ons for the Time-Crunched
I am a press-on convert and I will not apologize. Modern press-ons have genuinely evolved. They come in shapes, designs, and finishes that would have taken salon-level skill to recreate five years ago. For Valentine’s Day specifically, you can find heart accent sets, chrome finishes, and red glitter designs in press-on form for roughly $8 to $15. They are not a cop-out. They are a valid choice, especially if you’re short on time or doing your nails the morning of. Apply them with nail glue (not the little sticky tab) for a hold that actually lasts. Prep your nails the same way: clean, dry, and oil-free.
Tier Two: One Small Step Up (But Still Very Doable)
5. Heart Accent Nail with a Dotting Tool
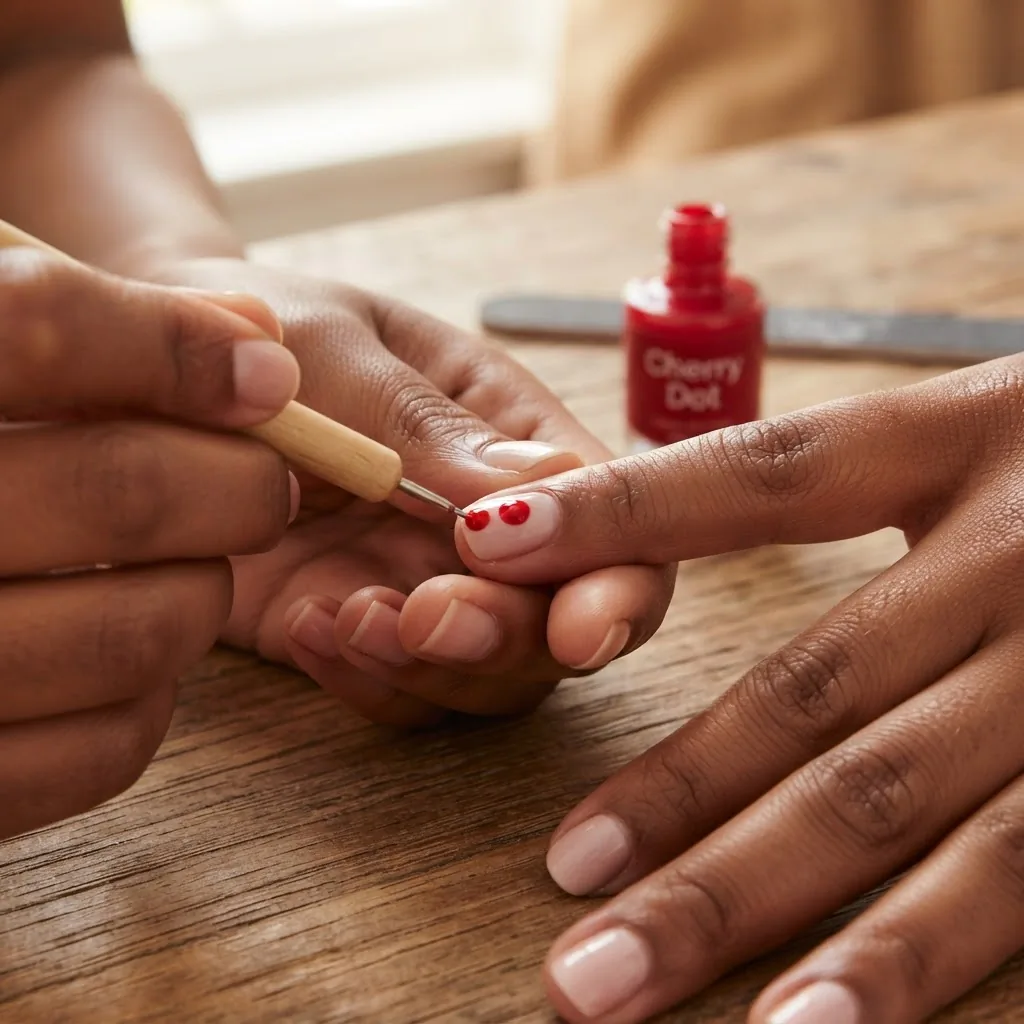
This is where I started. During that famously boring internship, the first design I ever practiced was a simple heart using two dots, and it is still my go-to for a reason: it looks intentional, it’s very fixable when it wobbles, and it absolutely reads as “I did something cute” without requiring a steady hand.
Here’s the technique that actually works for beginners. Load a medium dotting tool with nail art polish or a thick regular polish. Place two dots side by side, close together, slightly overlapping. Then drag each dot downward toward a center point with a thin nail art brush or even a toothpick. That’s your heart. The key is to let the first dot set for about 10 seconds before dragging, so it’s tacky but not fully dry. Clean up the edges with an acetone-dipped thin brush. Practice twice on a piece of paper before you do it on your nail, and you will be genuinely surprised how quickly it clicks.
6. French Tip with a Pink or Red Tip
The modern Valentine’s French is not the bright white block tip of 2003. It’s a thin, soft, romantic arc in dusty rose, cherry red, cherry red glitter, or even deep burgundy over a sheer base. You have two options for the tip. You can use French tip guides (sticker strips you press just above where you want the line), paint the tip, and peel them off before it dries fully. Or you can use a thin flat brush dipped in your tip color and paint freehand. The guide method is absolutely the beginner move, and there is nothing wrong with that. It gives you a clean, consistent arc every time.
7. Glitter Gradient (Ombre Glitter Tips)
Take a small makeup sponge, dab glitter polish onto it, and press it onto the tip of your nail. Build it up in two or three layers, letting each dry briefly. That’s a glitter gradient. It looks textured and dimensional and like you definitely know what you’re doing, even though you are literally pressing a sponge onto your nail. Red glitter into a clear or nude base is deeply Valentine’s Day. Rose gold or champagne glitter on a milky pink base is a subtler, equally gorgeous option.
8. Red Nails with White Heart Outline
Paint your nails red. Once dry, use a very thin nail art brush (a liner or striper brush) and white nail art polish to draw a small heart outline in the center of one or two accent nails. The outline-only approach is more forgiving than a filled-in heart because the red base shows through any wobbles and the graphic contrast reads as intentional. For short nails, keep the hearts tiny and centered. For longer nails, you have room to go slightly bigger.
9. Nude Base with Red Hearts Scattered
A nude or beige base with small red hearts dotted across the nail gives a playful, graphic, confetti-like look that’s very Pinterest right now. Use the two-dot method from design #5. The nude base means any imperfection in the hearts blends visually rather than competing. This works especially well as a mix-and-match set where some nails are solid red and one or two have the scattered heart pattern.
10. Deep Burgundy with Subtle Gold Foil
Apply deep burgundy. Let it dry fully (or cure if you’re using gel). Then press tiny pieces of gold or rose gold nail foil onto the nail. Foils come in sheets or rolls, and you apply them by pressing them face-down onto a tacky surface (either a thin layer of foil adhesive gel or onto a top coat that hasn’t fully dried yet) and then pulling the backing away. The result is a crinkled, abstract metallic texture that looks wildly expensive. No brushwork required.
Tier Three: The Wow Factor Designs (With a Few Steps, Zero Salon Degree)
11. Chrome Glazed Donut Nails
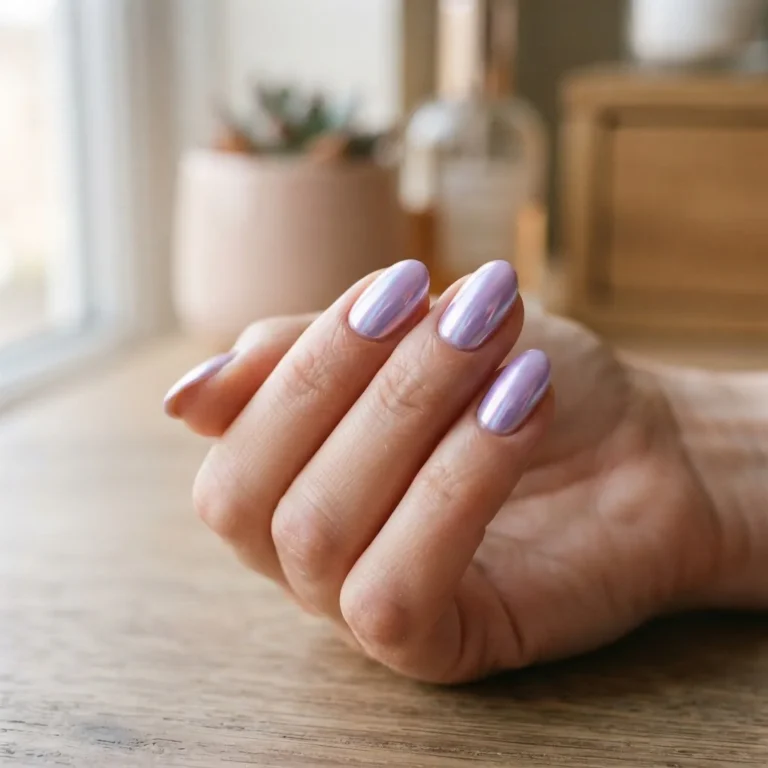
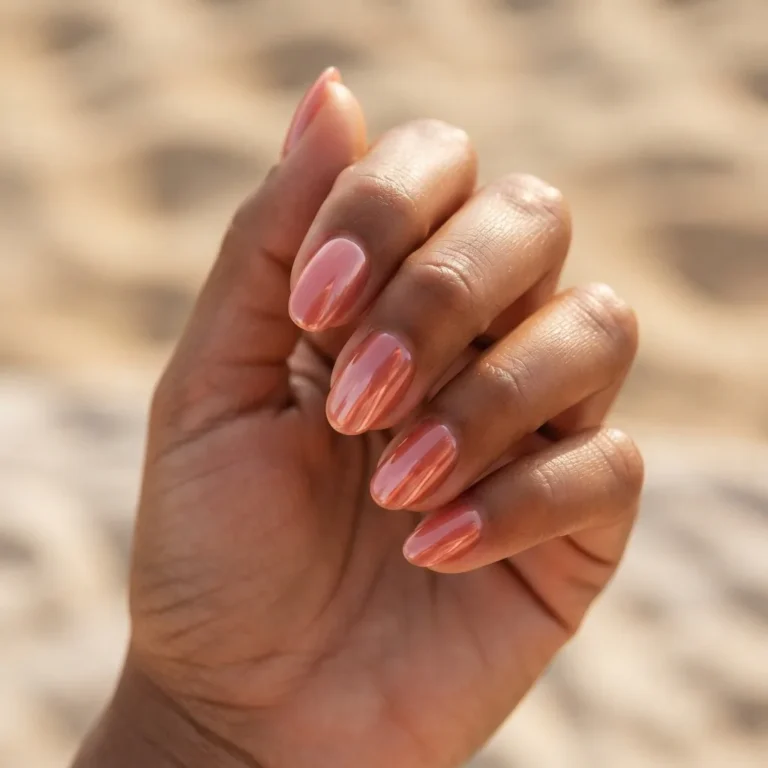
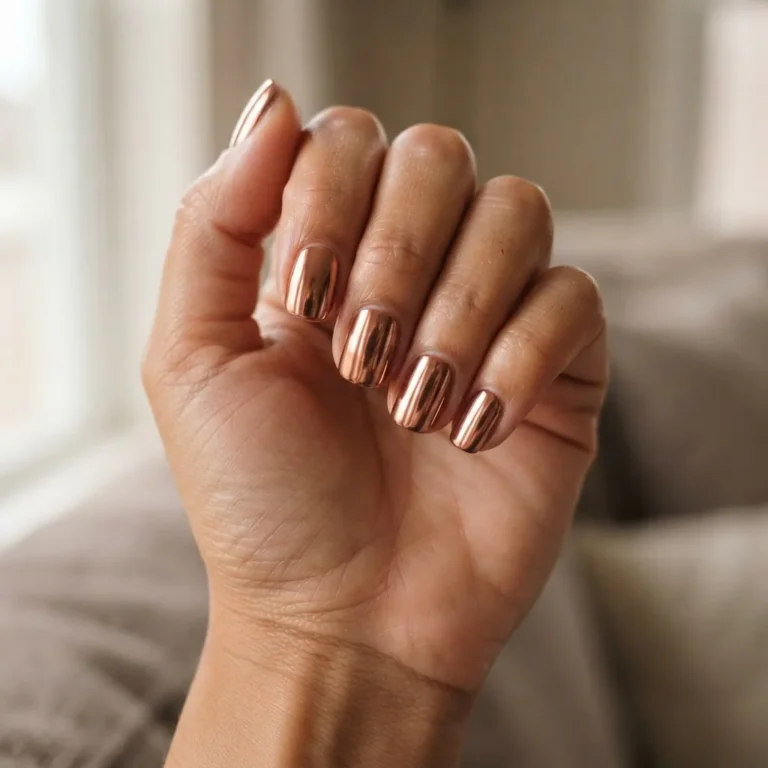
This is the Valentine’s version of the look that’s been all over your feed. You start with a milky sheer pink or white gel base (this works best with gel, not regular polish, because you need a tacky uncured layer). Apply your sheer base, cure it, apply a second coat, and cure again. Then apply a thin, sticky no-wipe gel top coat and cure it just enough so it’s tacky. Take a small chrome powder applicator (usually a sponge or rubber fingertip that comes with most chrome powder kits) and rub the chrome powder onto the nail in small circular motions. You’ll see the mirror effect appear immediately. Seal with a no-wipe gel top coat and cure fully. Rose gold and pink chrome are perfect for Valentine’s Day and the result genuinely looks like something from a high-end salon.
12. Magnetic Cat-Eye Hearts
Cat-eye gel is one of those techniques that looks incredibly technical but is actually very beginner-friendly once you understand the one key step: the magnet must go over the nail while the gel is still uncured. Here’s how to do it. Apply one thin coat of cat-eye gel polish (a magnetic gel that contains iron particles). Do not cure it yet. Hold your magnet about 2 to 3mm above the nail surface for about 5 to 10 seconds. The particles in the polish will pull toward the magnet and create that distinctive line or shimmer pattern. Then cure in your LED lamp. For a Valentine’s spin, use a heart-shaped magnet to pull the shimmer into a heart silhouette in the center of the nail, or layer a red or burgundy cat-eye over a milky pink base.
If you’re new to gel at home, it’s worth knowing that gel polishes contain acrylate compounds, and research published in peer-reviewed literature identifies HEMA (2-hydroxyethyl methacrylate) as the primary sensitizer in gel-related allergic contact dermatitis cases. This doesn’t mean gel is dangerous for most people, but it does mean you should keep gel polish off your skin during application. Avoid flooding the cuticle. If you notice itching, redness, or swelling around your fingers or eyelids after gel use, stop using it and see a dermatologist.
13. Aura Nails in Red and Pink
Aura nails look like a soft, blurred halo of color radiating from the center of the nail toward the edges, or vice versa. They’re an intentionally imperfect, watercolor-dreamy look that actually gets more beautiful the less precise you are. Win for beginners! The technique uses a dry-brush or sponge-blending method. Apply a white or very pale pink base and let it dry. Load a tiny amount of red or hot pink onto a flat nail art brush, wipe most of it off on a paper towel (you want just a trace of color), and then lightly stipple and stroke it around the perimeter of the nail. Let that dry, then add a touch of deeper color at the very edges. Finish with a glossy top coat to pull it all together. The “mistake” of uneven blending is literally part of the look.
14. Swirled Pink and Red Marble
Marble looks complicated because of the photos, but the technique for nail-scale marble is much more forgiving than it appears. Apply a white or pale pink base. While it’s still slightly tacky, use a thin striper brush loaded with red or deep rose and draw loose, flowing, irregular lines across the nail. Immediately use a clean dry brush to drag and soften the line edges in one or two directions. Add a second, thinner vein line in a contrasting pink or even a bit of gold. Seal with a high-shine top coat. The key is to not overthink the lines. Real marble is chaotic and imperfect, and so should your nail version be.
15. Strawberry Nails
Strawberry nails were genuinely everywhere in 2024 and they’ve evolved into a cleaner, more graphic version for 2026. The base is a saturated red. While it’s dry, use a white nail art pen or thin brush to draw tiny V-shaped seed marks across the nail. A small green line at the very tip or base suggests the leafy top. It sounds fiddly but the seeds are just tiny checkmarks, and on a red background the white stands out so clearly that small wobbles read as charm rather than mistakes.
16. Ombre Pink to Red
You need two polishes (a soft pink and a cherry red) and a makeup sponge. Paint both colors side by side on the sponge so they slightly overlap in the middle, then press the sponge onto your nail. Repeat three or four times, building coverage. Clean up the edges with acetone and a fine brush. Add a top coat and the gradient is seamless. The pink-to-red fade is literally the color palette of Valentine’s Day and it works on every nail length.
17. Lace-Look Stamping
Nail stamping is one of the best-kept beginner secrets in nail art. You use a metal stamping plate (covered in engraved designs, including hearts, lace patterns, and florals), a stamping scraper to wipe the stamping polish across the plate, pick up the image with a soft stamping roller, and then press it directly onto your nail. The result is a crisp, detailed design that would take a professional to freehand. For Valentine’s Day, lace patterns on a nude base or tiny repeating hearts on red look incredible. Stamping kits start at around $10 to $20 for a starter set and they are genuinely one of the best investments for beginner nail art.
18. White Base with Painted Red Tips and Heart Detail
Think of this as a Valentine’s French with an upgrade. Start with a clean white base (two thin coats). Paint the tips red using either French tip guides or a flat brush. Once the tips are dry, use a tiny dotting tool to place a small white heart in the red section of each tip. The contrast between the white heart on the red tip is crisp, graphic, and reads as very intentional nail art. This one is absolutely doable on short nails: just scale the tip width and the heart down to fit.
19. Glass Nails with Pink Heart Foil
Glass nails (also called jelly nails) are built on a sheer, translucent base that looks almost see-through. Apply a sheer jelly pink polish in three to four thin coats until you have a subtle, glassy depth. While still slightly tacky, press tiny heart-shaped foil pieces (they come in packs of mixed shapes) onto one or two accent nails. Finish with a high-shine gel top coat or a regular glassy top coat. The translucent base makes the foil hearts look suspended inside the nail, which is legitimately one of the most ethereal looks you can achieve with about $15 worth of supplies.
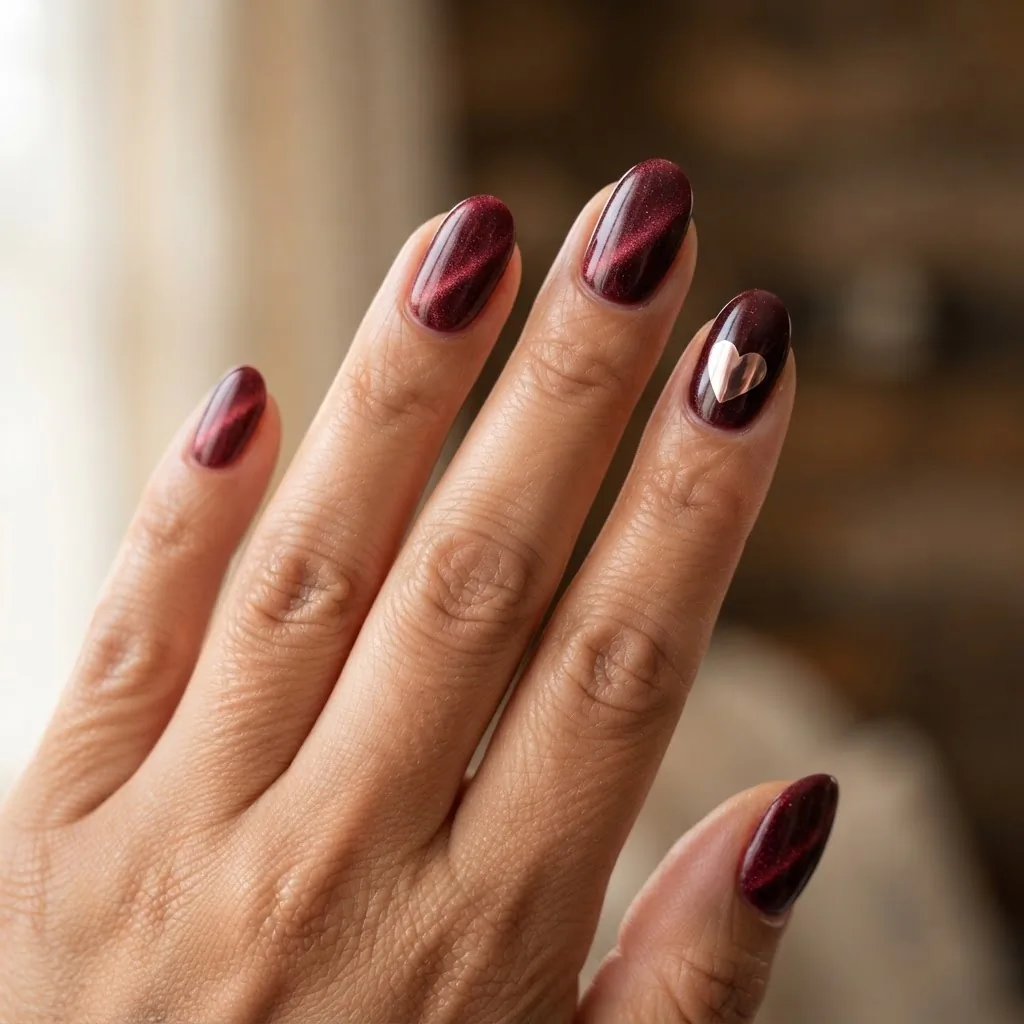
20. Burgundy Cat-Eye with Chrome Heart Accent
This is the one I’d call the “boss move” of Valentine’s Day nail art, but it is absolutely achievable if you have gel and a magnetic cat-eye polish. Apply two coats of a deep burgundy cat-eye gel, using the magnet technique from design #12 on each coat before curing. The result is a rich, dimensional shimmer that shifts in the light.
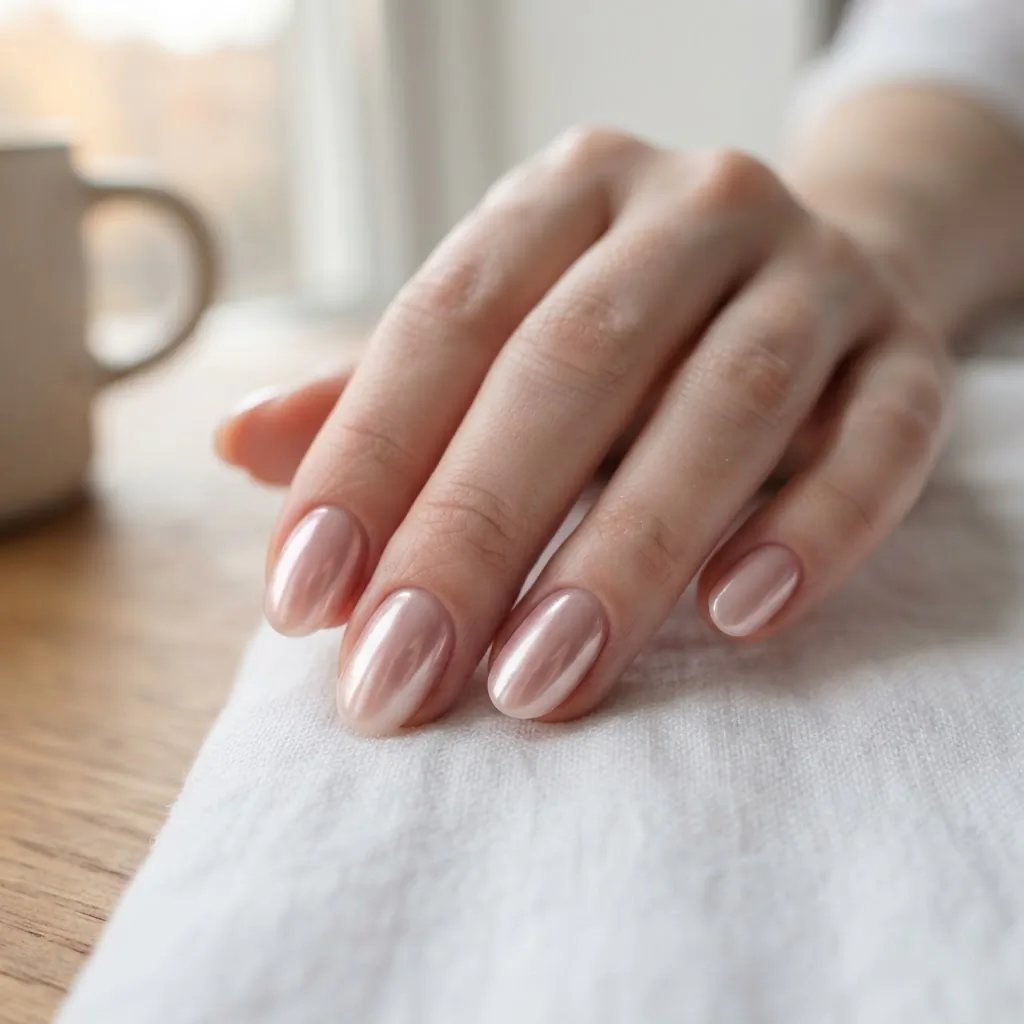
On one accent nail (usually the ring finger), take a chrome applicator with rose gold powder and use a fine detailing brush or a vinyl heart sticker as a stencil to apply a chrome heart shape in the center. Remove the stencil, seal with no-wipe top coat, cure. The contrast of the dark magnetic base and the chrome heart is genuinely next-level.
A Note on Short Nails
Every single design above works on short nails. The adjustments are small but they matter. Scale your heart sizes down. On very short nails, a heart that spans more than about 5mm gets cramped. Keep stamping designs to smaller plates. Choose round or oval shapes over square to give designs room to breathe. Aura nails, glazed chrome, and ombre are actually some of the most flattering finishes for short nails because they fill the nail evenly rather than directing the eye to a specific drawn element.
Choosing Your System: Regular Polish vs Gel for Valentine’s Day
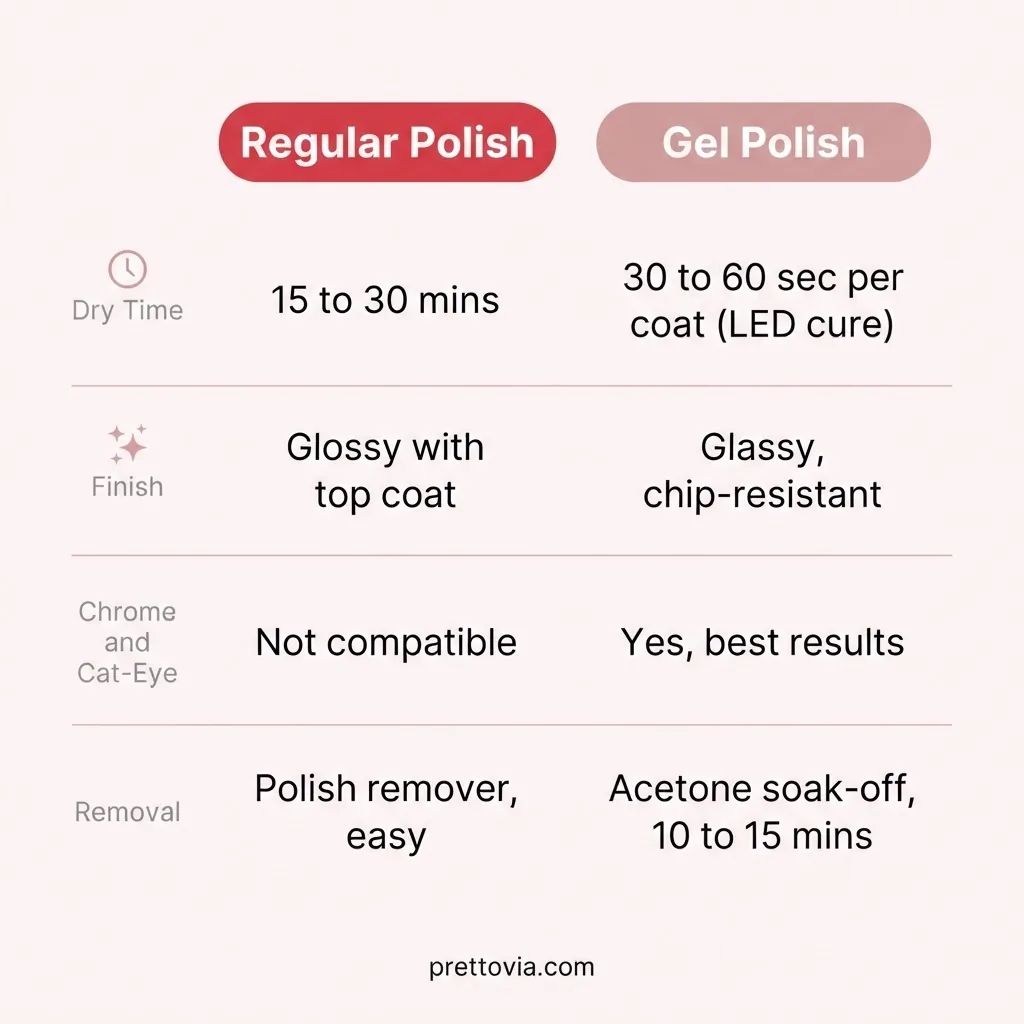
If you’re only doing Valentine’s Day nails and you don’t have a gel lamp yet, regular polish plus a quality fast-dry top coat will absolutely serve you. It’s a one-time set, not a long-term system.
If you already have an LED lamp at home, gel gives you better chip resistance and is the only real option for chrome powder and cat-eye techniques. LED lamps cure gel polish faster (around 30 to 60 seconds per coat for most polishes) and emit lower UV doses than older UV lamps, but if you’re going to be doing gel regularly, applying broad-spectrum sunscreen to your hands before each session, or wearing UV-protective gloves with the fingertips cut off, is a smart habit. The FDA’s nail care products page is also worth reading if you want to understand how nail cosmetics are regulated and what to look for on ingredient labels.
Starter gel kits run from around $35 to $65 and most include a lamp, base coat, top coat, and a few colors.
They’re worth it if you plan to use them beyond February.
When Things Go Wrong (And They Will, At Least Once)
Flooding the cuticle is the most common beginner problem. The fix is simple: dip a fine angled brush in pure acetone and drag it along the edge of the skin right after you paint. Don’t wait until it’s fully dry.
Smudging within the first few minutes usually means the coat underneath wasn’t dry enough. Thin coats, patience, and a quality fast-dry top coat are your solutions.
Lifting at the edges with gel almost always comes back to a prep issue. The nail surface wasn’t clean enough, oil got onto the nail plate, or the gel was applied too thick. Thin coats, capped edges (that means running the brush along the very tip of the nail to seal the edge), and a properly dehydrated nail plate will fix most lifting issues.
Bubbling in regular polish is caused by either a thick coat, shaking the bottle (roll it instead), or painting in a very warm room. Thin coats again, and make sure your nail surface and polish are at room temperature.
Removing Everything Safely After Valentine’s Day
Please, please don’t peel your gel off. I know it’s satisfying. It’s also taking layers of your actual nail plate with it and that’s what causes the thin, bendy, damaged nails people blame on gel. The right method is the acetone soak-off: soak a small cotton pad in acetone, place it directly on the nail, and wrap each finger in a small square of foil. Leave it for 10 to 15 minutes, then slide the foil and cotton off. The gel should move easily. If it doesn’t, re-wrap for a few more minutes. The AAD has a clear, dermatologist-backed guide to removing gel polish at home that walks through this method and explains why gentle removal protects the nail bed.
After removal, apply cuticle oil and a nail strengthening base coat. Give your nails a few days to breathe before the next set.
The Final Thing I Want You to Remember
The first Valentine’s Day set I did at home was not perfect. The hearts were lopsided. I flooded two cuticles. The ombre gradient looked more like a mistake than an effect. I fixed what I could, left what I couldn’t, and went out anyway. Nobody noticed the wobbles. They noticed that my nails were red and sparkly and that I’d clearly done something fun with them.
That’s the whole point. You don’t need steady hands. You need thin coats, a little patience, and the willingness to try. If I can do it after a 10-hour workday with a dotting tool I bought on a whim, so can you.
Happy Valentine’s Day. Now go paint something pretty.