How to Do Double French Nails (Even on Short Nails)
I still remember the first time I saw a double French manicure on my feed. Two clean curved lines at the tip, impossibly parallel, looking like someone had a tiny printer installed in their fingers. My first thought was “beautiful.” My second thought was “absolutely not, I can’t do that.” And then, true to my actual personality, my third thought was: “hold on, let me figure this out.”
If you are reading this right now, I am guessing you are somewhere between thought one and thought two. You have the inspo saved. You are not sure you have the skill. I am here to walk you from thought two straight to the part where you text your friend a photo of your own nails and she asks which salon you went to.
Double french nails are genuinely one of the most beginner-friendly “looks hard, isn’t” designs out there once you understand the technique. The secret is not a steady hand. The secret is the right tools and the right order of operations. Let me show you both.
What Even Are Double French Nails?
Before we pick up a brush, let’s make sure we’re talking about the same thing. As beauty editors at Byrdie describe it, a double French is any French manicure that features more than one tip element. The classic version places a second curved line just below the traditional white tip, so instead of one arch at the free edge you get two parallel curves. But the definition is actually broader than that. The “second element” could be a thin outline just inside the main tip color, a half-moon mirror line at the base of the nail, a contrasting color band, or even a strip of glitter sitting right below a chrome tip.
What this means for you as a beginner: you get a lot of room to choose your own level of difficulty. The micro double line (two very thin, tightly spaced arches in the same or similar color) is actually one of the simpler versions to execute because the lines are so fine that small wobbles essentially disappear. The bold two-color block double French takes more precision but delivers that jaw-dropping contrast payoff. I will walk you through both in the designs below.
One more thing worth knowing: this look is trending hard right now. Micro double tips and chrome double lines are showing up consistently on Pinterest and TikTok, and they have the kind of staying power that comes from being rooted in a classic. The double French is not a flash-in-the-pan trend. It is an evolution of the French manicure, and it is not going anywhere soon.
The Tools That Make or Break This Design
Here is where most tutorials let beginners down. They show you the finished look and skip the part where the right tools make the whole thing possible.
For double french nails, your two most important tools are nail guide strips (also called French tip stickers or nail guide tape) and a thin liner brush.

That is it. You do not need a steady hand. You need these two things.
Guide strips / French tip stickers. These are thin, slightly curved adhesive strips that you press onto your nail to create a clean line before you paint. You paint over them, let the polish tack up slightly, then peel them off to reveal a crisp edge. For a double French, you use them twice on the same nail: once for the outer (first) tip line and a second time, positioned slightly lower, for the inner (second) line. Packs of guide strips are inexpensive, widely available at beauty supply stores and online, and they are the single fastest route to clean parallel lines on any nail length. You can find large packs for roughly $4 to $8.
Thin liner brush / striping brush. For the freehand approach, or for any design where you want to add a fine accent line, a liner brush with a 6 to 10mm bristle length is your best friend. Budget nail art brush kits that include a liner brush start at around $4 to $10 for a multi-piece set and punch well above their price point. You do not need a $20 professional liner to get a good result as a beginner. Load the brush lightly, wipe one side gently on the edge of the bottle, and use the full length of the bristles rather than just the tip for smoother, more controlled lines.
Other essentials: a base coat, your chosen polish or gel colors, a clean-up brush (a small angled brush dipped in acetone), and a good top coat. For gel users, an LED or UV lamp is required for curing.
A note on the acetone cleanup brush: this is your eraser, and it is genuinely one of the most underrated beginner tools in nail art. Any time a line slightly floods the cuticle area or goes a hair outside where you intended, dip the small angled brush in pure acetone and gently erase the edge before it fully cures (for regular polish) or before you seal it under the lamp (for gel). Clean nail art is not about painting perfectly the first time. It is about knowing how to correct small mistakes fast.
Nail Prep: The Step That Decides Everything
I know. Nobody wants to spend 10 minutes on prep when the fun part is the actual design. But here is the truth I have learned at my Chicago nail lab: a double French line looks sharp and clean on a smooth, dehydrated nail, and it looks blurry and smudged on an oily, uneven one. The prep is what makes the polish behave.
The American Academy of Dermatology’s manicure and pedicure safety guidelines are worth bookmarking because they cover the basics that make home manicures both safer and more effective. The key ones for our purposes are: always moisturize nails after polish removal since most removers are drying, apply cream to the nail after removal, and avoid cutting the cuticle itself. Pushing back the cuticle gently with a rubber or wooden pusher is fine. Cutting live cuticle tissue creates a small opening that can invite bacteria. This is not something to skip or rush.
Here is my prep sequence for double french nails specifically:
Start with clean, dry nails. Remove any old polish with acetone-based remover and a cotton pad, wiping in one direction from cuticle to tip. Wash your hands, then let your nails dry completely. Any residual water or lotion will interfere with adhesion.
File your nails to your preferred shape. For double French, oval and almond shapes are the most forgiving because the natural curve of the shape mirrors the arc of the French line. Square and squoval shapes work beautifully too, especially with geometric double lines. The key is to file in one direction rather than sawing back and forth.
Lightly buff the surface to smooth any ridges, then wipe each nail with a lint-free pad slightly dampened with polish remover or rubbing alcohol to remove any buffing dust and dehydrate the surface. This is your final step before base coat and it significantly improves how evenly your polish lays down.
Apply one thin layer of base coat and let it dry fully.
8 Double French Nail Designs to Try at Home
Now for the fun part. I have ordered these loosely from easiest to most advanced, but I want to be honest: even the designs at the end of this list are totally doable with the guide strip method. “Advanced” here just means it involves one or two extra tool steps.
Design 1: The Classic Micro Double White
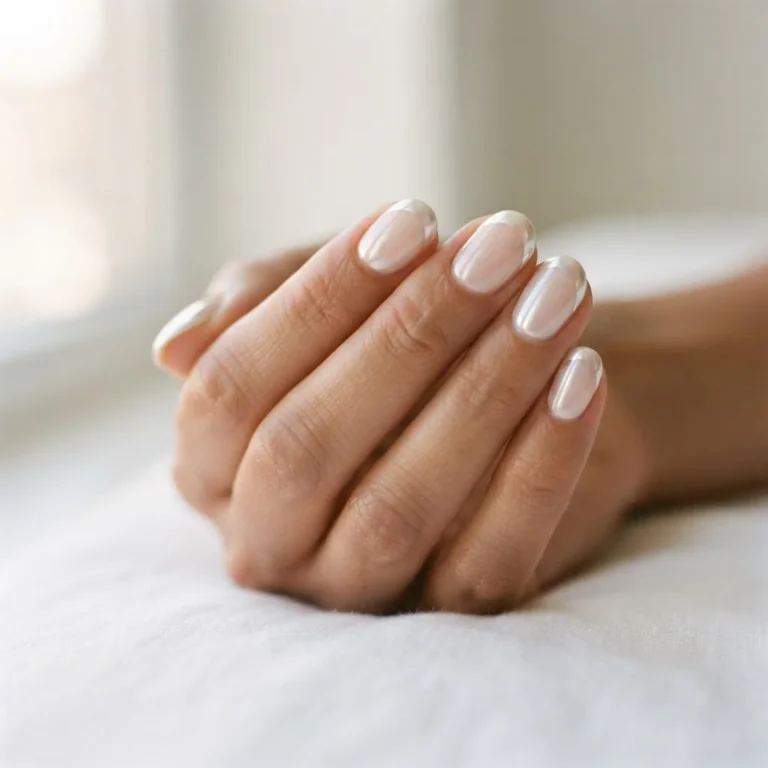
This is the one to start with if you have never done a double French before. Two thin arched white lines, close together, on a bare or barely-there pink base. Micro lines (about 1 to 1.5mm wide) are forgiving because they are so fine that tiny inconsistencies blend into the overall shape.
Apply your base coat, let it dry, then optionally apply one coat of a sheer nude or blush pink. Apply a guide strip at your tip line and paint a thin stroke of white polish over the edge. Let it tack for 30 to 45 seconds (for regular polish) then peel the guide strip while the polish is still slightly wet for the cleanest edge. Let that first line dry. Now place a second guide strip just below the first line, leaving a gap of about 1 to 2mm of your base color showing between them, and repeat the process. Seal with a glossy top coat. That shiny top coat is not optional: on micro lines, a thick glossy topcoat is what makes the lines look intentional and crisp rather than accidental.
Design 2: Two-Tone Pastel Double Tip
Same technique as design 1, but each of the two tip lines is a different pastel color. Think butter yellow for the outer tip and a dusty lavender for the inner line, or a peachy coral paired with a mint. The color contrast is what makes this one pop, so lean into combinations that are related but distinct rather than colors that are too close to each other.

The color-theory note here: if you have warmer or deeper skin tones, terracotta, peach, and warm coral combinations tend to look especially luminous against your nail bed. Cooler skin tones generally look beautiful with lilac, icy blue, and periwinkle pairings. Neither rule is absolute, wear what makes you happy, but this is a useful starting point if you are staring at a wall of polishes feeling overwhelmed.
Design 3: White Tip With Thin Color Outline
This is the design I practiced first when I was teaching myself freehand line work, and it is a great stepping stone to fully freehand double French. You paint a standard French tip in white, let it dry, and then use a thin liner brush to trace a thin line of a contrasting color just below the white arc. The white tip acts as a visual guide for your liner brush stroke, making the line much easier to control.
For color choices, a fine red or black outline below a white tip is classic and editorial. A fine gold line below a white tip is clean and bridal-adjacent. A fine periwinkle line below a white tip is the kind of subtle detail that people will notice without being able to immediately articulate why your nails look so good.
Design 4: Chrome Double French
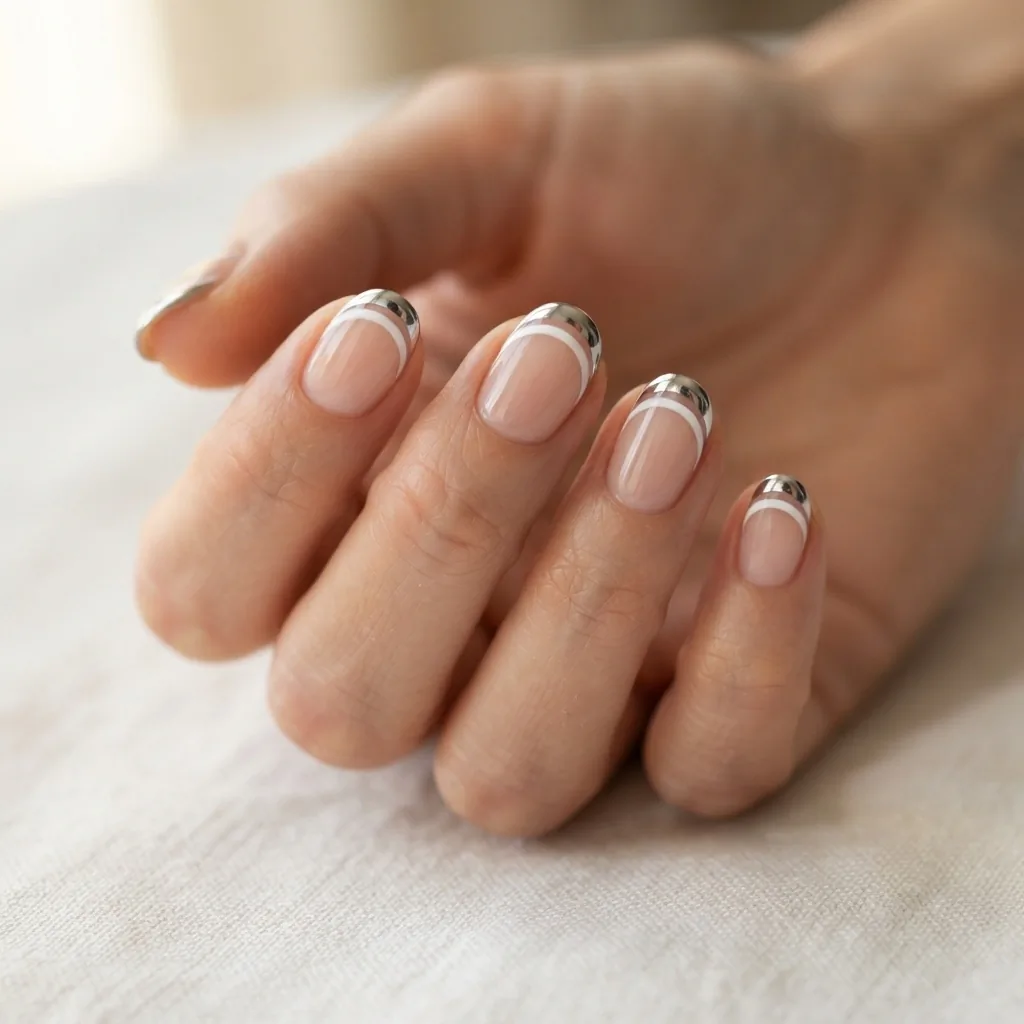
This is the most-saved version of the double French on Pinterest right now, and I genuinely understand why. A chrome-powder tip catches light the same way glazed-donut nails do, and that second arc below it (usually in white or the same chrome) gives it a structured, editorial quality.
For regular polish, you can approximate chrome with a silver or platinum metallic polish rather than actual chrome powder. For gel users: chrome powder is applied by rubbing a small sponge applicator over a cured, no-wipe top coat layer. The chrome bonds to that sticky surface and buffs to a mirror finish. You then add another top coat to seal. The double line below the chrome tip can be achieved with a white or silver gel liner, painted freehand or with guide tape, before you add the chrome layer on top.
One safety note worth mentioning here: if you are using a gel system and curing under a UV or LED lamp, the Skin Cancer Foundation notes that both UV and LED lamps emit UVA rays, and recommends applying a broad-spectrum sunscreen to your hands about 20 minutes before exposure. The overall UV risk from gel lamps is considered moderate and far lower than tanning beds, but it is an easy precaution to build into your routine.
Design 5: Reverse Double French
Instead of both lines sitting at the tip, the reverse double French places one arch at the tip and a second mirrored arch at the base of the nail near the cuticle, creating a half-moon effect. This one looks like it requires major precision, but guide stickers at both ends of the nail make it very manageable.
The key for this design is to let the tip line fully dry before working on the base line. Any wet polish at the tip that gets disturbed while you are working near the cuticle will smear. I also recommend leaving more visible nail plate showing in the center of the nail than you think you need: the spacing between the two lines is what gives this design its elegant negative-space quality.
Design 6: Mismatched Pastel Double French (Different Color Per Nail)
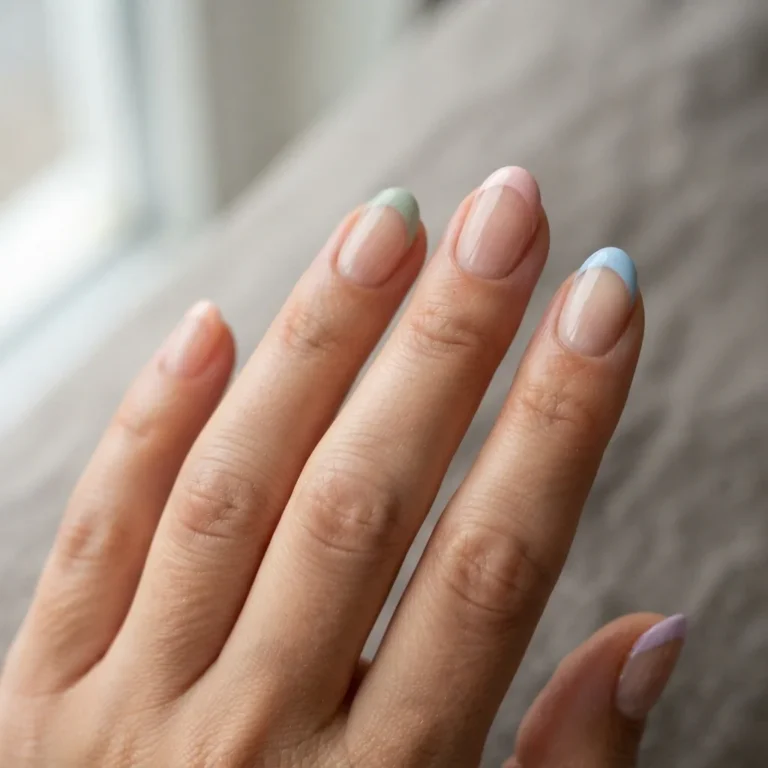
One of the most Pinterest-friendly iterations of this trend: each nail gets a double French line, but the colors vary from nail to nail. One nail might have coral and peach, the next has mint and white, the accent nail has lilac and lavender. The result is a coordinated-but-playful set that photographs beautifully and is actually much easier than it looks because the variety means any small inconsistencies between nails read as intentional.
For beginners, I suggest choosing three colors and alternating them across the nails rather than using a completely different palette per nail. This keeps the set cohesive without looking chaotic.
Design 7: Glitter-Line Double French
This one is for the sparkle lovers, and I fully count myself in that group. The outer tip line is painted in your choice of base color (white, nude, or a pastel), and the inner “second line” is a thin stripe of fine glitter polish or a glitter liner gel. The glitter line acts as a separator between the tip and the nail bed, adding dimension without requiring any freehand technique beyond a steady swipe.
Fine glitter polishes or glitter gel liners give the cleanest result here. Chunky glitter makes the line look uneven because the individual particles are too large to sit in a thin, straight-ish arc. Look for polishes described as “micro glitter” or “fine shimmer” for the inner accent line.
Design 8: Geometric Double French (For Square and Stiletto Shapes)
This design swaps the traditional curved arch for straight, angular lines, giving the French tip a graphic, modern edge. For square nails, the double line can be perfectly horizontal. For stiletto nails, the lines angle sharply inward to follow the pointed nail edge. This is the design that photographs best with a high-contrast color combination like black lines on a white base, or navy on a pale yellow.
Nail tape, which is a very thin adhesive tape sold in nail art tool kits, works better than curved guide strips for straight geometric lines. Press the tape across the nail at the angle you want, paint your line, let it tack for 20 to 30 seconds, then peel. The straight edge from the tape makes this design genuinely beginner-achievable even though the angular finish looks very precise.
Adapting Double French for Short Nails
I want to address this specifically because I hear from so many people who assume this design is only for long, almond-shaped nails. It is absolutely not. Short nails can carry a double French beautifully. The adjustment is simple: go micro.
On shorter nails, both lines should be very thin (1mm or less each) and the gap between them should be tiny, about 1mm.

This prevents the two lines from crowding the nail bed and making the nail look shorter. Think of it as a fine-line illustration drawn right at the edge of the nail, rather than two bold bands eating up the free edge. On a short rounded or squoval nail, a micro double white line looks genuinely elegant and professional.
The other adjustment for short nails is to skip the reverse double French (Design 5) or keep it very minimal, since adding the base-of-nail arch to an already short nail can make the visible nail plate look even smaller. The tip-only designs work best.
Choosing Your System: Regular Polish vs. Gel
Both regular nail polish and gel work for double french nails, and each has tradeoffs worth knowing before you start.

Regular polish is beginner-friendly because you can wipe away mistakes with acetone immediately, it does not require a lamp, and it is lower commitment. The downside is wear time: regular polish typically lasts about five to seven days before chipping, and fine line work at the tip is often the first area to show wear. That said, if you want to practice the technique, try the design, or just want pretty nails for a weekend event, regular polish is a perfectly great choice.
Gel polish lasts significantly longer (typically two to three weeks with proper prep and top coat sealing), dries harder and more instantly under the lamp, and the liner gel used for the double line stays crisp without smudging between coats. The tradeoff is that gel requires proper removal to avoid nail damage. The AAD provides clear guidance on how to reduce damage from artificial nail systems, including soak-off gel: the key points are to soak only the fingertips in acetone (not the whole hand), to never pick or peel gel off, and to use foil wraps rather than aggressive soaking.
A quick note on gel ingredients: some gel systems contain HEMA (2-hydroxyethyl methacrylate) or related acrylates. If you have previously had a reaction to gel polish (redness, itching, swelling around the nail), that is worth noting because sensitization to acrylates can develop over time. Doing a patch test on one nail a few days before a full set is a sensible precaution, and if you experience a reaction, stop use and see a dermatologist rather than continuing. HEMA-free gel systems exist and are worth seeking out for anyone with sensitivity concerns.
The Troubleshooting Section Nobody Else Writes
These are the four most common failure points for double French nails at home, and exactly how to fix each one.

Problem: The second line looks wobbly and uneven. This is almost always a brush control issue, but the fix is not “practice more.” The fix is to load your liner brush more lightly, rest your working hand’s pinky finger on the table as a stabilizer, and move the brush across the nail in one slow, continuous stroke rather than multiple short ones. Short strokes create micro-joins that look jagged. One long stroke follows the curve of the nail naturally.
Problem: Polish bled under the guide strip. The guide strip was either not pressed firmly enough at the edges, especially the corners, or you applied the polish too thickly and it crept under. Fix for next time: really press each end of the guide strip down. Apply polish in a thin coat. The fix right now: use your cleanup brush with acetone to remove the bleed before it fully dries.
Problem: The two lines are uneven in thickness. One line came out thicker than the other. This typically happens because your brush was loaded differently for each line. For consistency, load both lines from the same amount of polish, wipe the brush once on the bottle rim before each stroke, and aim for the same pressure on both passes.
Problem: The top coat smeared the liner. For regular polish, this usually means the liner line was not fully dry when you applied top coat. Wait longer than you think you need to, at least five minutes, before sealing. For gel, make sure each line is properly cured before adding the next layer. Rushing between layers is the most common cause of smearing in at-home gel work.
How to Remove Your Double French Safely
I want to end here because removal matters as much as application for the health of your natural nails.
For regular polish: standard acetone-based remover works well. As the Mayo Clinic’s nail health guidance notes, proper nail care includes keeping nails dry and clean and using appropriate tools rather than harsh shortcuts. Avoid peeling polish off, even if it is lifting, because this pulls the top layer of the nail plate with it and causes the thin, peeling nails that make the next manicure harder to apply.
For gel polish: soak acetone-soaked cotton pads onto each nail, wrap with foil, and wait 10 to 15 minutes. The gel should soften enough to slide off with gentle pressure from an orange stick. If it is resisting, re-wrap and wait a few more minutes. Scraping hard at softened gel still removes nail plate cells and thins the nail over time.
Between gel sets, give your nails a few days of rest if you can. Apply a nail-strengthening base coat or cuticle oil daily during the break. Nails are not actually “breathing” during this time (nails get oxygen from the blood supply, not the air), but the break gives you a chance to assess the condition of the plate and catch any early signs of thinning, discoloration, or lifting that need attention. If you notice lifting with discoloration, pain, or unusual thickening of the nail plate, those are signs to see a dermatologist rather than layer another set on top.
One Last Thing
Double french nails started showing up everywhere on Pinterest because they genuinely are one of the most elegant, versatile, and surprisingly achievable nail designs in the current rotation. I went from “I could never do that” to “let me teach you exactly how” the same way I go from everything: one wobbly dot at a time, one trial run in my apartment, one “oh, that actually worked” moment that flips the whole script.
Try the micro double white first. Use guide strips. Let each line dry properly before the next. And please don’t judge your first attempt against someone’s professional salon set. Judge it against your very first try, and then go from there. I promise the improvement between attempt one and attempt three is going to genuinely surprise you.
Now go save this tab alongside your Pinterest board and let’s make those nails happen.