15 Colored French Tip Designs That Are Easier Than They Look
I still remember the moment I realized the classic white french tip was just one option on a very long, very colorful menu. I was deep in a Pinterest spiral at my desk during that infamous internship, surrounded by people in business casual, and I had just saved about forty nail photos in a row. About thirty of them had color at the tips. Not white. Not beige. Lilac. Cobalt. Dusty rose. A chrome edge so shiny it looked like liquid foil. I put my phone down, looked at my stubby intern nails, and thought: not a chance.
I was wrong. And that is basically the whole point of this article.
Colored french tips are genuinely one of the most beginner-friendly nail art styles out there once you understand a few key things about tools, technique, and why your lines probably went sideways the last time you tried. I have practiced version after version of this look in my Chicago apartment, on tired weeknight hands after a full day of work, and I can tell you with full honesty that most of these fifteen designs require less precision than you think. Some of them require almost none at all.
Below is every design I want you to try, organized from the most forgiving to the slightly-more-practice-required, with honest notes on what makes each one work and what trips people up. Let’s go.
Before You Paint Anything: The Two Things That Actually Matter
Every single frustrating colored french tip experience, including mine early on, comes down to two things: the wrong tool and skipping prep. I want to get these out of the way first because they will change your results immediately.
Your tool for the line. The single easiest upgrade you can make is switching from a regular polish brush to either french tip guide stickers or a dedicated curved french tip brush. French tip guide stickers (sometimes listed as nail vinyls or french nail guides) are self-adhesive strips you press along your natural smile line before painting. They create a physical barrier so your tip color goes on clean every time. A pack of 1,500-plus stickers typically costs under $10. You peel them off before the color dries fully and boom, clean edge. A curved angled brush is the other option if you want freehand control, and it is the approach I use personally now. Angled flat brushes create sharp, curved lines with a single stroke once you get the angle right, which usually takes three or four practice tries on a piece of paper before it clicks. Start with the stickers if you are brand new.
Prep is everything. A colored french tip on a bare, oily nail will chip at the tip within a day or two, no matter how carefully you paint it. Clean each nail with a lint-free wipe or cotton pad dampened with rubbing alcohol right before you paint. Push back your cuticles gently with a wooden orange stick instead of cutting them. Apply a base coat all the way to the free edge, cap the tip (meaning swipe base coat along the very edge of the nail), let it dry or cure fully, then build your design. Capping the tip with your color and again with top coat is what keeps colored tips from peeling. It is the step most tutorials skip and the reason most DIY french tips chip fast.

If you are using gel polish, the same logic applies with one addition: the American Academy of Dermatology recommends keeping gel products off your surrounding skin, because repeated contact with uncured gel on the cuticle and skin can contribute to sensitivity over time. Flood your cuticles with gel and you are also setting up premature lifting. Wipe any skin contact before you cure.
The 15 Designs
1. Tinted Sheer Tips
This is the one I tell every beginner to start with, and it is also the most wearable everyday look on this whole list. Instead of a saturated, opaque color at the tip, you use a sheer or jelly formula in a soft color, pink, peach, blush lavender, or barely-there coral. Because the color is translucent, an uneven line is almost invisible. The color kind of melts into the base naturally. Pair it with a neutral or sheer nude base coat and you get something that looks like a more interesting, more modern version of the classic french set. Great for work, great for first attempts, great for people who are nervous. There is nothing to mess up.
2. Pastel Solid Tips
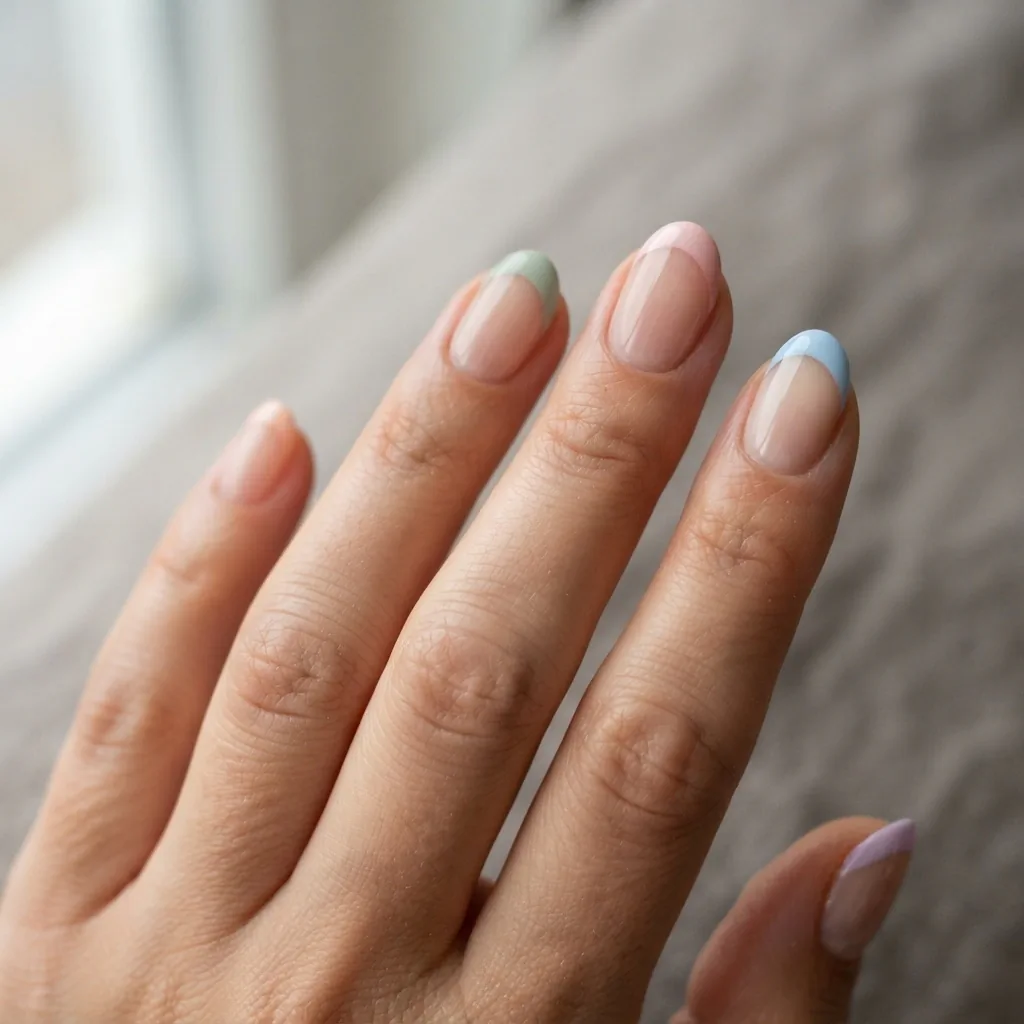
Pastel french tips are one of the most pinned looks right now, and they have been sitting comfortably in salon menus and Pinterest boards through spring and summer 2025. Think lavender, sage green, sky blue, baby yellow, or soft peach at the tip on a clean nude or white base. Vogue named this exact direction one of the standout french tip revivals, noting that modern versions pair saturated tip colors with skin-toned bases for a polished, editorial feel. For at-home execution, pastels are forgiving because they are not so high-contrast against most skin tones that a slightly imperfect line jumps out. Use your guide stickers or a curved brush, apply two thin coats of your chosen pastel at the tip, and cap with a glossy top coat.
3. Hot Pink Bold Tips
Hot pink at the tip is having a serious moment. Fuchsia, bubblegum, shocking pink, candy rose, pick your favorite and just go for it. The boldness is the point. This one does show a wobbly line more than sheer tips do because of the high contrast against a nude base, so it is a great candidate for guide stickers or a cleanup brush (a thin, stiff-bristled detail brush dipped in acetone to neaten any edges). Two thin coats of the pink, let each coat dry before the next if you’re using regular polish, or cure fully between coats with gel. Cap the tip edge. Top coat. This look is loud, confident, and currently showing up everywhere.
4. Neon Tips
Neons are the electric, retro-summer version of the bold tip. Yellow, electric blue, neon orange, lime green. They work especially well on longer nails but can absolutely be done on shorter ones if you keep the tip line thin. One thing worth knowing about neon polishes: most of them are naturally a bit more sheer than regular polished colors, so you may need three thin coats to build full opacity. Cure each coat fully if you are in gel. Elle’s summer nail edit highlighted neon and citrus-bright tips as one of the defining french manicure directions of the season, and I fully agree, this is one of those looks that photographs absolutely brilliantly.
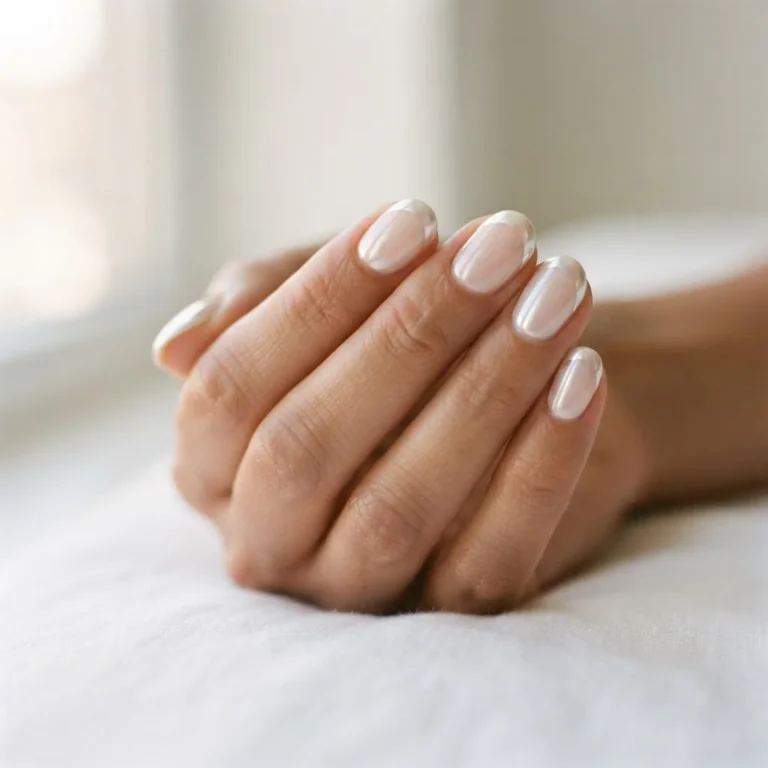
5. Chrome or Metallic Tips
This is the design that stopped my scroll that first time. Chrome tips look insanely high-end and are genuinely not difficult to achieve at home, though the process depends on which medium you are using. For gel, chrome powder is applied to a sticky inhibition layer after curing your color (usually a silver, gold, or rose gold gel without wiping the residue layer off), then buffed with a silicone fingertip or eyeshadow applicator in circular motions. The metallic shift appears in about ten seconds. It is one of those nail moments that genuinely feels like magic.

For regular polish, metallic polishes in silver, gold, or bronze skip the chrome powder entirely and just need a good glossy top coat to really pop. Finish with a non-wipe top coat over chrome powder to seal it, since chrome is technically a pigment sitting on top of the gel and needs that seal to stay put.
6. Glitter Ombre Tips
Instead of a solid line of color, this version has glitter that starts dense at the very tip and fades toward the middle of the nail. It is soft, sparkly, and extremely forgiving because there is no line to paint cleanly. You literally dab. Pick up loose glitter or a chunky glitter polish on a sponge piece (cut a small square from a makeup sponge), press it onto the tip area, and blend the inner edge by patting lighter. Build up layers until you are happy. The messier, the more gradient it looks. Seal well with two coats of top coat because glitter can catch and snag without a good thick seal.

This is one of my absolute favorite picks for people who feel they “can’t do nail art” because there is zero precision required.
7. Dusty Rose or Mauve Tips
If you want something that leans more editorial and less obviously “doing nail art,” dusty rose and mauve tips are it. These muted, slightly warm pinks have a cool-girl, effortless quality that goes with everything. They are also incredibly forgiving on a range of skin tones. On lighter to medium skin, they blend softly with a beige or sheer base. On deeper skin tones, a richer mauve or berry tip with a caramel or neutral base looks stunning. The less stark the contrast between your base and your tip color, the more room you have for imperfect lines. This is your quiet, sophisticated option.
8. Cobalt or Electric Blue Tips
Cobalt blue at the tip of a nude nail is one of those combinations that looks like it came from a professional photo shoot, and it is as simple as painting the tip in a single bold color. Blue tips have been popping up in editorial roundups regularly, and the reason is clear: the cool, confident color reads as modern rather than costumey. It works especially beautifully on medium to deeper skin tones where the color has enough contrast to really sing. Like with hot pink, the line visibility here is higher, so this is a good one to use guide stickers on or to clean up with an acetone detail brush afterward.
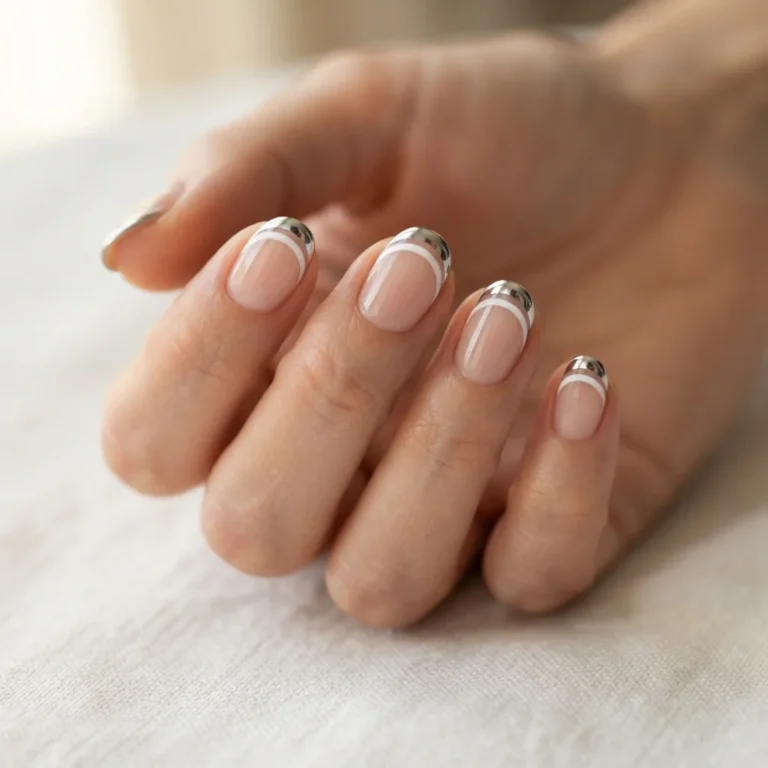
9. Outlined or Double French Tips
This trend takes the classic tip shape and adds an outline around it, a thin contrasting line just inside or along the edge of the colored tip. The result looks incredibly detailed but is actually done with a fine liner brush, which is one of the more controllable nail brushes you can work with once you understand how to hold your hand steady (rest your painting hand against the table and move the brush, not your whole arm). The contrast can be tip color with a white or black outline, or you can do a nude base with just a fine colored outline at the smile line with no filled-in tip at all. That barely-there outlined french is one of the most sophisticated easy-nail-art tricks I know.
10. Pastel Vertical Gradient Tips
This one looks complex in photos but is genuinely more about patience than skill. Instead of a horizontal colored tip line, you drag three or four different pastel colors vertically across the tip area using a thin brush or even a fan brush, then blend the colors where they meet. Each color takes up a vertical stripe of the tip, and they blur softly at the edges. Work quickly before the polish dries if you are using regular polish, and add a glossy top coat to smooth everything out. With gel you have more time because the color will not dry on the nail until you cure, making blending easier.
11. Negative Space French Tips
The flip of the traditional filled tip, negative space leaves the tip of the nail bare and instead uses a thin line of color along the smile line as the only element. It looks architectural and very cool and requires literally one clean line of color per nail. Because there is no filled-in area, imperfect wobbles are less obvious than you’d expect. A fine liner brush loaded with any color you like, a single steady stroke, and a top coat is all this takes. It photographs beautifully because of the contrast between painted and bare nail.
12. Rainbow or Multi-Color Tips
One different color per nail, each tip a different shade of the rainbow. This is the loud, playful, maximalist version and it requires zero matched precision because the whole point is that they are different. You can pick a full rainbow order (red, orange, yellow, green, blue, purple), or a curated palette of colors that complement each other. Each individual nail gets one solid tip color, which is actually the most basic application. The effect looks incredibly intricate but is just repeating the simplest move fifteen times in different colors.
13. Glitter Outlined Tips
A variation on the outlined french that uses a glitter liner or thin glitter strip along the smile line instead of a solid color. Fine glitter liner polishes (sold in most drugstores for a few dollars) are self-contained and come with their own thin brush, making this one genuinely foolproof. One careful stroke along the smile line. Done. It adds sparkle to a simple nude or sheer nail without demanding any real line work.
14. Dusty Sage or Earthy Green Tips
Green tips were the unexpected nail trend of the past couple of years and have not gone anywhere. Sage, olive, pistachio, eucalyptus: these earthy greens have a quiet, grounded quality that feels fresh without being loud. They work brilliantly on a sheer beige or white base and are genuinely flattering on every skin tone because the muted warmth of sage pulls from nature rather than neon. This is the tip color for people who love the idea of colored french tips but want something that still reads “polished” in a meeting.
15. Chrome Ombre or Gradient Tips
For the most ambitious look on this list, chrome ombre involves blending a chrome or metallic shimmer from the tip inward, so the nail looks like it graduates from foil at the edge to a soft sheer or nude toward the cuticle. With gel, this is done by applying chrome powder over a gradient base rather than a solid one. With regular polish, a metallic sheer applied in increasing density toward the tip achieves a similar effect. It takes practice and patience, and I will be honest, my first attempt was more “smeared foil” than “editorial gradient.” But after a couple of tries it clicks, and the payoff is extraordinary.
Which Nail Shapes Work Best for Colored Tips
The colored french tip works on every nail shape, but the visual effect changes dramatically depending on your shape. On almond and oval nails, the curved tip line follows the natural shape of the nail beautifully, giving the look a soft, elegant quality. On square and squoval nails, you can either follow the curve of the smile line softly or paint a straight horizontal line for a more graphic, modern feel. Both work. On stiletto nails, the tip naturally elongates the color into a dramatic point. And on short, round nails? Short nails are genuinely great for this look, and I want to spend a moment on that because a lot of people assume they are not.
Colored French Tips on Short Nails: Yes, Really
The assumption that french tips require length is one of the things I most want to challenge in this whole article. Short nails actually look beautiful with a very thin, close-to-the-edge colored tip, which proportionally suits shorter lengths better than a thick white band does. The key adjustments are keeping the tip line thin (a micro-french, just a sliver of color at the very edge), choosing a tip color that is not so high-contrast it makes the nail look cut in half, and keeping the base sheer or nude. Pastel tips, dusty rose, and sheer colored tips all work wonderfully on short nails.

Maniology’s short nail french tip guide makes a useful point that one of the reasons the french tip is so appealing is its ability to elongate and define the fingertip, and that effect is just as real on short nails when the proportion is right.
Gel vs. Regular Polish for Colored Tips: Which Should You Use?
Both work, and the right choice depends on what you want from the manicure. Regular polish is accessible, fast, and removable with standard polish remover. It dries rather than cures, which means your tip color can smudge if you touch it before it is fully set. A thin fast-dry top coat helps, but regular polish tips will typically start showing tip wear within five to seven days. Gel polish lasts significantly longer (reviewers consistently report two to three weeks on well-prepped nails), but requires an LED or UV lamp, takes more time to apply because you cure between every coat, and must be removed properly rather than just wiped off.
One important thing to know about gel if you are just starting out: gel polish contains acrylate compounds, and skin contact with uncured gel product is something to be careful about. The FDA notes on its nail care products safety page that allergic reactions and infections can occur with nail products, and that methacrylate monomers in gel and acrylic products have sensitizing potential when they contact skin. This does not mean gel polish is dangerous to use, millions of people use it safely every day, but it does mean you should keep uncured product off your cuticles and surrounding skin, wash your hands if you get gel on your fingers before curing, and work in a ventilated space. If you notice redness, itching, or swelling around your nails during or after a gel application, stop using that product and see a dermatologist.
How to Fix the Most Common Colored Tip Mistakes
Wobbly line. This is the number one complaint and it is almost always a grip and anchor issue, not a talent issue. Rest the side of your painting hand against the table or a folded towel. Move the brush, not your arm. Use guide stickers if freehand is not clicking yet. Clean up with an acetone brush after the color dries.
Color flooding onto the cuticle. Load your brush with less polish, apply from the center of the tip outward, and work slower. Flooding the cuticle with gel specifically will cause premature lifting because the gel will cure against your skin and peel away from the nail edge.
Tip chipping within two days. You almost certainly skipped capping. Swipe your tip color and your top coat along the very free edge of the nail (holding the brush vertically against the tip edge). This wraps the color around the nail edge and dramatically extends wear.
Glitter tips snagging. Two coats of top coat minimum, and let each dry fully. A second top coat 24 hours later (the “day two gloss”) helps glitter sets stay smooth.
Chrome not sticking or looking patchy. The chrome powder needs to go on a tacky gel layer. If you wipe the residue off your gel before applying chrome, start over. The stickiness is what the chrome powder bonds to.
Removing Colored Gel French Tips Without Wrecking Your Nails
Removal is the part most DIY nail tutorials skip entirely, and it is important. Peeling or prying gel off your nails takes layers of your actual nail plate with it, which is where that post-gel peeling and thinning comes from. It is not the gel itself that causes damage in most cases, it is forceful removal.
The method that board-certified dermatologists consistently recommend is the foil soak method: lightly file the shiny top coat layer to break the seal, soak a cotton ball or pad in 100% pure acetone, press it against the nail, wrap in foil, and wait 10 to 15 minutes. The gel will soften and slide off with gentle pressure from an orange stick. The American Academy of Dermatology has a clear step-by-step guide for safe at-home gel removal that is worth reading in full before you try it. After removal, your nails will be dry. Apply cuticle oil generously and let your nails breathe for a day or two before your next set if they feel thin or flexible.
If you see any lifting at the nail plate edge paired with discoloration (white, green, or brownish patches under where gel was), that can be a sign of a bacterial or fungal issue and is worth getting checked by a doctor before you apply another set on top of it.
A Quick Skin-Tone Guide for Tip Color
This is the section I wish every nail article included, because “what color should I choose?” is a real and valid question, not a vanity one.
On fair to light skin tones, almost every pastel works beautifully, and chrome or glitter tips give a luminous, ethereal quality. Very pale yellows and lavenders are especially flattering. Stark neons can look a little harsh, but a sheer neon over a light pink base softens the effect nicely.
On light to medium skin tones, the full spectrum opens up. Dusty rose, sage, cobalt blue, and warm corals are especially flattering. Sheer and jelly tips look clean and modern.
On medium to olive skin tones, terracotta, burnt orange, warm sage, and mauve tips look stunning. Cobalt and navy are also beautiful against warmer olive undertones.
On deep to rich skin tones, high-contrast tip colors really sing. Bright hot pink, electric blue, warm gold chrome, classic red, and bold neons all look extraordinary against deeper skin tones because the contrast is dramatic and intentional. Soft pastels can work but a more saturated version tends to show better than a very pale one.
The only real rule is that you should choose what makes you happy when you look down at your hands. These are yours.

One More Thing Before You Start
If I could go back and tell that anxious intern staring at forty saved nail photos one thing, it would be this: the wobble does not ruin it. The first time I tried to freehand a tip line, it looked like a toddler drew it. The second time, slightly better. By the fifth attempt I had something I was genuinely proud of. And the tenth attempt, I looked down at my hands at my desk and felt that little spark I had been chasing since that first Pinterest scroll.
You do not need steady hands. You need guide stickers, a cleanup brush, a little patience with yourself, and permission to have a bad first attempt. That’s it. If I can do this after a 10-hour workday, you can do it on a Sunday afternoon with your favorite show on in the background. Start with the sheer tips or the glitter ombre. Give yourself the grace of a learning curve. And then tell me which one you tried.