10 French Tip Nail Variations Beginners Can Actually Do
Here is something I tell everyone who asks me about French nails: this look has a reputation it does not deserve. Somewhere along the way, the French tip became the manicure people point to when they want to say “that’s too hard to do at home.” I get it. The smile line is nerve-wracking. The white looks unforgiving. And if you have short nails, you probably assume it is off the table entirely.
None of that is actually true, and I want to prove it to you. I taught myself nail art with a cheap dotting tool during a long internship, one wobbly dot at a time, and the French tip was one of the first things I figured out how to make actually work. What I know now that I did not know then is that there is not just one French tip. There is a whole family of them, and some of them are genuinely easier than a basic single-color polish. Knowing which one to start with changes everything.
So let’s go through all of them, from the true classic to the chrome glazed-donut version that breaks Pinterest every three months, with honest guidance on tools, technique, and what to do when it goes sideways.
Before You Pick a Variation: A Quick Word on Prep
Every French tip variation, no matter how simple or advanced, is only as good as the prep underneath it. Clean, dry nails with no residue hold polish better, give you a smoother canvas, and help your top coat bond without peeling. Start by removing all old polish completely, then wash your hands. Push your cuticles back gently using a rubber or wooden pusher after a brief warm soak or after applying a small amount of cuticle oil to soften them. Do not cut your cuticles at home. The American Academy of Dermatology is clear that cutting or aggressively pushing cuticles can cause infections and inflammation, and that the cuticle exists to protect the nail root from bacteria. Gently nudge, do not clip.
File your nails into your preferred shape, then lightly buff the surface to remove any shine. This step is especially important if you are applying gel, because polish needs something to grip. Apply a thin base coat and let it dry completely before you touch any color. For gel, follow your lamp’s instructions for cure time. This is not a step to rush.
A quick note on gel systems and safety: if you are using a gel-based French at home, be aware that gel polishes contain ingredients called methacrylate monomers, which can cause skin sensitization over time if they repeatedly contact the skin uncured. The FDA’s own nail care products guidance explains that traces of reactive monomers can remain in gel products and may cause reactions in people who develop a sensitivity. Avoid getting gel on your skin before curing, cap the free edge of your nail when applying, and if you ever notice itching, swelling, or redness around your nail folds that does not resolve, that is a signal to stop and see a dermatologist. Gel French nails can be beautiful and practical at home. They just ask for a little caution.
Now, on to the good stuff.
The Classic White-Tip French
This is where almost everyone starts, and it is the variation that gets the worst reputation because people try it freehand with an opaque white polish and then wonder why it looks wobbly. Here is the thing: freehand with a regular brush and opaque white is genuinely one of the harder ways to do this. It is not you. It is the approach.
The tools that actually make the classic French work at home are guide strips, also called French tip stickers or nail guides. They are thin adhesive strips you press onto the nail right where you want the smile line to land, paint the white tip above them, let it dry slightly (not fully, just tack-free), then peel them off. A decent multipack of guide stickers runs about $4 to $8 and can be found at most drugstores or online. They come in different smile-line shapes, from straight to curved, so you can match the curve to your own nail’s natural free edge.

The result looks cleaner than most professionals manage freehand.
The white polish itself matters more than people realize. A sheer white is far more forgiving than a solid opaque one. It allows you to build the tip in two thin layers rather than fighting one thick, streaky one. Think more milky than blazing white for your first few tries.
For short nails, keep the tip very narrow, maybe 2mm at most. A thick white band on a short nail looks bulky and makes the nail look even shorter. A slim white line at the very edge looks chic and elongated.
The Micro French Tip
If you have short nails or just want something more modern and understated than the classic, the micro French is where I would actually send you first. The white line is razor-thin, sitting right at the very tip of the nail, sometimes just 1mm wide. It looks like your nails are just naturally, impossibly healthy. It is also, counterintuitively, easier to control than a full-width classic French because you have less ground to cover.
The technique that works best here is using the very tip of a thin liner brush dipped in white polish, or the corner of the brush that comes in most gel polish bottles. You are barely painting anything. One stroke across the very edge of the nail plate, keeping it as tight to the tip as possible. Because the line is so narrow, small wobbles are almost invisible to the eye. Any cleanup can be done with a tiny brush dipped in acetone run along the edges.
The micro French is also having a major moment in terms of current trends. It is particularly flattering on oval and almond-shaped nails and looks stunning in soft ivory or a barely-there sheer white rather than a bright opaque one. It is genuinely the variation I tell people to start with when they are afraid of the classic.
The Colored French Tip
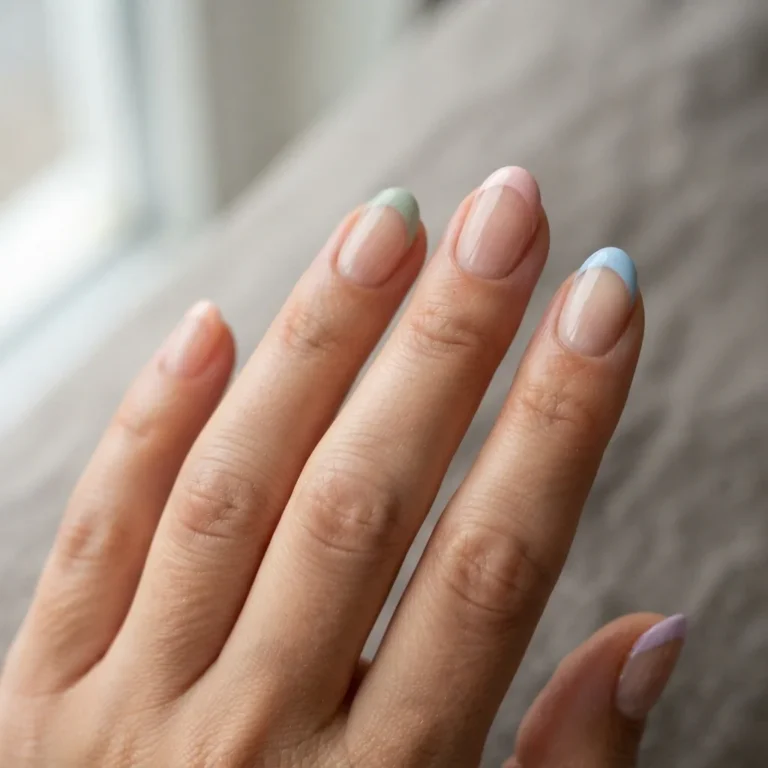
This is the one that makes people do a double-take, and it is a lot more accessible than it looks. Every technique for the classic white tip applies here, you just swap the white for any color. What makes colored French tips so beginner-friendly is that imperfections in the line are far less visible with color than they are with stark white. Soft lavender, warm terracotta, dusty blue, cherry red, or even deep navy against a nude base are all having a serious moment right now.
Guide strips work exactly the same way here. The only extra consideration is choosing a base that actually complements the tip color. A soft beige or sheer nude base works with almost anything. For a more graphic, editorial look, a white or pastel base with a darker tip creates beautiful contrast.
Color-blocked French tips using two bold shades are trending, where both the base and the tip are saturated colors rather than nude plus tip. Think cobalt blue body with a burgundy tip, or a soft yellow base with a terracotta tip. These feel modern and fun, and they are genuinely easy because neither color needs to be painstakingly precise. The contrast does the work.
The Milky French (Glazed Finish)
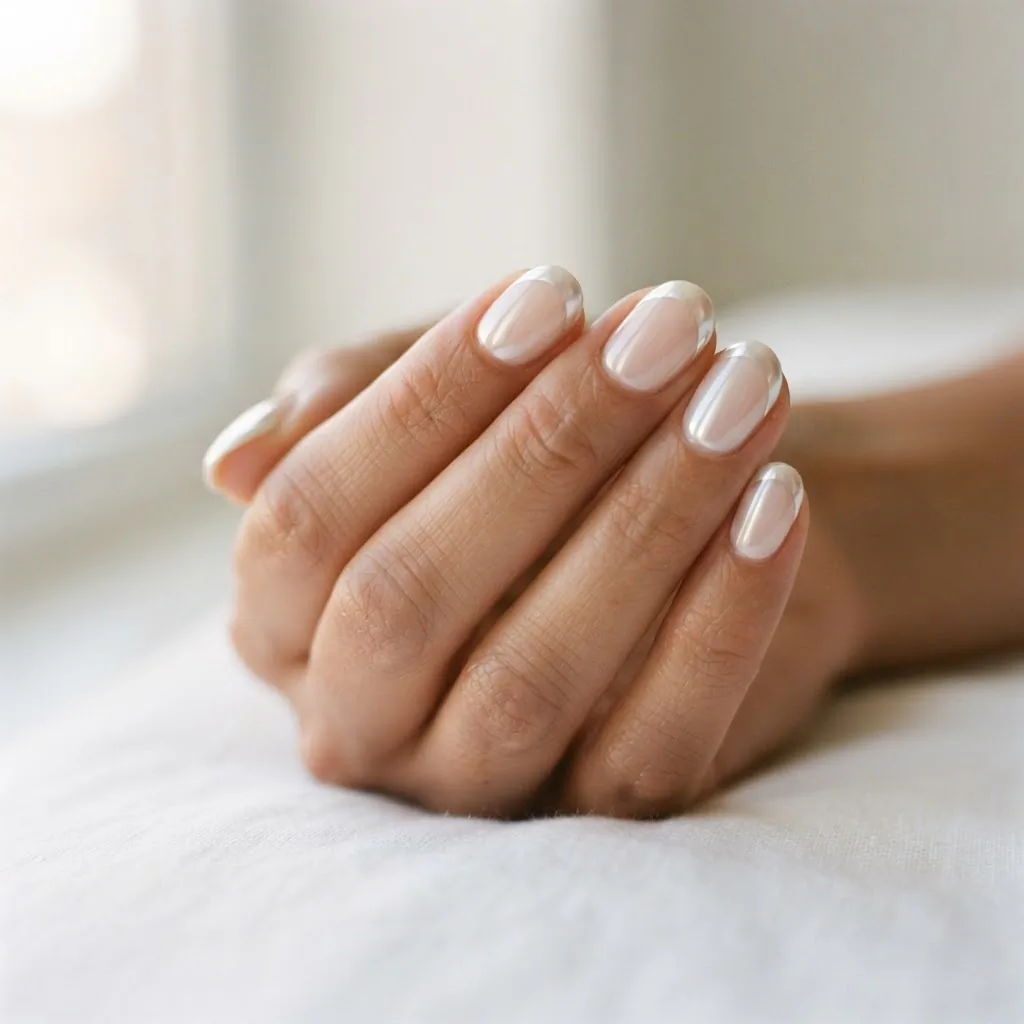
This one is everywhere right now, and for good reason. The milky French tip skips the obvious smile line entirely in favor of an almost-sheer, barely-there pink-white finish that looks as though your nails are made of glass. ELLE’s beauty team recently declared milky French tips one of the most dominant nail trends heading into 2026, describing them as “soft, elegant, and effortlessly chic.”
To recreate this at home with regular polish, you need a sheer milky-white or sheer nude-pink shade. Apply it in two to three thin layers, letting each dry fully. The slight translucency lets your natural nail show through just enough to create that lit-from-within glow. Finish with a high-shine glossy top coat, the glossier the better. The “glazed” look is mostly in the finish.

For a more opaque version, a soft opaque white or champagne pink applied over your natural nail, then sealed with a gel-effect shine top coat, gets you close to the viral glazed-donut look without a UV lamp at all. This is hands-down the most beginner-friendly variation on this list for anyone who has never done nail art before, because there is no precise smile line to paint.
The French Ombré (Baby Boomer Nails)
The French ombré, sometimes called baby boomer nails, replaces the crisp tip line with a soft gradient that fades from a pink or nude base into white at the free edge. It looks incredibly polished and elegant, and it is actually more forgiving than a classic French because a soft blend hides anything that would otherwise be a visible mistake.
Byrdie’s extensive collection of French ombré nail designs shows just how many directions this variation can go, from classic pink-to-white to chocolatey-brown fades, chrome finishes, and glitter gradients. The technique at home involves applying a white or very light nude polish at the tip, then while it is still slightly wet, using a small makeup sponge to dab and blend the edge where the two colors meet. Work in thin layers, blend, let dry slightly, and repeat. It takes a few tries to get the softness right, but the learning curve is fast.
The French ombré is also one of the most flattering variations on short nails because the gradient creates an illusion of length without requiring any length to be there.

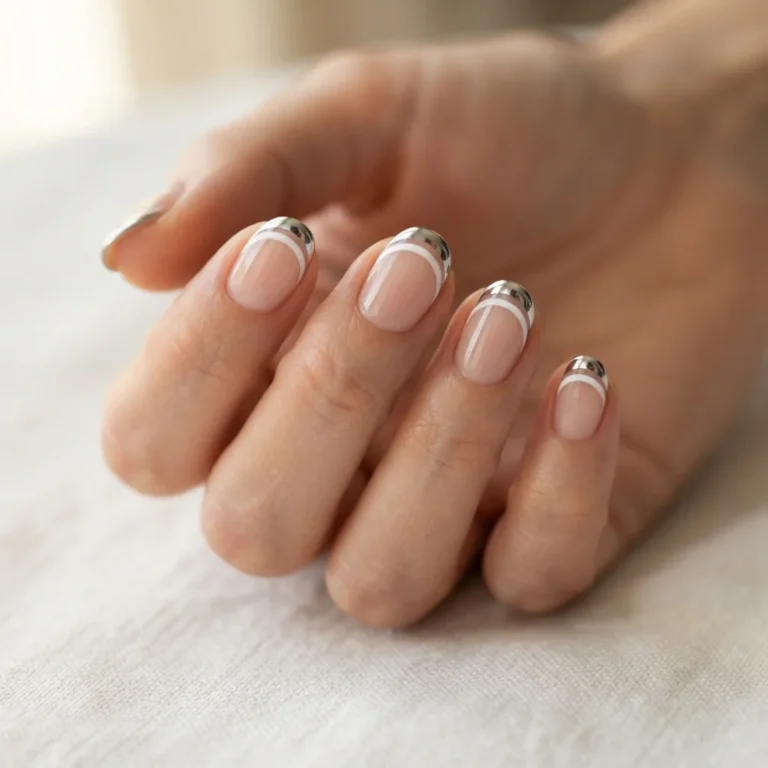
The Chrome or Glazed-Donut French
This is the high-drama version, and I will be honest with you: it does require a gel system to achieve the full mirror-chrome effect at home, because chrome powder only adheres properly to an uncured or wiped gel top coat. But the result is extraordinary. You apply a gel top coat over your French tip, do not wipe it off (leave the tacky residue), then buff a chrome powder onto the tip only using a silicone finger applicator, cure it, and finish with another top coat. The tip turns into a liquid-mirror finish that catches every light in the room.
If you are not working with gel at home, chrome nail foil is a solid dupe. Press the foil onto the tip area using a tacky base, peel it away, and you get a metallic effect that looks spectacular with a sheer or nude base.
The glazed-donut French specifically refers to a warm, pearl-white chrome over a nude or white base. It became one of the most-saved nail looks on Pinterest and has not lost any momentum. It flatters every skin tone because the warmth of the pearl balances cool and warm undertones equally.
If you are doing the gel-based version, please apply a broad-spectrum sunscreen to your hands before putting them under the UV lamp. Dermatologists from the AAD specifically note that repeated UV lamp exposure during gel manicures can contribute to premature skin aging on the hands. It takes five seconds to apply and it genuinely matters, especially if you are doing your nails at home every two to three weeks.
The Reverse French (Half-Moon Manicure)
The reverse French flips everything. Instead of the accent going at the tip, it goes at the base of the nail, over the half-moon or lunula. It looks architectural and intentional, and it works beautifully with bold colors, glitter, or chrome finishes at the base.
Here is the thing about the reverse French that I love for beginners: you do not have to paint a smile line at all. The technique involves placing a small round guide sticker or a round reinforcement sticker (the kind for binder holes, which cost almost nothing at an office supply store) over the base of the nail, painting your accent color below it, letting it dry, removing the sticker, then painting your main body color over the rest of the nail. The base accent was applied first, so the main color overlaps it slightly and creates a natural boundary. The line takes care of itself.

The reverse French is particularly striking on square and coffin nail shapes, and it is one of the more creative variations that still photographs beautifully, which matters for anyone building a Pinterest-worthy nail portfolio.
The Glitter Tip French
Think of this as the party version of the classic French. The white tip is replaced entirely with a strip of glitter polish, usually a fine silver, gold, holographic, or iridescent formula. Because glitter is textured and sparkly, the edge of the smile line is far less visible than it is with a flat opaque color. This is genuinely one of the most forgiving French variations to do freehand.
Apply your glitter strip using the guide strip method or freehand, building two to three thin coats until the coverage is even. Seal with a gel-finish top coat to flatten the glitter texture and give it that salon-smooth finish. Because glitter polishes can be difficult to remove with standard remover (the glitter fragments cling to the nail plate), soak a cotton pad in acetone, press it flat against the nail, wrap it in foil, and wait five to seven minutes before sliding off. It works much more effectively than scrubbing.
The Double French (Stacked Tips)
The double French places two parallel lines at the tip, usually in two different colors or finishes, one right above the other. It sounds complicated but it is actually just two guide strips applied in sequence. Place the first strip slightly lower on the nail, paint your first color above it, remove it, let it dry, place the second strip right above the first color band, paint your second color, remove it. Done.
The combination that works best for beginners is a classic white micro tip at the very edge plus a second thin line in a complementary color just below it. Or a nude base with a white tip and a gold glitter line sitting right at the boundary between the two. It looks like serious nail art. It takes maybe five extra minutes.
The Negative Space French
This one leans into the artistic end of the spectrum, but it is still absolutely doable at home. Instead of painting a colored tip over a colored base, the negative space French leaves part of the natural nail unpainted as part of the design. A common version paints the base of the nail and the tip, leaving a band of bare nail through the middle. Another version paints only the outermost edges of the tip, creating a thin outline rather than a filled color band.
This variation benefits hugely from steady guide strips for the edges and a thin liner brush for any detail work. The natural nail color becomes part of the design, which means no two people will end up with exactly the same result. It is also one of the freshest-looking variations right now because it leans modern and editorial in a way that feels very different from the traditional salon French.
A Word on Skin Tone and Color Matching
I want to address something that most French tip guides completely skip: which base and tip colors actually work on different skin tones. The classic pink-and-white combination was designed on and for pale skin, and it genuinely reads differently on medium, olive, and deeper skin tones. It can appear chalky or washed out rather than elegant.
If you have medium or olive skin, warm nude bases like soft caramel, peachy beige, or champagne read more natural than cool pinks. The tip works beautifully in ivory or warm white rather than bright white. For deeper skin tones, a rich beige, terracotta, or even a deep chocolate base with a creamy ivory tip is stunning and feels far more intentional than the classic pale pink combo. Chrome and glitter tips are particularly flattering on deeper skin because the metallic contrast pops rather than blends.

Colored French tips are also a great equalizer here. A deep berry tip on a rich mahogany base, a cobalt tip on a caramel base, a sage green tip on a warm sand base: these combinations look incredible across a wide range of skin tones and are honestly more interesting than the original anyway.
Troubleshooting the Most Common French Tip Problems
The smile line is jagged or wobbly. This happens when you try to paint freehand with a thick, round brush. Switch to guide strips, or use a thin liner brush dipped in white polish and a cleanup brush dipped in acetone to refine the edge after painting. Let each layer dry fully before adding another.
The tip looks thick and bulky. You are either using too much product at once or applying too many coats without letting them thin at the edge. Two thin coats of polish, tapered at the very edge of the nail, are always better than one heavy coat. Cap the edge by dragging the brush lightly across the very tip of the nail with each layer.
The polish is flooding the cuticle. Your brush is too loaded. Wipe one side of the brush on the bottle rim before starting each nail. Start the stroke a tiny fraction away from the cuticle, not pressed against it, and let the brush feather down toward it gently.
The tips are chipping within a day or two. The most common reason is that the free edge was never capped. Every time you apply a layer of polish or top coat, drag it lightly across the very tip of the nail. This seals the edge and significantly extends wear. The AAD also recommends moisturizing nails regularly and using a base coat as key practices for healthy, longer-wearing manicures.
The gel is lifting at the tip. This is almost always a prep issue. The natural nail must be completely free of oils, moisture, and shine before gel is applied. After buffing, wipe the nail with an alcohol-soaked pad or a dedicated nail prep wipe and let it dry completely before your base coat. Never skip this step.
Safe Removal
Whichever variation you choose, please remove it properly. Peeling polish or gel off the nail, especially if it has been on for a while, pulls layers of the actual nail plate away with it. Over time this causes thinning, peeling, and weakness.
For regular polish, a non-acetone remover is gentler on the nail but takes a little longer. For gel, the proper approach is the foil soak-off method: soak small pieces of cotton in pure acetone, press each one against a nail, wrap in foil, and wait 10 to 15 minutes. Slide the foil off and the gel should lift easily. If it does not slide off cleanly, do not force or scrape it. Rewrap and wait a few more minutes. Use a 180-grit buffer to gently remove any remaining residue, then apply cuticle oil to rehydrate the nail plate and surrounding skin.
If you are removing gel and notice any lifting that comes with discoloration, unusual texture, or pain in the nail bed, those can be signs of a fungal infection or other issue. See a dermatologist or your doctor rather than just continuing to reapply.
The Only Tool List You Actually Need
You do not need much to do any of these variations well. Guide strips or nail stickers are your single biggest investment in better results, about $4 to $8 for a large multipack. A thin liner brush or a nail art detail brush (often sold for under $10 in a set) handles cleanup and fine detail work. A small silicone applicator is the tool for chrome powder if you are going that route. A quality base coat and top coat are genuinely not optional, and you do not need an expensive brand: a solid gel-effect top coat from the drugstore does the job. A bottle of pure acetone, a pack of foil wraps or reusable clips, and a 180/240-grit buffer complete the kit. That is it. Total investment for a fully stocked French-tip toolkit runs $20 to $30 at the drugstore or online, and most of it you will use for months.

Final Thought
If I can figure out a clean smile line after a 10-hour workday at my little Chicago kitchen table, with no formal training and a cheap liner brush, you can absolutely do this. The French tip earns its timeless status because it is genuinely one of the most versatile, wearable, and adaptable nail styles there is. You do not have to start with the hard version. Start with the micro French on short nails, or the milky glaze that requires zero smile-line technique at all. Build from there.
Pretty nails are not for the steady-handed or the professionally trained. They are for anyone patient enough to try again after the first wobbly attempt. That is every single one of us.