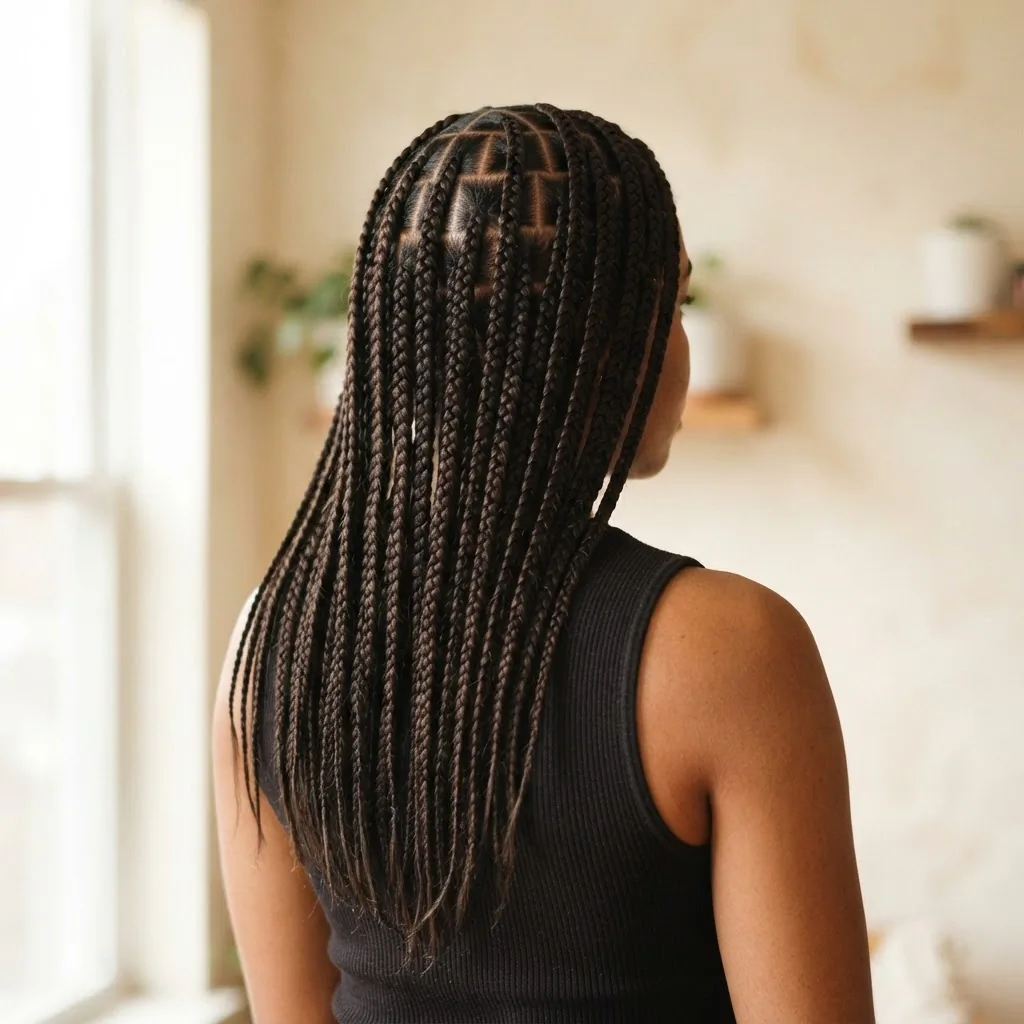
9 Knotless Braids Ideas That Are Actually Beginner-Friendly
If you have a Pinterest board full of knotless braids and a little voice in the back of your head saying “that could never be my hair,” I am writing this specifically for you.
Knotless braids have completely taken over the protective style world, and honestly, for really good reasons. They look incredible in photos, they are gentler on your scalp than traditional box braids, they move like real hair, and the styling options are genuinely endless. But between figuring out what size to get, which braiding hair to buy, how long they should stay in, and whether your hair is “the right type” for them, it can feel like a lot to sort through before you even sit down in a chair.
So here is what I want this post to be: your actual starting point. We are going to talk about nine knotless braid ideas worth saving (and actually getting), and along the way I am going to break down exactly what makes this style work, what you need to know before you book or DIY, and how to take care of them so your hair comes out healthy when it is time to take them down. No gatekeeping, no jargon, just the honest version.
First: What Actually Makes Knotless Braids Different
Before we get into the styles, it helps to understand what you are actually asking for when you say “knotless braids,” because there is a real technique difference here that affects how your hair feels, how long the style lasts, and how healthy your scalp stays throughout.
Traditional box braids start with a knot. The braider wraps synthetic hair tightly around your natural hair right at the root, which is what creates that firm, dense base. It works, and it lasts, but that knot also creates concentrated tension right at your follicle from day one. The first few days in traditional box braids can be genuinely uncomfortable.
Knotless braids use a feed-in method instead. The braid starts with just your own natural hair, and the stylist slowly feeds in small pieces of braiding hair as they work their way down each section. Because there is no knot anchored to your scalp, the tension is much more evenly distributed, the base sits flat and natural, and there is far less pulling on your hairline and scalp.

As StyleSeat’s breakdown of knotless vs. box braids puts it, the feed-in technique is gentler on the scalp and allows for more immediate styling comfort, which is a big deal when you want to throw your hair into a bun the morning after installation. With traditional braids, pulling them back too soon can be genuinely painful.
The tradeoff is that knotless braids typically cost $50 to $150 more than traditional box braids because the technique takes longer to install. They can also start frizzing a little sooner, especially if your hair texture has more natural texture to it. But for most people, the comfort, the health benefits, and the way they lay flat against your head make that tradeoff completely worth it.
For a deeper walkthrough of everything knotless from prep to aftercare, the Un-ruly complete guide to knotless box braids is one of the most thorough resources out there, and it is written specifically for Black hair.
The Size Question (It Matters More Than You Think)
One of the questions I hear most often is, “What size should I get?” and it is genuinely one of the most important decisions you make before installation, because size affects literally everything: how long they take to install, how heavy they feel, how long they last, and how much weight is sitting on each individual follicle.
Here is a quick orientation. Sizes generally run from jumbo on the large end down through large, medium, smedium (a salon shorthand for small-medium), and small on the finer end. Un-ruly’s complete guide to box braid sizes is genuinely helpful here if you want to see each size laid out visually, but in general terms, here is what you need to know.

Jumbo and large knotless braids use fewer, thicker sections of hair across the whole head, which means faster installation (usually 3-4 hours) and a bolder, high-impact look. They photograph beautifully and are a great starting point if you are new to braids and want something low commitment in terms of time. The downside is that fewer, heavier braids mean more weight concentrated on each section, and they tend to loosen at the root faster, usually around four to six weeks.
Medium knotless braids are the sweet spot for most people. They are versatile enough to style in almost any way, light enough to feel comfortable, and defined enough to look polished and neat. Most stylists recommend medium for first-timers because they strike the right balance between wear time (six to eight weeks with good care), weight distribution, and overall look.
Small knotless braids are gorgeous and incredibly detailed, but they take significantly longer to install (sometimes eight or more hours), cost more, and require your stylist to work through many more sections. That means more total time with tension on your scalp, which is worth thinking about from a hair-health perspective.
For fine hair specifically, staying in the medium to large range is generally the smarter move. Small braids on fine, low-density hair create a lot of tension on individual follicles that may not handle that weight as well as thicker strands.
9 Knotless Braids Ideas to Save Right Now
1. Classic Medium Knotless Braids
This is the foundational version, and it is a classic for a reason. Medium-sized knotless braids styled straight down (no fancy color, no embellishments, just clean parts and well-fed braids) look polished, professional, and genuinely timeless. They suit almost every face shape, work on hair from about 4 inches and up, and give you maximum styling versatility. You can wear them loose, half-up, in a high pony, or wrapped into a bun.

If you have never had knotless braids before, this is the one I would recommend starting with. Get comfortable with the style and the maintenance before you add extra variables.
2. Jumbo Knotless Braids
Jumbo knotless braids are having a serious moment on Pinterest and TikTok right now, and the appeal is obvious. They are bold, they install faster than any other size (usually under four hours), and they have a retro-meets-modern energy that photographs incredibly. Because you are working with larger sections of hair, the parts need to be cleaner and wider to support the weight of each braid, so clean parting is key here. These are a great option if you want the knotless look without a full-day installation, and they work especially well on medium-to-thick natural hair.
3. Boho Knotless Braids
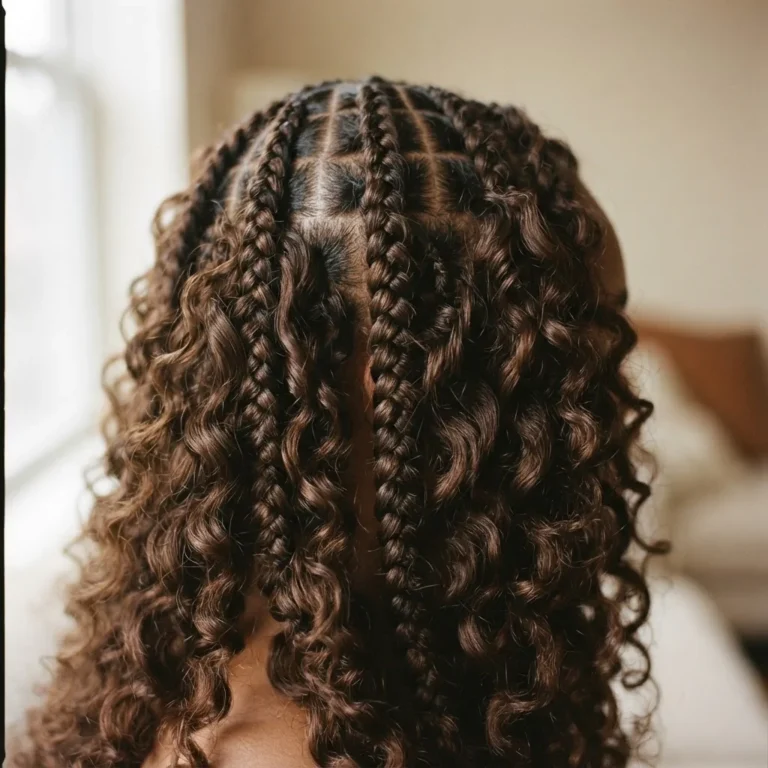
Boho knotless braids are hands down one of the most-pinned styles right now, and they look significantly more complicated than they actually are. The technique involves weaving loose curly or wavy hair (usually human hair or a high-quality curly synthetic) into the braid at intervals and around the edges, creating that effortless, flyaway, festival-ready look. The curly pieces are not a separate step added after installation. They are fed in during the braid, which is why stylist skill really matters here.
For maintenance, the loose curl sections need a little more attention than a standard braid.

Finger-detangle those sections gently rather than brushing or combing, and keep a water-based leave-in conditioner on hand to refresh them. This is where Swella Braid Bar’s knotless braid care guide genuinely comes in handy. They are a professional braiding studio that has distilled a lot of real-world maintenance wisdom into one place, including the note that water-based products keep natural hair inside the braid hydrated without the buildup that heavy oils create.
4. Knotless Braids with Beads
Adding beads to knotless braids is one of the simplest ways to make a straightforward style feel elevated and personalized. Gold metallic cuffs give a warm, editorial look. Colorful wooden or acrylic beads add a playful, maximalist energy. Shell beads lean bohemian. The key is to use lightweight beads and not to pile too many onto a single braid, because extra weight at the tip of each braid adds pull over time. Space them out, mix sizes, and have fun with it.

5. Knotless Braids with Curly Ends
Similar to the boho version but a little more structured and polished, this style keeps the body of each braid clean and smooth and lets the ends flare out into loose curls. The curls come from dipping the ends of the braiding hair in warm water (if it is a crinkle or kinky texture that activates with heat) or from leaving out a bit of naturally curly hair at the tips. This is a fantastic option for people who want just a little texture and personality without a full boho installation.
6. Large Knotless Braids with Color
Color has become one of the biggest trends in knotless braids, and the good news is that you do not need to color your own hair at all to try it. Pre-colored braiding hair comes in every shade imaginable, from warm auburn and honey blonde to lavender, cobalt blue, and vivid burgundy. The most wearable trend right now is what people are calling “peekaboo color,” where one or two layers of braids underneath are done in a contrasting shade that catches the light when you move. It is subtle enough for a work environment, eye-catching enough to make your Pinterest followers double-tap. A budget tip: you can add a single pack of colored pre-stretched braiding hair to your order alongside your natural shade, and your braider can weave it in strategically for the layered effect.
7. Knotless Braid Bob
The knotless bob is one of those styles that always stops the scroll. It sits anywhere from chin to shoulder length and creates this incredibly clean, structured silhouette. If you usually wear your braids mid-back length and are nervous about going shorter permanently, knotless braids are actually a great way to experiment with a bob length without cutting your own hair. Ask your braider to cut and seal the braiding hair to your preferred bob length. You get the look, and your actual hair is safe underneath.
8. Knotless Braids Styled Up
This is less a specific size or color choice and more a reminder that knotless braids are one of the most versatile protective styles you can get in terms of daily styling. You can wear them in a high bun, a half-up half-down look, a low pony, twisted into an updo, or clipped back with a claw clip. The fact that there is no bulky knot at the root means they lay flat enough to actually work in sleek styles, which traditional box braids sometimes struggle with. FroHub’s roundup of 25 ways to style knotless braids is full of visual inspiration if you want a reference for how many directions one install can take you.
9. Knotless Braids Tailored to Your Texture
This one is less a single aesthetic and more a category worth calling out on its own: knotless braids customized by hair type. For 4c natural hair, which has significant shrinkage and a coarser texture, the feed-in technique works especially well because the natural hair grips the braiding hair without needing a tight knot to anchor it. For finer or lower-density hair, going larger in size, using lightweight pre-stretched braiding hair, and keeping the install time to the lighter end of the tension spectrum are all smart calls. For transitioning hair (part natural, part relaxed), the texture difference between your roots and ends means extra care during parting and feed-in to avoid unnecessary stress on the line of demarcation.
How Much Braiding Hair Do You Actually Need?
This question causes so much unnecessary stress before a braid appointment, so let me simplify it. Most stylists recommend between five and seven packs of pre-stretched braiding hair for medium to long knotless braids, and around four packs for a shorter style. Jumbo braids will sit on the lower end of that range because each braid uses more hair per section. Small braids can actually use more packs total because there are more individual braids.
The most commonly recommended brands across Reddit threads, YouTube tutorials, and community forums are X-Pression Pre-Stretched (widely considered the go-to for knotless because of its light weight and easy braid-ability), Outre X-Pression, and EZ Braid. All three are available at most beauty supply stores and typically run between $5 and $10 per pack, which makes pre-stretched braiding hair one of the most budget-friendly parts of this whole style. If your stylist has a preferred brand, defer to them. Working with a hair they know makes a genuine difference in the finished result.
The Scalp and Health Conversation Nobody Wants to Skip
I know this is not the most Pinterest-aesthetic part of the article, but it is one of the most important, and I would be doing you a disservice if I glossed over it.
Knotless braids are genuinely gentler on your scalp than traditional box braids because the tension is distributed along the length of the braid rather than concentrated at the root. That is a real, meaningful difference. But “gentler” does not mean “zero risk.” The American Academy of Dermatology notes that hairstyles that pull on the hair, including tightly braided styles, can contribute to traction alopecia, which is gradual hair loss along the hairline and temples caused by repeated or sustained tension on the follicle. A 2018 peer-reviewed study published in the International Journal of Women’s Dermatology found that traction alopecia affects roughly one-third of women of African descent who wear traumatic hairstyles long-term, which tells you this is not a rare or theoretical risk.
The good news is that knotless braids, when installed with reasonable tension and taken down within the recommended window, are one of the safer braided protective styles. Here is what actually protects you: choosing an experienced braider who understands light-tension installation, not wearing your braids too tight or too small for your hair density, keeping the install in no longer than eight weeks, giving your hair a full break between installs, and never pulling your braids into a tight ponytail every single day.
If your scalp feels sore, inflamed, or you notice thinning around your hairline after removal, those are signs worth taking seriously. A dermatologist or trichologist can assess whether there is damage and what your next steps should be.
Keeping Them Fresh: A Beginner’s Maintenance Cheat Sheet
The first thing to know is that knotless braids require a lot less daily effort than your natural hair does, which is part of the appeal. But “low maintenance” does not mean zero maintenance. Here is the simple version.
At night, wrap your hair in a satin scarf or sleep on a satin pillowcase. This one step makes a dramatic difference in how long your braids stay smooth and frizz-free. Cotton pillowcases create friction that breaks down the braid structure and dries out the hair inside.
Every week or so, give your scalp some attention. A small amount of a lightweight oil or aloe-based spray applied directly to the scalp (not piled onto the braids themselves) keeps things hydrated without buildup.

If you are noticing flakiness or buildup, stylists commonly recommend a diluted apple cider vinegar solution applied with a cotton ball along your parts.
Yes, you can wash your braids. Wash every two to three weeks, dilute your shampoo, focus on the scalp, rinse thoroughly, and squeeze (do not rub) to dry. A bit of frizz afterward is completely normal and settles down.

If you want to smooth it out faster, apply a mousse and tie a silk scarf over your braids for an hour.
Take them out before eight weeks. I know that feels earlier than you want, but braids left in too long develop knots and tangles at the roots that lead to serious breakage during removal. The style wearing beautifully for six weeks and coming out cleanly is a much better outcome than eight weeks of subtle tangling that you pay for when you finally take them down.
Before You Book: A Few Honest Notes
If you are going to a professional, which I strongly recommend especially for your first time, ask to see their work, specifically on hair similar to yours in density and texture. Look at their hairline work. Clean, undisturbed edges are the sign of someone with genuinely light hands. Scroll their social media. Read their reviews. A braider who has installed knotless braids hundreds of times will make your scalp feel completely different from someone still building that technique muscle.
If you are thinking about DIY, it is doable with practice, but knotless braids are genuinely more technique-dependent than most beginner tutorials let on. The feed-in tension, the evenness of the parts, and the gradual feeding of hair are all things that take time to feel natural. Consider starting on a friend before you attempt your own head, or practice on a mannequin head first so you can see what you are doing without craning your neck.
Either way, make sure your hair is freshly washed, fully detangled, and blown out or stretched before you sit down. Trying to braid on shrunken or tangled hair creates uneven tension from the start, and that is where the scalp stress begins.
The Bottom Line
Knotless braids earned their place as the go-to protective style for a reason. They are comfortable, beautiful, endlessly adaptable, and genuinely gentler on your scalp than the knot-based alternative. Whether you go jumbo for a bold statement, medium for maximum versatility, or dive straight into a full boho install with curly flyaways, there is a version of this style that works for your hair, your budget, and your life. The key is going in informed: the right size for your hair type, the right braider with the right tension, a good aftercare routine, and a realistic timeline for taking them down.
You have the mood board. Now you have the plan. Go get those braids.