How to Do a Micro French Manicure (No Shaky Hands Needed)
Let me tell you what happened the first time I tried a micro French tip on myself. I had steady-ish hands from months of dotting tool practice, a striping brush I ordered off Amazon for three dollars, and approximately zero patience. The first nail looked like a seismograph reading. The second one was pretty good. By nail five, I had genuinely figured it out. That is the honest version of “it just takes practice,” and it is the version I am here to walk you through.
The micro French manicure is arguably the most quietly impressive nail look circulating right now. It does not scream for attention. It just makes your hands look polished, deliberate, and somehow expensive whether you are in a board meeting, at a brunch, or heading to a wedding. The whole appeal is that thin, precise little line that sits right at the free edge of the nail, and the reason so many people assume it requires a professional is exactly that: the line is so tiny that any wobble feels obvious. But I am going to show you it really does not need to be.
Below I am covering everything: what a micro French actually is, the tools that make it genuinely doable, how to prep your nails properly, 10 different looks you can recreate at home (including colored tips, chrome finishes, and glazed variations), and how to troubleshoot the moments when things go a little sideways. Short nails, welcome here. Beginners, especially welcome.
What Actually Makes It “Micro”
The classic French tip, the one your mom probably got in the 90s, runs about 3 to 5 millimeters of white across the tip of the nail. It is visible from across the room, which was very much the point at the time. The micro French shrinks that line down to roughly 1 to 2 millimeters, sometimes even less. The result is a tip that reads more as a barely-there rim of color or shimmer than a bold white band, and it looks just as refined on a short natural nail as it does on a longer set.
As InStyle notes in their micro French overview, the design is essentially a modern, minimalist take on a formal classic that works because it sits so close to the natural edge of the nail that it almost looks like an extension of your nail itself. It is sometimes called a “skinny French,” a “thin French tip,” or a “baby French.” Same look, different names. What ties all the current versions together is that the tip line is so small it forces precision, and that precision is what makes the finished result look so intentional and expensive.
The Tools That Actually Make This Work
Here is my honest take: most people who try a micro French for the first time fail not because their hands are unsteady, but because they use the wrong brush. A standard nail polish brush is designed to cover the whole nail, not draw a 1-millimeter line. Using it for a micro tip is like trying to write your signature with a paint roller. So before we talk technique, let us talk tools.
The striping brush (your best friend for freehand). This is a very thin, long-bristled nail art brush, usually sold as a “00 liner brush” or “nail striping brush.” The bristles are long enough to hold polish evenly and narrow enough to deposit just a hairline of color. Striping brushes in nail art sizes run about $3 to $8 each, and the cheap ones work just as well for this technique as the expensive ones. You can dip it into the cap of your polish or decant a small drop onto a palette.
French tip guide tapes and nail vinyls (your best friend for precision). If freehand sounds terrifying, guide tapes are genuinely the most beginner-friendly solution in existence. These are small adhesive stencils you press just below the tip of your nail. You paint over the exposed tip area, peel the tape, and you have a clean, crisp line. What’s Up Nails makes French tip guide vinyls that come in multiple curve sizes for about $5 to $8 a sheet, which covers multiple manicures. The key for micro French specifically is to position the tape very close to the free edge, leaving only 1 to 2 millimeters of nail tip exposed above it.
An angled cleanup brush and acetone. This is the secret weapon that separates a good manicure from a great one. After you paint your tip, tiny imperfections at the edges are normal and expected. A thin angled brush dipped in acetone (or pure nail polish remover) lets you erase and sharpen those edges in seconds. Keep one nearby every time.
A good base coat and top coat.

For regular polish, a sticky base coat helps your color adhere and protects your natural nail. For gel, a proper bond base is non-negotiable. A glossy top coat seals everything and gives you that glass-finish depth.
For the gel version: a UV or LED lamp to cure each layer. Most beginner-friendly at-home gel systems use LED lamps that cure in 30 to 60 seconds per layer, making the whole process much more manageable than it sounds.
Nail Prep: The Step You Cannot Skip
I know, I know. Every nail tutorial tells you to prep your nails and you skip it because you just want to get to the fun part. I did this for years. And then I finally did a proper prep routine and was genuinely shocked by how much longer my polish lasted and how much better the micro tip line looked. A smooth, clean nail surface makes the precision work dramatically easier.
The American Academy of Dermatology recommends keeping nails clean and dry, filing them in one direction to avoid splitting, and leaving the cuticles alone rather than cutting them, because the cuticle is your nail’s natural barrier against bacteria and fungi. For our purposes, that means: remove all old polish completely, wash your hands, push back cuticles gently with a rubber-tipped cuticle pusher (never cut them unless you are a trained tech), and buff any ridges on the surface very lightly with a 180-grit buffer. Finish by wiping each nail with a lint-free pad soaked in isopropyl alcohol or acetone. This removes the oils that would cause your polish to lift or bead up.
For gel specifically, this prep step is even more important. Oil on the nail plate is the number one cause of gel lifting within the first day or two, and lifting is even more obvious on a micro French where you are looking right at the edge of the nail.
How to Do a Classic White Micro French: Step by Step
This is the foundational technique. Once you have this one down, every variation below becomes a remix of these same moves.
Step one: Apply your base coat. Cover the whole nail and cap the free edge (run the brush along the very tip of the nail) to seal it. Let it dry fully, or cure it if you are using gel.
Step two: Apply your base color if using one. Many micro French looks sit on a sheer nude, a soft pink, or a milky white base. This is optional for a naked-nail micro French but lovely for a more polished look. Apply in thin layers and let each dry.
Step three: Place your guide tape or pick up your striping brush. If using tape: press it gently just below where you want your tip line, smoothing out any bubbles. Leave only 1 to 2 millimeters of free edge exposed above it. If going freehand: load your striping brush lightly with white polish, wipe excess on the bottle rim, and use the side of your finger resting on a stable surface as a brace.
Step four: Paint the tip. For freehand, start at one side of the nail, draw across in one slow, steady motion, and do not panic if it is not perfect on the first pass. You can add a second pass or clean up with your acetone brush. For tape: apply polish over the exposed tip, let it get barely tacky, and peel the tape back slowly at a low angle (not straight up, which can pull fresh polish with it).
Step five: Clean and refine.

Use your angled acetone brush to sharpen edges, remove any flood onto the skin or cuticle area, and even out the line. This step takes about 30 seconds and it is where the magic happens.
Step six: Seal with top coat. Apply a glossy top coat over the whole nail and cap the free edge again. This locks in the tip, adds depth and shine, and extends wear.
For gel application: the process follows the same sequence but each layer (bond base, color base, white tip) gets a full cure in your LED lamp before the next layer goes on. When you apply the white gel for the tip, cure it, then apply top coat and cure again. Always cap your free edge with top coat as well, since an unsealed edge is where gel starts to lift and peel.
10 Micro French Manicure Looks to Try at Home
Here is where it gets fun. The classic white-on-nude micro French is beautiful, but it is just the starting point.
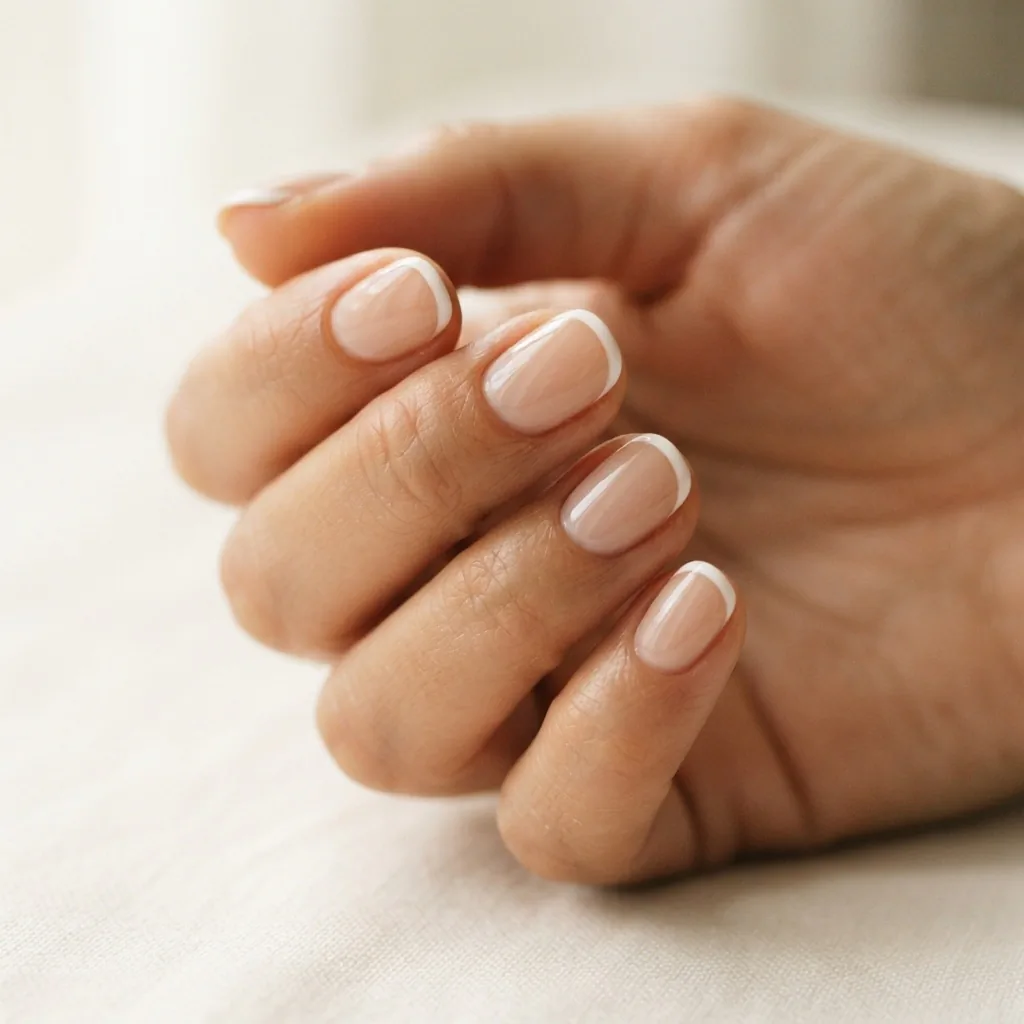
Look 1: The Classic White Micro French. White tip, sheer nude or natural base. The most versatile version in existence. Works at every occasion from a job interview to a first date. For short nails, keep the tip line as thin as possible (closer to 1 millimeter) so it reads as a clean rim rather than a chunky cap.
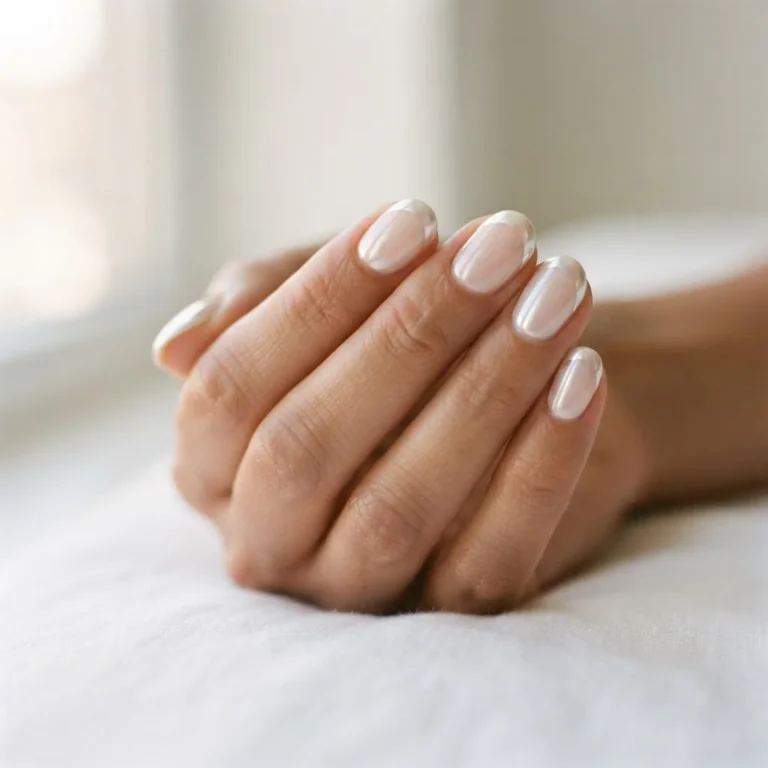
Look 2: The Glazed Micro French. Apply a sheer milky-pink or nude gel base, cure it fully, then rub a pearl white chrome powder onto the tacky layer using a silicone foam applicator. The chrome adheres to the tackiness without a top coat underneath it. Then apply top coat over everything and cure. The result is a soft, luminous finish across the whole nail that echoes the glazed donut trend with the micro tip line barely visible underneath the shimmer. This is one of the most pinned nail looks right now for a reason.
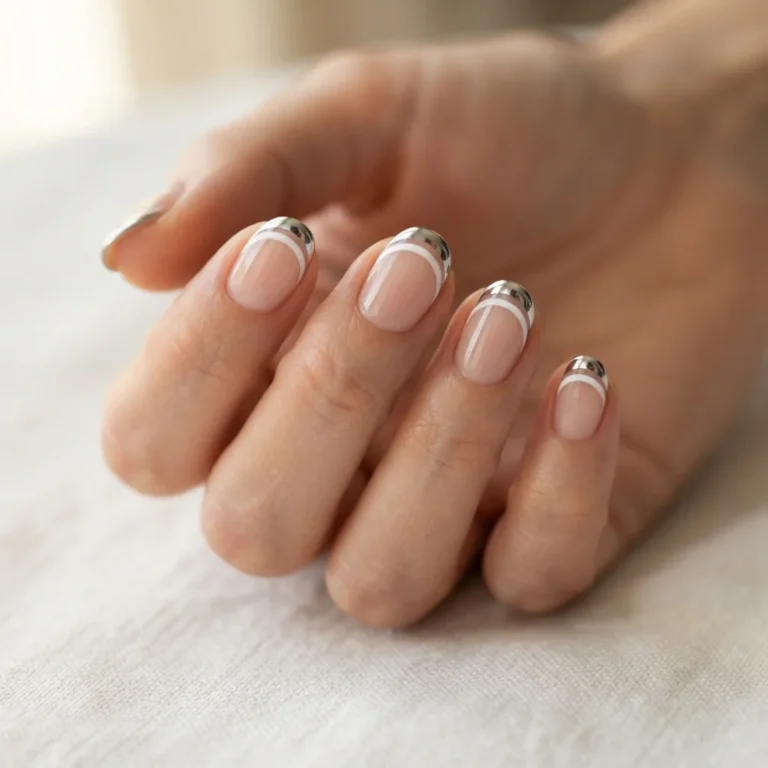
Look 3: Chrome Tip Micro French. Instead of chrome all over, apply it just to the tip area after your base color, using your guide tape to keep it precise. Silver chrome over a sheer base reads ultra-modern. Rose gold chrome over a warm nude is incredibly flattering on deeper skin tones.
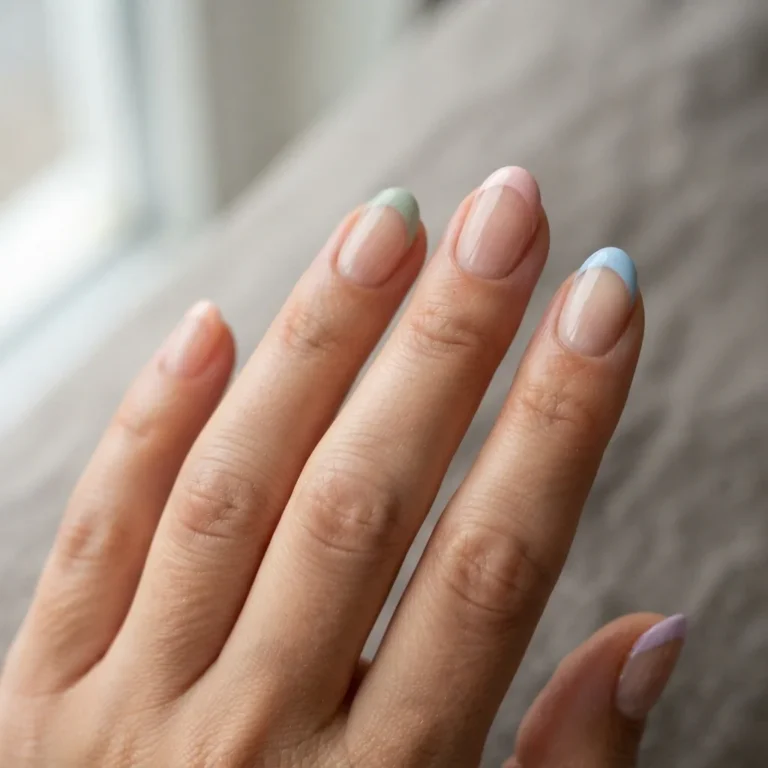
Look 4: Colored Tip Micro French. Swap white for any color you love: dusty lilac, warm terracotta, sheer red, navy, chocolate brown, sage green. The micro size of the line keeps even a bold color feeling subtle and chic rather than overwhelming. This is a great experiment for anyone nervous about committing to color.
Look 5: Ombre or Gradient Micro French. Using a tiny bit of sponge or a fan brush, blend the tip color slightly inward from the free edge so it fades from your chosen hue to nothing. This softens the line and works beautifully for a more romantic or bridal look.
Look 6: Double Micro French. Two lines instead of one. Apply your first thin white tip, let it set, then paint a second even thinner line in a contrasting color just inside the first. Think white tip with a barely-there gold line just below it. Advanced-looking but genuinely achievable with a striping brush.
Look 7: Black Micro French. A thin black tip on a sheer or nude base is one of the most unexpectedly cool looks you can do. It reads edgy but refined, not gothic at all. Great for fall and winter, or anytime you want your nails to feel a little more interesting without being high-maintenance.
Look 8: Micro French on Short Nails. Short nails are actually ideal for the micro French, not a limitation. The thin line proportionally works beautifully on a short nail because it defines the free edge without adding visual length that looks fake. File your short nails into a soft round or squoval shape (a square with slightly softened corners), which gives your micro tip the most flattering arc. Keep the tip line at 0.5 to 1 millimeter.
Look 9: Negative Space Micro French. Instead of painting the tip over your base color, leave a clean gap of bare nail between your base color and a very thin colored line right at the very edge. The negative space adds dimension and looks intentional rather than unfinished. Best achieved with guide tape.
Look 10: Micro French with Nail Art Accent. Keep your micro French as the base and add one small accent nail: a single tiny star stamped in gold on the ring finger, a dot of rhinestone at the corner of the tip, or a delicate floral done with a detail brush.

This way you get the clean, everyday elegance of the micro French with one nail that makes your hand feel like a whole moment.
Nail Shape and Length: How It Changes the Look
One thing I wish more tutorials addressed: the same technique looks different depending on the shape of your nail, and adapting it slightly for your shape is the difference between a micro French that looks custom and one that looks slightly off.
On a round or oval nail, the natural curve of the free edge means your tip line follows a gentle arc. This is the most forgiving shape for freehand application because the natural curve guides your brush.
On a square nail, the tip line sits across a flat edge and can look very sharp and architectural. This is stunning if that is your aesthetic, but the corners are where you are most likely to flood with polish, so clean up those corners carefully.
On an almond or stiletto nail, the tip line follows the nail’s own tapering shape, getting narrower at the point. It ends up looking almost like a crescent at the tip rather than a straight line, which is naturally beautiful.
On a squoval (the most popular everyday shape right now), you get a gentle softened corner that makes the micro tip look clean and modern without the strictness of a full square.
For very short nails or bitten nails that are still growing back: round is your most flattering shape, and the micro tip in a sheer or nude color rather than a stark white will look more proportional and intentional.

Troubleshooting: When Things Go Wrong
Knowing what to do when a step goes sideways is, honestly, more useful than any ideal-conditions tutorial. Here is what most beginners run into.
Wobbly tip line. This is almost always a tool issue or a pressure issue. If you are using a striping brush, you may be pressing too hard or loading too much polish. Try wiping more product off the brush and letting the bristles do the work with almost no pressure. If you are using tape and the line is jagged, your tape probably had a bubble or was not pressed down firmly. Press tape edges down with an orange stick before painting.
Polish bleeding under the tape. This happens when polish is too thick or too wet when you peel. Let your tip color get barely tacky before pulling the tape, and always pull at a low angle slowly.
Uneven thickness. One side of the tip looks thicker than the other. This is extremely common and the cleanup brush fixes it in seconds. Dip your angled brush in acetone, tap off the excess, and gently erase the thicker side until both sides match.
Flooding the cuticle. Go back to your prep. Polish floods the cuticle area most often when there is too much product on the brush or when the cuticle was not pushed back far enough before painting. Apply polish at the base of the nail with a tiny gap between the polish and your skin, then lay the color down rather than pushing it into the sidewalls.
Gel tip peeling at the edge. Almost always a capping issue. If you did not run the brush along the very tip of the free edge during every gel layer (base, color, top coat), moisture and daily wear will start lifting from that unsealed edge. It feels tedious, but capping takes two extra seconds per nail and it genuinely doubles the lifespan of your gel.
Gel lifting within the first day or two. Go back to prep.

Oily nail plates, product residue, or skipping the bond base step are the most common culprits. The FDA’s nail care products page notes that nail products are generally safe when used as directed, and for gel systems that means following the brand’s full prep sequence, not skipping steps.
A Note on Gel, HEMA, and Your Skin
Since a lot of you will be doing the micro French in gel, this is worth a moment of honesty. Many gel polishes contain HEMA (2-hydroxyethyl methacrylate), which is a monomer used to help the product adhere. Most people use gel polish with no issues at all. However, HEMA is a known sensitizer, meaning some people develop a contact allergy to it over time, especially with repeated skin exposure during application. A 2024 peer-reviewed study found that HEMA patch testing identifies approximately 85 to 93 percent of patients with acrylate allergy, which tells you both that the allergy is real and that it is diagnosable.
The practical steps to protect yourself are simple: avoid getting uncured gel on your skin during application, wash your hands after applying and before curing, and if you notice itching, burning, redness, or swelling around your nails or fingertips after using gel products, stop using them and see a dermatologist. These reactions can also develop after years of problem-free use, not just on the first try, so they are worth staying aware of. If you want a HEMA-free option, several brands now formulate their gel polishes without it, and those are worth looking at if you have sensitive skin.
Safe Removal: Please Do Not Peel
I am going to ask you one thing: please do not peel your gel off when you are done with your micro French. I know it is satisfying in a deeply chaotic way, and I know we have all done it. But peeling gel removes layers of your actual nail plate with it, leaving the surface thin, weak, and chalky, and that damage takes months to grow out.
The right way, according to board-certified dermatologists at the AAD, is the acetone soak-off method: file the shiny top coat surface gently to break the seal, soak cotton pads in 100% pure acetone, place them on each nail, wrap each finger in small squares of foil, and leave everything in place for 10 to 15 minutes. The gel will soften enough to slide off with light pressure from an orange wood stick. Finish with cuticle oil and a hand cream, because acetone is drying and your nails and cuticles will thank you for the moisture immediately after.
Do not use gel nail polish removers that contain methylene chloride. The FDA has flagged several products marketed as gel nail polish removers containing this ingredient, and it carries serious health risks when inhaled in poorly ventilated spaces.
UV and LED Lamp Safety
One quick note for gel users, because it comes up. UV and LED nail lamps emit radiation in the UV-A range, and a widely circulated 2023 study raised concerns about DNA damage with cumulative exposure. A more recent 2025 analysis in PMC concluded that UV nail lamp exposure does not significantly increase lifetime skin cancer risk at typical use levels. Even so, MD Anderson Cancer Center suggests that applying broad-spectrum sunscreen to your hands before curing, or using fingerless UV-protective gloves with the fingertips exposed, is a simple and reasonable precaution if you are curing frequently. This is especially worth noting if you are doing gel nails on yourself every two to three weeks.
Micro French for Every Occasion
Part of why this look has staying power is its genuine versatility.

The classic white micro tip on a nude base is acceptable in a professional environment and still feels pretty enough for a night out. The glazed or chrome variation dresses up effortlessly for a wedding, a formal event, or a date. A colored micro tip (burgundy, navy, black) gives the same clean precision with a bit more personality. Bridal nail trends right now are leaning heavily into micro French in gel with a soft sheer base, and the reason is obvious: it photographs beautifully, it does not distract from the ring, and it will not look dated in photos years later.
The Honest Practice Reality
I want to be real with you about the freehand method in particular. The first attempt will probably have some wobbles. The tape method will get you cleaner results faster if you are brand new to nail art. After a few practice sessions with the striping brush, your hand will find its natural rhythm and the muscle memory develops quickly. I remember feeling like my hands were hopeless during my internship dotting-tool phase, and then one afternoon everything just clicked into place. If I could do this after a 10-hour workday with a three-dollar brush from Amazon, you can absolutely do it at a relaxed Saturday afternoon kitchen table. Give yourself two or three tries before you judge the result.