Struggling to Style Your Bangs? Here’s What Actually Helps
So you got bangs. The salon appointment was perfect. The stylist blew them out, you caught a glimpse in the mirror on your way out the door, and you thought, yes, this is the era. Then you woke up the next morning, looked in the mirror, and your bangs were doing something completely different. Something that required an explanation.
I have been there. Not just as a beginner but as someone who spent years as a salon assistant, watching clients walk in every week specifically because they could not figure out how to recreate what their stylist had done. Bang styling was one of the most common “I give up” conversations I heard on the floor, and it does not have to be.
Here is what I want you to know before we go any further: learning how to style bangs is a real skill, and it takes a little practice to land it. That is not a warning, it is a permission slip. You are not doing it wrong because you are bad at hair. You are doing it for the second time ever. Give yourself that grace, and then let me walk you through everything that actually works.
Understanding Your Bangs Before You Touch a Tool
The first and most important thing is knowing what kind of bangs you are working with, because the technique genuinely changes depending on the style. I see a lot of beginner tutorials that treat “bangs” as one monolithic thing, and then people end up using a curtain bang technique on blunt fringe and wondering why nothing is landing.
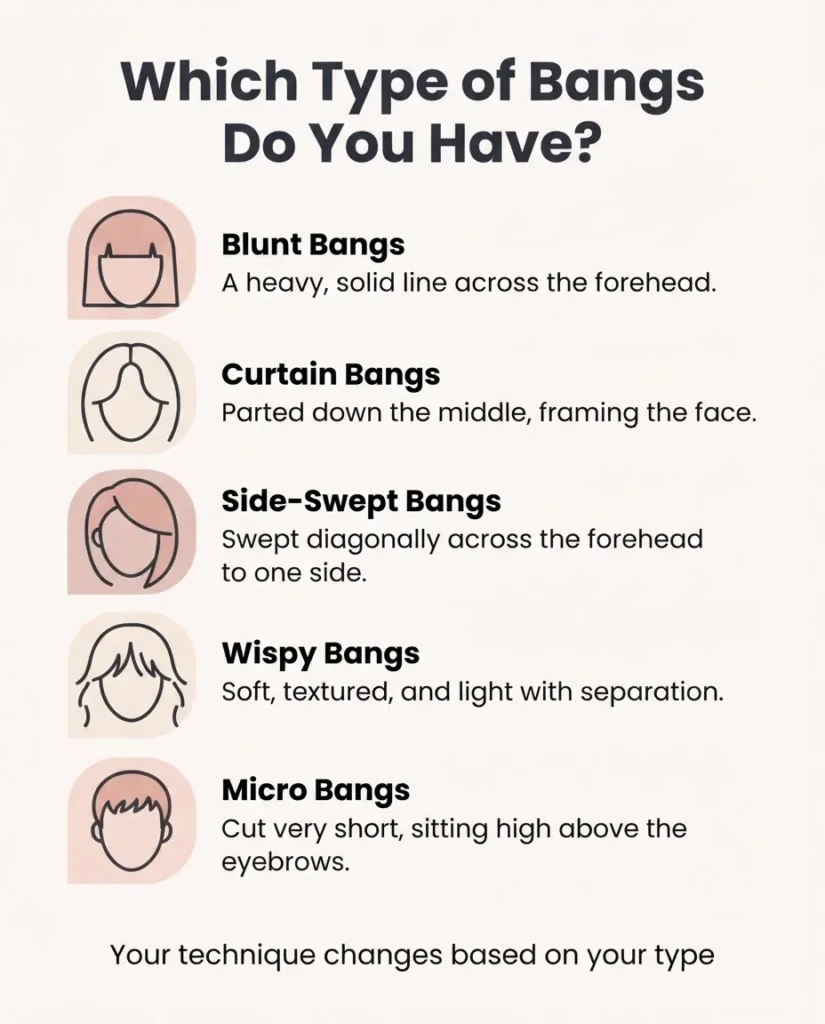
Here is a quick breakdown of the most common types you will encounter:
- Blunt bangs are cut straight across with a solid edge. They are thick, bold, and need a lot of precision in the blow-dry to look polished rather than heavy.
- Curtain bangs are parted down the middle (or close to it) and sweep out away from the face on both sides. They are softer, more forgiving, and extremely popular right now for a reason.
- Side-swept bangs fall across the forehead in one direction. They are versatile and suit almost every face shape.
- Wispy bangs are thinner, lighter, and more effortless-looking. They work beautifully on fine hair and have a very low-maintenance, lived-in vibe.
- Micro bangs are short, cropped, and bold. They are honestly one of the harder styles to style yourself and require precision.
Once you know which category you are in, the tips below will make a lot more sense.
The Tools That Actually Matter (and the Budget Swaps)
You do not need a salon setup to style bangs well. But having the right tools does make a meaningful difference, and I want to be honest with you about which ones are worth buying and which ones are optional.
The foundational tool is a good round brush. For bang styling, you want a smaller diameter than you might use for a full blowout. A round brush somewhere between 1 and 1.5 inches in diameter gives you enough curve to shape the bang without over-curling it. The Sam Villa round brush guide for bangs is one of the most practical professional references I have come across for understanding brush size and bristle type by hair texture. Their educators break it down in a way that actually makes sense for home styling, not just a salon environment.
Budget-friendly round brushes that work well for bangs include options from Conair and Diane, both widely available at drugstores for under $15. You do not need to spend $50 on a brush to get a solid result.
You also need a blow dryer with a concentrator nozzle. That narrow attachment that focuses the airflow is not optional for bang styling. It is what gives you control over direction. Without it, you are essentially blowing air at your hair from every angle and hoping for the best. Most drugstore blow dryers come with a concentrator included.
A pintail or rat-tail comb is genuinely useful for sectioning your bangs off from the rest of your hair before you start, especially if your bangs blend into layers around your face. Sectioning clips or bobby pins hold everything else out of the way while you work.
Velcro rollers in a small to medium size are a great alternative if you want to go lower on the heat. More on that below.
Finally: heat protectant. I cannot skip this one. The American Academy of Dermatology notes that excessive heat causes real damage regardless of hair type, and the AAD’s tips for healthy hair specifically call out limiting heat tool use and using protective products when you do style with heat. Your bangs are short, which means the heat tool is close to your scalp and working on the same section of hair repeatedly. A light spritz of heat protectant before every blow-dry session is one of the most protective habits you can build.
The Classic Blow-Dry Method, Step by Step
This is the foundational technique that most bangs need, and once you get comfortable with it, the whole process takes about three to five minutes on a good day.
Start with your bangs slightly damp, not soaking wet. If you just showered, rough-dry the rest of your hair first and come back to your bangs when they have gone from dripping to just damp. Styling completely wet bangs makes it harder to control the shape, and they tend to dry with more volume and less direction than you want.
Clip the rest of your hair back and focus entirely on the bang section. Pick up your round brush and your dryer, concentrator nozzle attached.
For blunt bangs, roll the brush under the bang section at the roots, pointing the dryer nozzle downward from above your forehead rather than directly at the front of your face. The stylists Byrdie consulted for their bang styling breakdown consistently recommend sweeping the bang section side to side under the brush while keeping that nozzle directed down. This smooths the cuticle, reduces frizz, and gives you that clean, flat edge without pressing the bang flat against your forehead.
For curtain bangs, you want to split the bang section down the middle first. Take the left half and roll your brush under it, directing the hair slightly out and away from your face as you dry. Then repeat on the right side. The goal is that soft outward sweep, like a curtain parting, rather than pushing everything straight back.
For side-swept bangs, you are drying everything in the direction it will ultimately fall. So if your bangs sweep to the left, keep tension going to the left throughout the entire drying process. You can roll the brush underneath for volume or use a comb for a flatter, sleeker finish.
Roll to the ends, hold for a second, release, and then let that section cool before you move on.
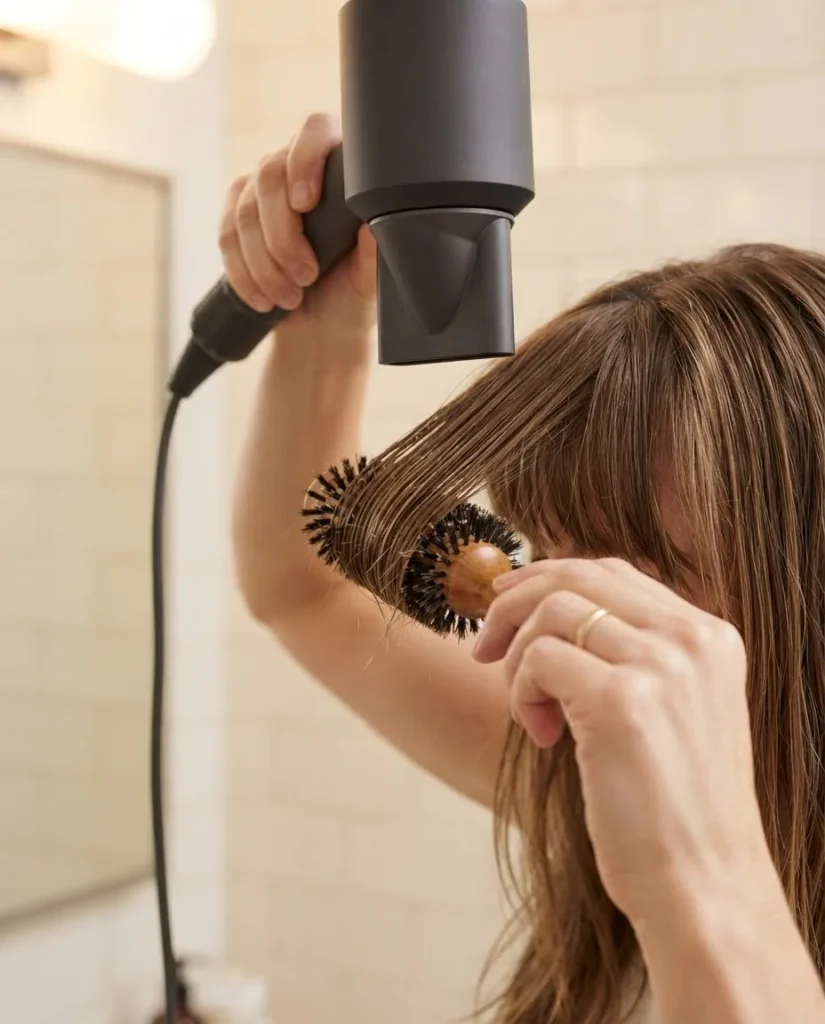
That cooling step is where the shape actually sets. A lot of beginners skip it and then wonder why their bangs immediately fall flat.
If You Have a Cowlick, Read This First
Cowlicks in the bang area are genuinely one of the hardest styling challenges, and if you have one, you have probably already discovered that your bangs want to part somewhere strange or spike up at the root no matter what you do. This is the thing nobody tells beginners, and it leads to a lot of frustration.
The trick is working with the cowlick rather than fighting it. Sam Villa’s professional tutorial on how to blow dry bangs when you have a cowlick is genuinely one of the most helpful resources out there for this specific problem. The core technique involves misting the bang section, using a comb to direct the hair as you dry, and using tension to train the growth pattern rather than battling it. It takes a few tries to feel natural, but it works.
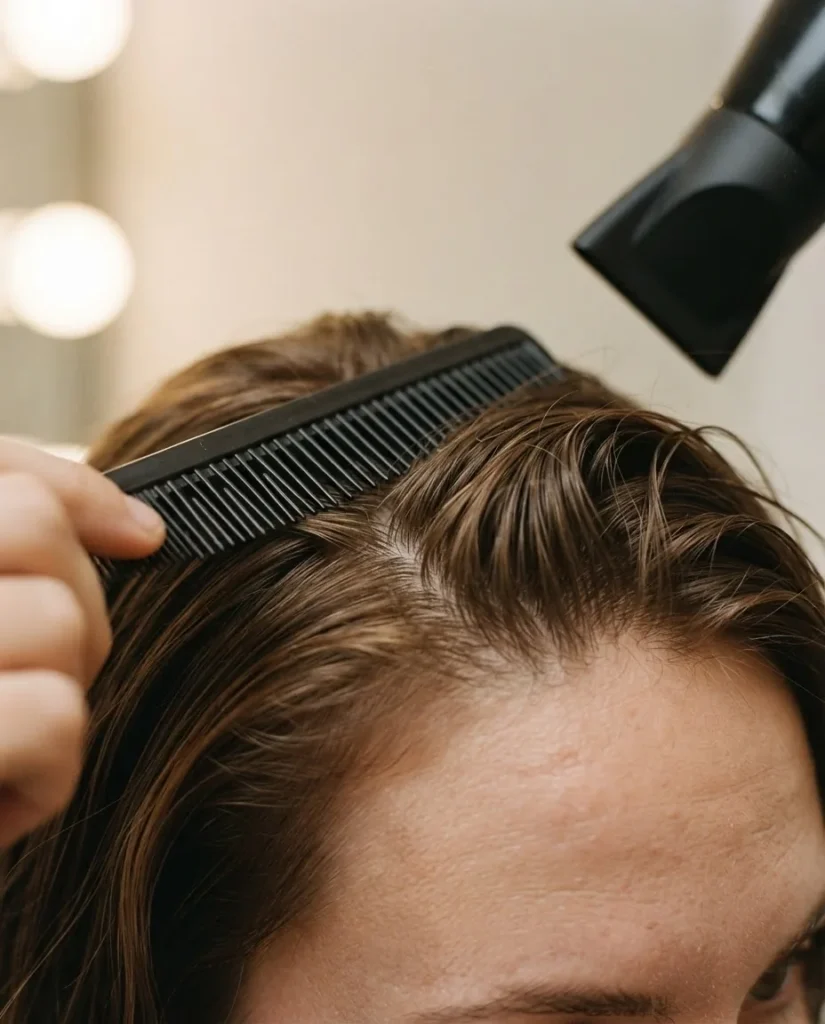
One thing to know: the earlier in the drying process you apply that directional tension, the better. If your hair is almost dry before you start working with the cowlick, you have already lost that window. Start immediately, while the hair is still damp and moveable.
The Heatless Option (For When You Want to Give Your Hair a Break)
I am a big advocate for giving your hair days off from heat tools, and bangs are actually one of the easiest things to style heatlessly once you know the method. The AAD recommends reducing blow dryer frequency as one of the most effective ways to limit styling damage over time, and I think that is worth actually building into your routine rather than just nodding at.
The velcro roller method is my favorite low-heat option for bangs. Take your bang section when it is slightly damp (again, not soaking), roll the velcro roller under the section from the ends toward the roots, and let it sit while you do the rest of your makeup or morning routine. When you take it out, use your fingers to gently shape the bang and follow up with a light spritz of hairspray if you need hold.
For curtain bangs specifically, this method works beautifully because the roller creates that natural outward curve without you needing to manage a brush and a dryer at the same time. A lot of beginners actually find this easier than the full blow-dry approach until they build more confidence with tools.
Another heatless option that works for side-swept bangs is the pin-set method. Style your damp bangs in the direction you want them to fall, use a clip or pin to hold them in place, and let them air dry. Takes longer, but zero tool skill required.
Adjusting Your Technique by Hair Type
This is the piece most tutorials skip entirely, and it is genuinely why techniques that work beautifully for one person leave another person completely frustrated.
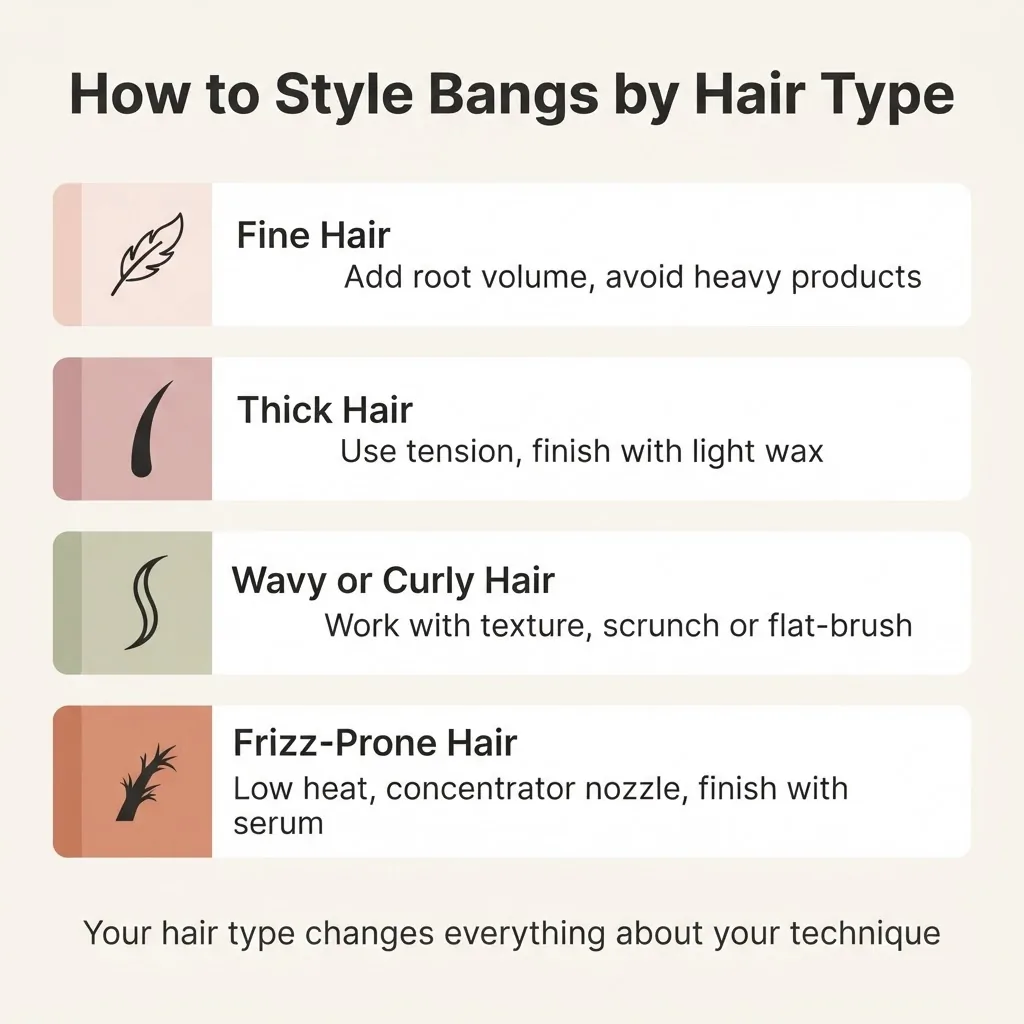
Fine or thin hair: Your bangs will get oily faster and lose volume quickly. Use a volumizing mousse or lightweight texturizing spray at the roots before blow-drying. Go for a slightly smaller round brush to create more lift at the root. Avoid heavy oils or serums anywhere near your bang section because they will flatten and grease your bangs out within a few hours.
Thick hair: Your bangs hold shape well but can go puffy or wide if you are not careful with tension during blow-drying. Use a stronger hold product, a light wax or pomade worked through just the tips, to keep blunt bangs looking clean and intentional. Dry in sections if your bang section is particularly dense.
Wavy or curly hair: This is where things get more interesting. Your bangs are going to curl, and unless you are committed to straightening them every day, working with that texture rather than against it is going to be your sanity. Scrunching a small amount of curl cream into your bang section and letting it air dry with your natural pattern is a genuinely beautiful look. If you want them straighter, blow-dry with a flat brush and a downward nozzle direction, pulling tension downward as you go. It is more effort but achievable.
Frizz-prone hair: Use your concentrator nozzle on low heat and keep it moving. Do not let the dryer hover in one spot. Finish with a tiny amount of smoothing serum worked between your palms and then gently pressed through the bang surface (not rubbed, that creates frizz rather than reducing it).
The Oily Bangs Problem (And How to Fix It)
If your bangs are flat and greasy by midday, you are not alone. Bangs sit right on the forehead, which is one of the oiliest areas of the face, and they pick up skin oils faster than any other part of your hair. This is the number-one complaint I hear from people who got bangs and regret them, and it is almost entirely fixable.
Dry shampoo is the obvious answer, but the technique matters. The Batiste guide on dry shampoo for bangs recommends spraying at the roots of the bang section from about 12 inches away, letting it sit for 30 seconds to absorb, and then brushing through gently. Applying it to the ends of your bangs instead of the roots actually makes the problem worse by adding visible product buildup at the tips.
A few habits that help a lot: avoid touching your bangs throughout the day, because your fingertips transfer oil to the hair immediately.
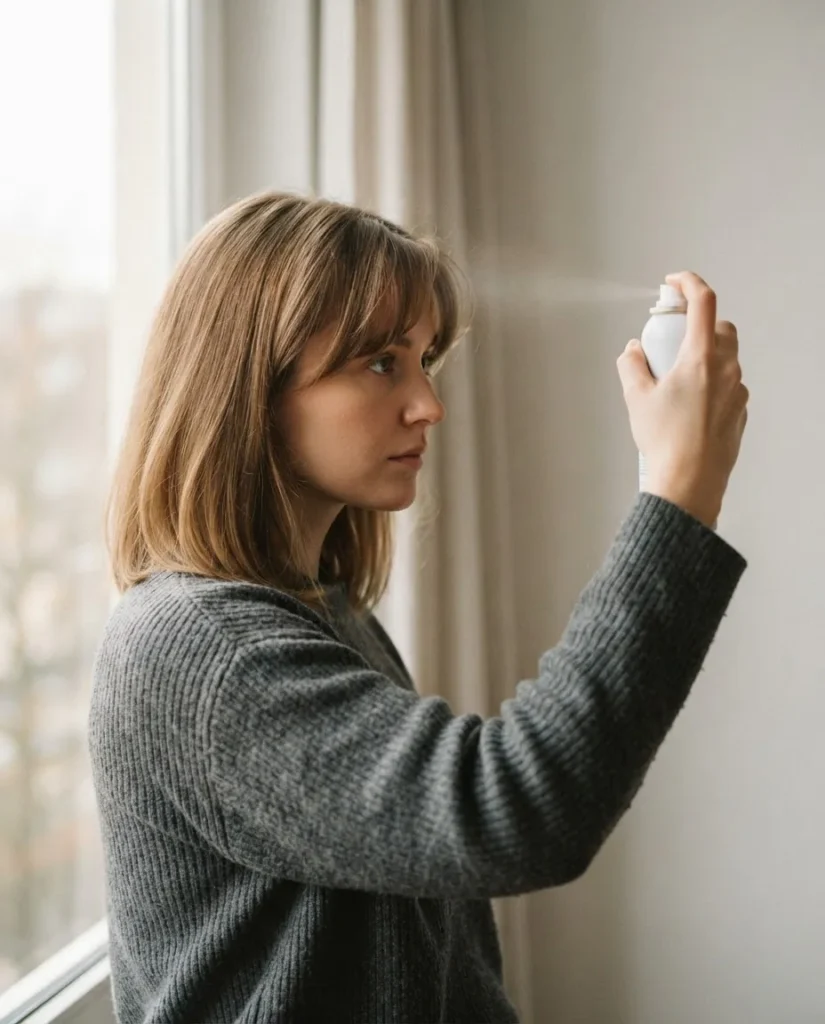
If you use sunscreen or moisturizer on your forehead (which you should), apply it and let it absorb fully before styling your bangs. And washing your bang section alone, without doing a full hair wash, is completely fine if you are prone to oiliness, just wet the bang section, shampoo lightly, rinse, and blow dry. Takes about three minutes.
Styling Bangs for Your Face Shape
You do not need to over-engineer this. Face-shape guidance can get overwhelming fast, but for bangs, there are a few simple principles that are worth knowing.
If you have a round face, side-swept bangs and curtain bangs both work beautifully because they add vertical lines that elongate the face rather than emphasizing width. Blunt, full, straight-across bangs can make a round face look wider, so they require a softer, longer cut to balance things out.
If you have an oval face, you are in the lucky position of being able to pull off almost any bang style. The proportions are naturally balanced, so feel free to experiment.
If you have a heart-shaped face (wider forehead, narrower chin), longer curtain bangs are your best friend. They soften the width of the upper face and create symmetry. Byrdie’s comprehensive guide to bangs for every face shape covers this in a lot of detail and is worth bookmarking if you are still in the “figuring out which cut to ask for” stage.
If you have a square face, soft, wispy bangs with some texture work really well. They soften the strong jaw and angular lines without completely hiding your features.
When Your Bangs Are Growing Out
Growing out bangs is its own challenge, and the awkward middle-length phase is real. The good news is that there are several ways to style bangs in that in-between stage that do not require pinning them back with a sad bobby pin every day.
A deep side part is your easiest option. When your bangs are long enough to tuck behind your ear or blend into layers around your face, a deep side part makes the growing-out look intentional rather than accidental.
Curtain-bang styling works even when the bangs are not perfectly curtain-bang length. If your blunt or side bangs are growing past the eyebrow, you can start parting them down the middle and sweeping them out to recreate a softer, more effortless version of curtain bangs while you wait for them to fully grow.
Clip styling has had a major moment, and the fringe clip or claw clip is genuinely useful here. Pulling your growing bangs back and up with a claw clip or pinning them back with a vintage-style barette is a style in itself, not a styling failure.

A Few Quick Habits That Change Everything
A lot of bang styling success comes down to small daily habits rather than any single perfect technique. Here are the ones that consistently make the biggest difference for beginners.
Always style your bangs while they are still slightly damp. Dry bangs are set and resistant. Damp bangs are workable.
Let the shape cool before you touch it. Thirty seconds of patience after taking the round brush out is the difference between a shape that holds and one that drops.
Trim your bangs every three to four weeks. Even a tiny amount of growth changes how they fall, and once they are past your eyebrows, the styling technique shifts. A quick bang trim at the salon is usually free or very low cost, and it is 100% worth it for how much easier it makes the daily routine.
Sleep on a satin pillowcase or wrap your bang section loosely in a clip before bed. Cotton pillowcases create friction that roughens the hair cuticle overnight, which is why bangs often look messy in the morning even after a perfect blow-dry the night before.
And finally, give yourself the learning curve. I watched experienced stylists on the salon floor do amazing bang blow-outs every day, and even they had a method they had refined over hundreds of repetitions. Your version gets better every time you do it. The first few weeks are the hardest, and then one morning it just clicks, and you will wonder why you ever thought it was difficult.
Your bangs are going to be great. I promise.