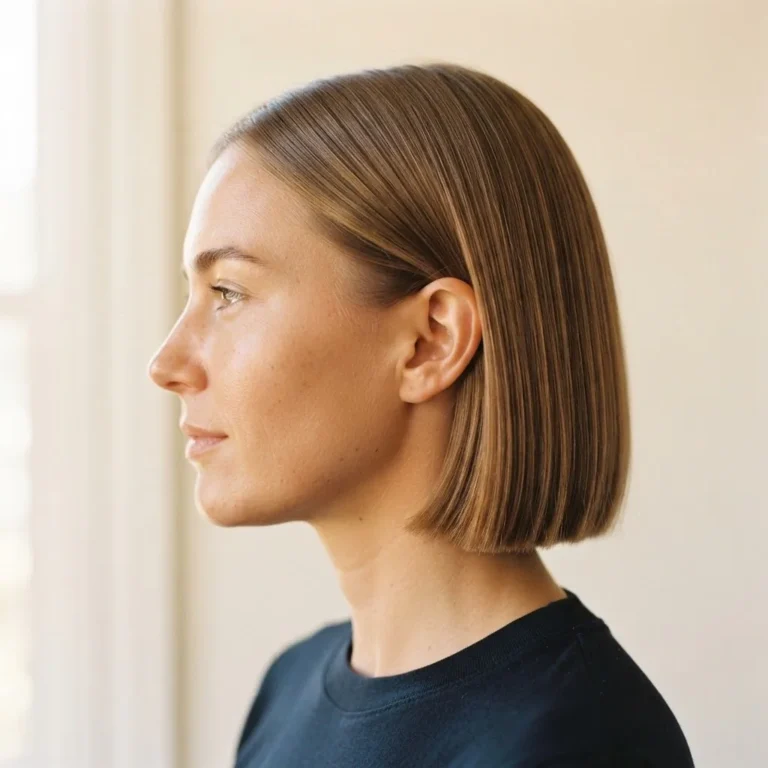
The Butterfly Haircut: 22 Looks, What to Ask For, and How to Style It
If your Pinterest board is anything like mine right now, it is at least thirty percent butterfly haircut. That bouncy, layered, face-framing look has been quietly building momentum for a couple of years, and by summer 2025 it fully took off. Google Trends data tracked the searches doubling over that period. It is showing up in celebrity style coverage, all over TikTok, and yes, on every third save in my own hair inspiration folder.
And yet for every person who books the appointment, there are probably five more who love the look and never pull the trigger. I hear it all the time: “I’m scared it won’t look like the photo.” “My hair is too thin.” “I don’t know what to even say at the salon.” Those are legitimate concerns, not silly ones. I have been that person. I was the woman who printed a photo, lost her nerve, and walked out with just a trim.
So here is everything I wish someone had told me before I started asking for this cut. What the butterfly haircut actually is, which hair types and face shapes it genuinely suits (and when to adjust expectations), exactly what to say to your stylist, how to style it at home, and how to keep it healthy as it grows. Plus 22 looks organized by length, texture, and face shape so you can find your version of the cut, not someone else’s.
What Is the Butterfly Haircut?
The butterfly haircut is a layered style that creates what celebrity stylist Andrew Fitzsimmons describes as an optical illusion: “It’s designed to give the appearance of shorter hair, without sacrificing length.” Shorter, graduated layers frame the face and lift the crown, while longer layers underneath stay intact to keep your overall length. When the cut is finished and you look at the shape from behind, those two distinct layer lengths mimic the upper and lower wings of a butterfly.

That is where the name comes from, and it is not just a cute description. You can genuinely see the two-wing silhouette when the layers are cut well.
According to Marie Claire’s reporting on the butterfly haircut trend, colorist and stylist Temur Hamilton explains that the shorter layers should “start around the chin to add volume and shape, and keep the bottom layers long and blended smoothly for length.” The result is a cut that gives you the face-framing benefit of a bob and the versatility of long hair all at once. You can throw it in a ponytail, clip it up, blow it out, or let it air dry. It is that flexible.
The cut has roots in the 1970s when airy, voluminous layers were everywhere, and it is connected directly to The Rachel, Jennifer Aniston’s iconic layered cut from Friends in the 1990s. Its current revival has picked up co-signs from Sabrina Carpenter and a host of other celebrities, which is a big part of why the search interest exploded when it did.
How Is It Different from a Wolf Cut, Shag, or Octopus Cut?
This is one of the most searched questions around this topic, and for good reason. All of these cuts involve layers, so the confusion is understandable. According to Byrdie’s breakdown of the butterfly cut versus the wolf cut, the wolf cut uses choppy layers throughout for a deliberately edgy, textured result. It leans rock-and-roll. The butterfly cut is softer and more intentional in its layering. The layers are feathered rather than choppy, and the disconnection between the short crown layers and the long bottom layers is the whole point of the cut’s shape.
The shag takes the choppy layer idea even further, usually pairing heavy fringe and distributed texture throughout for a more undone, vintage vibe. The octopus cut is more sculptural and dramatic, with a voluminous rounded crown and long, tentacle-like pieces extending below. If the wolf cut is edgy and the shag is retro and undone, the butterfly cut is the most polished and wearable of the group. It is the one that looks intentional even on a lazy hair day, and that is largely why it has the widest appeal.
Does the Butterfly Haircut Work for Your Hair Type?
The short answer is yes for almost everyone. The longer, more honest answer is that what it looks like on your hair depends on your texture and density, and some versions of the cut suit you better than others. Here is a real breakdown without any sugarcoating.

Straight hair tends to be where this cut gets the most dramatic transformation. Straight strands can look flat and heavy in a blunt style, and the butterfly layers add the lift and dimension that straight hair often lacks on its own. You will likely need a round brush blowout or a curling iron pass to really show off the shape, since straight hair will not naturally fall into the bouncy wing silhouette the way wavy hair does. With the right styling, though, straight hair can look stunning in this cut.
Wavy hair is honestly the sweet spot for this cut. The natural movement in wavy hair plays perfectly with the layered structure. The layers remove bulk, encourage the wave pattern to separate and look more defined, and the whole thing can air dry into something that looks like you spent an hour on it. The styling note here is not to go too heavy on the product: a lightweight curl cream or texturizing spray is enough. Heavy gels and creams will flatten the layers.
Curly hair can absolutely do this cut, but the approach needs to be different. The standard advice from stylists is to ask for a dry cut when you have curly hair. When curly hair is cut wet, it shrinks as it dries, which means layers can end up shorter than intended and land in places you did not plan for. A dry cut lets the stylist see exactly how each curl falls and place the layers accordingly. L’Oreal Paris notes that curls tend to spring up as they dry, so working with a stylist who understands shrinkage and curl pattern placement is the key to getting layers that fall exactly where you want them. If your stylist works only on wet hair and does not know your curl pattern, that is a conversation worth having before the scissors come out.
Fine or thin hair is where I want to slow down and be really honest with you. The butterfly cut can look beautiful on fine hair, but it is also the hair type most likely to be disappointed by a version of the cut that is not tailored correctly. The reference photos you are saving on Pinterest are probably on thick or medium-density hair, where the layers have enough volume to create that full, dramatic butterfly wing shape. On fine hair, too many disconnected layers can make the ends look sparse and wispy rather than full and bouncy. What works better is a softer version: a few targeted face-framing pieces, a light curtain bang, and a blunt-ish perimeter that keeps the ends looking dense. You will get the face-framing effect without sacrificing the fullness of your ends. Be upfront with your stylist about this and ask them to go lighter on the layering than they might normally.
Thick hair benefits enormously from this cut. The layers remove bulk and weight, help the hair move instead of just sitting heavy, and give you that airy, bouncy look that thick hair rarely gets on its own. This is the hair type where the cut really shows its full range.
The Face Shape Guide: Which Version Suits You
The butterfly cut works across all face shapes, but the layer lengths and placement get adjusted depending on your face. According to the licensed hairstylist guide at Haiirology, here is how to think about it by face shape.
Oval faces have the most flexibility. The balanced proportions mean you can go for dramatic face-framing layers without overwhelming your features. If this is your face shape, almost any version of this cut will work for you.
Heart-shaped faces, where the forehead is wider and the chin is more narrow, benefit from layers that add volume around the lower half of the face. This distributes the visual weight downward and softens the chin area. Longer face-framing layers that hit around the chin or below tend to be most flattering.
Round faces benefit from keeping the face-framing pieces longer so they draw the eye downward and add the illusion of length. Avoid very short face-framing pieces that stop at the cheekbones, since they can make a round face look wider.
Square faces with a strong jawline do well with wispy, soft face-framing layers that take the edge off the angles. The butterfly cut’s feathered texture does this naturally, so this face shape tends to look softened and more harmonious.
Diamond faces, where the cheekbones are the widest point, can use the butterfly cut to add volume at both the jaw and the forehead to create balance. It is one of the more forgiving cuts for this face shape.
The practical takeaway: when you sit down with your stylist, mention your face shape and ask where they will be starting the face-framing layers.

Round and square faces should ask for layers starting closer to the chin. Heart and oval faces can start the layers higher, around the cheekbones.
What to Actually Say at the Salon
This is the part most posts skip, and it is honestly the most important piece of information in this entire article. Knowing what to ask for is the difference between leaving the salon with the look you pinned and leaving with something that vaguely resembles it.
First, bring reference photos. Not one, three or four from different angles and on different hair types if possible. Haircut terminology varies from stylist to stylist, and a photo communicates what words cannot. Bring pictures of the back silhouette, the front face-framing layers, and a side profile if you can find one.
When you are describing the cut verbally, here are the phrases that consistently land well. Ask for “shorter, graduated layers around the crown and face starting around the chin, with longer layers underneath kept blended for length.” You can also say “soft curtain fringe that flows into longer layers” and “internal layering to remove bulk without changing the perimeter.” These phrases tell a stylist you know what you are talking about.
Here is what to avoid saying: “Just give me lots of layers.” That phrase gives the stylist too much latitude and can result in choppy, all-over layering that does not create the butterfly wing silhouette. Be specific about where the short layers should start (around the chin is the most common starting point) and make clear that you want to keep your overall length.
If you have fine hair, explicitly say: “I want face-framing layers but I need to keep the perimeter dense. Please go softer on the all-over layering.” If you have curly hair, ask: “Can we do this as a dry cut so you can see my curl pattern?” These specific conversations before the scissors come out can completely change the result.
How to Style the Butterfly Haircut at Home
Knowing how to style this cut is honestly just as important as getting the cut itself. The butterfly haircut is not high-maintenance, but it does have a particular shape to honor, and the right styling technique brings it to life.
The blowout method (the most flattering): Start on damp hair. Apply a lightweight volumizing spray at the roots before you begin. Using a round brush, work in sections and dry each section by pulling the brush away from your face while directing the airflow downward along the hair shaft. This smooths the cuticle and adds shine. For the face-framing pieces, flip the brush outward at the ends to create that signature soft flick away from the face. Finish by flipping your head upside down briefly and hitting the roots with cool air to lock in volume.

The cool shot from your dryer is genuinely underrated for setting lift at the crown.
The curling iron method (for extra definition): Start with a heat protectant on dry or damp hair. I cannot stress this enough. The American Academy of Dermatology notes that reducing the frequency of heat styling and protecting hair before applying heat are two of the most consistent strategies dermatologists recommend for limiting heat damage. Layered ends tend to be more exposed than the ends on a one-length cut, so giving them that protective barrier matters. Use a medium-barrel curling iron, roughly one inch, and wrap sections away from your face. Start the curl a couple of inches down from the root to keep the crown area looking lifted rather than curled flat. After curling, let the hair cool completely before running your fingers through to break the curls into soft waves. That breaking step is what takes a curled look and turns it into the butterfly cut’s signature airy, lived-in shape.
The heatless version (my personal go-to for busy mornings): Wash your hair at night, apply a lightweight mousse or curl-enhancing cream, and loosely braid it into two side braids before sleeping. In the morning, undo the braids, shake your hair out gently, and hit the roots with a volumizing dry shampoo or root spray. The result is not the same as a blowout, but it gives you a soft, wavy, lived-in texture that works with the butterfly cut’s layered structure beautifully. For straight hair types, foam rollers or velcro rollers set overnight give you a bit more defined bend.
The air-dry method: If you have wavy or curly hair, air drying with a curl cream or a lightweight gel scrunched in from ends to roots will let the layers fall naturally into the butterfly shape without any heat. Diffuse if you want more volume and faster dry time.
Budget and Drugstore Notes
You do not need to buy a $40 volumizing spray to make this look work. A drugstore mousse, a good heat protectant under $15, and a root-lifting spray from any drugstore aisle will do the job. The technique matters more than the price tag on your products. What you actually need to invest in is a good curling iron or round brush if you do not already have one. A one-inch ceramic barrel curling iron and a round brush with a mix of nylon and boar bristles are the two tools that make the biggest difference. Both can be found at mid-range prices around $25 to $50 each, and they last for years.
The one thing I would not cut corners on is the heat protectant. A basic drugstore heat protectant spray, applied on damp or dry hair before any hot tool touches it, is doing real work for your ends. Skip it repeatedly and you will be dealing with dry, crispy layers that snap instead of bouncing. Not worth it.
How Often Do You Need to Trim a Butterfly Haircut?
The honest answer is every six to eight weeks if you want to keep the shape crisp. Because this cut relies on the contrast between the shorter crown layers and the longer bottom layers, when those shorter layers grow out and start to blend into the length, the butterfly wing shape starts to disappear. The cut does not look bad as it grows, but it does look less intentional. Regular trims keep the face-framing pieces fresh and the whole shape bouncy.
If you are trying to grow your hair longer while maintaining the cut, the good news is that TYME Style’s stylist-backed guidance on the butterfly haircut grow-out confirms what many stylists know: this cut grows out gracefully. Because of the built-in layering, there is no blunt perimeter line that suddenly looks chopped and awkward when it grows out. Ask your stylist for a “dusting” at each appointment, just taking the very ends, while keeping the overall shape. This supports healthy growth without undoing your length progress.
If you have curly hair, you may be able to stretch appointments to the 8 to 12 week range, since shrinkage helps the layered shape look balanced even with a little growth.
22 Butterfly Haircut Looks to Inspire Your Next Appointment
Here are 22 variations organized by length, texture, and the styling mood they suit. Use these as your reference photo starting point.

Short Butterfly Cuts (above the shoulder)
- The Collarbone Butterfly: layers that start at the chin with a barely-there length and maximum volume at the crown.
- The Butterfly Bob: a blunt base with shorter crown layers and a strong face-frame, no curtain bangs.
- The Textured Short Butterfly: razored face-framing pieces on thick hair for a lived-in, tousled feel.
- The Flippy Short Butterfly: ends curled outward for a retro 70s nod that works beautifully with short lengths.
Medium Length Butterfly Cuts (collarbone to armpit)
- The Classic Medium Butterfly: the most common version, medium layers with soft curtain bangs.
- The Blowout Medium Butterfly: styled with a round brush for maximum volume and a polished salon finish.
- The Wavy Medium Butterfly: air-dried with a curl cream on wavy hair, effortless and beachy.
- The Side Part Medium Butterfly: a deep side part that plays up the asymmetry of the face-framing layers.
- The Curtain Bang Butterfly: longer curtain bangs that blend seamlessly into the face-framing layers.
- The No-Bang Medium Butterfly: all the face-framing structure with a center part and no fringe.
Long Butterfly Cuts (armpit length and longer)
- The Dramatic Long Butterfly: very long layers with a strong contrast between the crown layers and the ends.
- The Soft Long Butterfly: longer, more blended layers for a subtler wing effect on very long hair.
- The Long Butterfly with a Blowout: the most glamorous version, perfect for events.
- The Boho Long Butterfly: air-dried on wavy or curly long hair with a little texturizing spray.
- The Claw Clip Long Butterfly: half-up claw clip styling that shows off the layered shape.
Butterfly Cuts by Hair Type
- The Straight Hair Butterfly: blowout-styled with a round brush, sleek and voluminous at the crown.
- The Wavy Hair Butterfly: natural wave pattern enhanced by the layered structure, minimal product.
- The Curly Hair Butterfly: dry-cut layers that define the curl clumps and lift around the face.
- The Fine Hair Butterfly: a softer, more targeted version with fewer layers and a denser perimeter.
- The Thick Hair Butterfly: heavier internal layering that removes bulk while keeping the length.
Trend-forward Variations
- The Butterfly with Money Pieces: face-framing highlights or lighter pieces that make the layered shape even more visible.
- The Butterfly Shag Hybrid: slightly choppier layering that sits between the butterfly and shag aesthetics for a more textured, undone feel.
A Few Things That Are Harder Than They Look (and How to Work Around Them)
I always want to be honest about the learning curve, because tutorials that make everything look effortless are part of why people feel like they are failing when they try it at home and it does not look the same.
Getting the crown volume to stay is the hardest part for most people. Without the right technique, the top layers collapse within an hour and the butterfly shape disappears. The fix is a combination of a root spray or volumizing mousse before blow drying, working in smaller sections with your round brush, and that cool-shot step at the end. If your hair is naturally flat at the roots, a velcro roller set on the crown while the rest of your hair dries can give you a boost.
On fine hair, the face-framing pieces can look beautiful when freshly styled and then fall limp by mid-morning. A light-hold hairspray or a tiny amount of texturizing spray on the face-framing pieces helps them hold their bend throughout the day without looking stiff.
For curly hair, the hardest part is getting uniform definition in the shorter crown layers versus the longer layers without one section looking frizzy. A diffuser on low heat and high airflow is the tool to reach for. Scrunch the layers up toward the root as you diffuse to encourage curl clumping and definition.
Keeping Your Hair Healthy While You Rock This Cut
Layered ends are exposed to more friction than the ends on a one-length cut, which is why a consistent hair care routine matters a bit more with this style. Use a sulfate-free shampoo if you can, since sulfates can strip moisture from the hair cuticle and make the layered ends feel dry and rough over time. A hydrating conditioner applied from mid-lengths to ends at every wash is the minimum. A weekly deep conditioning treatment or hair mask is worth adding if you use heat tools regularly.
The AAD’s guidance on everyday hair care is clear that reducing the number of times you apply heat to your hair is one of the most impactful things you can do for its long-term health. This does not mean never using a blow dryer. It means alternating your full blowout days with air-dry days, and always using a heat protectant when you do reach for the hot tools. This is especially important when you have layers, because the shorter pieces have less length to absorb the heat and the ends can become brittle faster.
If you notice your layered ends feeling particularly dry or starting to look frayed before your next trim appointment, a small amount of a nourishing hair oil or serum on the mid-lengths and ends between washes can help seal the cuticle and reduce the look of frizz without weighing the layers down. Apply it to dry hair in tiny amounts. A little goes a long way, especially on fine hair.
The Bottom Line
The butterfly haircut earned its viral moment because it genuinely delivers. It is versatile enough to work across hair types, flattering enough to suit most face shapes when the layers are tailored correctly, and flexible enough to go from a casual air-dry day to a proper blowout depending on how much time you have. It grows out gracefully, it photographs beautifully, and it is the kind of cut that makes a ponytail look more interesting even when you are not styling it.
The only thing standing between you and the look you have been saving on Pinterest is probably the conversation at the salon. Go in with your reference photos, use specific language about where you want the layers to start, and be honest with your stylist about your hair density. That combination of good communication and the right haircut is what turns the pins into your actual hair.