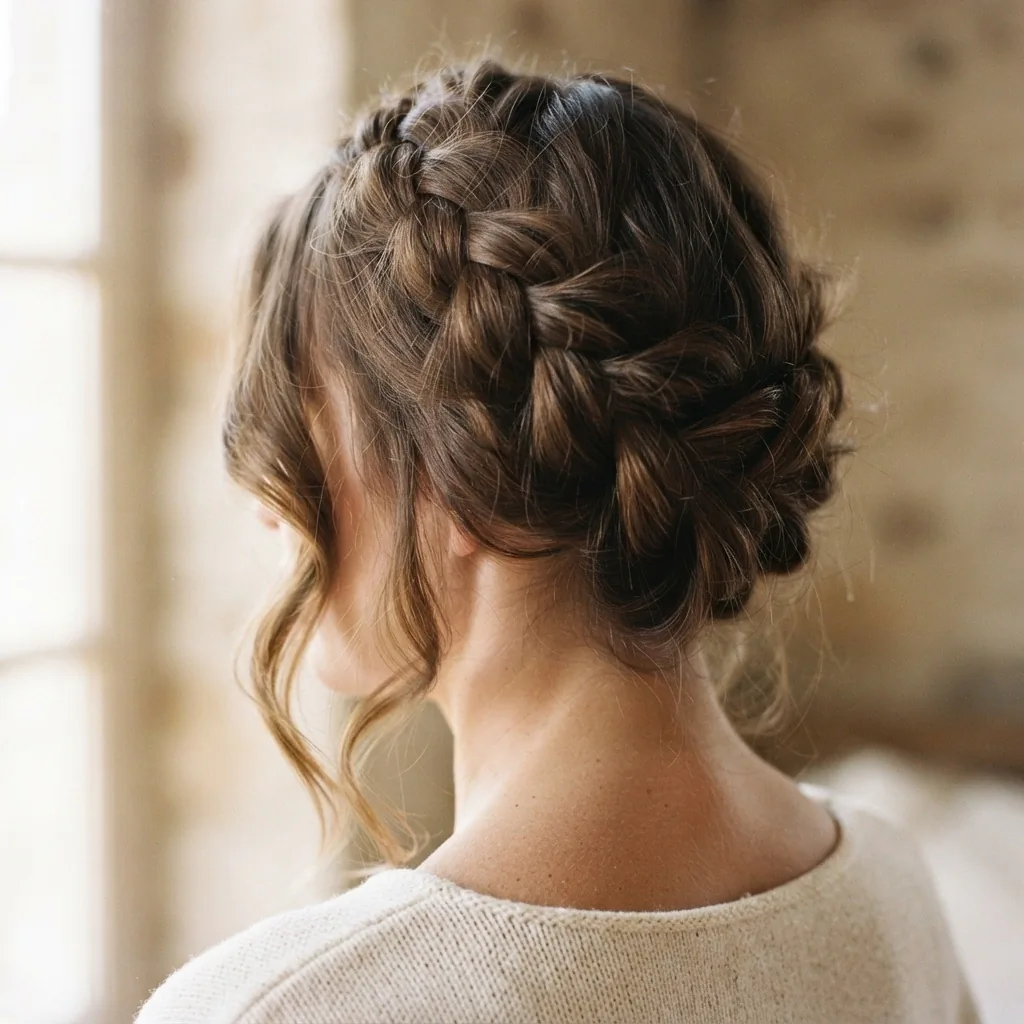
15 French Braid Styles Even Beginners Can Actually Do
Let me guess. You have a saved folder on Pinterest that is basically 80% braids. You tap every gorgeous french braid you see, fully intending to try it, and then you stand in the bathroom with your arms twisted behind your head and nothing goes the way you planned. The braid looks bumpy, one side is fatter than the other, and by the time you get to your ears half the sections have escaped.
Yeah. I’ve been there. I spent years watching professional stylists french braid hair in the salon like it was the easiest thing in the world, and I still remember the very first time I tried to braid my own hair and produced something that looked less like a braid and more like a regret. The trick is not magic talent. It is understanding the mechanics, choosing the right style for your skill level and your hair, and having a few honest tips that the Pinterest photos never bother to tell you.
That is exactly what this guide is for.

I’m covering 15 real french braid hairstyles, from the most beginner-friendly starting points all the way to styles that look fancy enough for a wedding. For each one, I’ll tell you the actual difficulty level, what hair types it works best on, and what usually goes wrong and how to fix it.
Before You Pick a Style: The French Braid Basics You Actually Need
A french braid is not a normal three-strand braid that you start in the middle of your head. The key difference is that as you braid, you add small sections of new hair from each side before crossing the strand over the center. That “adding hair” part is what beginners struggle with most, because you are simultaneously managing tension, keeping three strands sorted, and picking up new hair without losing the others. It takes coordination that only comes with repetition.
One thing I hear constantly is confusion between a french braid and a dutch braid. Here’s the simplest way to remember it: in a french braid, the strands cross OVER the center, so the finished braid sits flat and appears to be woven into the hair. In a dutch braid, the strands cross UNDER the center, so the braid pops up and sits on top of the hair in a raised, three-dimensional ridge. Dutch braids are what most people call “boxer braids.”

Neither is harder than the other once you understand the motion, but they look distinctly different, so knowing which one you’re chasing before you start saves a lot of frustration.
What you need before you begin:
- A fine-tooth rat-tail comb or a thin pintail comb for clean sections
- Two or three small, snag-free elastics
- A handful of bobby pins if you’re doing an updo finish
- A light texturizing spray OR a tiny amount of dry shampoo for grip (more on this by hair type below)
- A mirror setup where you can see the back of your head, or a front-facing phone camera propped up
That last one is genuinely underrated. Even experienced home braiders find it way easier to see what’s happening when they can glance at their phone screen rather than trying to work blind.
A Quick Word on Hair Prep (It Really Does Matter)
The number one reason a french braid falls out fast or looks uneven is that the hair is freshly washed, perfectly smooth, and has zero grip. Squeaky-clean hair is the enemy of braiding. If you can, braid on day-two or day-three hair. If you’ve just washed, blast some dry shampoo at the roots and let it sit for two minutes before you start, or mist a texturizing spray lightly through the lengths. Both add friction, which is what keeps your sections from slipping out of your fingers mid-braid.
For curly or coily hair, the opposite approach applies. A little moisture and a smoothing cream or light oil actually helps define the sections and reduces frizz so the braid looks cleaner and holds better. Apply a small amount of leave-in conditioner or a curl cream before you begin.
The 15 French Braid Hairstyles
1. The Classic Single French Braid
Difficulty: Beginner friendly (with practice)
This is where everyone should start, no exceptions. One braid, starting at the crown, ending at the nape or below, finished with an elastic. It sounds simple, and the motion is simple once your muscle memory clicks in, but it takes most people five to ten genuine attempts before it starts looking clean. Do not get discouraged after attempt two. I’m serious.
The technique: section off a triangle of hair at your crown, split it into three equal parts, do one regular crossover to establish your braid, and then from that point on, each time you go to cross a strand over the center, first scoop up a thin section of loose hair from the same side and add it to that strand before you cross it. Keep those added sections thin and consistent.

Uneven braids almost always come from grabbing wildly different amounts of hair each time.
Works beautifully on: medium to long hair, all textures. Trickier on very fine or very slippery hair because sections escape easily. The fix for fine hair is that texturizing spray before you begin.
2. Double French Braids (The “Boxer Braid” Look)
Difficulty: Beginner to intermediate
Two braids, one on each side, parted down the center. Technically these are usually dutch braids (strands going under) if you want the raised, sporty look, but done french style (over) they sit flatter for a more classic school-girl chic vibe. Either way, the principle is the same, you’re just doing the work twice.
The honest difficulty here is keeping both sides symmetrical. Part your hair carefully down the center before you start. A crooked center part is why one braid always ends up sitting higher or further back than the other. Use your rat-tail comb and take your time on that part, it’s the foundation of the whole look.
This is one of my favorite protective-style options for a workout or a hot day because it keeps every strand off your face and holds through sweat better than a ponytail.
3. The Side French Braid
Difficulty: Beginner friendly
Starting the braid at the side rather than the crown makes it significantly easier to do on yourself, because you can see what you’re doing much more clearly. Gather all your hair to one side, section off the top-side portion near your temple, and braid diagonally across toward the opposite side or straight down, incorporating hair as you go.
This style has a relaxed, boho quality that looks great with loose waves left out at the ends, and it’s genuinely one of the easiest french braid variations to nail solo.
4. The French Braid into a Low Ponytail
Difficulty: Beginner
Start a classic french braid at the crown but stop adding new hair about halfway down the head, then secure the remaining loose ends into a ponytail with the braid running into it. This is a brilliant shortcut for beginners because you only have to french braid the top half and the ponytail covers any messiness at the transition point.
It is also a genuinely polished look for work or school that takes under five minutes once you’ve practiced the top braid a few times.
5. The French Braid into a Bun
Difficulty: Beginner to intermediate
Same concept as above, but instead of a ponytail, you twist the remaining hair into a bun and pin it. The braid runs from the crown into a tidy or messy bun at the nape or the back of the head. This reads as considerably more “done” than a plain bun, and it is genuinely the kind of style people think took a long time when it didn’t.
For a relaxed, romantic version, let a few face-framing pieces fall out at the front. For a cleaner look, smooth everything back with a tiny amount of pomade or hair balm before you start.
6. The Half-Up French Braid
Difficulty: Beginner
French braid just the top section of hair, from the crown to the back of the head, and secure it with an elastic while the rest of your hair hangs loose underneath. This is one of the most forgiving beginner styles because you’re working with a smaller amount of hair and the loose hair below hides any roughness at the ends.
It is also incredibly versatile. Add a scrunchie at the tie point for a cute, casual finish. Use a clear elastic and let the loose waves fall for something that works at brunch, a birthday dinner, or a low-key date.
7. The Lace Braid
Difficulty: Beginner friendly
The lace braid is a french braid variation that almost nobody knows the name of, but once you see it, you’ll recognize it instantly. Instead of adding hair from BOTH sides as you braid, you only add hair from one side. The result is a braid that has a delicate, lacy look along one edge where strands are incorporated, while the other side is smooth.
StyleCraze has a clear visual step-by-step of the lace braid technique if you want to see exactly how the one-sided pickup works before you try it. I especially love this one for a subtle, pretty detail along a hairline or as a half-up accent braid because it looks fancier than it is.

8. The French Braid Crown (Halo Braid)
Difficulty: Intermediate
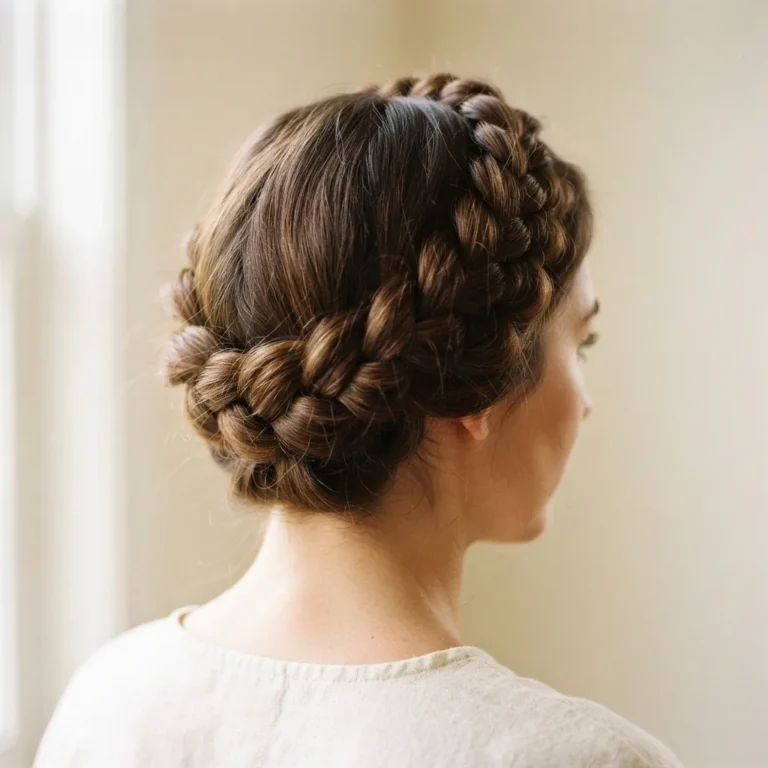
This is the wrap-all-the-way-around style that people absolutely love on Pinterest. You start a french braid at one ear, braid it up and across the top of the head, and curve it down toward the other ear, tucking the ends under and pinning them. The whole thing forms a crown or halo around your head.
The difficulty comes from maintaining consistent tension as you braid around a curved path. On straight or one-direction braids, tension is naturally even. On a curved braid, the outer edge wants to be loose and the inner edge wants to pull tight. Go slow, use small sections, and loosen the braid slightly as you curve it to compensate.
This look is absolutely stunning for a special occasion, festival, or any time you want to feel like you’re in a fairy tale.
9. The Milkmaid Braid (Double Crown)
Difficulty: Intermediate
The milkmaid braid is two braids that wrap across the top of the head and are pinned in place, sometimes overlapping each other. Think Austrian countryside meets Brooklyn rooftop. It is having a serious moment right now, and I understand why, because it looks incredibly romantic and put-together, and it works on a huge range of hair lengths and textures.
The simplest way to achieve it at home: part your hair down the center, make two low pigtail braids (regular three-strand, no french braiding required), then fold each braid up and across the top of your head in opposite directions, securing with bobby pins underneath. You can french braid from the root if you want a more seamless look, but the simpler version is gorgeous too.
10. The Bohemian Loose French Braid
Difficulty: Beginner
This one is really just a classic french braid that you intentionally loosen and pancake after you finish it. Once your braid is secured, take two fingers and gently tug apart the edges of each section from bottom to top, pulling the braid wider and softer. Then pull a few face-framing pieces loose at the front.
The result looks effortlessly undone and romantic, which is exactly the Pinterest aesthetic most people are chasing. Per Byrdie’s 2025 braid trend reporting, soft, boho, and “undone” braid textures are dominating this year, so the pancaked french braid is genuinely on trend.
11. The French Braid Headband (Half-Halo)
Difficulty: Beginner to intermediate
Instead of braiding all your hair, you braid just a small section along your hairline from one side to the other, like a headband. Start behind one ear, braid across the top of your forehead using a lace braid or a tight french braid, and pin the end behind the other ear. The rest of your hair falls loose beneath it.
This one is a beautiful accessory-free option for pushing hair back from your face, and it works especially well if your hair is too short to wear in a full updo.
12. The French Braid Updo (Braid to Twisted Bun)
Difficulty: Intermediate to advanced
Start with a french braid at the crown, and when you run out of hair to add, instead of finishing with a simple braid, twist the remaining length and coil it into a low bun, pinning sections as you go. The result is an updo that appears complex but is essentially a braid and a coiled bun, connected.
This is genuinely wedding-ready or formal-event ready if executed neatly. A small amount of firm-hold pomade or hair wax on the edges and a few hidden bobby pins will keep it secure for hours.
13. French Braid Pigtails for Short or Medium Hair
Difficulty: Beginner
French braids work on shorter hair too, though the technique adapts slightly. You’ll run out of hair to add sooner, which means your braid will transition to a regular three-strand braid fairly quickly near the ends. That’s completely fine and looks intentional. The key for short hair is to start your sections small and work slowly so you don’t run out of scalp hair too fast.
For hair that barely reaches the shoulder, try two small french braid pigtails starting near the temples, which gives a longer “reach” than starting at the crown.
14. The Overnight French Braid for Heatless Waves
Difficulty: Beginner
This one is less about the look of the braid itself and more about what you get AFTER you take it out. French braid your damp (not dripping wet, just slightly dampened) hair before bed, either in one braid or two, sleep on it, and wake up to soft, natural-looking waves.
Two french braids will give you a tighter, more defined wave pattern. One french braid gives you a gentler, looser wave. The wave size also depends on how thick each section is: finer sections while braiding give smaller, more texture-defined waves, and thicker sections give broader, beachier waves. This is genuinely one of my favorite heatless styling tricks and I reach for it constantly when I want texture without any heat.

15. The Formal French Braid Ponytail
Difficulty: Beginner
This is the elevated ponytail finish. Rather than just pulling hair straight into a ponytail, you french braid from the crown tightly toward the nape, keeping everything smooth and neat, and then gather the tail into a ponytail. The braided section replaces the bump you’d normally get from just pulling hair back, and it keeps the look polished and structured.
It is especially flattering paired with sleek, straight ponytail hair. Great for a job interview, a wedding guest look, or any time you want a ponytail that looks like you put actual thought into it.
French Braid Hairstyles by Hair Type: What Actually Works
Not every guide acknowledges this, and it drives me a little crazy. Hair type makes a real difference in how these styles behave, and what works for one person can be frustrating for another.

If you have fine or thin hair, your biggest enemy is slip. Freshly washed fine hair will slide right out of your fingers before you can cross the sections. The solution is texture. A light texturizing spray or a spritz of dry shampoo before you start creates enough grip to hold sections together. Also, keep your added sections very thin, because adding too much hair at once on fine hair creates visible “gap” lines on the scalp between pickups.
If you have thick or coarse hair, the main challenge is bulk. Your braid is going to be substantial, and if you add too much hair with each pickup, the braid can look lumpy where it widens. Use smaller added sections and braid a little tighter than feels natural at first, because thick hair braids tend to loosen as you go.
If you have curly or wavy hair, the trick is prep. Apply a small amount of leave-in conditioner or a light curl cream before braiding so the texture is somewhat tamed and you can feel clean sections. Do not braid completely dry, because the curl pattern will make it hard to keep sections sorted. Slightly dampened hair is much easier to work with. The upside of curly hair in a french braid is that it naturally has more texture and grip, which means the braid tends to hold really well once it’s in.
If you have short hair (chin to collarbone length), start your french braid further back on your head, because you’ll pick up sections quickly and run out of hair to add sooner. Side french braids and half-up braids are your most reliable options, and the french braid headband style was practically made for shorter lengths.
Why Your Braid Looks Bumpy (And How to Fix It)
This is the most common beginner complaint and it has a very specific cause: uneven section sizes. When you pick up a thick piece of hair on one side and a thin piece on the other, or a thick piece at one row and a thin piece at the next, the braid looks inconsistent and lumpy.
The fix is to slow down dramatically on the pickup step. Before you cross each strand, consciously check that the new section you’re adding is roughly the same width as the sections you picked up before it. You’re looking for a rhythm of consistent small pickup, consistent pickup, consistent pickup. It will feel slow at first and then it becomes automatic.
The second common cause of bumpiness is tension inconsistency. Pulling tightly at some rows and loosely at others creates visible ridges. Try to maintain the same gentle but firm pull throughout the whole braid. If you find your braid getting tighter as you go down (a very common beginner habit as your arms get tired), actively remind yourself to loosen slightly as you approach the nape.
A Real Note About Braid Tension and Your Scalp Health
I want to mention this because it’s something nobody talks about in braid tutorials and I think it genuinely matters. Braiding too tightly, especially repeatedly or around the hairline, can put stress on the hair follicles over time. The American Academy of Dermatology notes that hairstyles that pull on the hair roots can lead to a type of hair loss called traction alopecia, and that loosening braids around the hairline is one of the key protective measures.
If a braid hurts when you’re doing it, that is genuinely your signal to loosen it. A braid should feel secure, not like it’s pulling your scalp tight. This is especially worth noting for the crown braid and milkmaid styles where tension tends to be higher because of the directional pulling. Loose and pretty is the goal, not tight and painful. And if you ever notice tenderness or thinning along your hairline from repeated tight braiding, give your hair a break from styles that pull and consider talking to a dermatologist, because early-stage traction alopecia is largely reversible when you catch it in time.
Products That Actually Help with French Braiding
You do not need a lot. Here’s what stylists consistently recommend and what reviewers repeatedly point out makes a real difference:
For grip (all hair types): A light texturizing spray applied before braiding. It adds friction without making hair stiff or crunchy. This is especially key for fine or freshly washed hair. Look for something salt-spray-based or labeled “texture” rather than “hold,” which tends to be stiffer.
For smoothness (thick or curly hair): A tiny amount of hair balm, light pomade, or finishing cream on the hands before you section. Not enough to coat the hair, just enough to tame flyaways and help sections feel defined.
For hold after braiding: A light-hold flexible hairspray misted from about 12 inches away will set a finished braid without stiffening it. Skip heavy-hold sprays unless you want a helmet-effect, which most people don’t.
For overnight braids: Nothing at all, or the lightest mist of a leave-in spray on slightly damp hair. Heavy products overnight can cause buildup or breakage. Keep it minimal.
For tools, all you genuinely need is a rat-tail comb and snag-free elastics. Those braiding tool contraptions you see on late-night ads are fun but honestly not necessary, and the learning curve for using them can be just as steep as learning the real technique.
Starting the Practice: My Honest Advice
The salon where I worked had stylists who could french braid hair in sixty seconds flat. I used to watch them and think the skill was some kind of genetic gift. It is not. It is muscle memory, plain and simple, and the only way to build muscle memory is repetition on something that does not matter.
My genuine advice is to practice the motion on something you cannot mess up: a section of your own hair near your neck while watching TV, a friend’s hair while you’re both on the couch, or even a simple three-strand practice with yarn or ribbon if you want to build the over-under memory in your hands before touching your actual hair. The motion becomes automatic much faster than you think, and once it does, the whole thing clicks.
Also: your tenth braid will look dramatically better than your first. Your twentieth will look dramatically better than your tenth. That’s just how it works, and nobody you follow on Pinterest figured it out on their first try either.
The AAD’s everyday hair care guidance is also a good read if you want to understand general hair health while you’re building your styling skills, because keeping your hair healthy gives you better material to work with and helps braids look cleaner and hold longer.
Pairing Style to Occasion: A Quick Reference
For lazy Sunday mornings or running errands, the bohemian loose braid, half-up braid, or single classic braid are all effortless and quick. For work or school where you want something polished but not fussy, the french braid into a bun, the formal ponytail, or the braid headband all read as intentional and put-together. For a date or a dinner out, the milkmaid braid, the side french braid with loose ends, or the half-up crown braid are all romantic and a little more special. For a wedding, prom, or a formal event, the crown braid, the french braid updo, and the milkmaid braid all photograph beautifully and hold well for a long night.
The overnight braid for heatless waves is not really an “occasion” style, but if you’re heading somewhere and want texture without a curling iron, this is genuinely worth building into your routine.
The thing I love most about french braid hairstyles is that one skill genuinely unlocks so many different looks. Once the basic motion is in your hands, you are not learning fifteen separate techniques. You are just discovering fifteen different ways to use the same tool. Start with the classic single braid, do it ten times, and I promise the rest of the styles on this list will start to make so much more sense.
You’ve got this.