15 Wavy Hair Routine Tips That Actually Work for Beginners
There was a point in my life when I genuinely thought I had straight hair. Not perfectly straight, but straight enough that I just flat-ironed it every single day without asking any further questions. Then I got to college and stopped fighting it, and one day in the dorm bathroom mirror I looked at my roots while my hair was still wet and thought, wait a second. Those are waves.
If you are reading this, there is a good chance that is kind of your story too. You have hair that does something in between straight and curly, and you have spent years either trying to smooth it into submission or watching it air dry into frizzy chaos and calling that good. The internet keeps throwing around terms like “2B waves” and “squish to condish” and “gel cast” and you have no idea where to get started.
I get it. Here is what I want you to know before we dive in: building a wavy hair routine is genuinely a learning curve. It takes a few wash days to dial in. But once it clicks, it is one of the most satisfying things to figure out about your hair, because those waves have been there this whole time, just waiting for the right conditions to show up. Let me show you those conditions.
First, a Quick Minute on What Kind of Wavy Hair You Actually Have
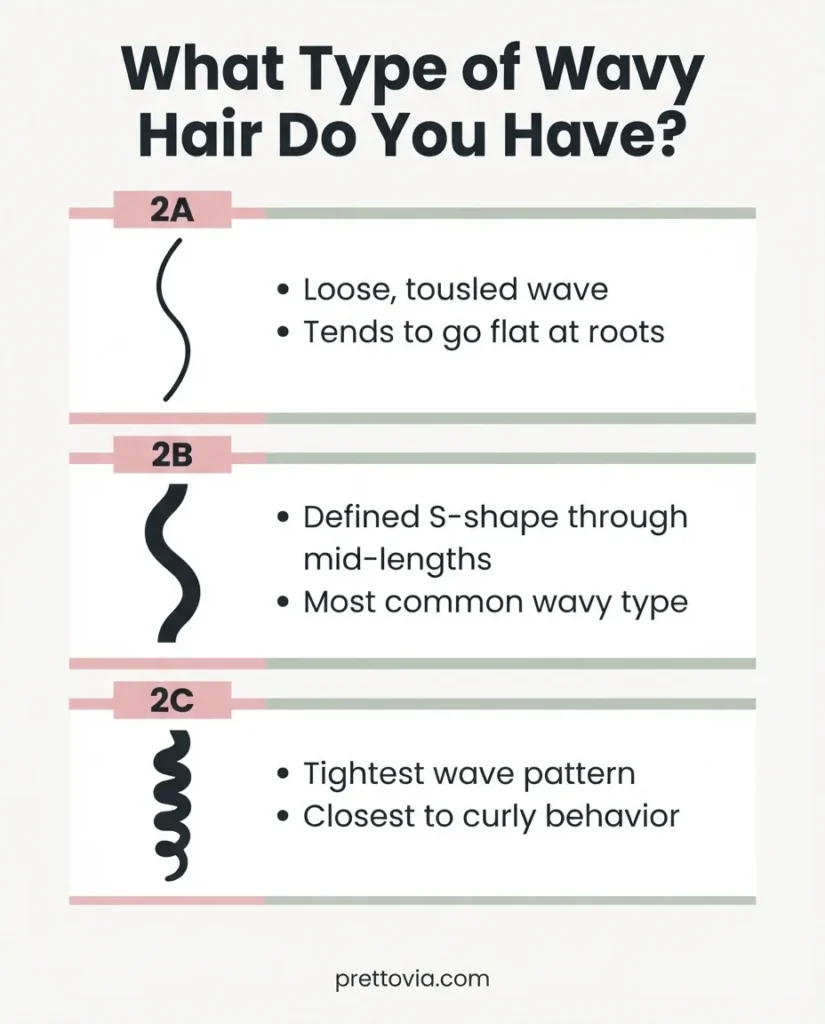
Not all waves are the same, and this matters for the tips that follow. The most widely used system divides wavy hair into three sub-types.
Type 2A is the loosest wave pattern. It tends to be mostly straight near the roots and develops a soft, tousled texture toward the ends. It is the most likely to go completely flat without the right technique. Fine hair falls here most often.
Type 2B has more defined “S” shaped waves through the mid-lengths and ends, though the roots still tend to sit flatter. This is the most common wavy type and most wavy hair tutorials are, quietly, aimed at this group.
Type 2C has the most defined, tight waves and can even have a few looser spirals mixed in. It is closest to curly hair in behavior and generally handles richer products better than 2A.
You do not need to be absolutely certain of your type to start.
A rough idea is enough to help you adjust product weight and technique as we go. Curlsmith’s Ultimate Guide to Wavy Hair is a solid visual reference if you want to look at side-by-side photos of each type to narrow it down.
Tip 1: Your Wavy Hair Routine Starts Before the Shower
I know that sounds like a wellness podcast, but stick with me. Before you wash, do a quick detangle with a wide-tooth comb or your fingers on dry hair. This removes shed hair and any surface tangles before water hits the strands, which means less mechanical stress in the shower and less frizz during styling.
Also take a second to think about buildup. If your hair feels coated, heavy, or your waves have been looking limp and undefined for more than a few wash days, that is almost always a product buildup situation. You need a clarifying shampoo before you start any new routine, otherwise you are applying fresh products on top of residue and nothing will behave the way it should. Think of it as clearing the canvas.
Tip 2: Shampoo Your Scalp, Not Your Lengths
This is one of the most useful things I absorbed from years of watching stylists work in the salon, and the American Academy of Dermatology backs it up directly. Shampoo belongs on your scalp. Your lengths do not produce oil the way your scalp does, and shampooing the entire length of wavy hair strips moisture from the mid-shaft and ends, which leads to frizz and a rough texture at the spots where your wave pattern is most visible.
In practice this means concentrating shampoo at your roots, massaging your scalp with your fingertips (not your nails), and letting the suds rinse down through your lengths on their own. That is enough to clean them without stripping.
For beginners, a sulfate-free or low-sulfate shampoo is a gentler starting point. Sulfates are the cleansing agents that create big lather. They work well, but for already-dry or frizz-prone wavy hair they can feel stripping. Drugstore picks that the wavy community consistently recommends include Not Your Mother’s Curl Talk Shampoo (around $7 to $9) and the Pantene Curl Perfection line.
Tip 3: Clarify Every Four to Five Washes
Wavy hair products tend to have silicones, polymers, and heavy conditioning agents that build up over time. Even great products create buildup if nothing is cutting through them. Clarifying every four to five washes, or whenever your waves start looking flat and sad, resets everything.
A clarifying shampoo is not a daily driver. Use it as a reset, then go back to your regular sulfate-free routine. Budget pick that consistently gets mentioned: Suave Essentials Daily Clarifying Shampoo at around $3. Neutrogena Anti-Residue is another one people swear by and usually costs under $8.
Tip 4: Condition Generously, But Strategically
Conditioner is where wavy hair really starts to come alive, but it also where a lot of beginners accidentally kill their volume. The mistake is applying conditioner all the way to the roots, which weighs the root area down and makes waves go flat.
Apply conditioner from about mid-ear level down to your ends, and leave it on for a couple of minutes. If your hair feels dry, damaged, or porous, you can apply a small amount closer to the roots, but for most wavy types keeping the root zone free of conditioner is worth trying first.
Dermatologists at the AAD specifically note that for curly and wavy hair, choosing a moisturizing conditioner and applying it primarily to the lengths and ends is the approach that preserves both moisture and natural volume. Their curly hair guide is short but worth a quick read.
Tip 5: Try Squish to Condish While You Are Still in the Shower
Squish to condish is not as complicated as it sounds. While your conditioner is on and your hair is still dripping wet, cup a small amount of shower water in your palm, bring a section of your hair into your hand, and gently squeeze upward toward your scalp. You will feel and see the hair start to clump together into little wave formations. Do this all over your head.
What this does is encourage your waves to form while there is slip in the conditioner, meaning they are less likely to separate and frizz on the way to drying. It also helps conditioner penetrate the hair shaft better. This single technique is responsible for a huge percentage of “I finally got my waves to cooperate” moments in the wavy hair community.
Tip 6: Understand Your Hair’s Porosity Before Choosing Products
I could write an entire article on porosity (and I will eventually), but the short version is this: porosity describes how well your hair absorbs and holds onto moisture, and it affects which products actually work on your hair.
Low porosity hair has a tightly closed cuticle. Products tend to sit on top rather than absorbing. Signs include water beading on your hair, products feeling sticky or gummy, and your hair taking forever to get fully wet. Low porosity hair generally does better with lighter products, liquid leave-ins, and warmth to help the cuticle open.
High porosity hair absorbs moisture quickly but loses it just as fast. Signs include hair that dries super fast, tangles easily, and feels rough or brittle at the ends. High porosity hair benefits from richer conditioners, leave-ins, and sealing the moisture with an oil or butter.
Healthline has a genuinely helpful and clear breakdown of how to test your hair’s porosity at home, including the float test, the slip test, and what your results mean. It takes about five minutes and helps you shop smarter.
Tip 7: Apply Styling Products to Soaking Wet Hair
This is probably the single most common reason beginner wavy routines fail. If you wait until your hair is damp or partially dry to apply your gel or mousse, you are too late. Wavy hair styling products need to go on when your hair is completely dripping wet.
The water is what helps distribute the product evenly and what allows your waves to clump together properly. When you apply gel to damp hair, it grabs unevenly, you get some crunchy patches and some frizzy patches, and the overall result is much less defined.
After squishing out the conditioner and leaving the shower, do not reach for a towel yet. Apply your leave-in and then your gel or mousse while your hair is still fully saturated. Then plop or gently scrunch out excess water. The product goes on first, water removal comes second.
Tip 8: Build Your Product Routine in Layers
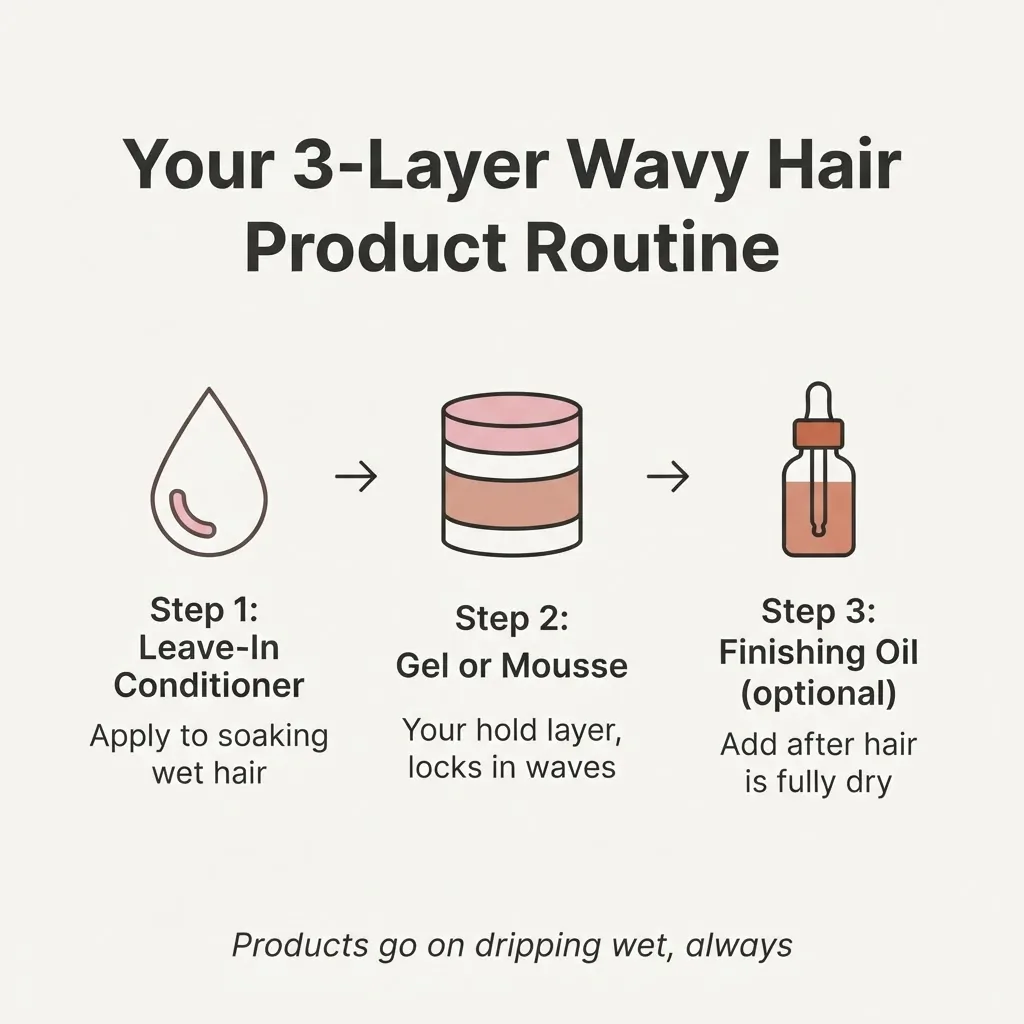
A solid beginner wavy hair routine usually has three product layers, and you do not need anything fancy to start.
Layer 1: Leave-in conditioner. A lightweight leave-in applied to soaking wet hair adds a base of moisture and slip. A budget favorite that shows up everywhere in the wavy community is the Kinky Curly Knot Today Leave-In (around $12) or the Cantu Shea Butter Leave-In Conditioning Repair Cream (around $8 to $10).
Layer 2: A gel or mousse. This is your hold layer and what creates the gel cast that locks your waves in. A lightweight gel or a volumizing mousse both work. For beginners, mousse is more forgiving since it is easier to distribute. Drugstore gel picks that the community is consistently enthusiastic about include LA Looks Sport Gel (costs around $3 and is a beloved budget icon) and the Pantene Flexible Waves and Curls Gel. For mousse, Not Your Mother’s Curl Talk Mousse is frequently recommended.
Layer 3 (optional): A finishing oil or serum. A very small amount of oil scrunched into your waves after they are completely dry can add shine and reduce any remaining frizz on day two or three. Less is more here.
Tip 9: Try Plopping to Set Your Wave Pattern
Once your products are in, plopping is a technique that sets your wave pattern before you dry while removing excess water without friction. Here is how to do it.
Lay a microfiber towel or an old cotton t-shirt flat on a surface (the t-shirt actually works better than a regular terry cloth towel because it has much less friction). Lean forward so your hair falls down toward the towel.
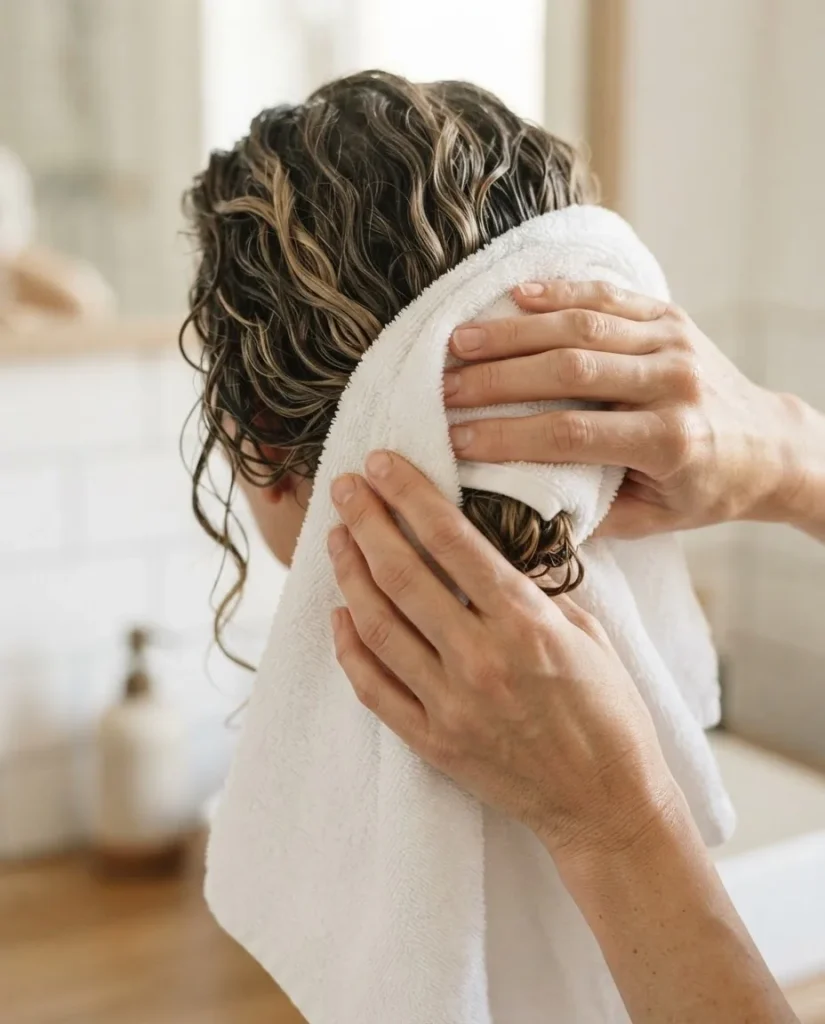
Lower your hair onto the center of the towel so it gathers into a pile on the fabric. Wrap the sides of the towel up around your hair, then flip the back portion up and secure the towel around your head. Leave it on for 10 to 20 minutes, then take it down and let your hair air dry or diffuse.
Plopping works because it removes water while your hair is still in the position your waves want to be in (gathered and clumped) rather than pulling them down with gravity or roughing up the cuticle with friction. For fine 2A hair, 10 minutes is usually enough since over-plopping can flatten the roots. For thicker 2B and 2C hair, 15 to 20 minutes is better.
Tip 10: Understand the Gel Cast (It Is Supposed to Feel Crunchy)
If you use a gel in your wavy hair routine and your hair dries crunchy and stiff, you did not do anything wrong. That is the gel cast, and it is exactly what you want while your hair is drying because it protects and locks the wave pattern in place.
The magic happens after your hair is completely, fully dry. This part is important: do not try to break the cast while there is any moisture left, or your waves will frizz out. Once your hair is 100 percent dry, flip your head upside down, add a tiny drop of oil to your palms if you like, and gently scrunch your hair with dry hands. The cast breaks and releases soft, defined, touchable waves underneath.
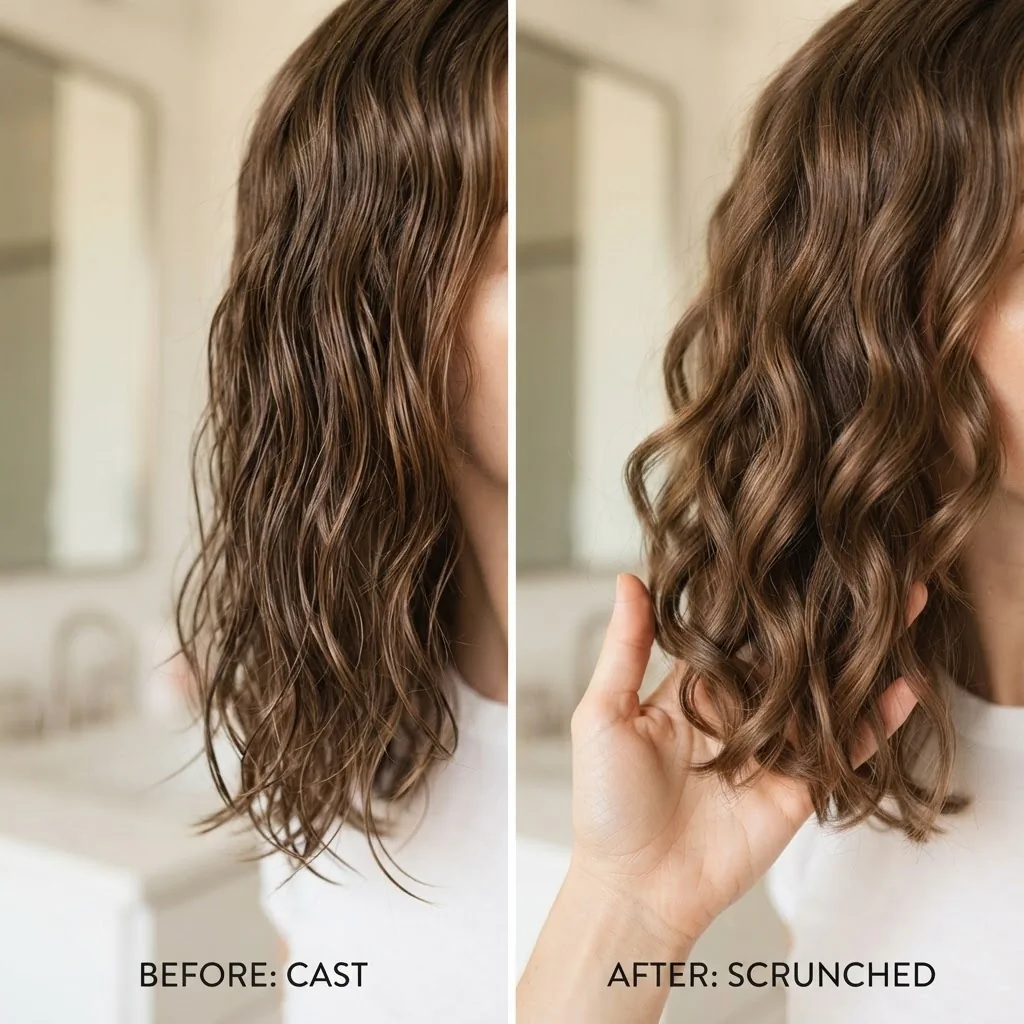
Curlsmith’s explanation of the gel cast is one of the clearest I have found if you want a more detailed breakdown of why this works at a technical level.
Tip 11: Choose the Right Drying Method for Your Hair Type
Air drying works for most wavy hair types but has a big weakness: gravity. As your hair hangs down while it dries, the weight can pull waves out, especially at the roots. If you air dry, try to avoid lying flat or resting your head against a surface while your hair is wet, and do occasional gentle scrunches with dry hands during the drying process to encourage clumping.
Diffusing is faster and often produces better volume and definition, especially for 2A and fine hair that tends to dry flat. To diffuse wavy hair, use low to medium heat and a low speed setting. Do not run the diffuser up and down the length of your hair, that creates frizz. Instead, cup sections of your hair in the diffuser bowl, bring the diffuser up toward your scalp, and hold it there for 30 to 60 seconds before moving to the next section. This is sometimes called the pixie diffusing method. Keep the diffuser about two to three inches from your scalp, never touching, for even drying.
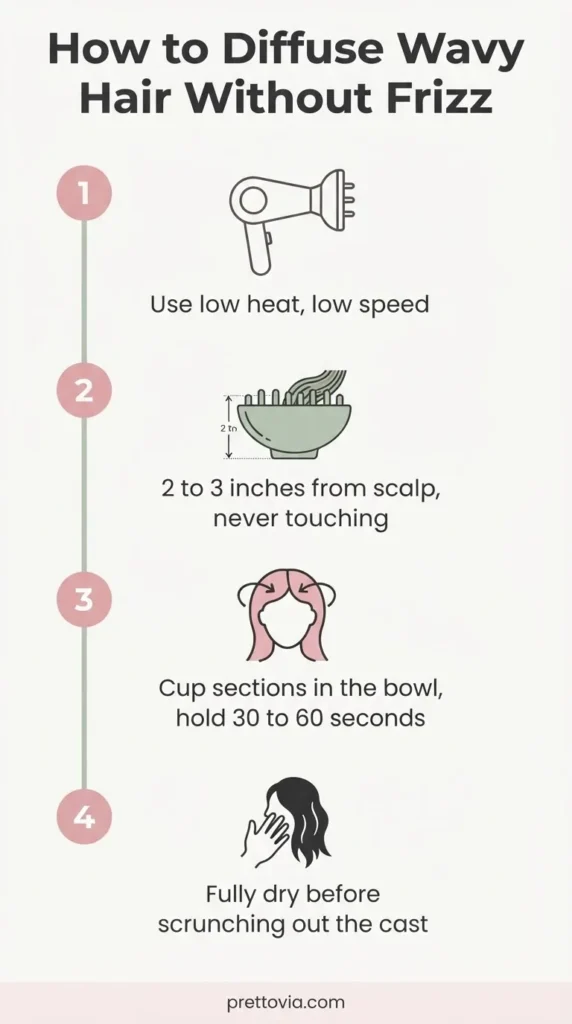
If you are going to apply heat to your hair regularly, even with a diffuser, a heat protectant is not optional. The AAD notes clearly that heat from styling tools can damage hair over time, and the damage is cumulative. A light heat protectant spray applied before diffusing is a small step that makes a real difference in the long run.
Tip 12: Stop Touching Your Hair While It Dries
I say this with love. Once your products are in and you are drying, hands off. Every time you run your fingers through your hair while it is wet or still drying, you are breaking the wave clumps and inviting frizz. Touching wet, styled wavy hair is the number one way the result goes sideways.
If you need to adjust something, use the prayer-hands method: press both palms flat together with your hair between them and gently smooth in one direction. No raking, no scrunching (until the cast-breaking step at the end), no fingers through the hair.
Tip 13: Watch for Glycerin in Humid Climates
If you live somewhere humid and your waves seem to puff up and frizz no matter what you do, check your product ingredient lists for glycerin near the top. Glycerin is a humectant that pulls moisture from the environment into your hair, which is great in moderate humidity but can backfire in extreme humidity, drawing in so much moisture that the hair swells and frizzes. Conversely, in very dry, low-humidity climates glycerin can pull moisture out of the hair instead of the air.
This does not mean you need to avoid glycerin entirely. It means in high-humidity summer conditions, you might experiment with lighter-hold products that have less glycerin or swap your gel for one without it on your frizz-prone days. Most beginner wavy routines do not mention this at all, but it explains a lot of those “I did everything right and it still frizzed” moments.
Tip 14: Learn to Refresh Your Waves on Day Two and Three
Re-washing wavy hair every day is usually too much, since it strips the natural oils that actually help your wave pattern behave. Instead, refreshing is the skill that turns wavy hair from a one-day look into a three-day routine.
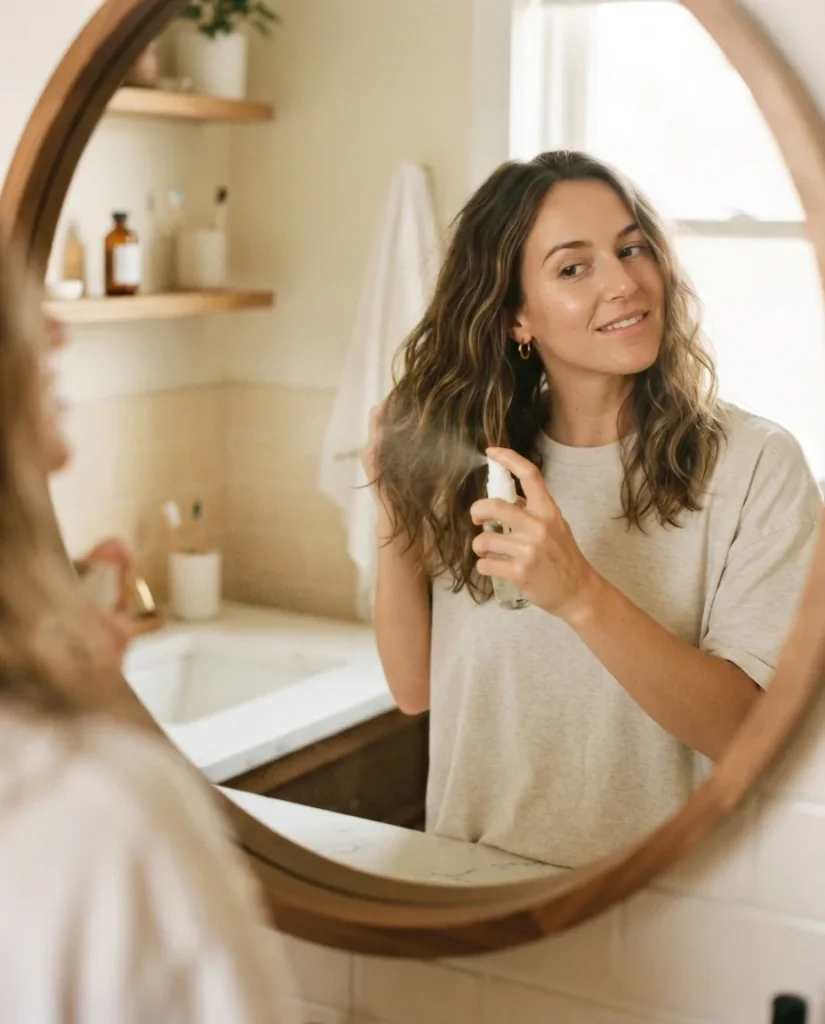
For a day-two refresh: lightly mist your hair with water (a spray bottle works perfectly), add a tiny scrunch of your original styling product or a refreshing spray, and then scrunch gently until the waves re-form. You might need to diffuse for five minutes on low heat to set them again. It takes some practice to figure out how much water and product your particular hair needs to refresh without going limp, but once you find it, it becomes a two-minute morning thing.
Tip 15: Give Yourself at Least Three to Four Wash Days
The first wash day in a new wavy hair routine is almost never the best result you will ever get. Your hair is adjusting, you are learning how much product to use, you are getting the feel of the techniques. Almost everyone has a mediocre round one. Keep going. By wash day three or four you will have a much clearer picture of what is working, what to dial back, and what your hair actually wants. Healthline’s overview of how to establish a sustainable hair care routine makes the excellent point that consistency, not perfection, is what actually transforms your hair over time.
The wavy hair community has a phrase: “trust the process.” It is used a lot because it needs to be. Your hair did not get confused overnight and it will not un-confuse overnight either. Three to four wash days is the real minimum before drawing conclusions.
A Quick Note on Common Beginner Troubleshooting
“My waves look great wet but disappear when dry.” Usually means products went on too-damp hair instead of soaking-wet hair, or you need more hold in your gel layer.
“Everything is just frizzy.” Check your towel first (are you using terry cloth?), then check whether you are applying products on wet enough hair, then check for buildup.
“My hair is crunchy but not in a good way.” The cast did not fully break, or your hair was still slightly damp when you tried to break it. Let it dry completely and try again.
“My waves are flat at the roots.” Classic fine-hair or 2A problem. Try less conditioner at the roots, reduce your plop time, and use a lighter gel or mousse rather than a heavier cream.
“I tried everything and nothing works.” You likely need to clarify first and start fresh. Buildup is the silent saboteur of more beginner wavy routines than anything else.
The Short Version: Your Starting Routine at a Glance
You do not need a ten-step system. Here is a clean, beginner-friendly wavy hair routine to start with:
Clarify once to reset. Then on wash days: shampoo your scalp, condition your lengths, squish to condish in the shower, rinse most of the conditioner out. Step out, apply leave-in while dripping wet, apply gel or mousse, plop for 10 to 20 minutes, then air dry or diffuse on low heat. When fully dry, break the cast with dry hands. Refresh on days two and three with a water mist and a small scrunch of product.
That is it. That is genuinely the whole foundation. Everything else is refinement.