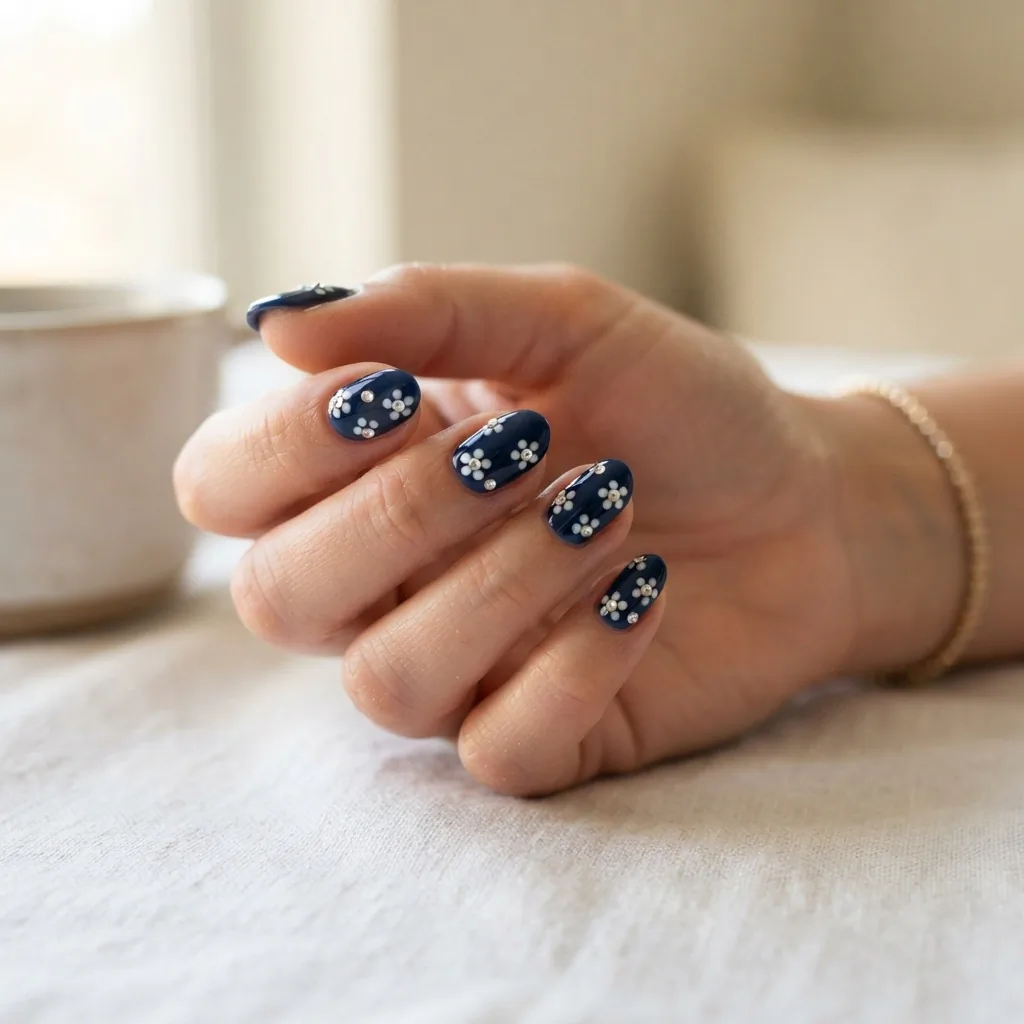
10 Floral Nail Designs That Look Hard But Really Aren’t
Let me tell you where my floral nail era started: a wobbly three-petal daisy on my left ring finger, painted with a cheap dotting tool I bought on impulse during the most boring internship of my life. It was lopsided. The petals were different sizes. The center dot was basically a small blob. And I was absolutely thrilled with it, because I made it, and it looked more like a flower than it had any right to given my level of skill at the time.
That is what floral nail art does. It looks impressive even when it is imperfect, because petals are organic. Nature does not make every flower identical, and neither will you, and somehow that makes your design look intentional instead of wobbly. It is genuinely one of the most forgiving categories in nail art, and if I can get here after starting with a dotting tool and a break room mirror, so can you.
Here are ten floral designs arranged from genuinely, laughably beginner-friendly all the way up to one that will give you bragging rights. No gatekeeping, no “but you might need a professional” hedges. Just real technique from my Chicago nail lab to your kitchen table.
Before You Touch a Brush: The Prep That Actually Matters
I know you want to skip this part. Do not skip this part. Good prep is the difference between a floral design that lasts four days and one that lasts ten. It is also what keeps your natural nails healthy underneath all the pretty art.
Start with clean, dry nails. If you have been wearing polish, remove it fully and let your nails breathe for a few minutes before you begin. Gently push back your cuticles with a rubber cuticle pusher or an orange stick, but please do not cut them unless you are trained to do so. The American Academy of Dermatology advises against cutting or forcefully pushing back cuticles because the cuticle acts as a protective seal against bacteria and fungus. Nicking it even slightly opens the door to infection. Gentle and soft is the rule.
File your nails to your chosen shape. Short and oval or short and rounded are actually my favorite shapes for floral art because the curved edge echoes a petal. Buff away any ridges lightly with a four-sided buffer, but do not over-buff. Too much buffing thins the nail plate and makes it more vulnerable. Wipe each nail with a nail prep wipe or a lint-free pad dampened with isopropyl alcohol to remove oils. Oils are the enemy of adhesion. Skip this and your base coat slides around and your flowers lift within days.
Apply one thin base coat and let it dry completely.
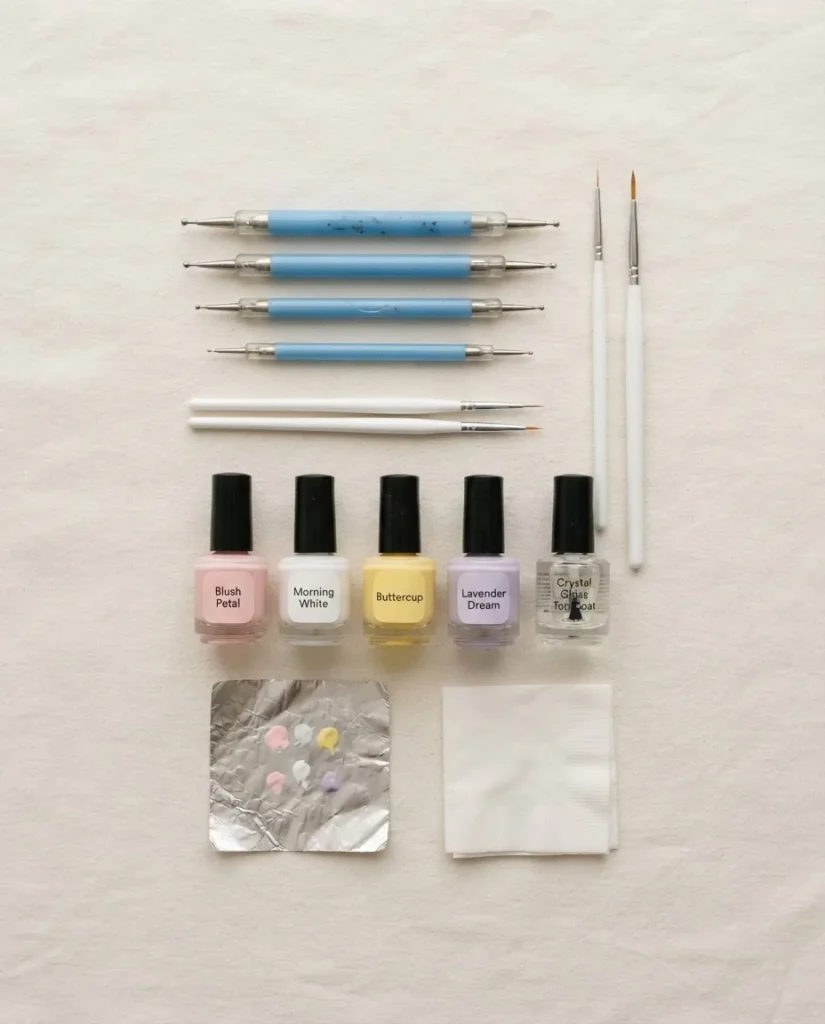
Now you are ready.
Your Tool Kit: What You Actually Need vs. What You Can Skip
You do not need a full brush set to do beautiful floral nails. Here is the honest breakdown.
A dotting tool is the single most useful tool you can own for flower designs. The double-ended ones with two different ball sizes are ideal. You can pick up a set of five double-ended dotting tools for under ten dollars on Amazon or at most beauty supply stores. In a pinch, the rounded end of a bobby pin, a toothpick, or the ball end of a cheap pen will give you something close enough to start.
A thin detail brush or liner brush opens up a lot of designs. Look for one with a very fine tip. Many nail art starter kits include these. You do not need an expensive brush at the beginner stage. A brush with a synthetic bristle tip that holds its point is all you need.
A nail stamping plate and stamper is worth considering if you want florals without any freehand element at all. More on stamping below. A good starter kit runs roughly fifteen to thirty dollars and includes multiple floral designs.
Polishes you need: a base color, one or two petal colors, a contrasting center color (usually a warm yellow, white, or deep contrasting hue), and a clear glossy top coat. That is genuinely it.
The 10 Designs, Ranked From Easiest to Most Advanced
Design 1: The Classic Five-Dot Daisy
This is where I started, and it is where I recommend everyone start. Apply your base color (soft pink, nude, or white are classic) and let it dry fully. Dip your dotting tool into white polish and place five dots in a rough circle on the nail, each dot roughly the same size and spaced equally. Then dip the smaller end of your dotting tool into a yellow or orange polish and place one dot directly in the center of your five-petal circle. That is a daisy. Cap with a top coat.
Your petals will not be perfectly round or perfectly spaced. That is fine. That is correct, actually. Daisies are casual flowers. The slight irregularity reads as charm, not mistake. Try starting on your non-dominant hand so your better hand is doing the detail work on your dominant nails.
Design 2: The Single Accent Flower on a Neutral Base
If the idea of covering every nail with flowers makes you nervous, do not. One flower on your ring finger against a sheer or nude base is a complete, intentional design and it photographs beautifully on Pinterest. Paint all nails in a soft nude or milky white. On your ring finger only, paint one or two florals using the dot method above. This is sometimes called the accent nail approach and it is a beginner’s best friend because it limits how many times you have to execute the design.
Design 3: Milk Bath Florals (The Pinterest Dreamy One)
This look is having a serious moment and it is far more achievable than it appears. Paint your nails with a sheer milky white or translucent pale pink gel or polish. While the color is still slightly tacky (if using regular polish, apply your florals quickly before full drying), use a toothpick or fine brush to place small petals from a slightly more pigmented white or pale pink onto the nail, then drag each petal inward slightly toward a center point. Seal carefully. The flowers look like they are floating inside the nail, which is what makes people stare at this design.
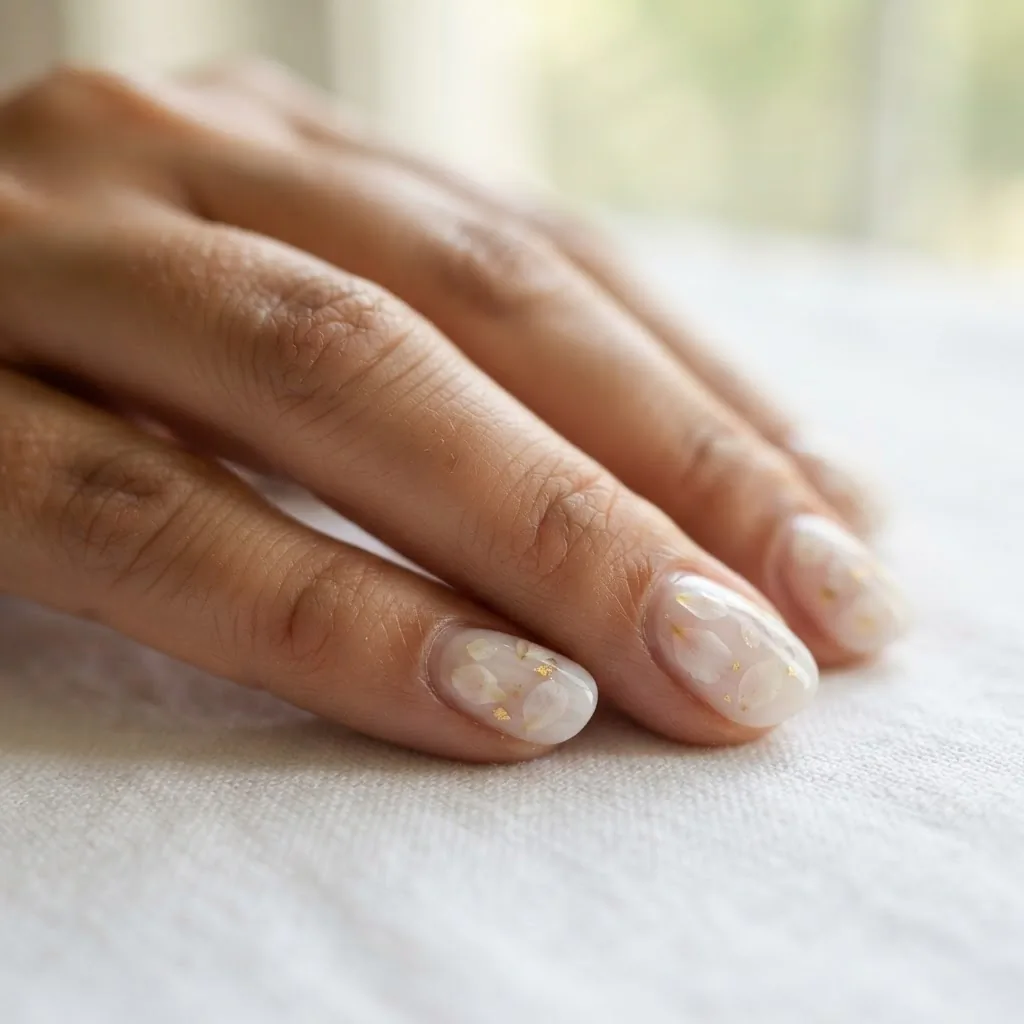
The trick is that your petals do not have to be perfect because the sheer base diffuses any imperfections.
Design 4: Floral French Tips
Take a classic French tip and place a small daisy or cluster of tiny petals right at the junction of the white tip and the natural nail line. You can do this with regular white polish for the tip, then dot on your flowers with a contrasting color. This design is endlessly flattering on every nail length because the French base keeps it looking clean and put-together even if your florals are a little rough.
Design 5: Stamped Florals (Zero Freehand Required)
If the freehand element is what has been stopping you, stamping removes it entirely. You apply a base color, let it dry, then apply a special stamping polish (which is thicker than regular polish) over a metal stamping plate that has floral designs etched into it. Scrape off the excess, press a stamper firmly onto the plate to pick up the design, then roll it firmly onto your nail. It transfers the complete flower image in one press.
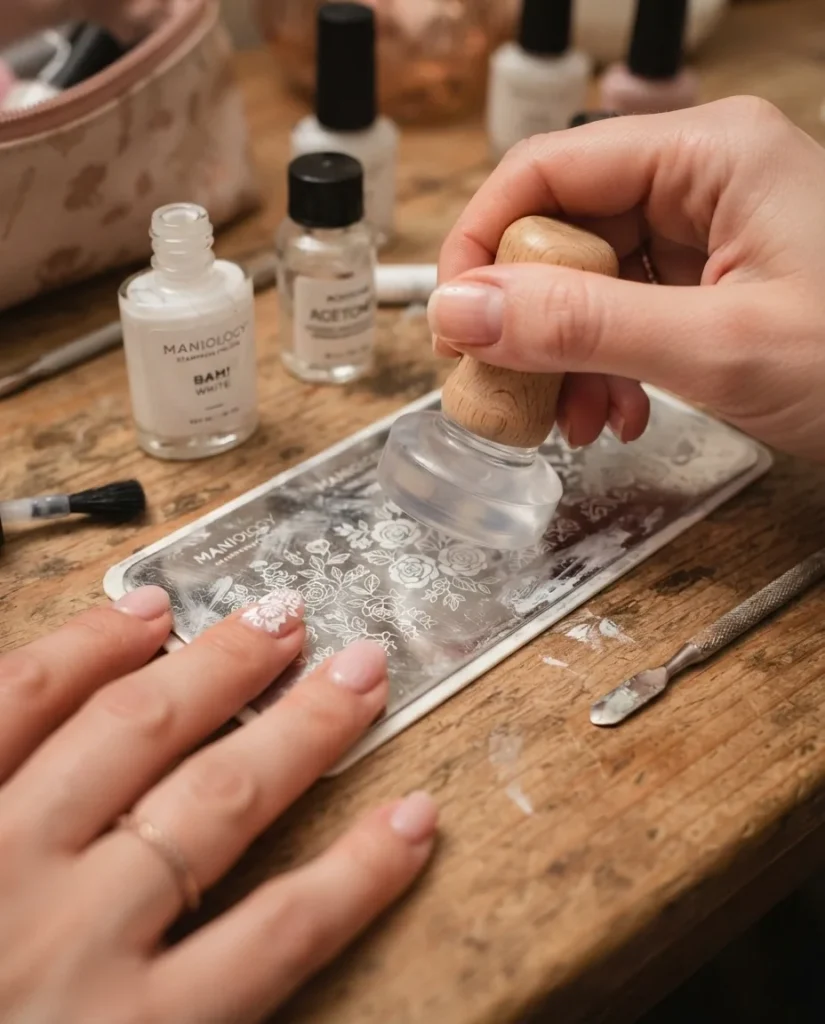
Maniology has a thorough beginner guide to the stamping technique that walks through every step including which polishes work, how to fix a smeared transfer, and how to position designs on shorter nails. Stamping does take two or three tries to get the pressure and timing right, but once you have it, the results genuinely look professional. Starter stamping kits with floral plates included run roughly fifteen to thirty dollars.
Design 6: Watercolor Botanical Florals
This is a gorgeous look that requires gel polish or very diluted regular polish. The idea is to create soft, blended petals that look painted with watercolors rather than sharp and defined. In gel, you brush on a very thin layer of a petal color over your base, then use a clean brush to blend the edges before curing. Layer two or three translucent petal shapes on top of each other to build depth. In regular polish, you can thin the polish slightly and work quickly, using a dry brush to feather the edges. Imperfection is not just tolerated here, it is the entire aesthetic.
Design 7: Vine and Leaf Trailing Detail
A single thin vine with tiny leaves running along the side edge of the nail is a design that looks incredibly intricate but consists mostly of simple curved lines. Use a very fine liner brush and a deep green or earthy olive polish. Paint one soft curved line from the base of the nail to the tip, then add tiny teardrop leaf shapes branching off it. Add a few tiny dot flowers in white or blush. This is the design I practice when I am testing new liner brushes at my nail lab, because the line work shows you immediately how a brush performs.
Design 8: Peony or Tulip Painted Florals
This is where you step up to actual petal painting with a liner or detail brush. For a simple peony, lay down a slightly rounded oval of pale pink, then use a slightly deeper pink to paint curved half-moon strokes along the top edge, layering them to suggest petals opening. For a tulip, think of a rounded cup shape in two connected strokes. Neither of these has to be botanically accurate. You are suggesting a flower, not illustrating a textbook. This design pairs beautifully with the vine-and-leaf work from design 7.
Design 9: Crystal Floral Nails (The 2025 Trend Moment)
Celebrity nail artist Mo Qin flagged crystal florals as one of the top trends for this season, and I completely see why. Paint a rich velvet or deep jewel-toned base, then place your dot flowers using a lighter or metallic polish, and finish by pressing a tiny nail rhinestone or flat-back crystal into the center of each flower using a dotting tool dipped in top coat. The crystal catches the light and the whole design reads as elevated and expensive. Rhinestone packs for nails run a few dollars and you can find them at any beauty supply store.
Design 10: 3D Gel Molded Flowers (The Advanced One)
This is the raised, sculptural flower you see on editorial nail content, where the petals actually lift off the nail surface and cast a tiny shadow. It requires builder gel or a thick sculpting gel, not regular polish. You place a small bead of sculpting gel on the nail and use a brush to pull out five petal shapes, curing briefly between layers to build height. If you are curious about how this technique has evolved across current trends, Vogue’s current floral nail roundup shows the variety of 3D floral approaches celebrity nail artists are using right now and gives you a sense of the range of looks this technique can achieve. I will be honest: 3D molded flowers are genuinely harder than everything else on this list. The learning curve is real. But they are also the design that makes people stop you on the street to ask about your nails, and that is worth something.
Design Tips for Short Nails (Because Short Nails Deserve Flowers Too)
Every single design on this list works on short nails. Here is how to adapt.
Scale down. The five-dot daisy on a long almond nail uses medium dots. On a short rounded nail, use your smallest dotting tip and make the whole flower smaller. One well-placed small flower on a short nail looks considered and elegant.
Think corner placement rather than center. A small flower tucked at the corner of the nail near the cuticle or at the tip line uses the limited real estate wisely and draws the eye to the nail’s best angle.
Limit to one or two florals per nail. Short nails can get busy fast. A single small daisy or a two-bloom cluster is enough.
The milk bath floating petal look is genuinely one of the best looks for shorter nails because the translucent base makes the nail itself look longer, and the minimal petal placement is proportional to the smaller nail surface.
Color Notes: Choosing What Works for You
One thing competitor guides almost never mention is how the base color affects the whole design. Here is the honest breakdown.
White and milky sheer bases make petal colors pop most vividly and are the classic floral foundation. They work well across every skin tone.
Nude and skin-toned bases give a delicate, barely-there effect that photographs beautifully and is especially flattering on medium and deep skin tones because the contrast between the base and the petal color creates a soft glow rather than a stark contrast.
Deep and jewel-toned bases (navy, forest green, burgundy, black) create a dramatic, editorial floral look where white or pale petals pop against the dark background. This is a completely different energy than pastels and it is stunning on all skin tones, but especially rich and gorgeous on deeper skin tones.
For skin-tone flattering petal colors: warm corals, terracotta-adjacent oranges, and golden yellows tend to complement medium and olive tones beautifully.
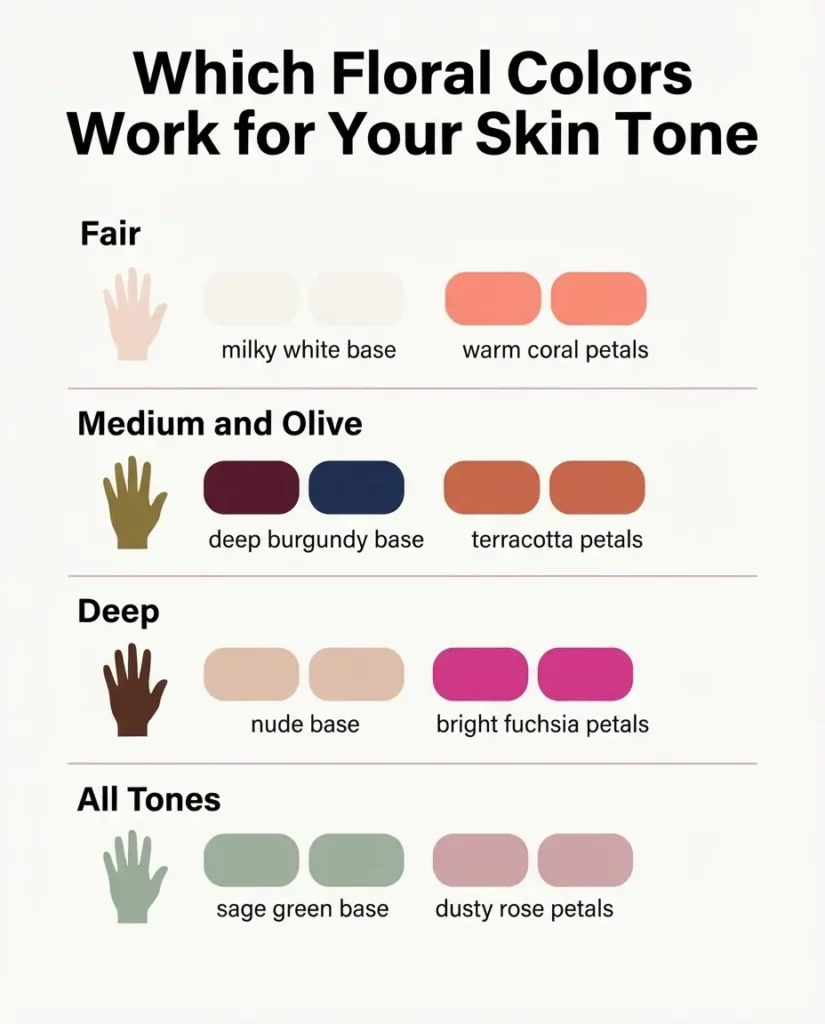
Cool lavenders, icy pinks, and white-on-white work especially well on fair tones. Bright tropical colors, saturated fuchsias, and electric blues are universally fun and do not need to match skin tone at all.
Gel vs. Regular Polish for Floral Designs: Which Should You Use?
This is a real question and the answer depends on what you already have and how long you want the design to last.
Regular nail polish works perfectly for every design on this list. The main challenge is drying time. You need each layer to be fully dry before you paint on top of it, or your petals will drag and smear. Give your base color at least two to three minutes between coats, and give your second coat ten to fifteen minutes before starting any nail art on top of it. A regular-polish floral design typically lasts three to five days before tip wear appears, depending on how much you use your hands.
Gel polish gives you a harder, more durable surface to paint on and holds floral details far better because the gel layers do not smudge once cured under the lamp. If you are doing floral art in gel, apply and fully cure your base color before starting any design work. Your florals will last one to three weeks depending on your prep.
If you are using an at-home gel system, the FDA’s nail care products page is a good resource for understanding how nail products are regulated and what to look for on ingredient lists, which matters if you have sensitive skin or are new to gel.
One note on gel and UV lamps: A 2025 peer-reviewed review published in PMC noted that repeated UV/LED lamp exposure during gel manicures is associated with skin damage risk on the backs of the hands over time. The current practical guidance from dermatologists is to apply a broad-spectrum SPF 30 or higher sunscreen or wear UV-protective gloves (with the finger cutouts that expose just your nails) before curing sessions, which keeps the exposure to your nail plate while protecting the surrounding skin. This does not mean gel nails are something to be afraid of. It means curing smart is part of a good at-home gel routine. You can read the full research overview at MD Anderson Cancer Center’s gel manicure safety explainer.
If you have experienced any itching, redness, or swelling around your nails or fingertips after using gel products, it is worth knowing that this can be a sign of sensitivity to HEMA (2-hydroxyethyl methacrylate), an ingredient in many traditional gel formulas. HEMA-free gel options are widely available. If you suspect a reaction, stop using the product and see a dermatologist.
The Biggest Beginner Mistakes (And How to Fix Them)
Nobody talks about this enough. Here are the failures I see most often, and what to do instead.
Flooding the cuticle with petal polish. This happens when you load too much product on your brush or dotting tool. The fix: wipe most of the polish off your tool before each application. You want just enough to place one dot or one petal stroke, not a full reload every time. Less is genuinely more.
Muddy blended colors. If your petal colors are blending into each other and turning brown or grey, you are painting on top of wet polish. Wait longer. The colors need to be dry before you layer. For gel, make sure you cure between layers.
Petals smearing when you apply top coat. This is heartbreaking and extremely common. The fix: let your design dry completely, longer than you think is necessary, before applying top coat. For regular polish, fifteen to twenty minutes of dry time for your nail art layer before top coat is a safe minimum. Apply the top coat in smooth, swift strokes without going back and forth over the same spot. Feather it on, do not scrub it on.
Uneven dot sizes. Your dotting tool is picking up different amounts of polish each time. Standardize by pressing the tool into a polish puddle on a palette or foil square to the same depth each time before placing it on the nail.
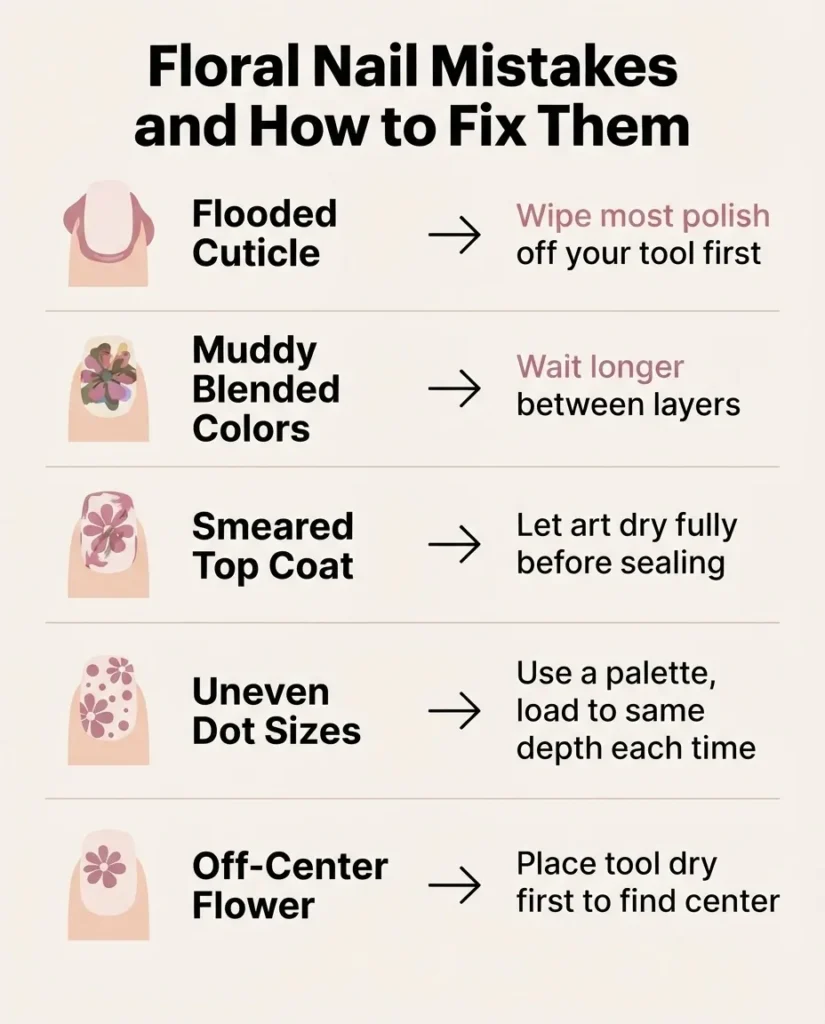
The whole flower looks off-center. This is a matter of placement practice. Before loading your tool with polish, place it dry on the nail to find your center point. Then dip and dot.
Protecting Your Natural Nails
Whatever design you choose, your natural nails deserve to stay healthy underneath. The AAD’s dermatologist-approved tips for healthy nails include keeping nails clean and dry, moisturizing the nail and surrounding skin, and never peeling off gel or nail art, which pulls layers of the natural nail with it.
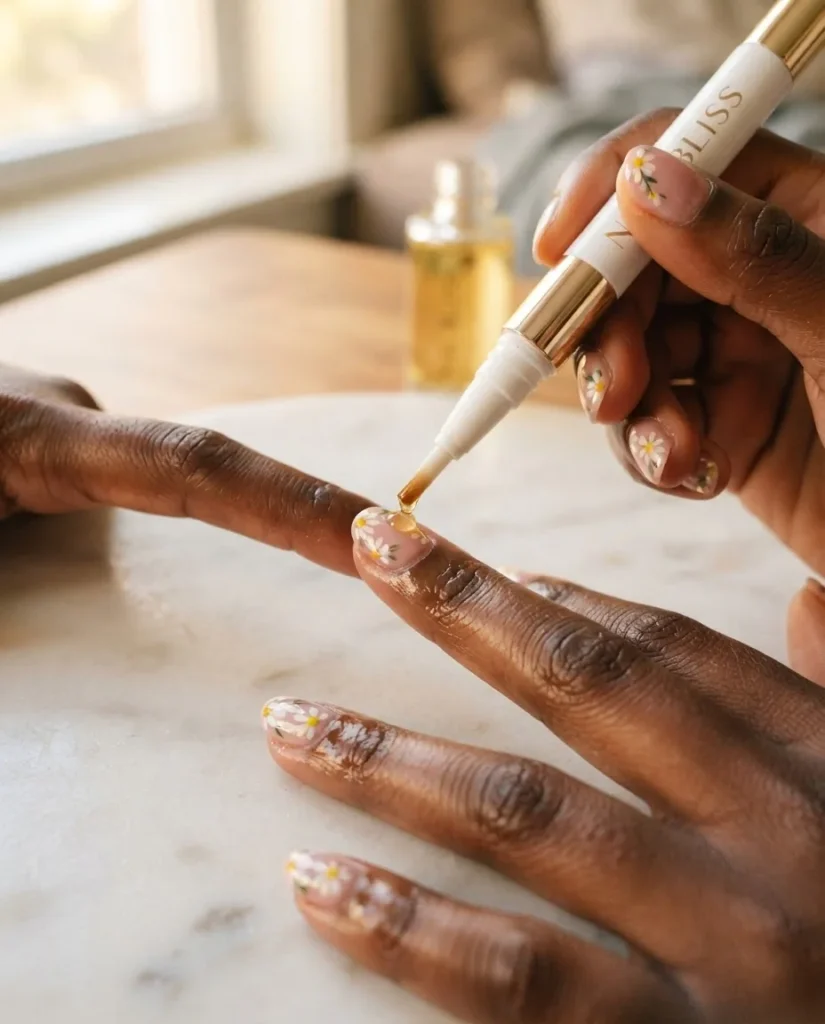
Safe removal matters as much as beautiful application. For regular polish, a regular remover is fine. For gel, use the foil-wrap soak-off method: saturate a cotton ball with pure acetone, place it on the nail, wrap the fingertip tightly in foil, and leave it for ten to fifteen minutes. The gel softens and should slide off with gentle pressure from an orange stick. If it does not, re-wrap and soak longer. Never force it. The acetone will dry the surrounding skin, so follow up with cuticle oil and a good hand moisturizer.
That is the whole safe removal protocol.
If you ever lift a nail with discoloration underneath, or notice pain, unusual thickness, or any change in nail texture after wearing art, that is worth a trip to a dermatologist rather than a re-application.
A Quick Note on Practice
I want to be honest with you. Designs 1 through 5 on this list can be done on your first try and look genuinely good. Designs 6 through 10 will get better with practice. Nobody’s first peony painting is their best peony painting. Mine certainly was not. I have smeared, flooded, dragged, and completely ruined manicures more times than I can count in my nail lab, and every single one of those ruined nails taught me something.
The goal of your first floral mani is not a perfect result. The goal is finishing it, looking at your own hands, and feeling that small warm flicker of “I made that.” That feeling is what builds the confidence for the next one, and the one after that.
If I can do it after a ten-hour workday with nothing but a cheap dotting tool and a whole lot of stubborn energy, so can you. Now go buy some dotting tools and some flowers. Your next manicure is going to be so good.