15 Bridal Nails with Rhinestones You Can Actually Do Yourself
I still remember the first time I tried to put a rhinestone on a nail. I pressed it down with my fingertip (wrong move), watched it skitter off the table, and spent five minutes on my hands and knees looking for a stone the size of a poppy seed. It was not my finest moment. But here’s the thing: a few wobbly tries later, I figured out the system, and now I can lay down a cluster of crystals that looks like it came straight out of a bridal salon.
That is exactly why I’m writing this. Rhinestone bridal nails have been one of the most-saved manicure categories on Pinterest for the past two seasons running, and I completely get why. There is something about the way crystal catches light during a ceremony that no amount of shimmer polish can replicate. But every time I see someone in a comment section say “I could never do this at home,” I want to reach through the screen and hand them a wax pencil and a jar of rhinestone gel. Because you can do this. I promise.
This article covers 15 specific bridal nail ideas with rhinestones, organized by style and skill level, plus everything you need to know about how to actually apply them so they stay put through the cake cutting, the bouquet toss, and whatever dancing happens after. Let’s go.
Before You Design: The Foundation Nobody Talks About
Here’s the part that most rhinestone nail articles skip completely, and it’s probably the biggest reason DIY rhinestone nails fall flat or fall off. No matter how beautiful your design is, it lives or dies based on what’s underneath.
Start with clean, dry, dehydrated nails. That means no lotion, no cuticle oil, nothing on the nail plate before you begin. Oils are the enemy of adhesion. I use a lint-free wipe with a little isopropyl alcohol to wipe each nail before I do anything else. Then I gently buff the surface with a 180-grit buffer, just enough to create a slight texture that gives your base coat or gel something to grip. The American Academy of Dermatology recommends keeping nails clean and dry as a baseline for healthy nail maintenance, and that same principle is your best friend here before you add any decoration.
Push your cuticles back gently with a rubber-tipped cuticle pusher. Do not cut them unless you are trained to do so. Cutting the living skin around your nail bed creates tiny openings that can allow bacteria or product to get in, and that is a situation nobody wants in the week before their wedding. Keep cuticle scissors away and stick to pushing and moisturizing regularly in the weeks leading up to your event. For deeper guidance on building healthy nails before a big occasion, the AAD’s nail care tips are a solid and honest starting point.
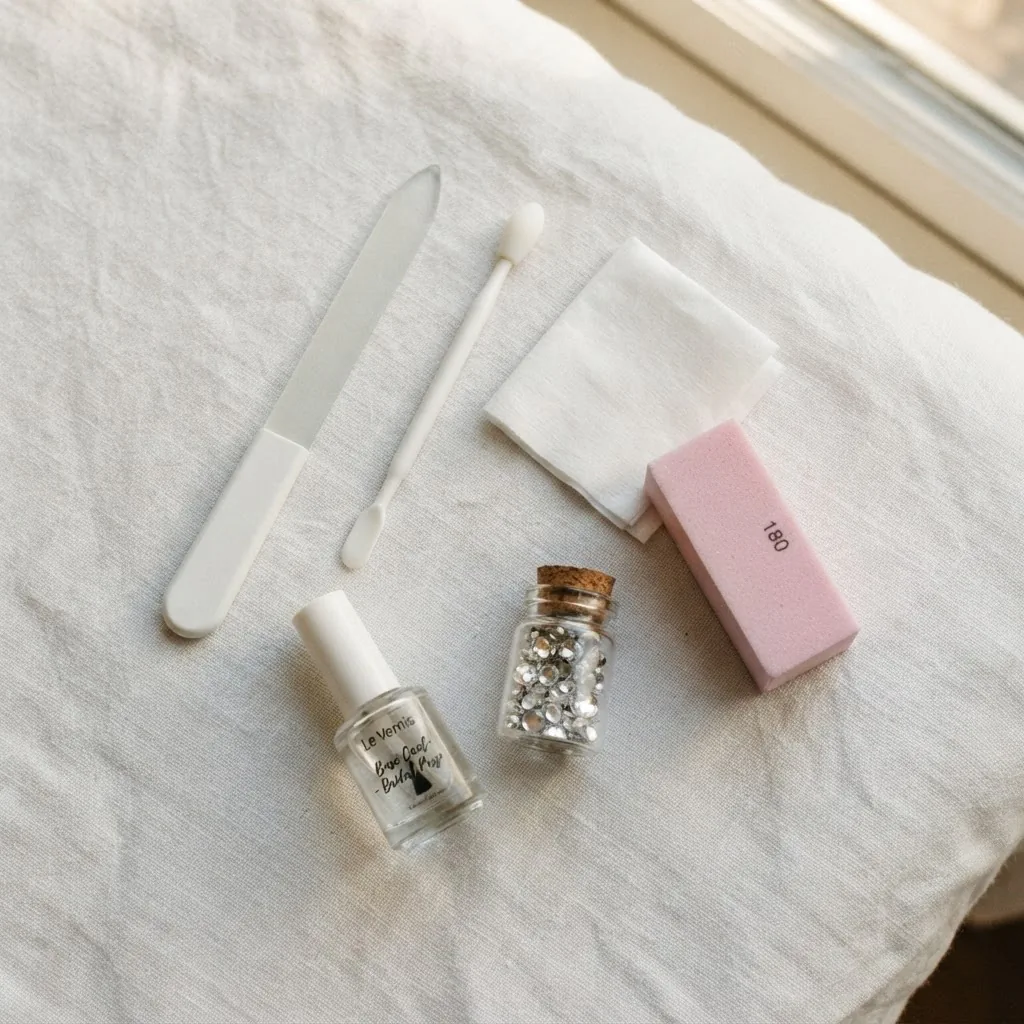
Apply a good base coat. This protects your natural nail and gives whatever color or gel you’re using a smooth, even surface to sit on. If you’re using a gel system with rhinestone adhesive, cure your base coat fully according to your lamp’s instructions before moving on.
Your Tool Kit: What You Actually Need (and the Dupes That Work)
You don’t need a professional nail supply haul to do bridal rhinestone nails. Here’s the honest list.
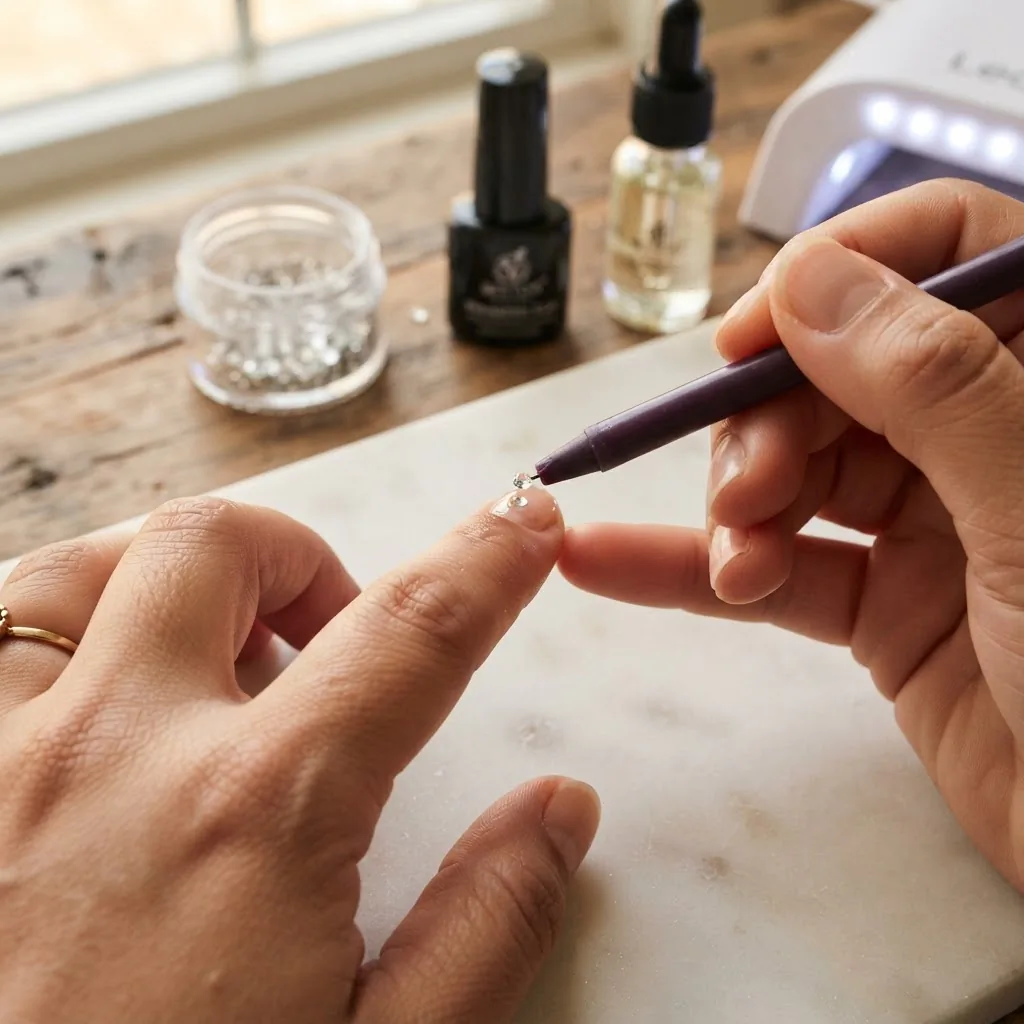
A rhinestone picker or wax pencil is non-negotiable. Trying to place tiny crystals with your fingers or tweezers alone is frustrating and imprecise. A wax-tipped picker picks up the stone on contact because the wax grips it just enough, and lets you set it down on the nail exactly where you want it. These run about $3 to $8 on their own, or come included in most rhinestone starter kits. This is your most important tool for the whole process.
For adhesive, you have three main options. Regular nail glue works, but tends to hold rhinestones for only 3 to 10 days before they start popping off. If your wedding is more than a week away or you want rhinestones that genuinely survive the weekend, rhinestone gel adhesive is a much better choice. This is a no-wipe gel formula that you apply to the nail, press your stone into, and then cure under an LED lamp. The bond it creates can last three to four weeks. You apply a small bead of it exactly where you want the stone, cure for 60 to 90 seconds under your LED, and then seal with top coat around (never over) the stones. Kiara Sky has a clear breakdown of the full four-step process on their how to apply rhinestones to nails guide, which is one of the most beginner-friendly application walkthroughs I’ve come across for this specific technique.
Budget dupe for rhinestone gel: some nail artists use a no-wipe gel top coat as a substitute for dedicated rhinestone adhesive in a pinch. It works for lighter, smaller stones, though it won’t hold larger gems as securely. If you’re doing a subtle micro-crystal look with ss5 or ss6 stones, a thick no-wipe gel top coat can get the job done. For a heavy cluster look with bigger stones, invest in the proper rhinestone gel.
Rhinestones themselves come in a lot of size options. The sizing system uses “ss” (Stone Size) numbers: ss3 is about 1.3mm, essentially a grain of sand, and is perfect for ultra-fine pixelated bridal art. SS5 at 1.7mm to 1.8mm and ss6 at 1.9mm to 2.0mm are the most popular nail art sizes because they’re small enough to look delicate and refined, but large enough to actually catch light beautifully. SS8 and ss10 give you that statement stone effect without being overwhelming on a nail. For a full breakdown of what each size looks like and how many you need for different placements, Crystal Ninja’s rhinestone size guide is the most comprehensive visual reference I’ve found, and it includes real-world size comparisons that make the numbers actually click.
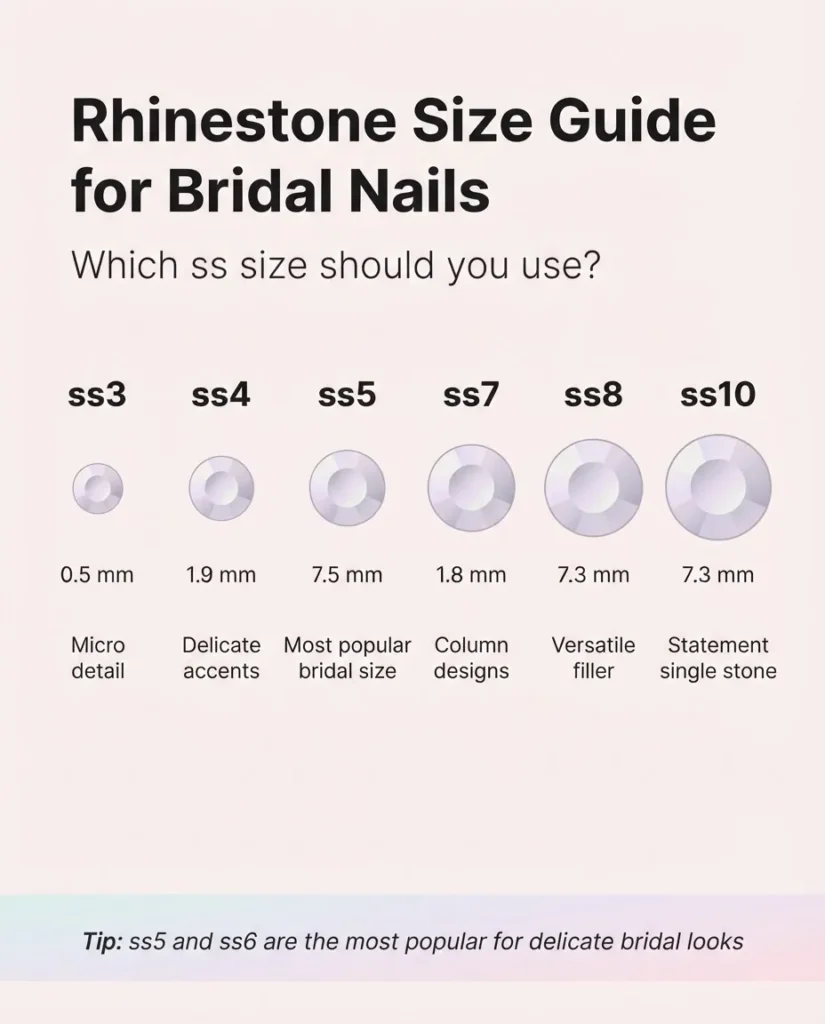
For finish, clear crystal AB (aurora borealis, which has an iridescent rainbow coating) and champagne or rose gold tones are the most universally flattering for bridal looks. Clear crystal AB in particular has a way of picking up whatever color surrounds it, so it works on every skin tone and against every dress color.
Finally, a good quality gel no-wipe top coat to seal everything in, and some cuticle oil for after you’re done.
A Word on Gel, LED Lamps, and Safety
If you’re using a gel-based rhinestone adhesive, you’ll need an LED lamp to cure it. LED lamps emit UV radiation, predominantly UVA rays. The Skin Cancer Foundation notes that nail lamps present only a moderate UV risk compared to, say, tanning beds, but recommends applying a broad-spectrum sunscreen to your hands about 20 minutes before lamp exposure if you’re curing regularly. That’s a small, easy habit worth building if gel manicures are a regular part of your life. You can read their full guidance at the Skin Cancer Foundation’s expert response on UV nail lamps.
If you’ve noticed redness, itching, swelling, or a rash around your cuticles after using gel products before, you may be sensitive to the acrylate monomers in those formulas, including compounds related to HEMA (2-hydroxyethyl methacrylate). The FDA’s page on nail care product safety has a thorough breakdown of methacrylate monomers and why contact with the skin around the nail bed is what tends to trigger reactions. The short version: keep gel products off your skin as much as possible while applying, work in a ventilated space, and if you’ve had a reaction before, do a patch test on a single nail a few days before your wedding rather than committing to a full set. If you develop pain, lifting with discoloration under the nail, or a skin reaction that doesn’t resolve, see a dermatologist.
The 15 Bridal Nail Ideas: From Subtle to Statement
I’ve organized these by vibe and skill level, starting with the easiest for absolute beginners and working up toward the more involved designs. Every single one is doable at your kitchen table.
Look 1: Micro-Crystal Accent Nails
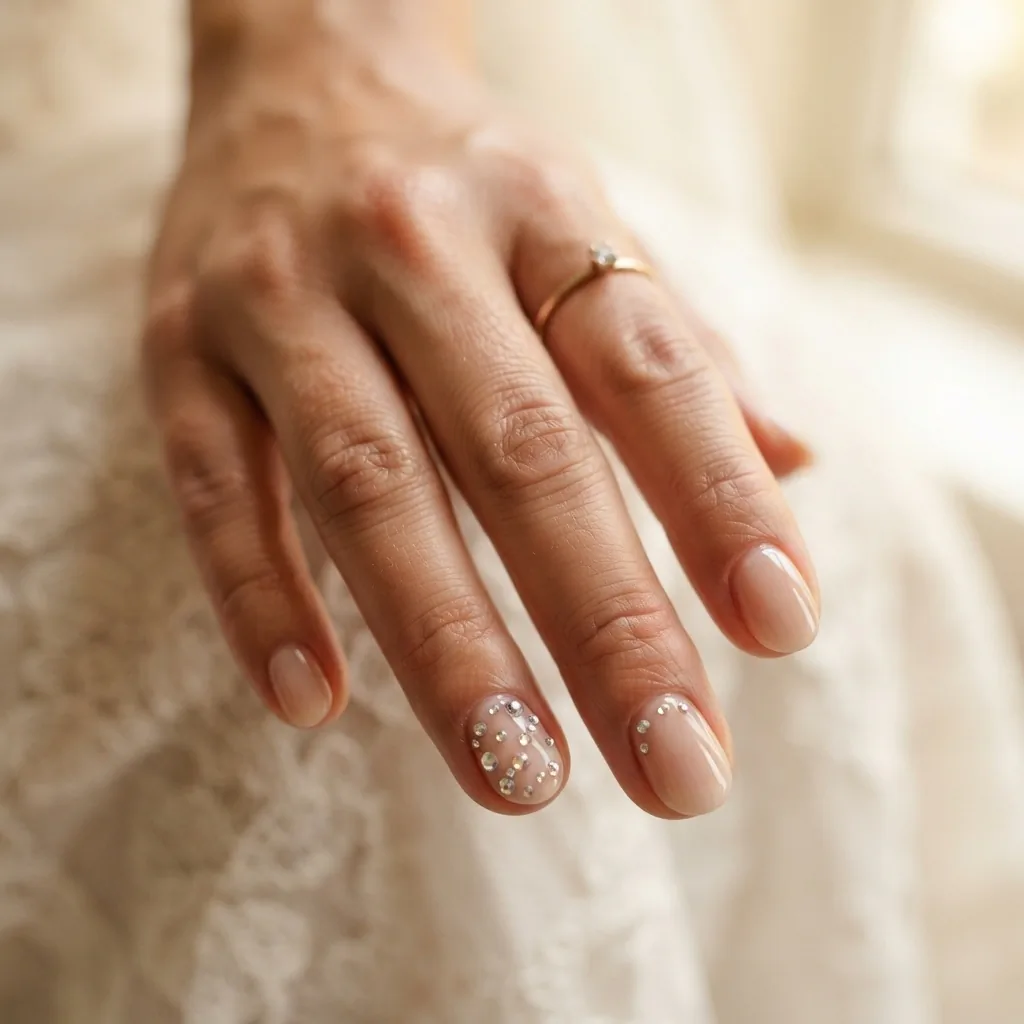
This is where I’d tell every first-timer to start, and honestly, it’s also one of the most elegant results you can get. Paint all ten nails with a sheer nude or milky pink. On just your ring fingers (or your ring fingers and thumbs), place a loose scattering of ss5 clear crystal AB stones across the lower third of the nail near the cuticle. The trick is to resist filling every gap. Spacing them out, maybe 8 to 12 tiny stones per nail, gives a “morning dew on glass” effect that photographs beautifully.
Skill level: Beginner. Number of stones per nail: 8 to 12. Best sizes: ss5, ss6.
Look 2: Crystal French Tip
The classic French tip gets a bridal upgrade. Paint a thin, clean white or sheer tip line, then press a single row of ss5 or ss6 clear crystals right along the smile line before it fully dries or while the gel adhesive is tacky. The stones sit exactly where the white polish meets the natural nail, creating a glittering outline that replaces the traditional white line. No freehand required for the placement since the tip line guides you.
Skill level: Beginner to intermediate. Best sizes: ss5, ss6. Tip: use rhinestone gel adhesive over the tip line rather than relying on the polish to hold stones.
Look 3: Rhinestone Column
One vertical line of stones running from the cuticle toward the tip, centered on the nail. Use graduated sizing, starting with ss6 at the base, moving to ss5 in the middle, and finishing with ss3 at the very tip, for a tapered effect that looks intentional and architectural. This design works on every nail length and is especially flattering on short to medium nails where a cluster might feel overwhelming.
Skill level: Beginner. Best sizes: ss3, ss5, ss6 mixed.
Look 4: Cuticle Cluster (the Most-Pinned Look on the Planet Right Now)
This is the rhinestone bridal design trending hardest through 2025 and into 2026. A dense cluster of mixed-size crystals placed right at the base of the nail, hugging the cuticle line, with clear polish or a milky sheer base. It looks like jewelry growing out of the nail. Use ss3 and ss5 to fill in gaps and ss8 as your larger accent stones. The key is building it in layers: place your bigger stones first to anchor the arrangement, then fill the spaces between with smaller ones.
Skill level: Intermediate. Takes practice to make it look organic rather than random. Best sizes: ss3, ss5, ss8 mixed. Pro tip: placing stones close to the cuticle area also makes them less likely to catch on things and pop off.
Look 5: Half-Moon Rhinestone Halo
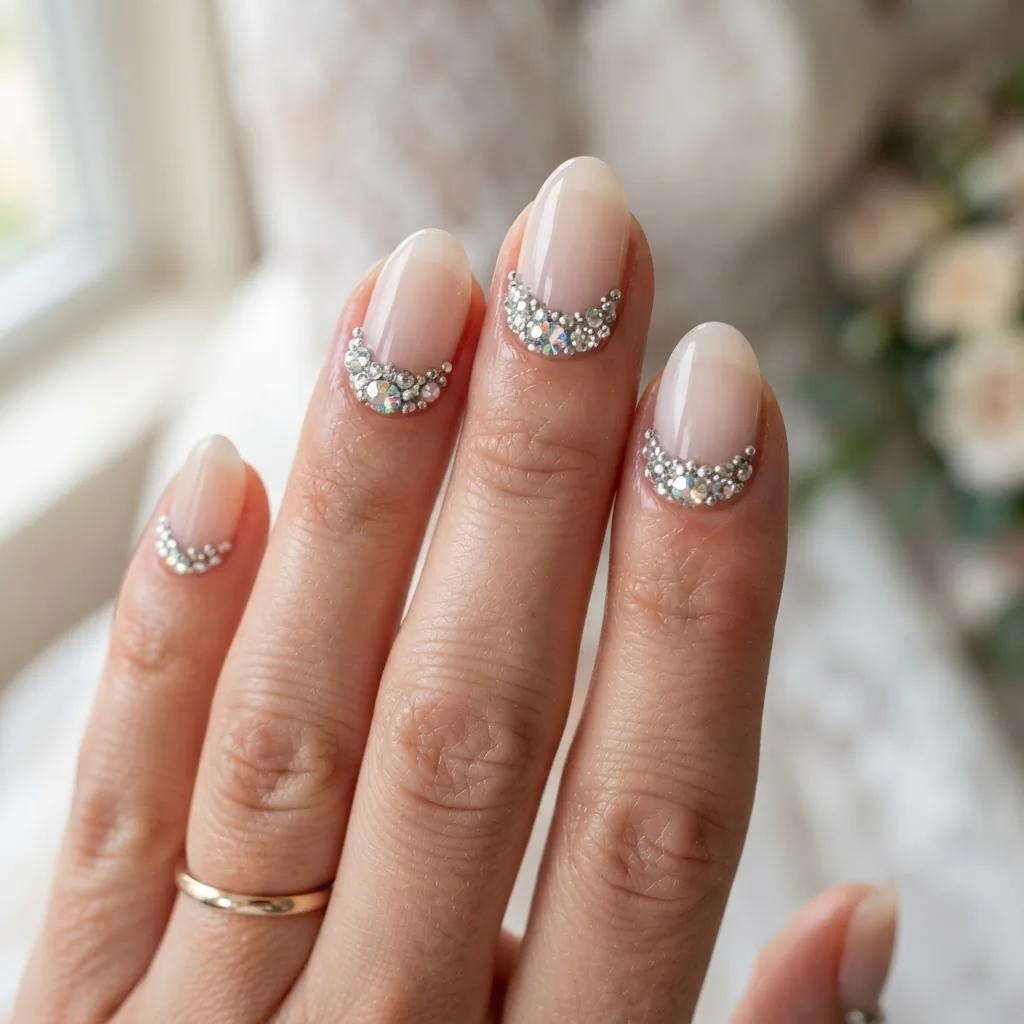
A delicate arc of ss5 stones following the natural half-moon shape at the base of the nail. Paint nails with a sheer pink or champagne base, then lay a single row of evenly spaced stones along that curved line. The symmetry of the half-moon makes it easier to place than a freehand cluster because the shape gives you a guide. This design is refined, not overdone, and works beautifully on shorter nails.
Skill level: Beginner. Best sizes: ss5, ss6.
Look 6: All-Over Scattered Crystal
Random-looking but actually planned. On a clear or milky base, scatter 15 to 20 ss5 stones across the entire nail surface in what feels like a haphazard pattern. The trick is to avoid clustering them all in one zone. Think of it like stars: you want variation in spacing to make it look natural. This design has a magical “caught in the light” quality that shows up especially well in photos.
Skill level: Beginner. Best sizes: ss5.
Look 7: Single Statement Stone
One large ss10 or ss12 crystal placed at the center base of the nail on a nude or white base. That’s it. No filler, no extras. This is the most editorial-feeling design in this list and the one that surprises people the most with how polished it looks despite being so simple. Use rhinestone gel adhesive for this one because a large single stone that falls off mid-wedding is heartbreaking.
Skill level: Absolute beginner. Best size: ss10, ss12.
Look 8: Rhinestone-Tipped Almond Nails
On medium to long almond-shaped nails, paint a soft white or pearl tip and then press a dense half-moon of ss5 stones right at the very tip edge. The curved almond shape makes this placement natural. The result is a “diamond-dipped” look that’s dramatic from a distance but refined up close. If you’ve never done almond nails before, this design really rewards the shape.
Skill level: Intermediate. Best sizes: ss5, ss6.
Look 9: Milky Nails with Gold and Crystal Mix
A milky white or sheer blush base with a mix of clear crystal AB and champagne-gold crystal stones. Mixing two tones of rhinestone adds warmth that pairs beautifully with gold jewelry and is especially flattering on medium to deeper skin tones. Place them in a loose cluster at the base or a column down the center.
Skill level: Beginner. Best sizes: ss5, ss6 in both tones.
Look 10: Chrome Base with Micro Crystals
Apply a chrome or mirror-finish powder over a gel base (rose gold or silver chrome work especially well for bridal), then press tiny ss3 or ss5 clear crystal AB stones into a scattered or clustered arrangement. The metallic base amplifies the light refraction of the stones dramatically, so you need fewer rhinestones to get a big impact. This is one of the most current bridal looks heading into 2026, and it photographs like actual jewelry.
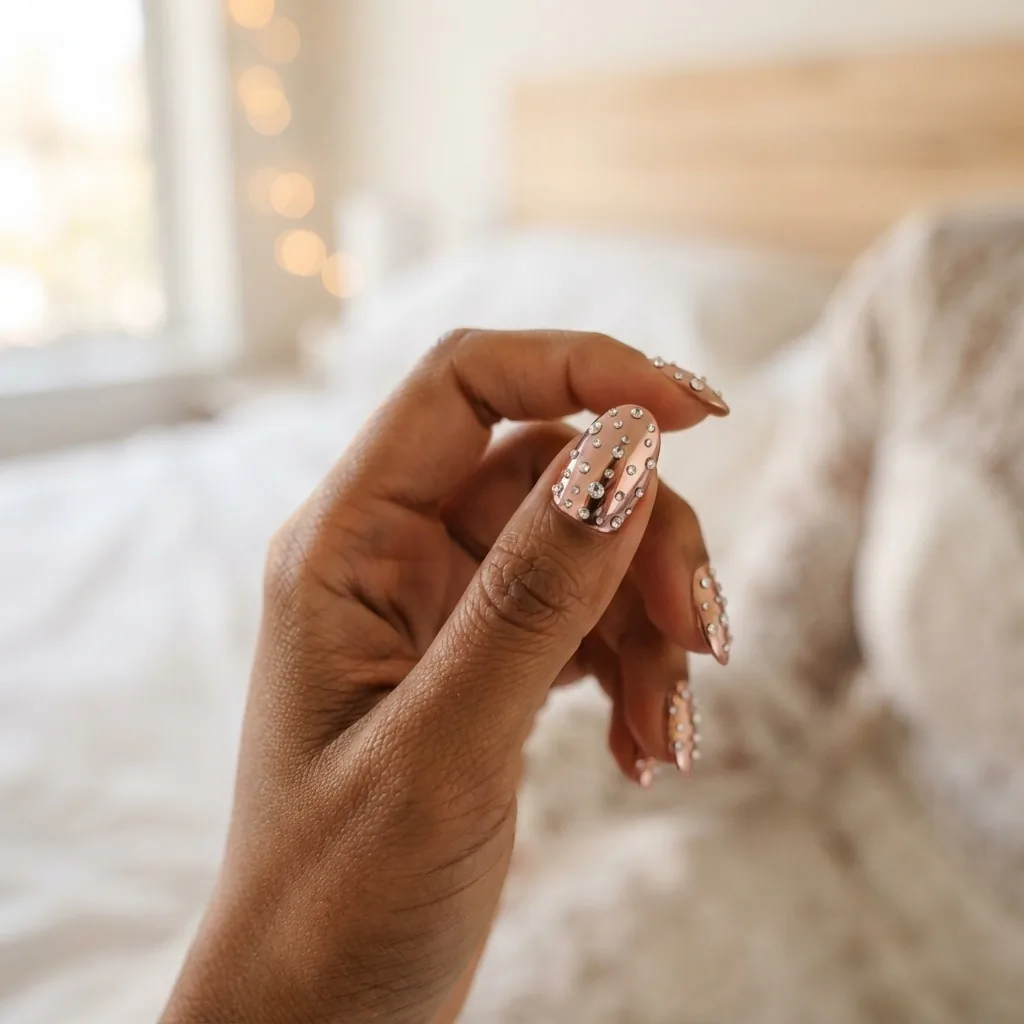
Skill level: Intermediate (chrome application takes a practice round). Best sizes: ss3, ss5.
Look 11: Ombre with Crystal Tips
Sponge a sheer white to nude ombre from tip to base, then add a scattering of ss5 stones concentrated at the tip where the white fades in. The gradient guides the eye to the sparkle. You don’t need a perfect ombre for this to look stunning since the rhinestones draw all the attention.
Skill level: Beginner to intermediate. Best sizes: ss5.
Look 12: Bridal Pink with a Rhinestone Bow Accent
Using nail art flat beads or a small bow charm as the centerpiece and ss5 stones as a surrounding halo, place the bow at the center of the ring finger nail on a soft pink base. The bow is technically a charm (not a rhinestone), but it belongs in this category because the surrounding crystal halo is what gives it the bridal feel. Bow nails are a major trend heading through 2025, and the rhinestone halo elevates it from cute to bridal.
Skill level: Intermediate. Best sizes: ss5 for the surrounding halo.
Look 13: Short Nails, Big Sparkle (Squoval Edition)
Short nails are not a limitation, and if anyone tells you otherwise, send them this article. A squoval (square-oval) short nail with a cuticle cluster of ss3 and ss5 stones looks just as intentional and just as bridal as a long coffin nail with the same treatment. In fact, on short nails the cluster can feel more proportional and wearable. Green Wedding Shoes’ 2026 wedding nail roundup specifically calls out shorter nails with chrome or crystal finishes as one of the most current bridal looks, so you’re completely on trend.
Skill level: Beginner. Best sizes: ss3, ss5. Keep the cluster small and tight to stay proportional.
Look 14: Floating French with Crystal Clusters at Both Ends
A “floating French” is a modern take where instead of a tip line, you use a thin arc of ss5 stones at both the tip and the base of the nail, with bare or sheer nail visible in between. The effect is that the nail looks cuffed in crystal at both ends. This is a contemporary, fashion-forward design that still reads as bridal because of the delicacy of the stones. It works best on medium to long nails with an almond or oval shape.
Skill level: Intermediate. Best sizes: ss5, ss6.
Look 15: The Mismatched Set (for the Non-Traditional Bride)
Not every bride wants matching nails. A modern approach is to do a different rhinestone placement on each nail: a column on the index, a cuticle cluster on the middle, a single statement stone on the ring finger, and a scattered crystal on the pinky. It sounds chaotic but it looks intentional when you keep the base color, stone color, and sizes consistent. The Knot’s short wedding nail guide highlights this kind of mix-and-match approach as increasingly popular among brides who want personality over perfection, and I love it for exactly that reason. If you want to see that kind of variety in a polished editorial context, their short wedding nails feature is worth a browse for placement inspo.
Skill level: Beginner to intermediate, depending on which placements you choose.
How to Make Rhinestones Actually Last Through the Wedding
Here’s where I want to be really honest with you. Even the best rhinestone job can lose a stone or two if it’s subjected to heavy abuse. Here’s how to protect your work.
Apply top coat around the stones, not on top of them. This means carefully tracing the perimeter of each stone with your top coat brush, essentially “encasing” the base of the stone in clear gel or polish. Getting product on the top surface of the stone makes it look cloudy and kills the sparkle.
Cure each nail one at a time if you’re using gel adhesive. Apply the adhesive, place your stones, check placement, and then cure before moving to the next nail. This gives you correction time before anything is locked in.
Wear gloves when washing dishes or doing anything submerging your hands. Extended water exposure is one of the fastest ways to weaken any nail adhesive.
Do a trial run at least a week before the wedding. This is not optional. You need to see how long your application holds, whether your lamp is curing the adhesive fully, and whether any design adjustments are needed. A bridal manicure trial should be treated the same way a hair and makeup trial is: a rehearsal, not the performance.
If a stone pops off before the event, don’t panic. Keep your rhinestone gel adhesive and a few extra stones in a small pouch in your bridal emergency kit. Press a replacement stone into a tiny bead of adhesive and flash-cure for 10 seconds if you have a portable lamp, or apply a dot of nail glue as a last resort and hold the stone still for 30 seconds.
Timing Your Bridal Manicure
The sweet spot for doing your bridal rhinestone nails is two to three days before the event if you’re using a gel system, or the day before if you’re using regular nail polish as a base. Doing them more than four days out with gel is fine in terms of product longevity, but it gives you more time to accumulate chips or lose a stone. Doing them the morning of means you’re adding stress to an already full day.
Prep your nails (trim, file, push cuticles, buff, dehydrate) the evening before. Apply your base coat and color the night before. Add the rhinestones the next morning when you have time, good light, and steady hands.
A Note on Nail Health Afterward
Whether you’re using a gel base or regular polish for your bridal rhinestone nails, removal matters. Do not pick or peel. Peeling gel off the nail surface takes layers of the natural nail plate with it and causes the white, papery, flaky nails that people mistakenly blame on gel itself. For gel removal, soak small pieces of cotton in pure acetone, press them against each nail, and wrap in foil for 10 to 15 minutes. The gel should slide off with gentle pressure from an orange stick. If it’s not budging, wrap again rather than forcing it.
After removal, give your nails a break with cuticle oil every day. Jojoba-based cuticle oils absorb well and keep both the nail plate and surrounding skin soft. Give yourself a week or two before the next gel application.
Final Thought
When I was at that boring internship, pressing wonky little dots onto practice nails on my lunch break, bridal rhinestone sets felt like something in a different universe. Now I sit at my kitchen table in Chicago and lay down crystal clusters that make me genuinely happy every single time. You don’t need talent to start. You need the right tools, the right information, and the willingness to mess up a practice nail or two before the real thing.
That’s literally the whole secret. Grab your wax pencil, choose one design from this list, and start. Your wedding nails are going to be beautiful.