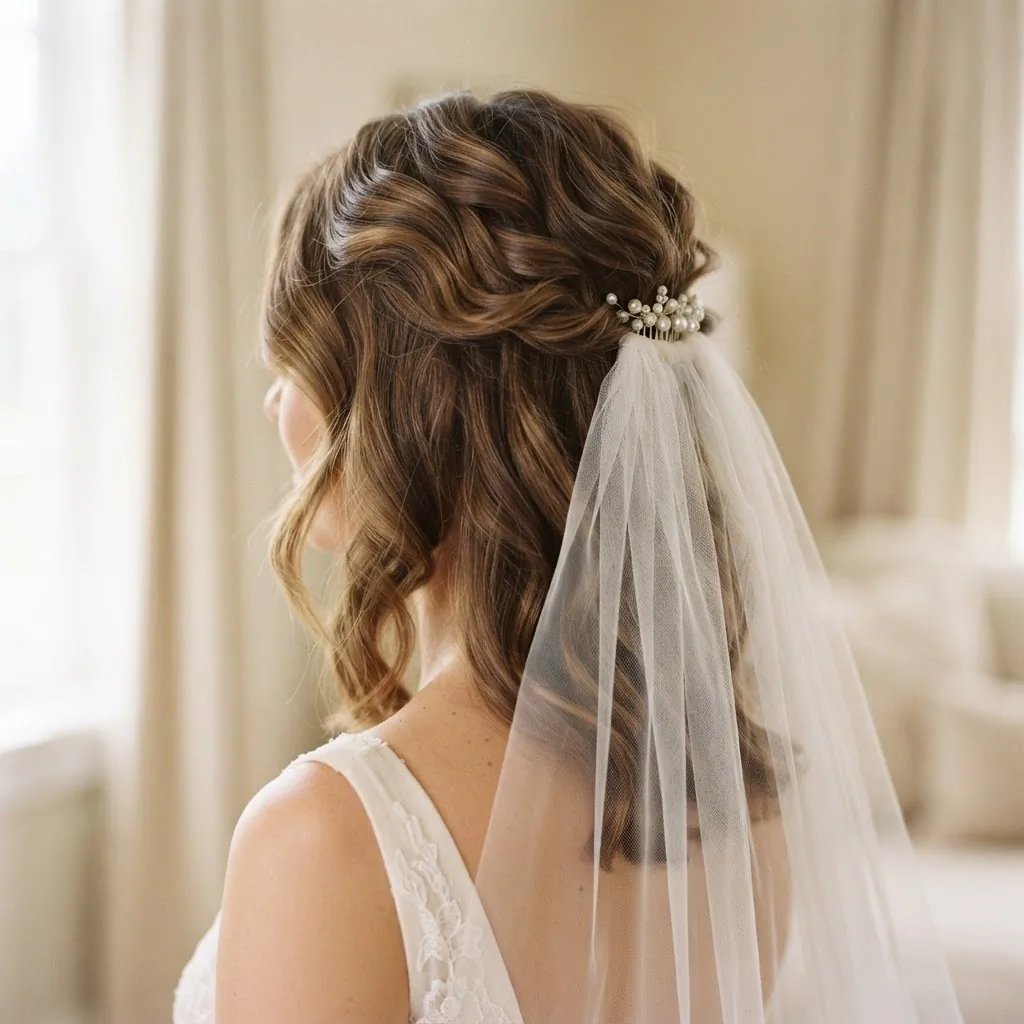
12 Bridal Hairstyles With Veils for Every Hair Type and Length
Can I be honest with you for a second? The veil is the part of bridal hair that stresses people out the most, and not because they can’t find a style they love. They can. Pinterest has given us approximately one million gorgeous options. The stress comes from the gap between pinning something beautiful and actually knowing how to make it work, specifically whether it will work with your hair, your veil length, and that all-important comb that has a habit of sliding out at the worst possible moment.
I spent years in a salon watching bridal stylists work, and the one thing that surprised me most was how much of their job was solving exactly this problem: matching the right hairstyle to the right veil, then making sure the whole thing held together from ceremony to reception. So that’s what this guide is about. Not just “here are 12 pretty looks” but here’s how each one actually works, which veil lengths play nicely with it, which hair types it suits, and what to do when things go sideways.
Let’s talk styles.
First, a Quick Word on Veil Lengths
Before we get into the hairstyles, it helps to know your veil lengths because the hairstyle you choose genuinely depends on how long and heavy your veil is. The scale runs from shoulder length (about 20 inches) through elbow (25″), waist (30″), hip (36″), fingertip (42″), waltz (60″), floor (78″), chapel (96″), and cathedral (114″). The Wedding Veil Shop’s veil length guide has a brilliant visual reference if you want to see exactly where each length lands on a body. The key takeaway is this: the longer and heavier the veil, the more structure your hairstyle needs to anchor it.
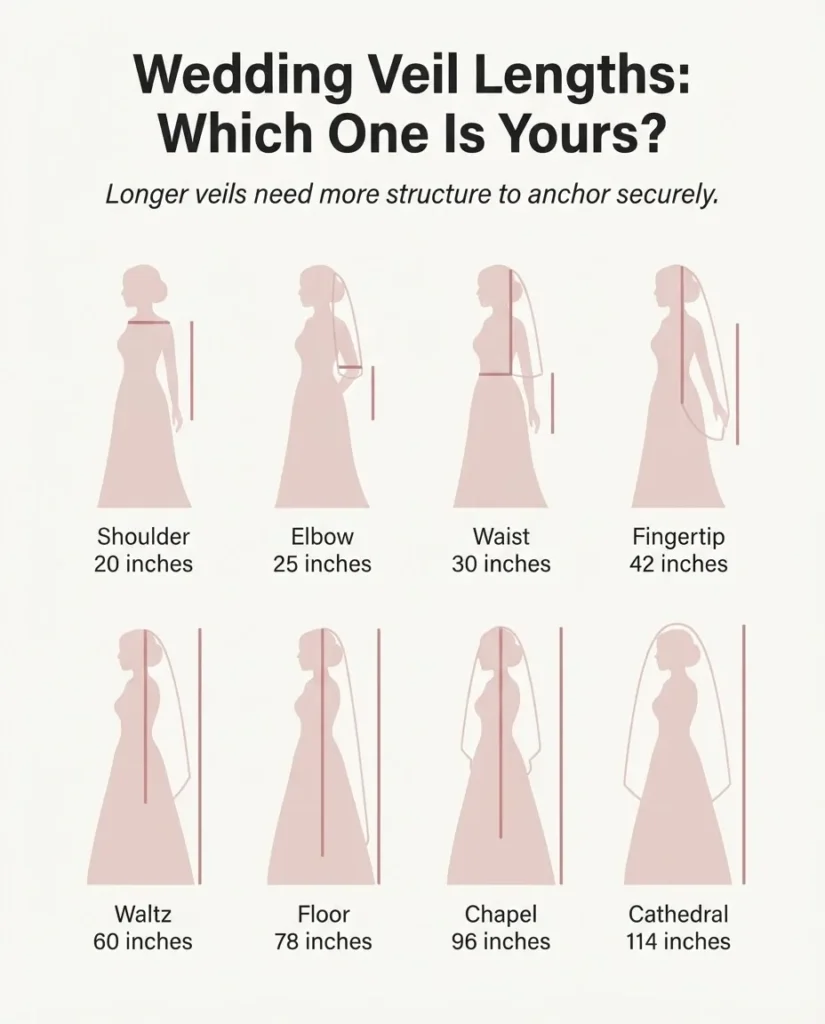
A cathedral veil on loose, unsupported waves is a recipe for a sliding comb. An updo or a half-up with a solid anchor point is a much safer bet for anything over fingertip length.
The Styles
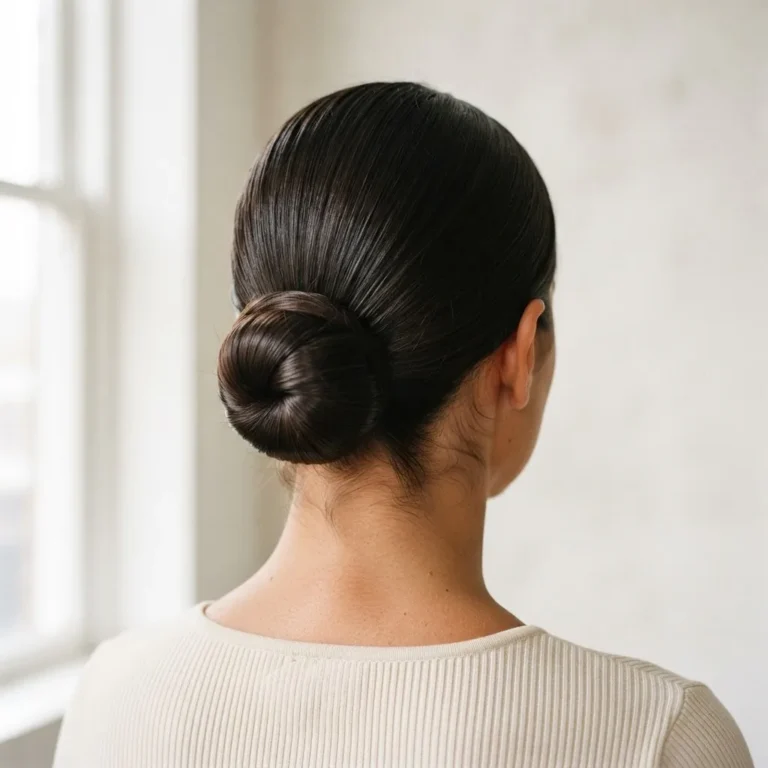
Style 1: The Classic Low Bun
The low bun is probably the most reliably elegant bridal hairstyle of all time, and it pairs with veils beautifully because the bun itself creates a natural platform for the comb. The big question beginners always have is whether the veil should go above or below the bun. The honest answer is: both can work, and both give you a very different look.
Above the bun means the veil cascades over the bun and down, which gives you that full, flowing, classically bridal effect. Below the bun means the veil sits underneath, so the bun stays visible and the veil drapes from it, creating a more modern, editorial feel. For ceremonies where you want a blusher (the shorter top layer worn over the face), placing the veil above the bun is the more traditional and practical choice, since the comb sits at a height that lets the blusher fall forward naturally.
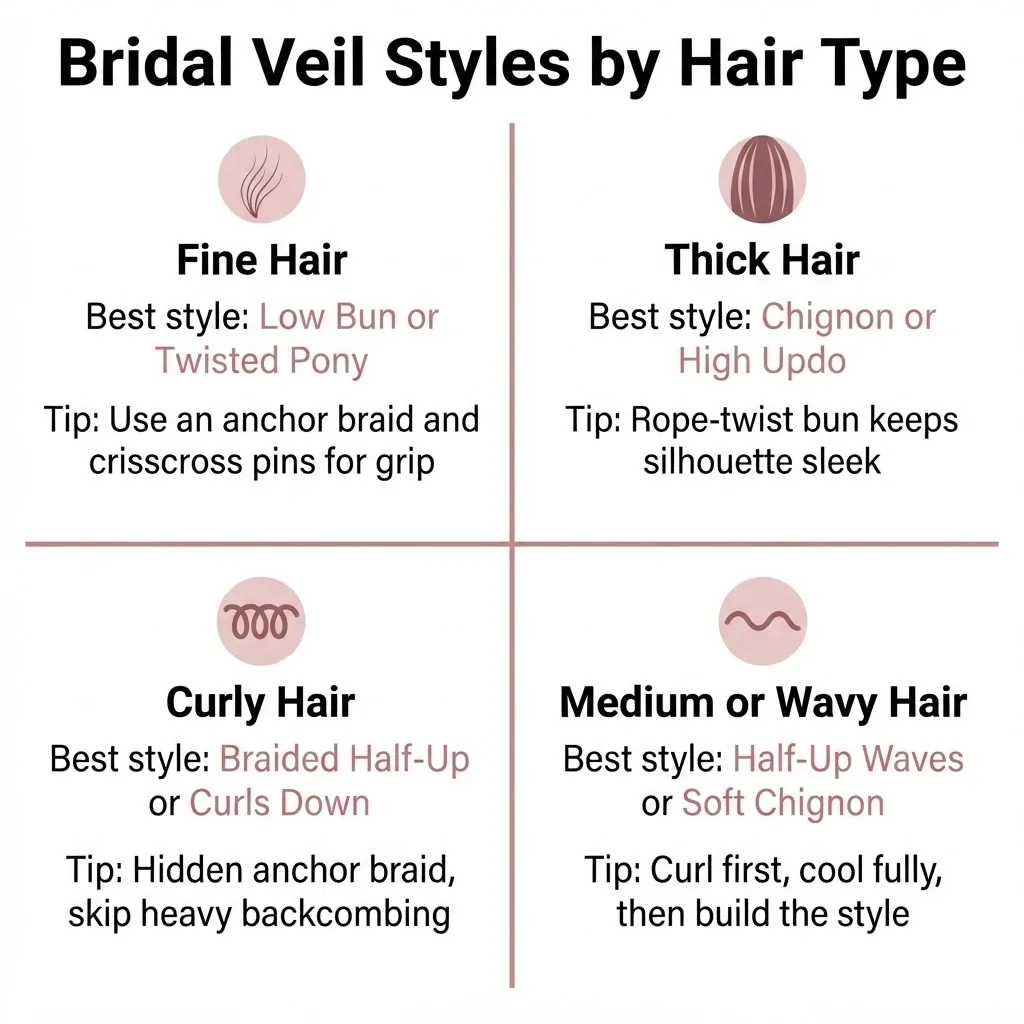
For hair type adjustments: if your hair is fine, add a teased section or a small anchor braid before sliding in the comb (more on that technique coming up). Thick or coarse hair can sometimes make a low bun look bulky, so try a twisted rope-style bun rather than a classic gathered one to keep the silhouette sleek.
Best veil lengths: fingertip, waltz, chapel, or cathedral.
Style 2: Half-Up, Half-Down with Soft Waves
This is the style that gets the most saves on Pinterest right now, and I completely understand why. It gives you the best of everything: the romance of hair flowing down your back, the polish of something intentionally styled up top, and enough structure for a veil to grip onto. In 2025, the trend has moved toward a half-up with a slightly higher-set twist or small braid where the top section is gathered, which makes the style look more intentional and also gives the veil comb a better anchor point.
For beginners, this is actually one of the more approachable styles to do at home because there are no pins to hide and no complicated updo architecture to maintain. The technique most people have success with is to curl the full head first, let everything cool completely, then gather the top section and secure it with a clear elastic or a small satin scrunchie before adding any texture or decorative pins.
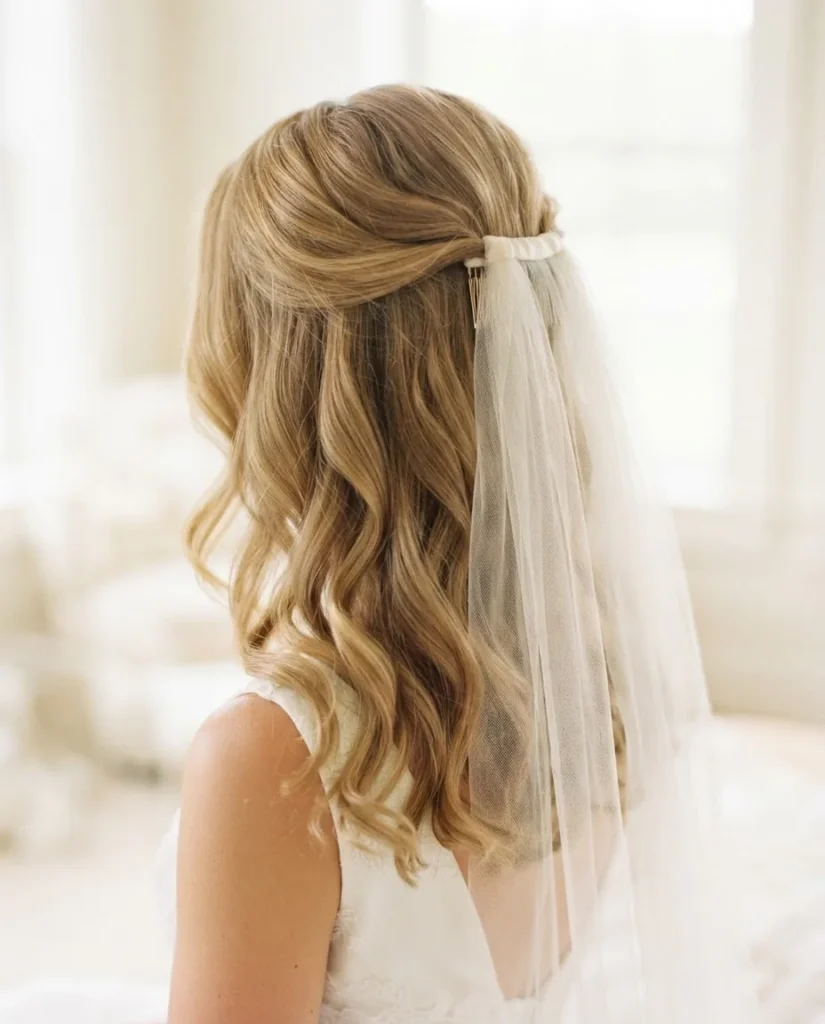
The veil goes in at that gathering point.
The The Knot’s guide to wedding hairstyles with veils includes a stylist tip I love: build a secure foundation with a little discreet backcombing and crisscrossed bobby pins to anchor the veil comb without it being visible from the front. That’s exactly the kind of detail most tutorials skip.
Best veil lengths: elbow, waist, fingertip. Works with a blusher tier if the half-up section is set high enough.
Style 3: Loose Romantic Waves (Hair Down with Veil)
Hair down with a veil is the style that makes every bride look twice and then immediately say “but I could never do that, the veil would just fall out.” I’m going to be straight with you: this one does require a bit of extra work to secure, but it is absolutely achievable.
The trick is what stylists call a hidden anchor braid. You don’t see it in the final look, but it’s doing all the heavy lifting. Take a small, narrow section of hair at the roots, roughly 3 inches wide, about an inch or two behind the crown.
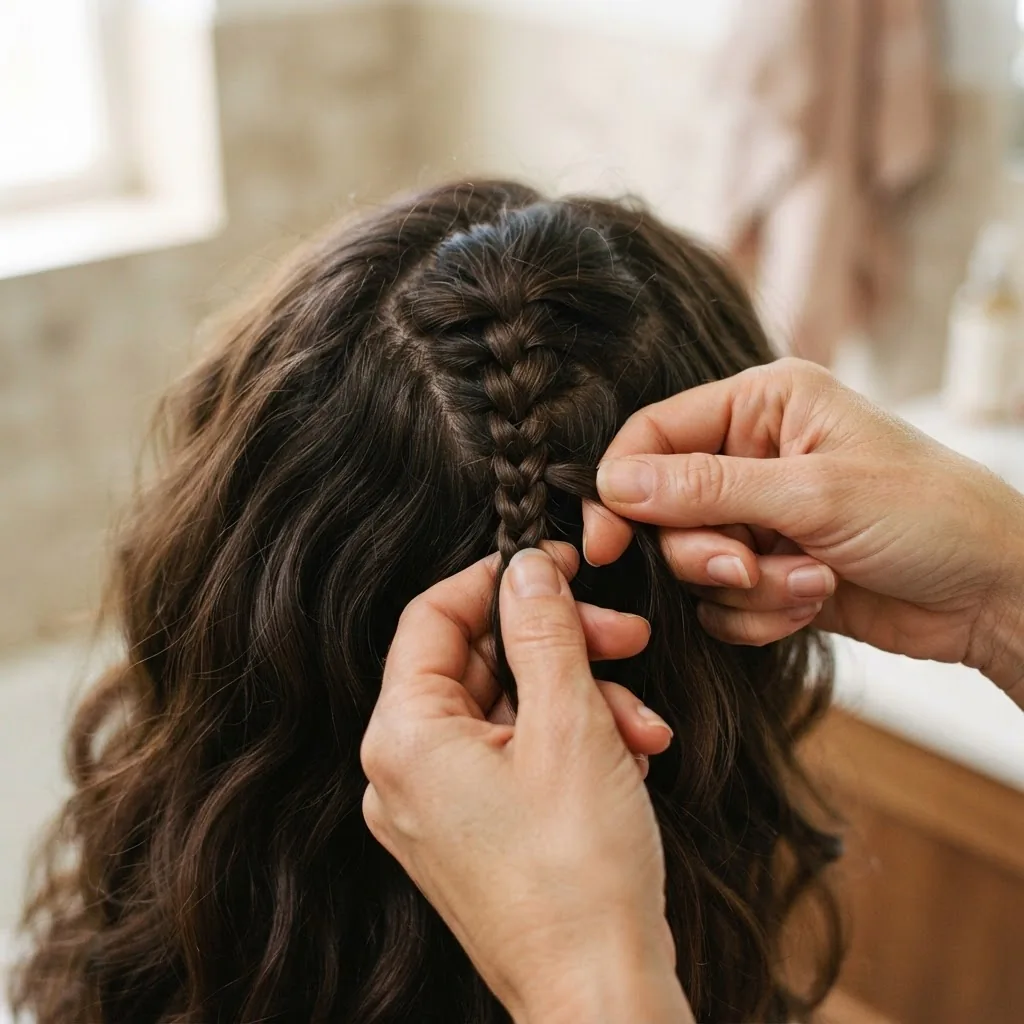
Braid it horizontally, secure it with a clear elastic, then lay the surrounding hair back over it so it disappears completely. Your veil comb slides into that braid like it was made for it. Without this foundation, the comb is just sitting in slippery waves with nothing to grip, which is exactly why veils fall out.
You can also use light backcombing at the comb placement site as an alternative or additional support, then secure the comb with two or three bobby pins pushed in a crisscross pattern over its teeth on either side.
Because heat is involved to get those waves, please do not skip your heat protectant. The American Academy of Dermatology’s hair care guidance notes that heat styling can cause real, lasting damage to the hair shaft, and that protection before using hot tools matters. For a wedding, you’re likely curling your entire head more carefully than you do on a normal morning, so this is not the time to skip that step.
Best veil lengths: shoulder, elbow, waist. Avoid anything heavier than fingertip without a strong anchor braid.
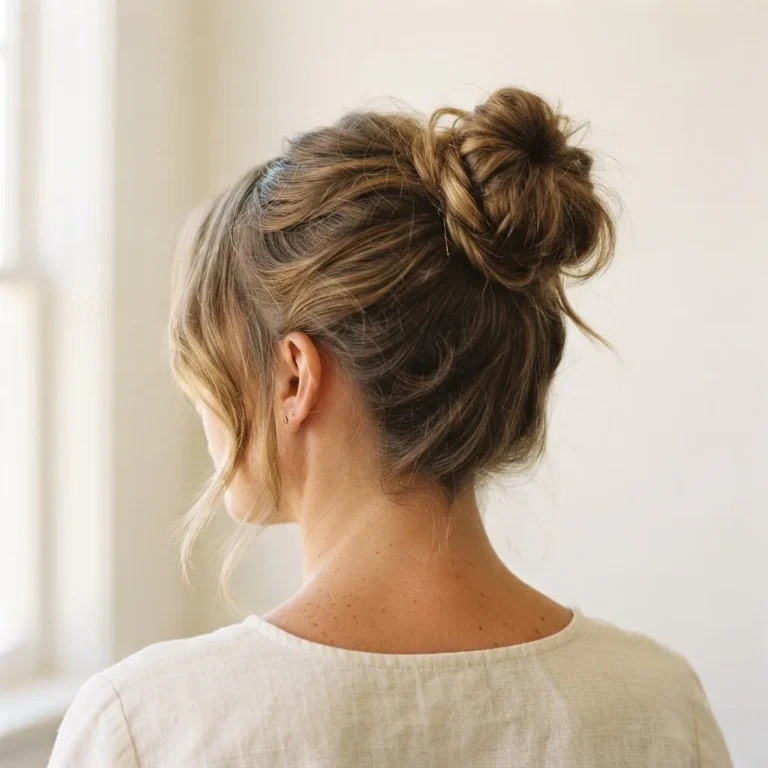
Style 4: The Textured High Updo (High Twist)
One of the standout bridal hairstyle trends for 2025, according to Sam Villa’s bridal hair trend report, is the high twist upstyle: a romantic, undulating updo set high on the head with face-framing tendrils that keeps hair off the neck while showing off dimensional color and texture. This is the style if you love the idea of a sculpted updo but not the severity of a slicked-back ballet bun.
For beginners, I’ll be honest: a high twist updo is not a five-minute style. It takes practice to get the texture and shape right without it looking like a messy mistake rather than an intentional one. That said, it is genuinely beginner-friendly in terms of technique, because the undulating, slightly undone quality means small imperfections actually add to the look rather than ruin it. The key is prep: add texture to clean, dry hair using a texturizing spray before you start building the style, and don’t try to do this on freshly washed hair, which tends to be too slippery.
For the veil, a high updo gives you one of the most secure placements possible. The comb can sit right at the crown or just below the peak of the updo, with bobby pins on either side for reinforcement. Your veil hangs beautifully from that high point and gives you the full dramatic cascade for photos.
Best veil lengths: everything from fingertip to cathedral works beautifully here. The higher the updo, the more dramatic a long veil looks.
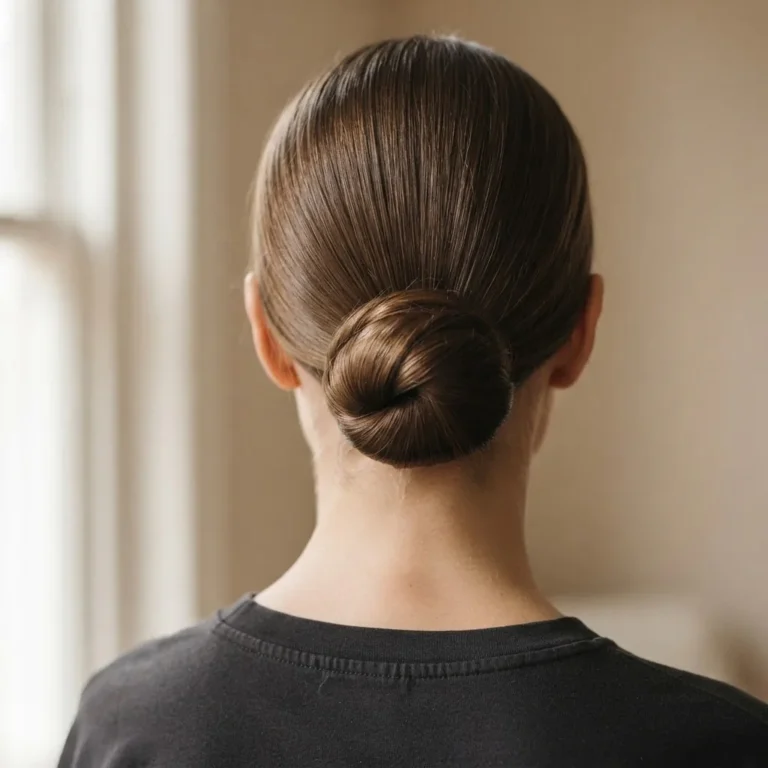
Style 5: The Classic Chignon
The chignon (pronounced sheen-yon, just to save you from having to whisper-ask your stylist to repeat themselves) is a smooth, coiled or twisted low bun that sits at the nape of the neck. It is eternally bridal, works on almost every face shape, and photographs incredibly well because it keeps all the attention on your face and neckline.
The chignon is also one of the most veil-friendly styles because its smooth surface lets you place the veil comb cleanly without it disappearing into texture or volume. For extra security, a little light hairspray at the comb placement point before inserting the comb makes a noticeable difference in how long the veil stays put.
For fine hair: a chignon can be tricky because the bun may not have much volume to work with. A small hair donut pad or a piece of braided false hair looped under the bun is a widely used solution that gives the style more body without requiring thick hair. For thick or coarse hair: this style is actually your friend because you have the volume to create a really full, luxurious chignon without needing any padding.
Best veil lengths: all lengths work. For a cathedral or chapel length veil, place the comb higher than the chignon (an inch or two above it) so the weight of the veil is anchored in the denser hair above the nape rather than pulling directly on the bun.
Style 6: The Braided Half-Up
Braids and veils are a combination that doesn’t get enough love, probably because people assume braids are complicated. But a simple three-strand braid or a Dutch braid pulled back from the face and pinned at the crown takes about ten minutes once you know the motion, and it creates one of the most naturally secure anchor points for a veil comb you can make with your own hands.
The braided half-up works by gathering the top section of hair, braiding it back, and pinning it at the crown or slightly behind it. The veil comb goes into the braid itself, which grips the comb far more reliably than loose hair does. Braids are also great for texture variation, so if you have naturally wavy or curly hair, you can work with your natural pattern rather than fighting it.
For curly hair specifically: this is one of my favorite style recommendations because it honors the texture rather than smoothing it away. Let your natural curl pattern do its thing in the down sections, braid the top back with just enough tension to keep the style clean at the hairline, and let the rest be beautifully itself.
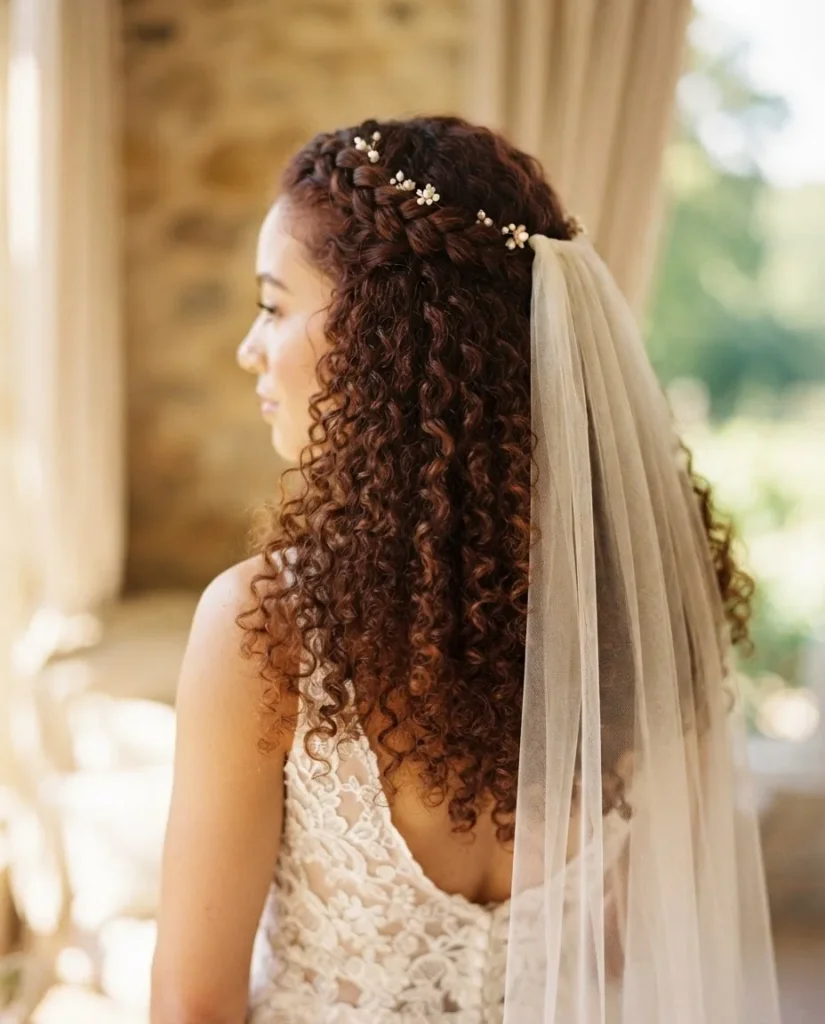
Best veil lengths: shoulder through fingertip. If you’re doing a heavier or longer veil, reinforce the braid anchor with a few additional bobby pins around the comb.
Style 7: The Twisted Low Pony
This one is trending hard right now for a reason. A low ponytail, especially one with a soft twist pattern across the nape and voluminous, softly curled ends, is modern, fresh, and simultaneously polished and laid-back. It photographs exceptionally well from behind, which, let’s be honest, is where a lot of the ceremony photos happen.
The twist detail across the back is created by taking small sections on either side and crossing them over each other as you gather toward the nape, similar in motion to a rope braid, then securing with an elastic. The curl in the ponytail tail can be done with a large-barrel curling wand and then finger-combed for softness.
For the veil: the comb usually sits just above the elastic at the nape, tucked into the twist pattern where there is plenty of structure to grip. This is a good option for fine hair brides because the twisting technique compresses hair in a way that gives the comb more to hold onto than a standard smooth ponytail would.
Best veil lengths: elbow through fingertip. Longer veils tend to engulf the ponytail rather than complement it.
Style 8: Soft Curls, Pinned Back on One Side
This is the style where you curl the whole head, then take the section on one side (usually from the temple back) and pin it loosely behind the ear with a floral pin, pearl clip, or decorative bobby pin. It’s romantic, it’s softly asymmetrical, and it photographs beautifully from both sides.
It’s also, genuinely, one of the most beginner-friendly bridal styles on this entire list because the curling step is the only technical element. Everything else is just pinning. The veil goes in at the back of the head, roughly at the crown or just below it, and the cascade of curls frames it naturally.
One hair-type note: this style looks different depending on your texture. On straight hair that you’ve curled with a wand, the curls will be smooth and uniform. On naturally wavy or slightly frizzy hair, the curls will be more organic and textured, which actually reads as very intentional and beautiful in photos. On naturally curly hair, you can skip the heat entirely and just use a curl-defining cream to enhance what you already have, then pin one side back.
Best veil lengths: shoulder through waltz. This style’s personality is soft and ethereal, so a shorter to medium veil complements it better than a dramatic cathedral train.
Style 9: The Sleek High Bun
This is the statement style: clean, architectural, modern. A sleek high bun is deeply trending in 2025 for brides who want their look to feel current rather than traditional, particularly those wearing minimalist, sculptural gowns. The bun is set high on the head, pulled smooth with no flyaways, and the veil cascades dramatically from that height for an effect that is genuinely cinematic in photos.
I will be straight with you: getting a sleek high bun actually smooth is harder than it looks in photos. The key is to brush the hair back in sections with a smoothing brush while applying a light layer of a smoothing cream or strong-hold pomade, not too much product or it looks greasy. Then wrap the ponytail into the bun and pin systematically, not all at once. Any small flyaways get laid down with a light spritz of firm-hold hairspray and a toothbrush (yes, a clean toothbrush is a legitimate professional technique).
Best veil lengths: fingertip through cathedral. The height of the bun with a long trailing veil is a seriously striking combination.
Style 10: The Waterfall Ponytail
The waterfall pony is a voluminous, elevated ponytail style with sculptured, layered curls that tumble down in a way that almost doesn’t look real, in the best possible way. It’s a 2025 bridal trend that stylists note works best on thicker hair or hair with extensions added for volume, because the whole point is that lush, abundant curl cascade.
This is one of the more advanced styles on this list, and I want to be honest about that. The construction involves two stacked ponytails, layered curling, and careful volume-building, which is a lot to manage solo. If you’re considering this style and plan to DIY, I’d strongly encourage a couple of dry run practices at home before the day. If you’re going to a salon, show your stylist the reference photo because the construction technique matters.
For the veil: the comb can be placed between the two ponytails or just above the upper one, and because the style has so much structure, veil security tends to be excellent.
Best veil lengths: shoulder through fingertip. This style is already such a showstopper at the back that a very long veil can compete with rather than complement the hair.
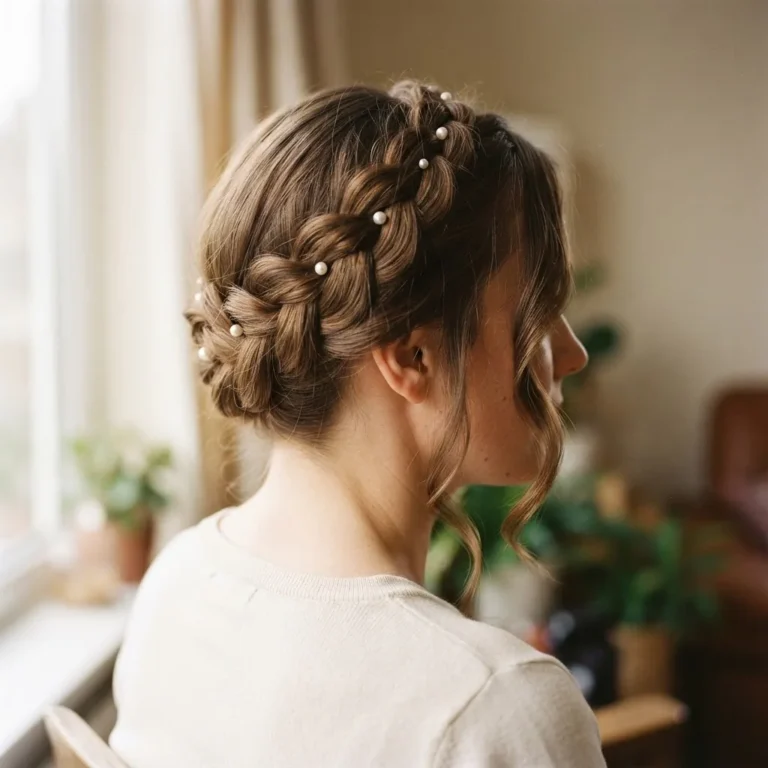
Style 11: The Floral or Pearl-Pinned Updo
Not every updo has to be one single architectural shape. A pinned updo where sections are twisted, folded, and pinned individually, then decorated with small florals or pearl pins scattered throughout, has a lush, garden-party quality that feels very bridal without feeling overly formal. This style also looks gorgeous on women with medium-length hair who feel excluded from the typical “updo” conversation, because it works beautifully even when the hair is shorter and doesn’t have enough length for a full bun.
The veil placement depends on how high or low you build the style. For a mid-height updo, the comb goes in at the same level as the bulk of the pinned sections. For a style pinned closer to the nape, go above the pinned sections so the comb has more hair density to grip.
Best veil lengths: all lengths work depending on placement. Shorter to mid-length veils let the floral or pearl details show; longer veils partially cover them, which can also look stunning in a layered, textural way.
Style 12: Natural and Curly, Mostly Down
For my curly-haired brides who have been nodding along thinking “great, but none of these are really for me,” this one is for you. Wearing your natural curls down or in a softly structured shape with a veil is absolutely a valid and beautiful bridal choice, and it is far more doable than most tutorials suggest.
The main challenge with natural curls and a veil is finding a grip point that the comb can hold onto without flattening or disturbing the curl pattern. The anchor braid technique I described in Style 3 is your best friend here: create a small, flat horizontal braid about 3 inches wide near the crown roots, hidden under the top layer of curls. This gives the comb a stable base that doesn’t require backcombing (which can disturb curl definition) or heavy hairspray (which can cause frizz or crunch).
For definition and hold without the crunch, reviewers of curl-focused styling products consistently point to creams and gels layered while the hair is damp, with a light diffuser finish. Let your curls fully dry and cool before attempting to insert the veil comb.
Best veil lengths: shoulder through fingertip. Lightweight tulle veils work better with natural curl patterns than heavily embellished or stiff styles, which can flatten the curl at the root.
How to Actually Keep Your Veil In Place
No matter which of the twelve styles above you choose, the security of your veil comes down to a few consistent principles. The hair needs something to grip. Backcombing at the comb placement site creates texture that the comb teeth can hold onto. A hidden anchor braid creates structure. Bobby pins inserted in a crisscross pattern on either side of the comb after it’s placed add a secondary lock. And a light mist of firm-hold hairspray at the comb site (before the comb goes in, so it can set) gives an extra layer of grip.
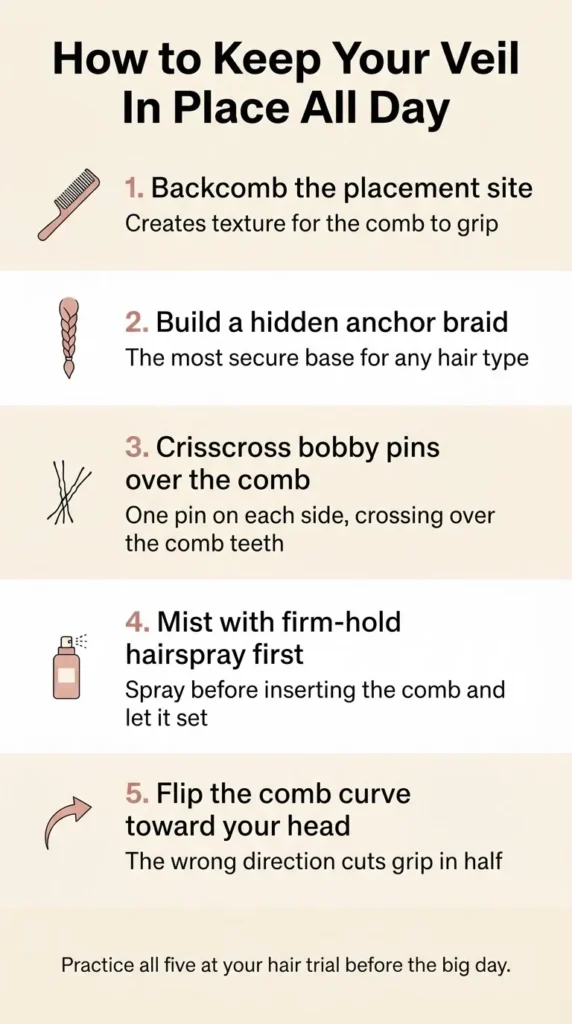
For fine hair brides, all three of those steps together are a good idea. For thick hair brides, you may only need one or two. The Wedding Veil Shop’s how-to guide on securing a wedding veil is one of the most thorough free resources I’ve come across on this specific problem, with technique breakdowns for different hair types including short hair and braided textures.
One more thing: the direction you insert the comb matters. Most veil combs are curved, and they should be flipped so the curve faces toward your head before sliding in. Inserting a comb the wrong way reduces its grip significantly and is one of the most common reasons veils slide out.
The Hair Trial: Don’t Skip It
I know it’s an extra appointment and an extra cost, and I know it’s tempting to skip. But if you are planning any of the styles on this list, especially if you want to DIY, please do a trial run. The point is not just to see how the style looks. It’s to test how long it holds, how the veil behaves with it, and whether you need any adjustments before the actual day.
The Knot’s wedding hair trial guide recommends wearing the trial style for several hours and paying attention to where things shift or loosen, which is genuinely useful advice. If you’re doing your own hair, try the full style at home, including putting the veil in, and then wear it for two to three hours while doing normal activities. This will tell you more than a mirror ever will.
If you’re booking a salon trial, bring your actual veil or a veil that is a close match in weight and length. Styling without the veil present means the stylist can’t test the anchor placement, and that’s the whole point.
A Quick Note on Heat and Prep
Most of the styles on this list involve some level of heat styling, whether that’s curling wands for waves, flat irons for smoothing, or blow-drying for volume. For your wedding day specifically, prep your hair well in the days before: a deep conditioning treatment a few days out helps your hair hold a style better and look more luminous in photos. Use a heat protectant every single time a hot tool touches your hair, including at the salon, and don’t be shy about asking your stylist what they’re using.
Heat damage is real, cumulative, and, importantly, irreversible once the hair shaft is broken.
Wedding-day styling doesn’t have to come at a cost to your hair health, but it does require that you treat your hair like the investment it is in the weeks leading up to the big day.
You’ve got this. Twelve styles, real technique details, hair-type adjustments, and the veil placement knowledge to actually make it work. Whether you’re pinning a low bun or testing out a waterfall pony, start with a trial, build your anchor, and don’t forget to flip the comb.
Your pretty, made simple.