10 Bridal Nail Ideas for People Who Aren’t Nail People
Let me tell you what nobody says out loud in the bridal beauty world: most people saving wedding nail photos on Pinterest are not nail artists. They are brides, bridesmaids, and maids of honor who have a vision board full of gorgeous hands and a very real fear that their own hands will look nothing like that on the day. I know this because I was exactly that person once. I started teaching myself nail art with a cheap dotting tool during a painfully slow internship, practicing one wobbly dot at a time on my lunch breaks. I looked nothing like the tutorials at first. And then, slowly, I did.
So this article is not a gallery of 50 looks for you to screenshot and hand to a nail tech. It is a practical, honest guide to 10 wedding nail ideas that range from “genuinely simple” to “impressive-looking but more doable than you think,” all of them beginner-friendly, most of them short-nail-friendly, and all of them tested and understood from a real nail-art standpoint. I’ll tell you what you actually need, how to approach each look, what tends to go wrong, and how to fix it.
You don’t have to be a nail person. You just have to try.
Before Any Design: Nail Prep Is the Step That Makes or Breaks Everything
I cannot stress this enough. The most common reason a beautiful nail design chips, lifts, or looks wobbly is not the nail art itself. It is everything that happened before the nail art. This section is short but it matters more than any color you choose.
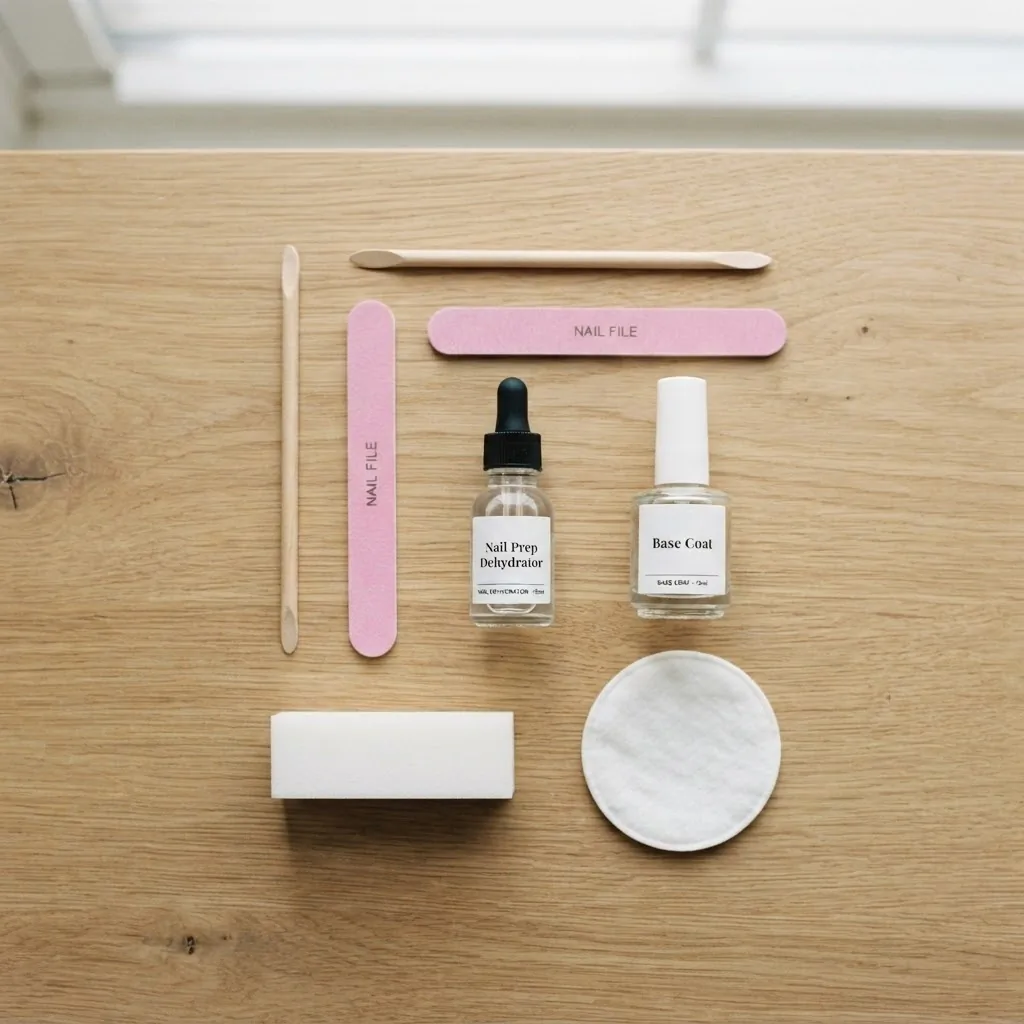
Start with clean, dry nails. Remove any old polish completely using a non-acetone remover for regular polish or pure acetone and the foil soak-off method for gel. File your nails into your chosen shape using a soft-grit file, moving in one direction rather than sawing back and forth. The American Academy of Dermatology recommends filing in a single direction to prevent splitting and peaking. Then gently push your cuticles back with a wooden or rubber-tipped cuticle pusher. Never cut your cuticles. They form a protective seal against bacteria and infection, and cutting them puts you at real risk of inflammation or worse, right before your wedding day. The AAD’s nail care guidance from board-certified dermatologists is worth bookmarking for this whole process.
After pushing cuticles back, lightly buff the surface of each nail with a 220-grit buffer. This removes shine and gives your base coat something to grip. Then wipe each nail with a cotton pad soaked in rubbing alcohol or a nail prep dehydrator. Skip this step and your polish will peel. Then apply a thin base coat and let it dry completely before any color goes on. This whole process takes about 15 minutes and it is what separates a manicure that lasts a week from one that chips at the reception dinner.
Choosing Your System: Gel, Dip, or Regular Polish?
Before we get into the actual designs, this decision matters a lot for brides. Here is the honest breakdown.
Regular polish is the easiest to apply and the easiest to fix when you make a mistake. With a good quality fast-dry top coat, it can last 5 to 7 days. For a wedding that is one week or less away, that is often enough. The trade-off is that it is less chip-resistant than gel or dip and requires more careful handling in the days leading up to the event.
Soft/soak-off gel polish lasts approximately 2 weeks with proper prep and curing. It requires a UV/LED lamp to cure and feels harder and glossier than regular polish. It looks salon-quality when done well. The trade-off for beginners is that it is less forgiving of mistakes (harder to fix mid-application) and requires careful removal with acetone to avoid nail damage. If you are trying gel at home for the first time before your wedding, do a full test run at least 3 weeks beforehand so you can see how your nails react. More on allergens in a moment.
Dip powder is arguably the most beginner-forgiving system for long wear. It builds up in thin layers dipped into colored powder and sealed with a gel-like activator and top coat. No UV lamp is required. Dip typically lasts 3 to 4 weeks, making it a genuinely practical choice if you have a honeymoon coming up or a destination wedding with an unpredictable schedule.
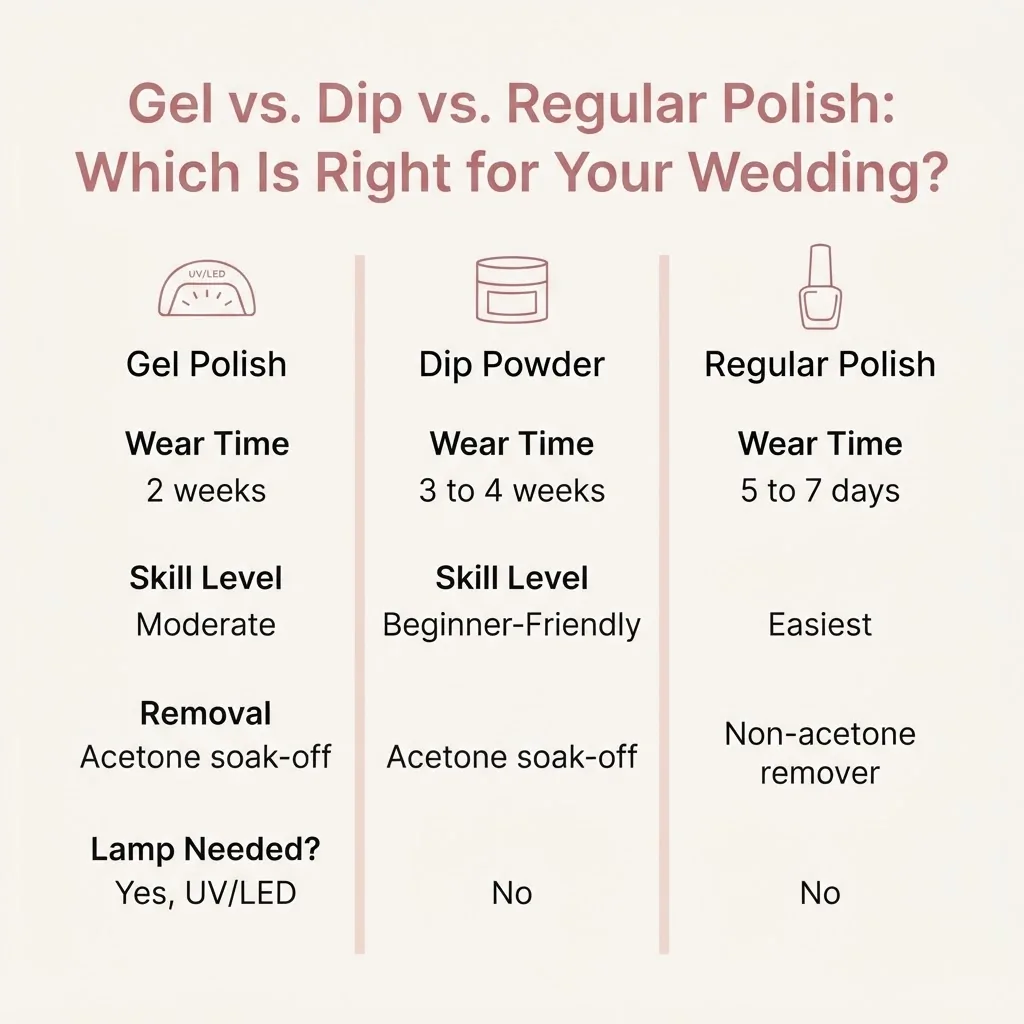
The Knot’s honest breakdown of wedding manicure systems covers the gel versus dip comparison from a practical bridal planning perspective if you want to read more on timing.
One important note if you are trying at-home gel for the first time: gel polish formulas often contain acrylate compounds including HEMA (2-hydroxyethyl methacrylate), which is one of the more common causes of allergic contact dermatitis in gel nail users. Reactions can show up as redness, itching, or swelling around the nail or even on the face and neck if you touch uncured gel. The FDA’s overview of nail care product safety explains how nail cosmetics are regulated as cosmetics and what ingredient disclosures mean. If you have sensitive skin or a history of reactions to adhesives or acrylics, do a patch test with a small amount of gel on one nail, cure it fully, and wait 48 hours before doing a full set. Do not test for the first time the week of your wedding.
The 10 Wedding Nail Ideas
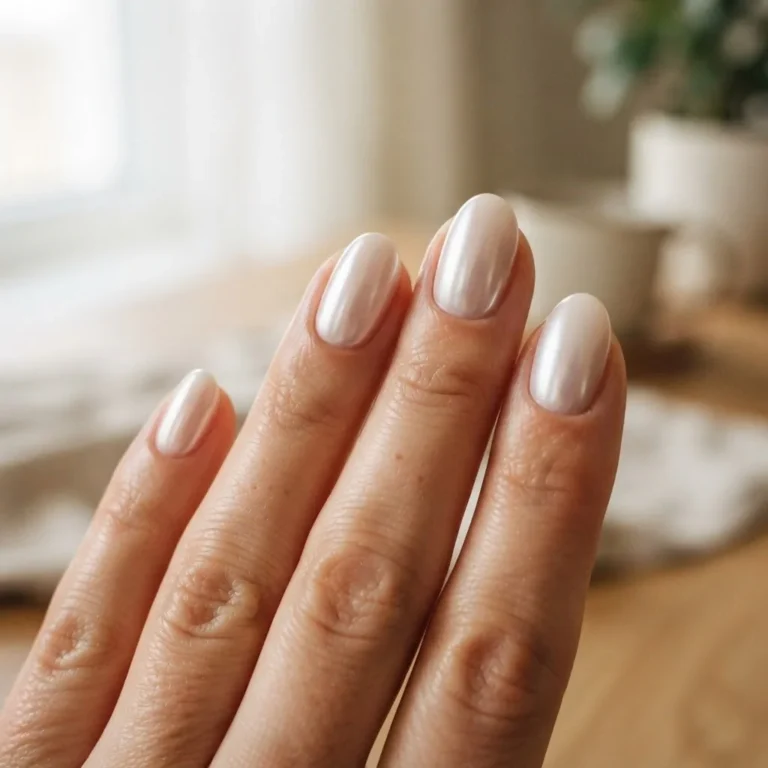
1. The Glazed Bride: Chrome Pearl Nails
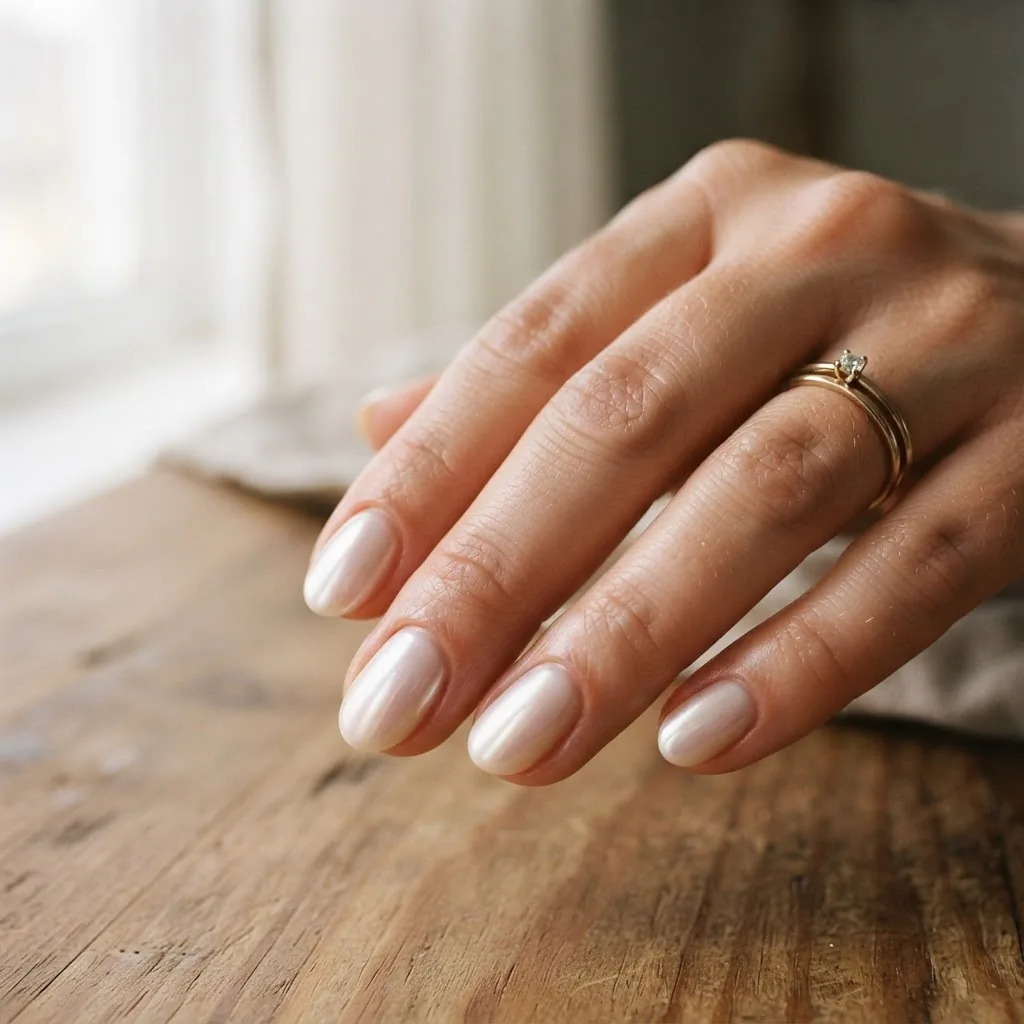
This is the one. If there is a single “wedding nail moment” of the current era, it is the milky, pearlescent, glazed finish that started with Hailey Bieber’s glazed donut nails and has since become the definitive bridal look of 2025 and 2026. It looks like liquid pearl. It catches light in photos better than almost anything else. And here is the part that surprises people: it is not that hard.
The technique uses chrome powder rubbed over a slightly tacky gel top coat. You cure your gel color (a sheer milky white or soft pink works best here) in your LED lamp, then apply a layer of gel top coat and cure it for about 30 to 45 seconds rather than the full cure time so the surface stays lightly tacky. Then you use a small silicone sponge applicator or even a clean eyeshadow sponge to rub chrome powder onto the nail in small circular motions. The metallic particles grab onto that tacky surface and create the mirror effect. Seal it immediately with a non-wipe top coat to lock it in.
For short nails, this look is actually more beautiful than on long nails in my opinion. The chrome finish is so clean and modern that it makes any length look intentional. Use an oval or rounded square shape to maximize the effect.
Where beginners go wrong: using too much chrome powder at once (less is more, build it up), not curing the base gel color fully before adding the top coat (which causes bubbling), and skipping the non-wipe top coat at the end (which leaves a dull finish). Take your time on that final buffing motion and you will genuinely be shocked at what comes off your own hands.
2. The Modern French: Colored Tips on a Natural Base
The French manicure is not what it was in 2005. The modern version swaps the stark white tip for softer, more personalized options, a sheer lavender tip on a nude base, a pale champagne gold tip that photographs like jewelry, a dusty rose tip that gives the look warmth and femininity without looking overdone.
For a DIY approach, nail tape guides are your best friend.
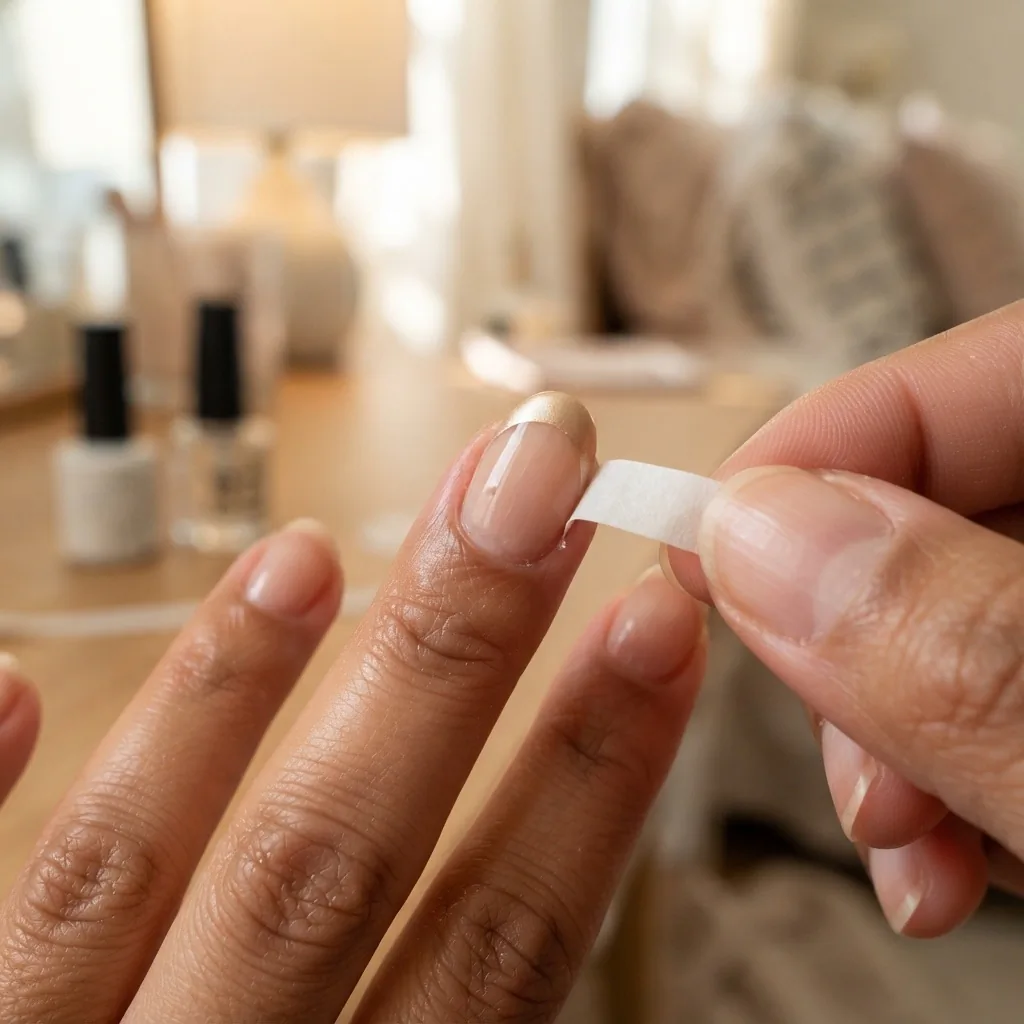
You can pick up a pack of thin nail guides (sometimes sold as French manicure stickers) for just a few dollars and they create a clean tip line without requiring a steady hand. Press the guide down, paint your tip color, let it set for 30 seconds so it is not fully wet, then peel the guide off at a low angle. Seal with a top coat immediately.
The tip color ratio matters. Keep the tip no more than one quarter of the nail length. A tip that is too wide looks costume-y. Too narrow and it disappears in photos. For short nails, an ultra-thin tip line (think 1 to 2 millimeters) actually elongates the nail beautifully. On an almond shape, a colored tip can make even a very short nail look intentional and sophisticated.
3. The Quiet Luxury: Sheer Tinted Glass Nails
This one is for the bride who looks at nail art and says “I just want my nails to look beautiful, not busy.” Glass nails, sometimes called jelly nails, use a sheer, slightly tinted polish that lets the natural nail show through while giving a wet, glossy, deeply hydrated look. Think of it as your nails but elevated to a genuinely otherworldly gloss level.
It is the most beginner-friendly look on this entire list. You need a sheer tinted gel or polish in a color that flatters your skin tone, and a high-shine top coat. For fair to medium skin tones, a sheer blush-pink or peachy nude reads beautifully. For medium to deep skin tones, a warm honey beige, soft terracotta sheer, or deep rose translucent tone is far more flattering than a stark white or ashy pink. The key is that the sheerness lets your natural skin tone show through and the tone-match does the flattering work.
Three coats for buildable translucency, then a gel top coat and lamp cure. That is genuinely the whole technique. You can do this on any nail length, any shape, and it will look intentional and expensive in photos.
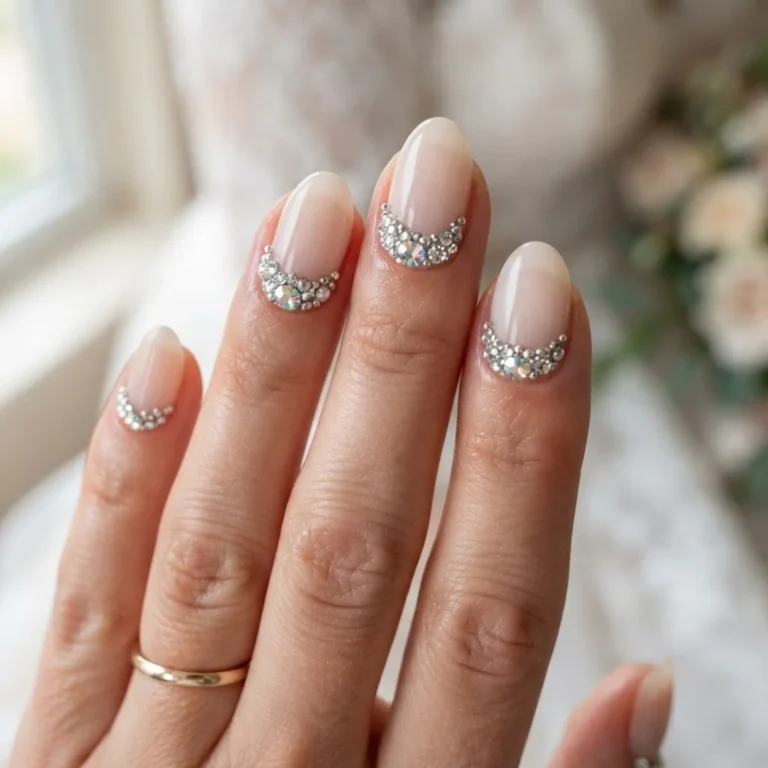
4. Pearl Embellishment Nails: The 3D Accent That Changes Everything
Pearls on nails are having a genuine moment in bridal beauty, and for good reason. A cluster of micro-pearls at the cuticle base of one or two accent nails, or a single pearl placed precisely in the center of a sheer nude nail, reads as genuinely romantic and bridal without requiring any freehand drawing at all.
The technique involves applying flat-back nail pearls (available in tiny packs from nail art supply stores or online) using nail glue or a thick gel top coat as an adhesive. Apply your base color and top coat first. Then use a dotting tool or the tip of a thin brush to pick up a pearl, place it where you want it, and gently press it flat. Work on one nail at a time and seal everything under a layer of top coat, being careful to encapsulate the pearls fully so they do not catch and snag.
For wedding day longevity, go with gel as your base and use a gel top coat over the pearls rather than regular polish. Regular polish top coats can sometimes cause flat-back embellishments to slide slightly before they fully set. If you are worried about pearls falling off mid-reception, limit them to one or two accent nails rather than all ten.
5. The Aura Nail: Soft-Focus Color That Looks Ethereal
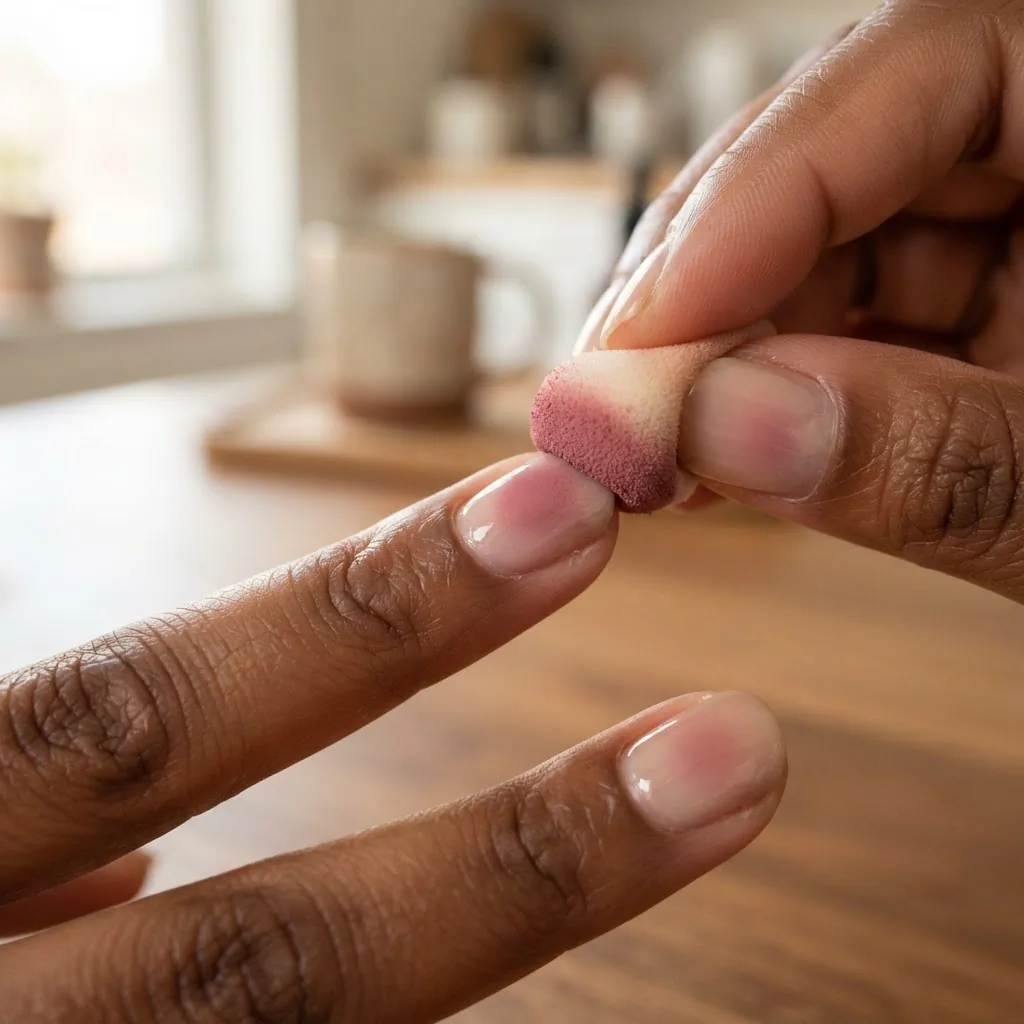
Aura nails are the watercolor dream look of the moment. They use a soft, diffused halo of color in the center of the nail that fades out at the edges, giving a dreamy, almost glowing effect. For brides, a soft rose or champagne-toned aura on a sheer or nude base reads as genuinely magical in photos and holds up beautifully on any nail length.
The technique uses a sponge or a slightly stiff fan brush. Apply your base (sheer nude or milky white), let it dry. Then load a makeup sponge with a small amount of your chosen aura color (a muted rose, a soft lavender, a pale gold) and dab it onto the center of the nail, building up the color gradually. You want the center to be most saturated and the edges to fade naturally. Clean up any color that reaches the skin around the nail with a small brush dipped in pure acetone. Seal with a shiny top coat.
This is a look where “imperfect” actually works in your favor. The soft edges are supposed to look blended, not sharp. Wobbles disappear into the gradient. It is genuinely one of the most forgiving creative nail looks I know for someone who gets nervous about free-hand technique.
6. Negative Space with a Gold Line: The Minimalist Statement
Negative space nails leave part of the natural nail showing as a design element rather than covering everything with color. A simple design that works beautifully for weddings: a sheer or lightly tinted base covering the top two-thirds of the nail, with a thin horizontal line of gold gel or gold nail art liner just above the halfway point. The bare natural nail below the line becomes part of the design.
This looks intentionally architectural and modern. On short nails it is especially striking because it uses the nail’s natural length as a design feature rather than trying to make it look longer. You do not need a steady freehand for the gold line, nail tape works perfectly here. Press a thin strip of tape where you want the line, paint the gold over it, wait for it to become tacky, then peel the tape and seal.
Keep your natural nail healthy and even for this look. A dry or ridged natural nail will show through and undermine the clean effect. Light buffing and a hydrating cuticle oil routine in the weeks leading up to your wedding genuinely makes a difference here.
7. Soft Floral: Watercolor Blooms for Romantic Nails
If you love the idea of floral nails but assume you need to be an artist to pull them off, I want to reassure you that the watercolor approach is kinder to beginner hands than you think. You are not painting precise petals. You are making a few soft overlapping blobs of color that together suggest a flower, then adding a small dot center, and the soft, slightly blurred quality is the whole aesthetic.
Use a thin detail brush and very watered-down, low-pigment polish. A sheer base nail first, then loose petal shapes in a muted dusty pink or cream white, letting them overlap slightly. Let that dry. Add a slightly darker tone at the petal edges for depth. One small yellow or gold dot at the center and you have a bloom. Three or four of these per nail and it reads as a full floral pattern. Full nails can have florals. Accent nails can have one bloom each. The rest of the nails can be plain sheer to let the florals breathe.
For weddings, one or two accent nails with watercolor florals and the rest of the set in a clean sheer works better than florals on all ten nails, which can feel overly busy in close-up photos.
8. Cat-Eye Gel: The Magnetic Finish That Looks Otherworldly
Cat-eye gel is a gel polish formula that contains magnetic particles. When you hold a magnet near the freshly applied (uncured) gel, the particles align into a band of light that shifts as you move your hand, creating a mesmerizing cat-eye or aurora effect. For brides who want something a little more unconventional and show-stopping, a bridal cat-eye in silver, rosé gold, or a dusty mauve is genuinely stunning.
The technique requires cat-eye gel polish (available from various nail art brands in starter kits ranging from roughly $20 to $45) and a magnet tool, which usually comes with the kit. Apply one thin coat, hold the magnet about 2 to 5 millimeters above the nail surface (without touching it) for 5 to 10 seconds, then cure in your lamp immediately without moving the magnet away too early. The pattern is set during the cure. Build up two to three layers for intensity.
Where beginners go wrong: curing before holding the magnet long enough, or using too thick a layer so the particles cannot move freely. Thin coats and patience make the difference. This look is magnetic (sorry) on shorter nails in an oval or almond shape.
9. The Milky White Set: Simple, Timeless, and Genuinely Chic
Sometimes the right answer is to stop second-guessing and just do the milky white. A solid, opaque creamy white polish, applied evenly across all ten nails in two to three thin coats, finished with a glossy top coat: this is one of the most photographed and most requested bridal looks for a reason. It is clean. It is elegant. It reads beautifully against every wedding dress fabric. It photographs like a dream. And on short nails it is actually more beautiful than on very long nails because it has nowhere to look garish.
The technique challenge with white is opacity without flooding. White polish tends to be thinner than other colors so it takes more coats, and the urge to apply it thickly is what causes it to look streaky or to flood the cuticle. Always cap the free edge of the nail (run the brush along the very tip of the nail) on each coat to prevent tip shrinkage. Three thin coats will give you full, even opacity.
If you want a modern update, a milky white with a satin (not gloss) top coat gives you the soft, slightly muted finish that is trending right now for a more editorial bridal look.
10. The Lace Accent Nail: One Show-Stopper Among Nine Simple Ones
You do not have to nail-art all ten fingers. One of the smartest approaches for a beginner bride who wants something genuinely impressive is to invest all your creativity in two accent nails and keep the remaining eight nails in a clean coordinating color or sheer nude.
For a lace effect on the accent nails, nail stamping plates are your secret weapon. A stamping plate is an etched metal sheet with patterns printed on it. You pour a small amount of stamping polish onto the plate, scrape it across with a card so the polish fills only the etched design, then pick up that design with a soft stamping head and transfer it directly onto your nail in one press. The pattern transfers in under a second. Clean up any overflow with a small brush dipped in acetone and seal with top coat.
Lace-pattern stamping plates are widely available online for $5 to $15 per plate. A white or silver stamping polish on a nude or champagne base gives an almost identical look to the lace nail art you see in high-end bridal editorial photos. Nobody will believe you did it at the kitchen table.
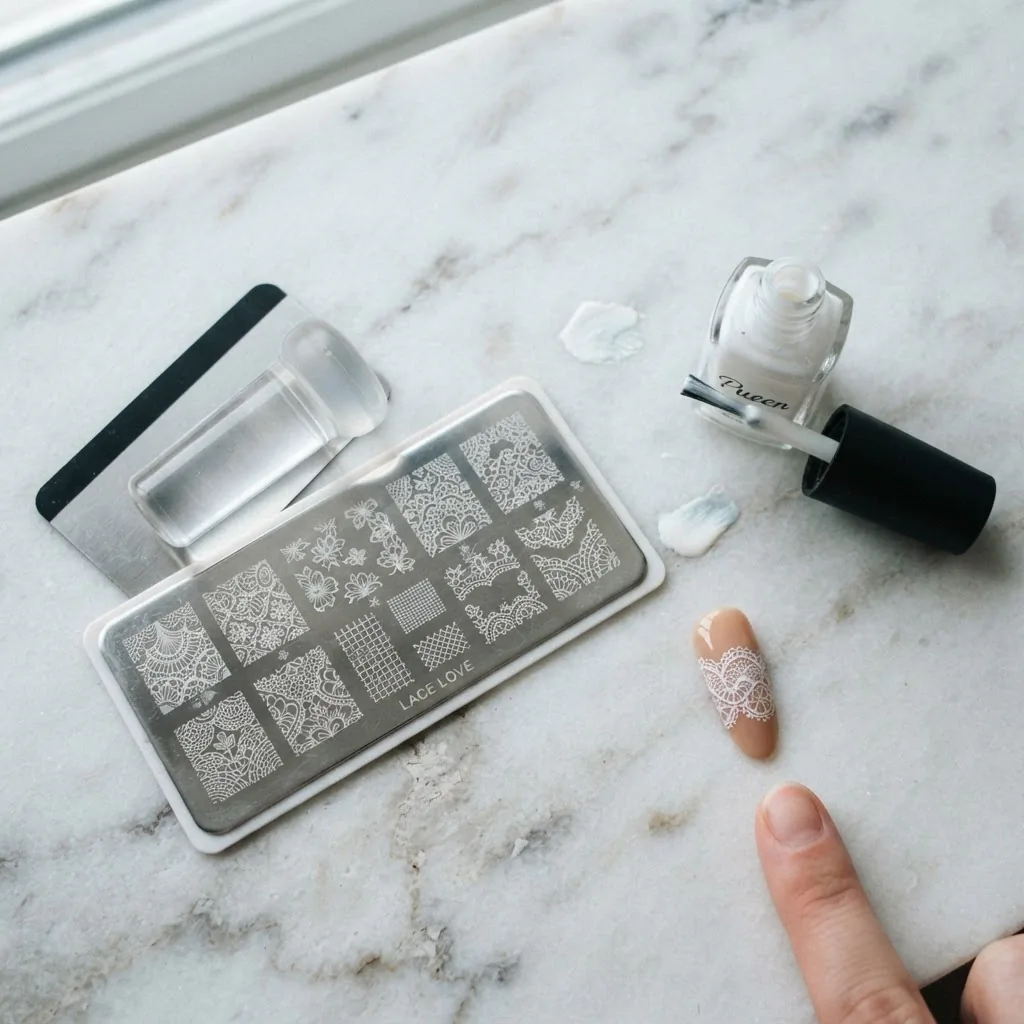
I genuinely mean that.
The Safety Conversation Nobody Has Before a Wedding
I want to talk about this before you hit “buy” on a gel kit, because I see brides discover it the hard way. If you are trying gel polish for the first time and your nails or the skin around them become itchy, red, swollen, or rashy, especially on your fingertips, eyelids, or neck, those are signs of a possible allergic reaction to acrylate compounds in the gel formula.
A 2023 peer-reviewed study published in Scientific Reports found that standard UV nail lamp exposure at recommended cure times does not significantly damage skin cells, which is reassuring. But the same research body of literature also notes that longer-term and repeated exposure warrants continued caution, and you can reduce any UV risk by applying a broad-spectrum SPF to your hands before curing or using UV-protective gloves with fingertip cutouts during the lamp cure. The acrylate allergy risk is a separate concern from UV exposure and does not go away with better lamp design. If you notice a reaction, remove the gel carefully (never peel or force it off) and consult a dermatologist.
On the topic of removal: after your wedding, please don’t peel. The AAD’s guidance on reducing artificial nail damage is clear that peeling gel off the nail plate takes layers of your natural nail with it, leaving them thin, white, and fragile for weeks. The right way is to gently file the shine off the top of the gel, soak a cotton pad in 100% pure acetone, press it to the nail, wrap each finger in a small square of aluminum foil, wait 10 to 15 minutes, and then gently slide the softened gel off with a wooden cuticle stick. Moisturize immediately after with cuticle oil and a rich hand cream.
If you see any nail lifting with discoloration underneath, unusual pain, or swelling that is not explained by normal post-removal sensitivity, that is worth showing to a doctor. A greenish tint under a lifted nail in particular can be a sign of bacterial or fungal involvement and should not be left alone.
A Quick Note on Short Nails
I want to close with this because it comes up constantly: short nails are not a consolation prize at a wedding. Some of the most beautiful bridal manicures I have seen, the ones that photograph best, the ones that look most elegant in ring shots, are on short natural nails. Sheer glass nails, milky whites, chrome glazed finishes, and colored modern French tips all look spectacular on shorter lengths. You do not need length to have a gorgeous wedding manicure. You need good prep, the right color for your skin tone, and a confident seal with a quality top coat.
Whatever length you have, whatever skill level you start with, the goal is the same: you want to look at your hands on your wedding day and feel genuinely happy with what you see. That is completely possible, without a salon, without a steady artist’s hand, and yes, even after a long work week.