10 Prom Nail Ideas That Look Salon-Made (They’re Not)
I will be honest with you. I did not become good at nails in a spa with soft music and good lighting. I taught myself one wobbly dot at a time during the most boring internship known to humanity, with a cheap dotting tool I bought on a whim. So when I say that every single design in this list is do-able at home, I mean it in the most unglamorous, kitchen-table, “I had three tries at this” way possible.
Prom is the one night where your nails are actually going to be photographed. The corsage moment. The pictures. The dinner where you are doing a lot of gesturing. You want nails that look intentional, last until midnight, and do not cost you a salon appointment you had to book three weeks in advance. I got you.
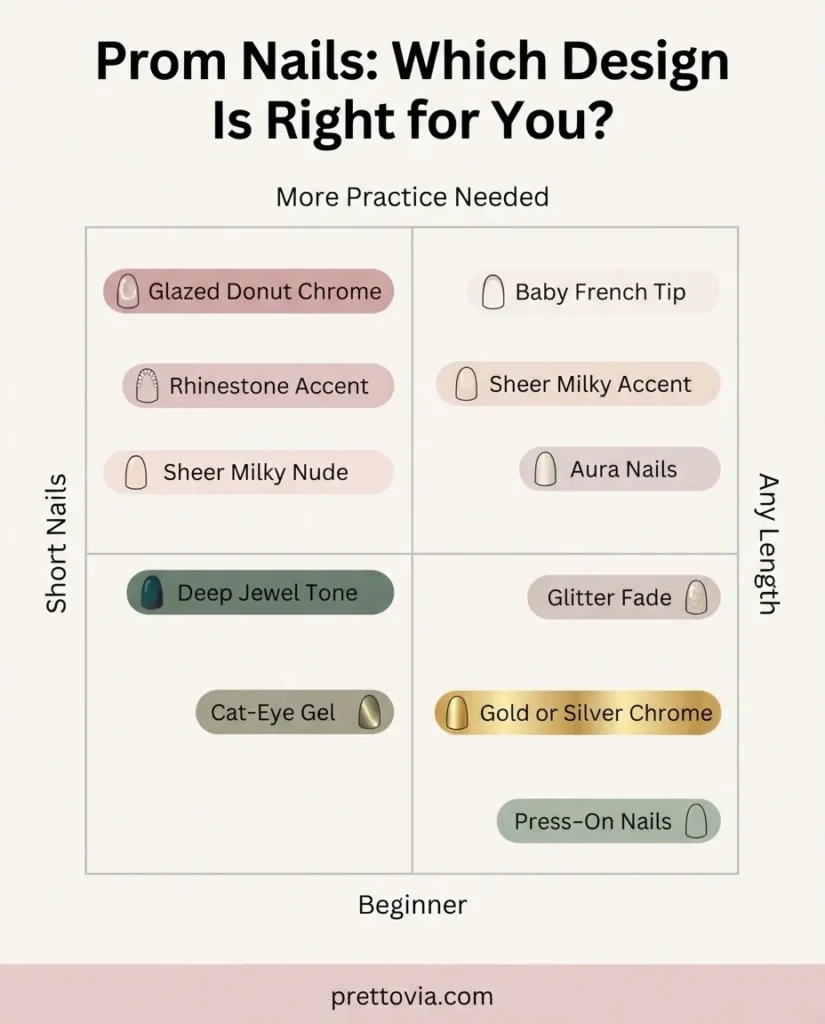
Below are 10 prom nail designs ranked roughly from most beginner-friendly to a little more involved. Every single one includes a short-nail version, a timing tip (because doing your nails the morning of is a recipe for disaster), and an honest assessment of what level of patience it actually requires.
Before we get into the designs, though, let us talk about two things that every single one of them depends on: prep and system.
The Prep That Makes or Breaks Prom Night Nails
This is the part most tutorials skip. They show you the pretty finished design and zero of the ten minutes of prep that made it possible. Here is what I do every time, whether I am doing a simple nude or full chrome.
Start with totally clean, polish-free nails. Any oil or residue on the nail plate will cause lifting. Gently push back your cuticles with a cuticle pusher after a warm shower, when the skin is soft. According to the American Academy of Dermatology’s manicure and pedicure safety guidance, you should never cut your cuticles, because they form a seal that protects your nail from bacteria and infection. Just gentle pushing back, please.
Lightly buff the surface of each nail with a fine-grit buffer (180 to 220 grit) to remove shine. Wipe with a lint-free pad and either nail prep solution or a small amount of isopropyl alcohol. This dehydration step is not optional if you want your polish or gel to stick.
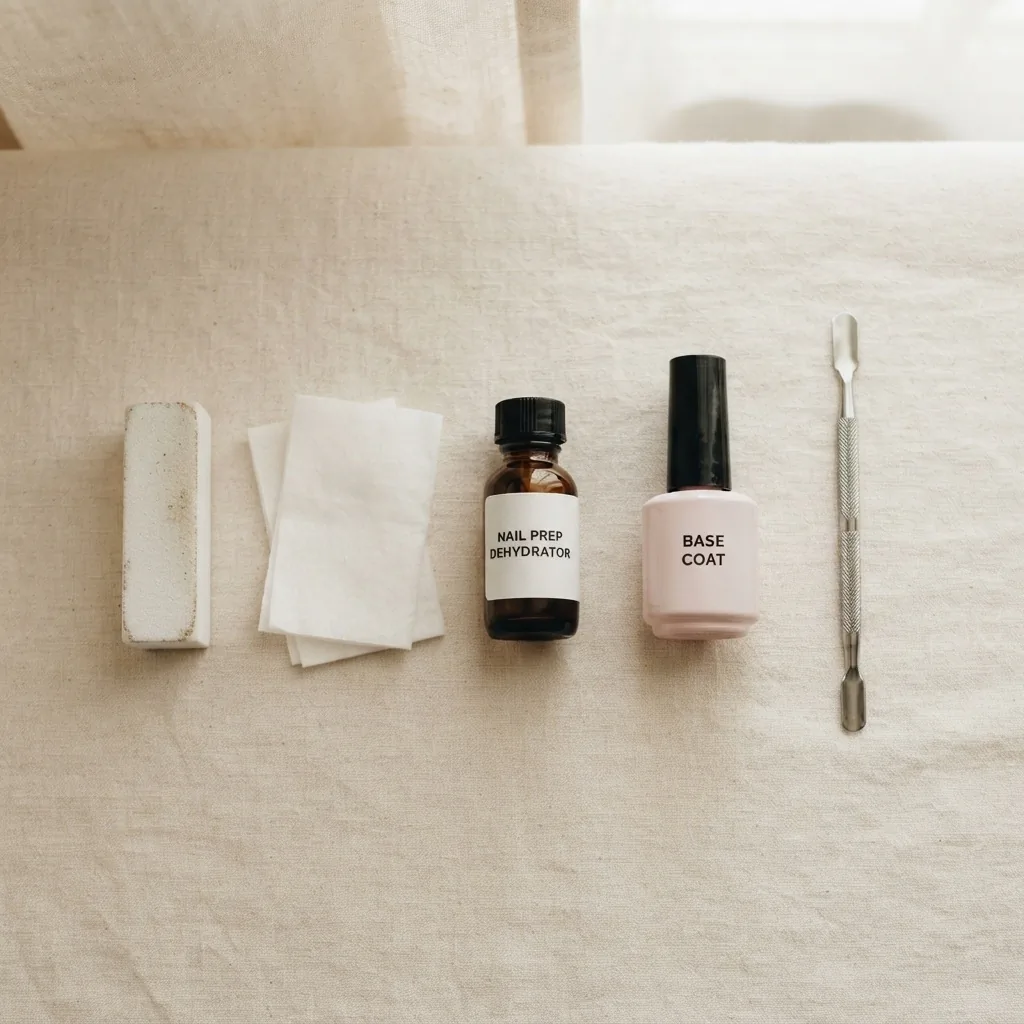
Apply a thin, even layer of base coat and let it cure if you are using gel, or dry fully if you are using regular polish.
The edge of the nail matters more than most people think. Capping the free edge, meaning dragging your base coat and every color layer slightly over the very tip of the nail, seals that edge and prevents peeling. Gel in particular tends to lift from the tip first if you miss this step.
Timing advice for prom: Do your nails two to three days before the event if you are using regular polish, so any minor chips can be touched up. If you are using at-home gel, do them three to five days before. Gel does not need drying time (it cures instantly under the lamp), but you want a trial run before the big night, not an experiment on it.
What System Should You Use for Prom?
This is worth a quick answer before we get to the designs, because the system affects how you apply every single one of them.
Regular nail polish is the most forgiving for beginners because mistakes wipe off with acetone. The downside is it needs careful drying time and it can chip within a day or two if not sealed with a good top coat. If you choose regular polish, go with a quick-dry top coat applied every other day to extend wear.
At-home gel polish cures under a UV/LED lamp, dries instantly to a hard, glossy finish, and lasts two to three weeks when applied correctly. This is what I use for anything event-specific because there is no smudging waiting period. The system requires a UV/LED lamp and soak-off removal. More on removal below.
Press-on nails have come a very long way. When applied with nail glue (not just the adhesive tabs) over dehydrated, clean nails, quality press-ons last one to two weeks. They are a genuine option if you are short on time, very new to nail art, or working with a tight budget. Many brands now sell press-ons in the same shapes and finishes you see in salons. Size them carefully before gluing, file any gaps, and seal the edges.
Design 1: The Glazed Donut (Chrome Shimmer)
Difficulty: Beginner-friendly with one new tool Best for: Nude, blush, or warm-toned dresses. Works on every skin tone. Flatters every nail length.
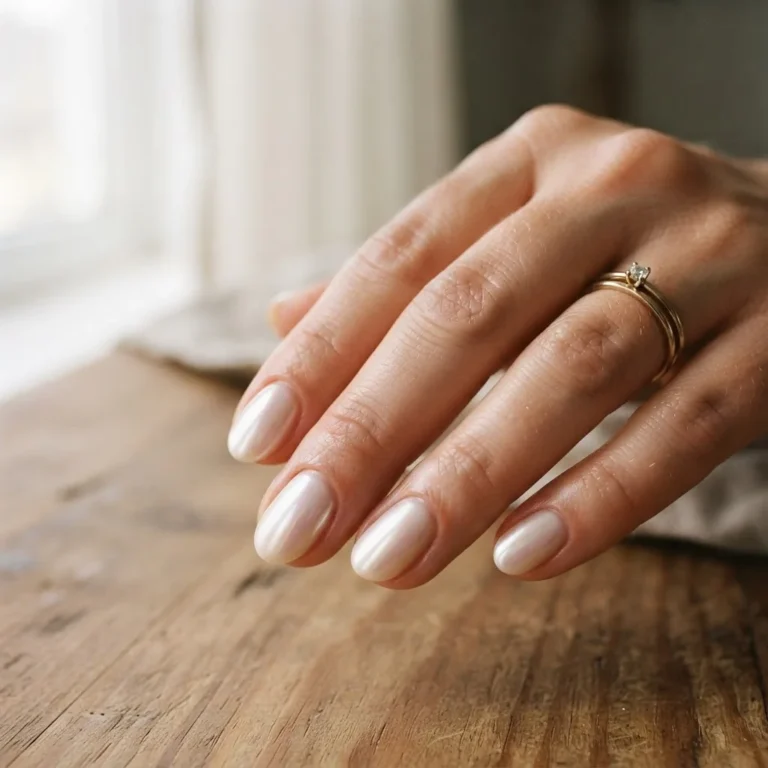
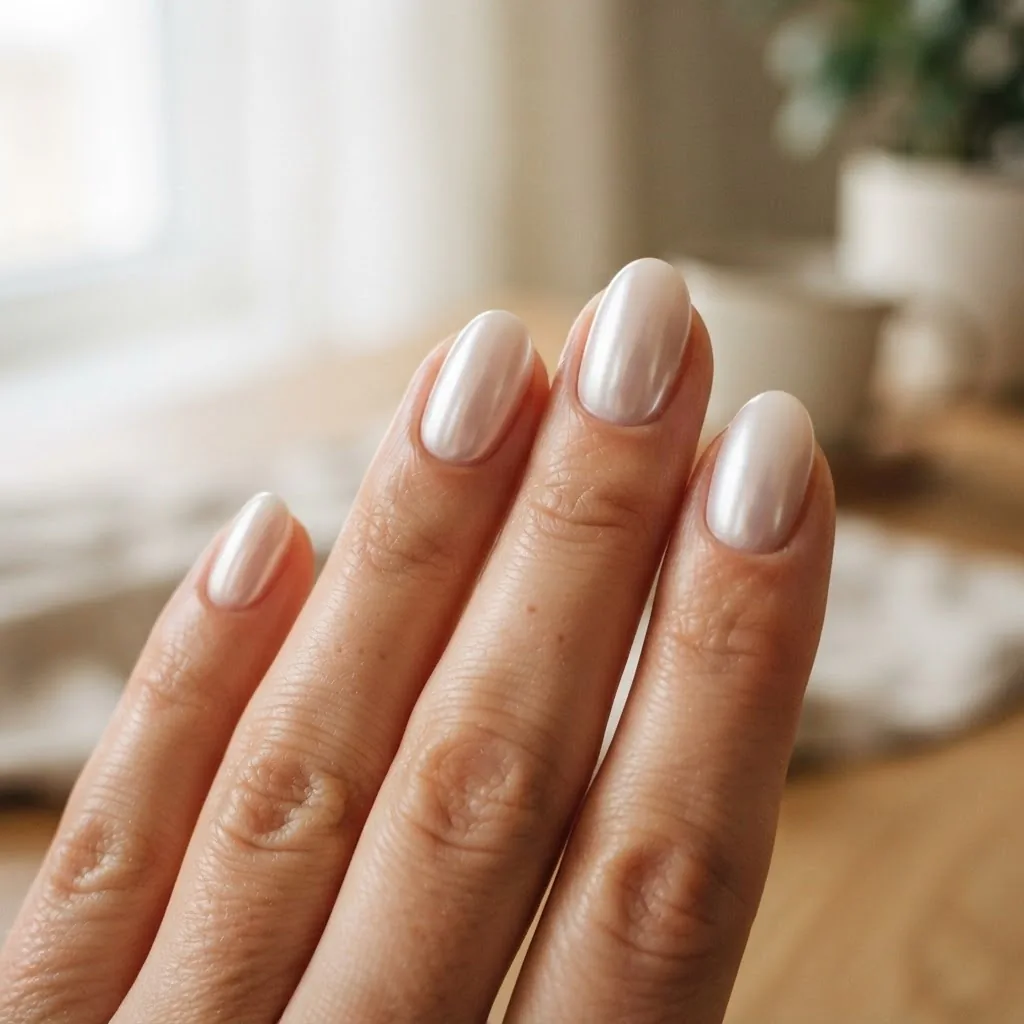
This is the one I keep coming back to because it photographs beautifully and it genuinely looks more complicated than it is. The glazed donut effect is a sheer, milky, pearlescent finish with a soft chrome shimmer on top. It became famous on Hailey Bieber’s nails but it is made for every skin tone and nail length, including short ones.
For regular polish: apply two thin coats of a sheer pinkish-white or nude polish (look for anything described as “milky,” “sheer white,” or “glazed”), then seal with a high-shine top coat. You will get the essence of the look even without chrome powder.
For gel: the full effect requires chrome powder. After curing your color gel, cure a “no-wipe” gel top coat, and while it is still tacky, rub the chrome powder onto each nail using a small sponge-tip applicator or a clean eyeshadow sponge. Work in circular motions with light pressure. The chrome will bond to the tacky surface. Then seal everything with a second layer of top coat and cure again. The key mistake beginners make here is using a regular (wipe-off) top coat before the chrome. It will not stick. You need the no-wipe version specifically.
Short nail version: This is actually one of the best designs for short nails because the shimmer effect catches light across the whole nail surface, making nails look longer and more luminous.
Budget tip: Chrome powder is available on Amazon and in Sally Beauty for around $5 to $12, and a small pot goes a very long way. You do not need a branded kit for this one.
Design 2: Modern French Tips
Difficulty: Easy to medium, depending on which version you choose Best for: Any dress color. Works on all nail lengths. Universally flattering.
The classic French tip has had the most gorgeous glow-up. The modern versions that are all over Pinterest right now include colored tips in burgundy, soft pink, lavender, or silver, chrome-tipped French, the “floating French” (a thin curved line instead of a thick fill), and the barely-there baby French with a super-thin white line.
For a beginner at home, the easiest approach is the baby French or colored French. Here is how: apply your base color (nude, sheer, or your chosen shade), let it dry completely or cure if using gel, then use a thin nail art liner brush or a French tip nail guide sticker to paint a curved line or fill just the very tip. Seal with top coat.
The most common beginner mistake with French tips is making the tip line too thick and too straight. Real French tips curve with the natural smile line of your nail. If your freehand line is not perfect, that is fine. Wait for it to dry, then use a thin liner brush dipped in acetone to clean up the edges. This trick saves nearly every French tip situation I have been in.
Short nail version: A baby French (extremely thin tip line) on short nails is incredibly elegant. Skip the thick, sharp-cornered fill and lean into the thin curved line. It looks intentional and modern, not like you ran out of nail.
Design 3: Cat-Eye Magnetic Gel
Difficulty: Easy once you understand the magnet Best for: Deep jewel tones, emerald, navy, burgundy, dark rose. Beautiful on medium and deep skin tones especially.
Cat-eye gel is one of those designs that looks like sorcery the first time you see it and turns out to be very logical once someone explains it to you. The gel itself has iron particles suspended in it. You apply it like regular gel polish, then hold a magnet wand close to (but not touching) the wet gel before curing. The magnet pulls the particles into a stripe or a starburst or a double-eye shape, depending on the magnet design. Then you cure it and the pattern is locked in.
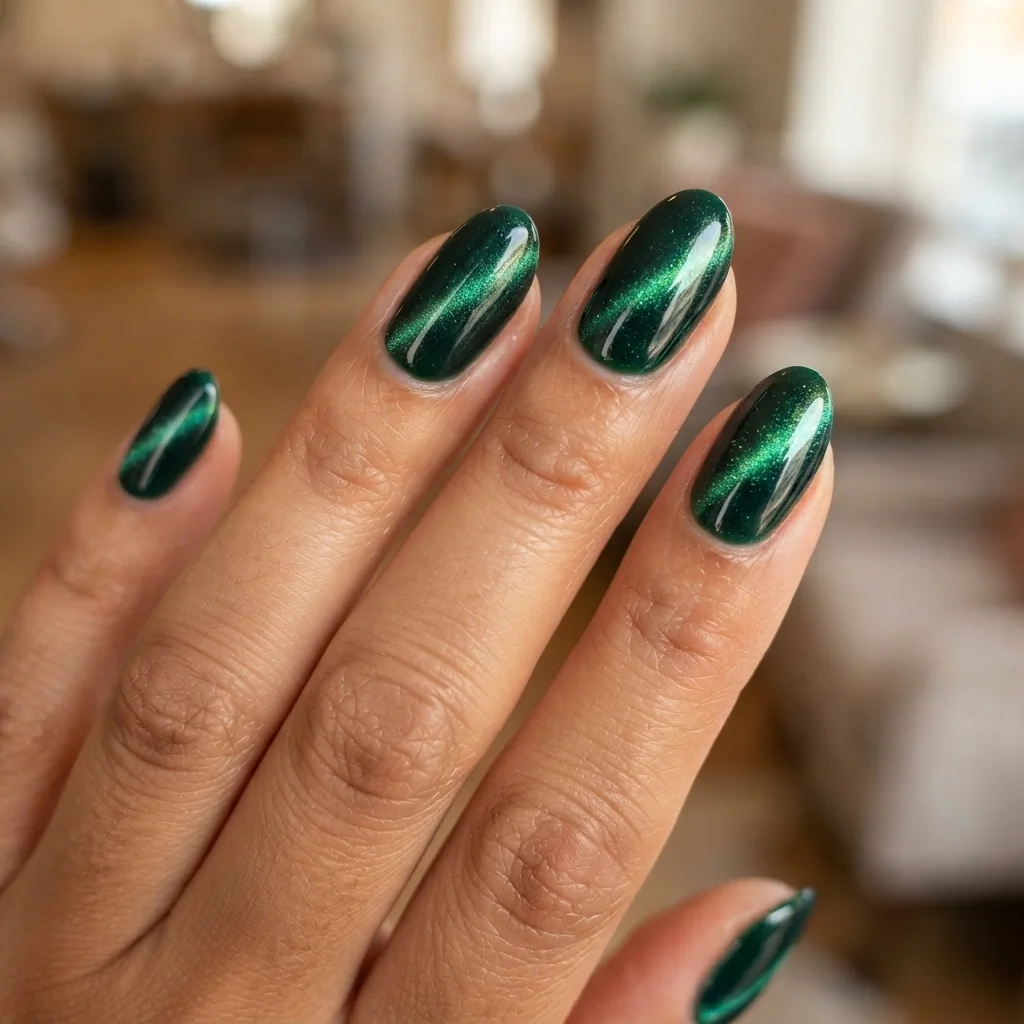
You need two things: magnetic gel polish (these are sold as a matched set with the color and the magnet wand, or you can buy them separately) and patience with the timing. The magnet needs to be close enough to affect the gel but the gel needs to still be wet, so you hold the magnet for about ten to fifteen seconds before curing. If you cure first and then try the magnet, nothing will happen.
Different magnet shapes give different effects: a bar magnet creates the classic cat-eye stripe, a circular magnet creates a starburst or solar flare, and a dual-tip magnet creates a double cat-eye that looks incredibly dimensional. For prom, the double cat-eye in a deep jewel tone with a glossy top coat is a showstopper.
Short nail version: Cat-eye actually looks stunning on shorter nails because the magnetic pattern creates visible depth across even a small nail surface. Go for a classic single-stripe cat-eye in emerald or deep bordeaux.
Design 4: Aura Nails
Difficulty: Medium (takes a little practice but no fine motor skill required) Best for: Soft, dreamy color palettes. Great for pastel dresses, white dresses, and bold contrast. Works on all skin tones.
Aura nails are the look that went truly viral and the one I get asked about most from people who say “I could never do this at home.” You absolutely can. No airbrush required. The effect is a soft, glowing halo of color in the center or around the edges of the nail, diffused like a sunset gradient.
The technique uses a small fluffy brush (a nail art fan brush or even a clean eyeshadow brush) and sheer or diluted color. Apply your base color and let it cure. Then load a tiny amount of your second color onto the brush tip and tap it gently onto the center of the nail (for an inner glow) or around the edges (for a halo), using a stippling or dabbing motion rather than a stroke. The goal is a soft, blended edge with no hard lines.
For gel aura nails, cure between each layer and build slowly. You can add a second or third shade to create dimension. Seal with a glossy top coat for a luminous finish or a matte top coat for a gauzy, ethereal effect that is really having a moment right now.
Short nail version: Aura nails look gorgeous on short, rounded, or oval nails. The softness of the diffused color complements a natural nail shape beautifully.
Design 5: Silver or Gold Chrome (Full Metallic Mirror)
Difficulty: Same as the glazed donut, one extra step Best for: Silver and gold dresses, black dresses, statement looks. Striking on deeper skin tones. Bold and photogenic.
If glazed donut is soft and quiet, full chrome is the extrovert of the group. A true mirror-chrome finish looks like actual liquid metal on the nail. The application method is the same as the glazed donut: no-wipe top coat plus chrome powder plus sealing top coat. The difference is in the color underneath.
For silver chrome, start with a light grey or silver-toned base gel. For gold chrome, start with a warm gold or champagne base. The base color shows through slightly and affects the undertone of the finished chrome. This is how you control whether your gold chrome reads warm and buttery or bright and brassy.
One thing I want to be honest about here: chrome powder can go everywhere. Do your chrome application before anything else in your environment is clean. Wash your hands gently after each nail if powder migrates to your cuticles, and clean up edges with a brush dipped in acetone before sealing.
Design 6: Rhinestone and Crystal Accent Nails
Difficulty: Easy application, fiddly placement Best for: Any base color or finish. Works on all nail lengths. Pairs beautifully with simple sheath dresses.
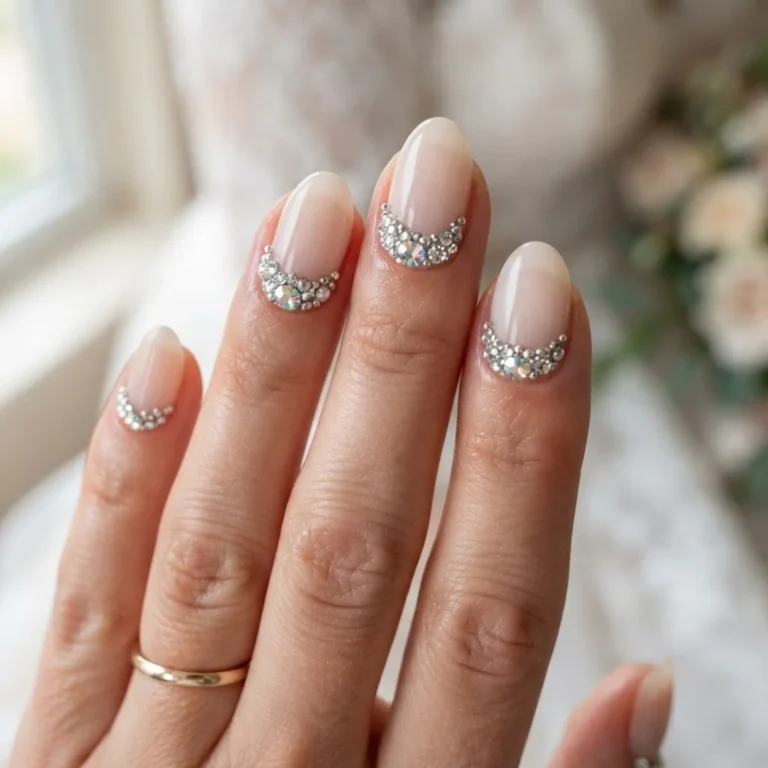
You do not need a full set of rhinestone nails to get the look. An accent nail or two (one or two fingers with gems, the rest plain or with a simple base) is actually the direction prom nail trends have been moving, because it looks curated rather than costume-y.
To apply rhinestones at home, cure your color and top coat, then while a final layer of top coat or gel is still wet, use a dotting tool or an orange stick with a tiny dab of clear top coat on the tip to pick up each stone and press it into position. Small rhinestones (SS5 and SS6 sizes) give a delicate, jewelry-like finish. Larger ones (SS10 and up) read more dramatic.
Seal over the stones with an additional thin layer of no-wipe top coat and cure. Do not flood the stones or the facets will cloud over. A thin seal around the edges of each stone is all you need.
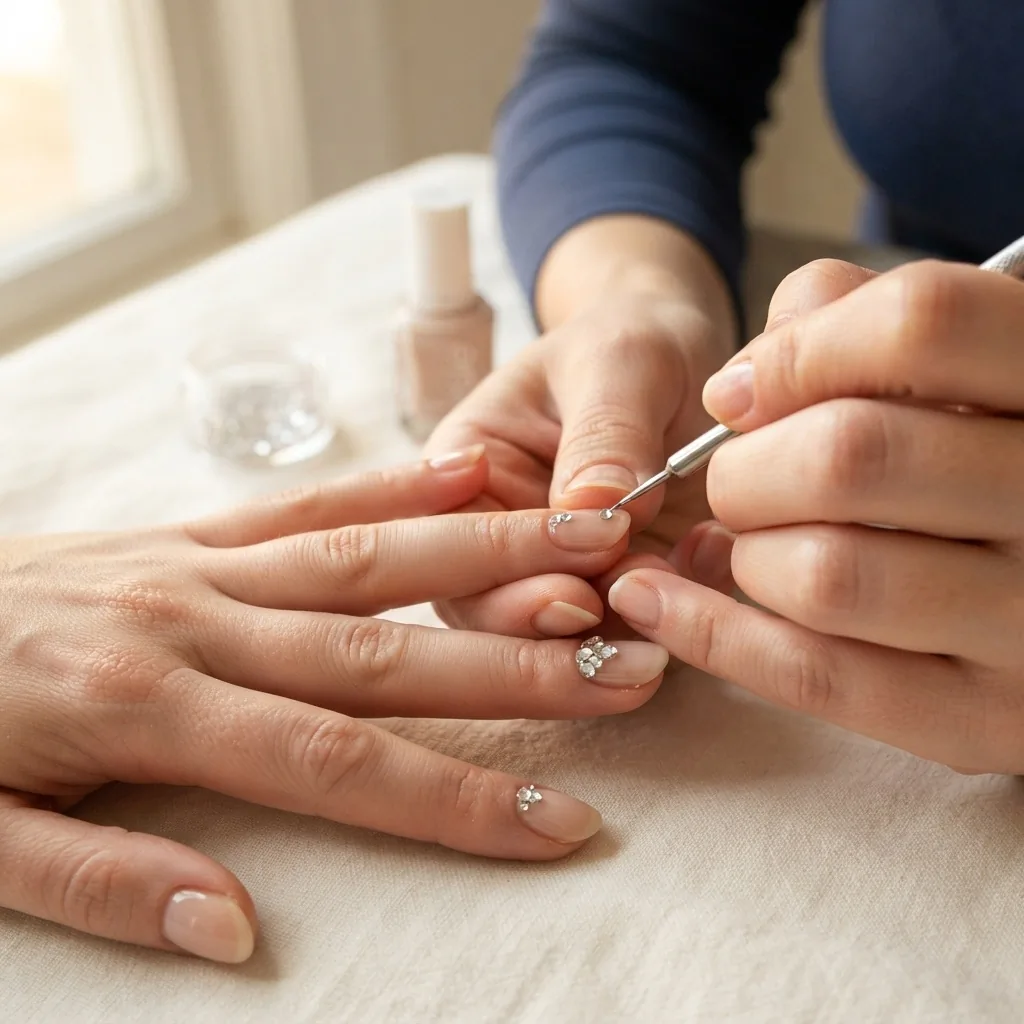
Short nail version: Rhinestone accent nails are one of the best choices for short nails because the stones add height and dimension without requiring length. A simple sheer base with three to five stones placed in a cluster near the cuticle or scattered across the nail looks elegant and intentional.
Design 7: Deep Jewel Tones (The Burgundy, Navy, Emerald Set)
Difficulty: True beginner. This one requires zero technique. Best for: Deep skin tones especially, but genuinely flattering across all undertones. Great with red, black, navy, or forest green dresses.
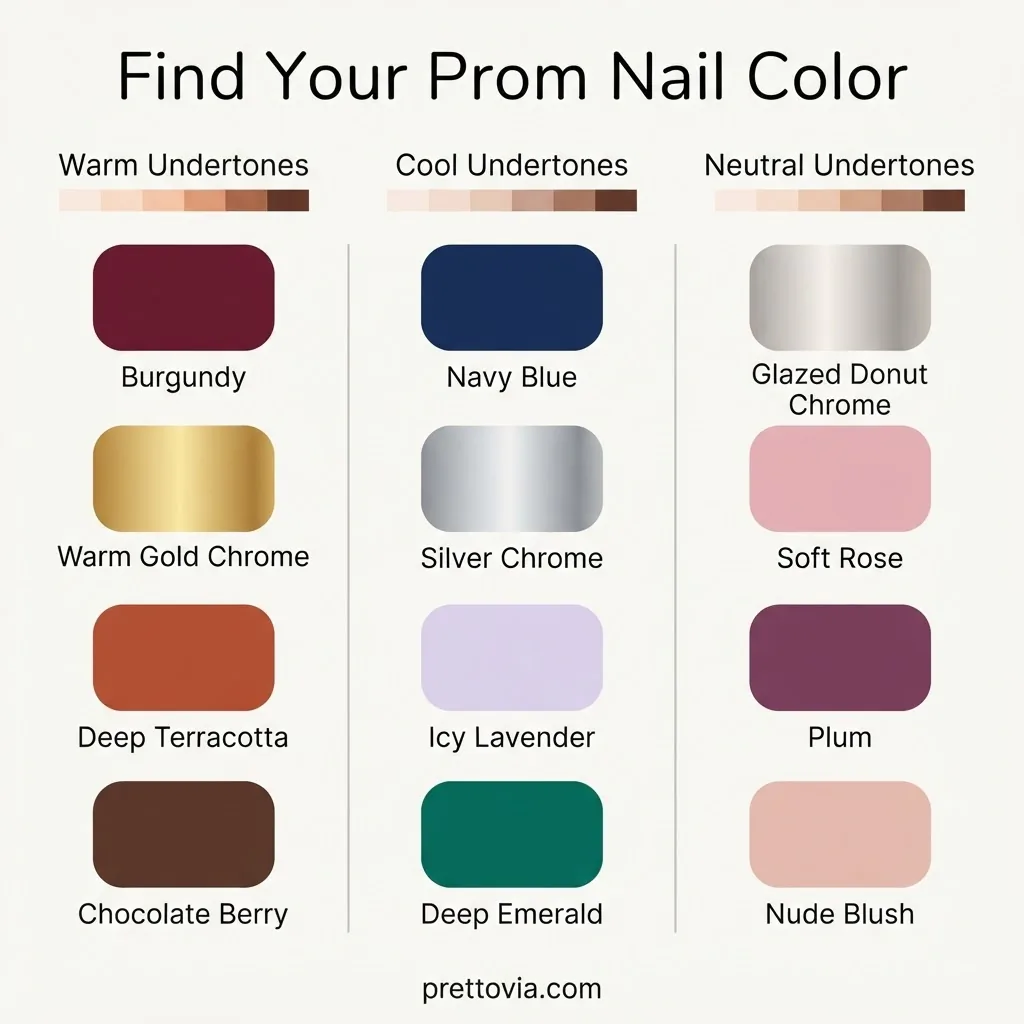
Sometimes the most stunning prom nail is a single, perfectly applied deep color. Burgundy, deep navy, rich emerald, and chocolate berry are among the most elegant choices for a formal event because they read sophisticated rather than trendy, and they age beautifully in photos.
The technique here is entirely about application. Two thin coats, always. A thick coat takes forever to dry, gets bubbles, and shrinks away from the edges. Two thin coats give you even, streak-free color. Use a base coat first for longevity and a top coat sealed over the edges.
OPI’s color theory guidance and dermatologist-backed color analysis both suggest that deeper jewel tones work exceptionally well on medium to deep skin tones, where the contrast between the deep shade and the skin creates a striking, jewelry-like effect. On fair and light skin tones, deep burgundy and navy are equally stunning and carry a vintage glamour that feels perfect for a formal event.
Design 8: Glitter Ombre or Glitter Fade
Difficulty: Easy, very forgiving of imprecision Best for: Any dress with sparkle detail, or as a contrast to a simple solid-color dress. Works on all nail lengths.
Glitter nails are one of the most beginner-friendly designs in existence because glitter hides every single sin. Bumpy application? Glitter. Uneven edges? Glitter. Slightly shaky hands? Absolutely nobody can tell under glitter.
The ombre or fade version is even more modern than a full glitter coat. Apply your base color (a nude, sheer, or a soft color that matches your dress), let it dry or cure, then load fine glitter polish onto a small piece of makeup sponge and dab it onto just the tips or the lower half of the nail, building intensity gradually. Each layer adds more sparkle. Seal with a thick top coat to smooth out the texture of the glitter.
For gel: use a gel glitter or a gel top coat mixed with fine cosmetic glitter. Apply in the same sponge-dab technique and cure each layer.
Short nail version: Glitter fade on short nails looks intentional and chic, especially in a champagne or rose-gold shade. The gradient draws the eye along the nail surface and creates the illusion of length.
Design 9: Sheer Milky Nude with a Colored Cuticle Detail
Difficulty: Medium (requires a steady hand for the detail) Best for: Minimalist aesthetic, pale or neutral dresses. Elegant on all skin tones, especially warm to medium.
This design has been quietly taking over Pinterest as an alternative to the full chrome look. The base is a sheer, milky nude that unifies the nail, and then a thin line of color or gold is painted just along the cuticle edge to frame the nail. It is intimate, intentional, and genuinely looks like something you would pay a lot for at a salon.
Use a very fine liner brush for the cuticle line. The steadiness comes from bracing your painting hand against the table and moving slowly, not from any inherent talent. If the line wobbles, clean it with a brush dipped in acetone and redo. This is the design I practiced first at my internship desk, before I had any real skill, and it cleaned up beautifully every time I corrected the edges.
Short nail version: The framed cuticle detail creates a visual border that actually makes short nails look more like a deliberate, architectural shape.
Design 10: Press-On Nails with a Custom Design (The Underrated Option)
Difficulty: Very easy, zero painting skill required Best for: Absolute beginners, people with very little time, those who want an intricate design without the technique investment.
I want to make a case for press-on nails because they genuinely do not get the credit they deserve anymore. The current generation of press-ons is a completely different product from the bubble-shaped plastic rectangles of ten years ago. They come in almond, coffin, oval, squoval, and stiletto shapes. They come with gel finishes, chrome finishes, rhinestones already applied, and intricate hand-painted designs. And when applied correctly, they last.
The correct application: size each nail before you glue anything. Most packs have 24 nails across multiple sizes for a reason. Find the ones that fit your natural nail width. Prep your nails (buff, dehydrate, no oils). Apply a thin layer of nail glue to both your natural nail and the press-on. Hold each one firmly for thirty seconds. Press from the cuticle outward to avoid air bubbles. File any edges that overhang.
To remove, soak in warm soapy water for ten to fifteen minutes, then gently slide off. Do not rip or force them. Your natural nails will thank you.
Keeping Your Nails (and Hands) Safe
Here is the section that feels like a buzzkill but is actually just me being the big sister who wants prom night to go well for you.
If you are using at-home gel polish, you will be curing under a UV/LED lamp. The Skin Cancer Foundation notes that UV nail lamps present a moderate UV risk, which is far lower than tanning beds, but they still recommend applying broad-spectrum SPF 30+ to your hands before curing, or wearing fingerless UPF-protective gloves. This is a sensible, low-effort precaution and worth doing every time.
The American Academy of Dermatology’s guidance on gel manicures also notes that repeated gel use can cause nail brittleness and peeling over time. Giving your nails a break between gel sets, keeping them hydrated with cuticle oil, and never peeling gel off (always soak off properly) are the habits that keep natural nails healthy long-term.
One more thing, specifically for anyone new to gel products: gel polishes and acrylate-based systems contain compounds that can, with repeated skin contact over time, cause allergic sensitization. A 2024 peer-reviewed study published in PMC found that 98% of nail acrylate allergies are linked to the methacrylate compounds in gel and acrylic nail products, with skin contact with uncured product being the primary route of sensitization. The takeaway is practical: keep gel products off your skin and cuticles, cure each layer fully, and if you ever notice persistent itching, redness, swelling, or blistering around your nails or fingers, stop using the product and see a dermatologist. This is rare, but worth knowing.
How to Take Gel Off Afterward (Without Wrecking Your Nails)
After prom, after the after-party, after the photos, you are going to need to remove your gel. Please do not pick it off. I know it is tempting when a corner is lifting, but peeling gel takes layers of your natural nail with it every single time.
The AAD’s recommended method for removing gel polish at home is to gently buff the shine off the surface, soak a cotton pad in acetone, place it over the nail, wrap the finger in foil, and wait ten to fifteen minutes. The gel will soften and slide off with gentle pressure from an orange stick. Follow up immediately with cuticle oil and a good hand moisturizer.
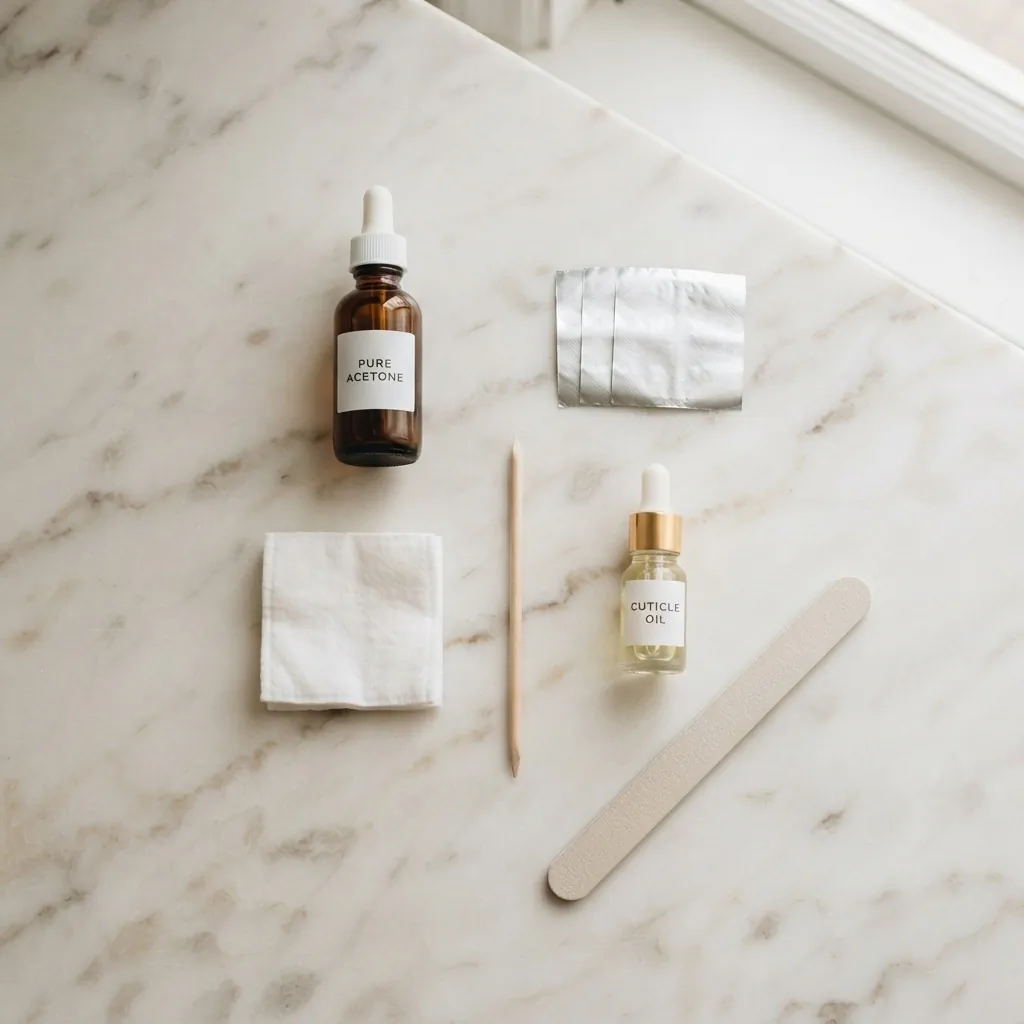
Before purchasing any gel remover product, it is worth checking the FDA’s nail care product safety guidance, as the FDA has recently flagged certain gel nail polish removers that contain methylene chloride, a prohibited ingredient. Stick to plain acetone or an acetone-based remover from a trusted brand, and you will be fine.
The Honest Short-Nail Prom Guide
I feel strongly about this because so much prom nail content acts like you need coffin-length extensions to belong in the conversation. You do not.
Short nails look stunning at prom. They are practical (no catching on corsage ribbons, no typing disasters), elegant, and they carry every single design in this list beautifully. The designs that are particularly flattering on short nails are: glazed donut chrome (light-catching across the whole surface), baby French tip (thin and curved, looks intentional), rhinestone accents (adds dimension without needing length), sheer milky nude with cuticle detail, and aura nails (the diffused color suits a rounded or oval shape perfectly).
If your nails are very short right now and you want a little more length for the event, that is exactly what press-ons and semi-cured gel strips are for.
One More Thing Before You Go
Prom nails are supposed to feel fun. If you mess up a coat, wipe it off and start again. If your French tip line is not perfect, clean it with an acetone brush and redo it. If your chrome powder goes rogue, that is what top coat is for. The learning curve is real but it is also genuinely worth it, because doing your own nails gives you a kind of satisfaction that a salon appointment does not.
I promise you, if I can get a decent manicure after a ten-hour workday in a Chicago apartment where I ran out of good lighting, you can do something beautiful for one night where it actually matters. Give yourself a practice run a few days before, pick a design that genuinely excites you, and do your prep.
The nails are going to be great.