Summer Nails for Vacation: 15 Looks You Can Do at Home
There is a very specific kind of energy that hits when you realize your vacation is three weeks away and your nails look like absolutely nothing. I know it well. I also know the next move, because I’ve been there: opening Pinterest, saving approximately forty gorgeous manicure photos, feeling briefly incredible about your future nails, and then slowly convincing yourself that none of those looks are meant for people like you. Too intricate. Too perfect. Definitely done by someone with a gift you were not born with.
I want to be the voice that interrupts that spiral. I taught myself nail art at a desk, with a cheap dotting tool, one wobbly dot at a time. I had zero talent and zero training. What I had was stubbornness and a willingness to practice. And right now, in my Chicago apartment that doubles as my nail lab, I am here to tell you that the gap between the manicure on your Pinterest board and the manicure on your actual hand is almost always just technique, not talent. Technique is learnable. You can learn it before you pack your bags.
Below are 15 summer nail ideas, ranging from genuinely five-minute easy to slightly more satisfying-because-you-worked-for-it, all designed to be done at home with accessible tools and honest expectations. I’ve organized them so you can find your starting point fast, whether you are a complete beginner, someone who’s done a few at-home manicures, or a confident DIYer ready to level up.
Before You Touch a Single Polish Bottle: The Prep That Makes or Breaks Everything
I am putting this here, before the designs, because I have watched too many people rush past prep and then wonder why their manicure looked incredible for exactly one day. Good prep is not glamorous, but it is the actual reason a manicure lasts on vacation. Chlorine, saltwater, heat, and sunscreen all work against your polish, and solid prep is your defense.
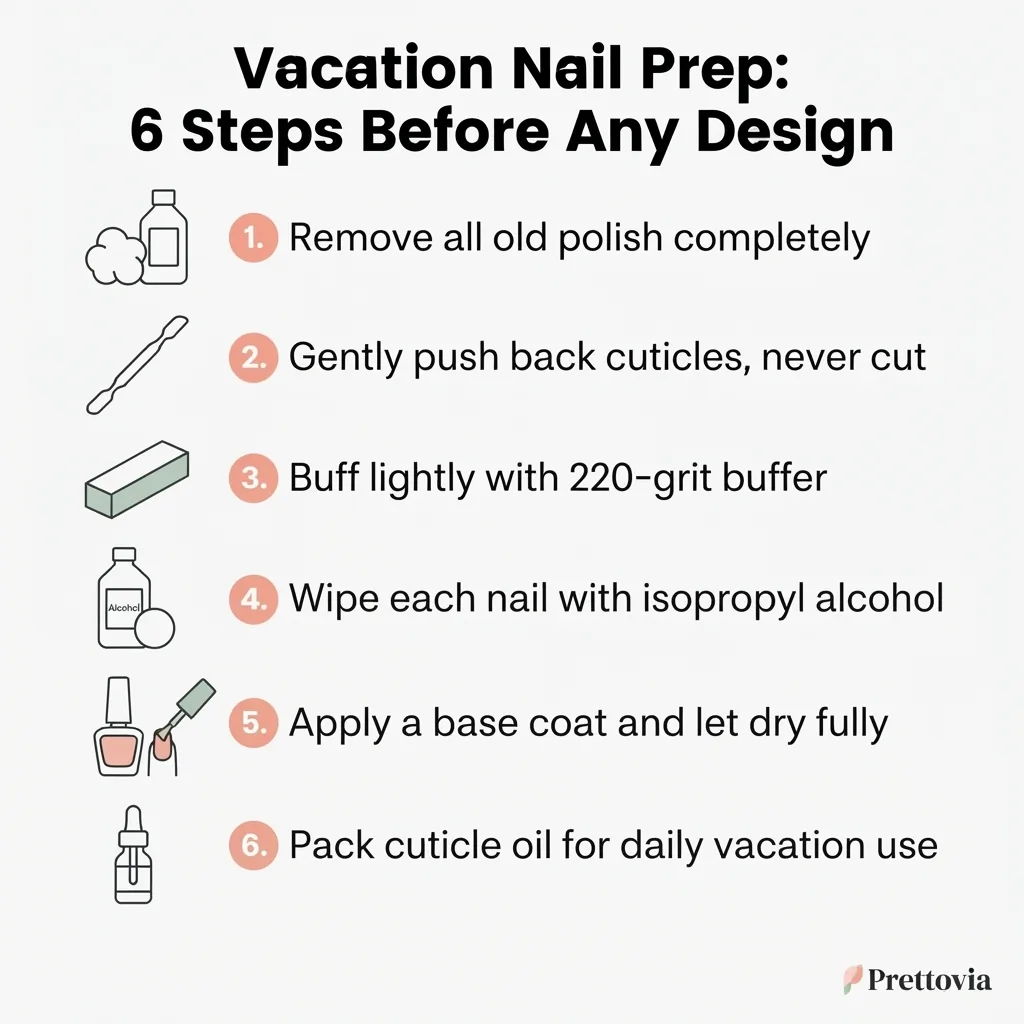
Start with clean, dry nails. Remove any old polish completely and wash hands with soap and water. Gently push back your cuticles with a rubber-tipped cuticle pusher, not a metal one, and please do not cut your cuticles. The American Academy of Dermatology is very clear on this: cuticles act as a protective seal against infection, and removing them opens the door to bacteria and fungus. Pushing them back gently is fine. Cutting them is not worth the risk.
Buff the surface of each nail lightly with a fine-grit buffer (220 grit is your friend here, coarser grits are for gels and acrylics, not natural nails). Wipe each nail with a lint-free wipe or a cotton pad soaked in isopropyl alcohol to remove any oils or lotion residue. This step is the single biggest factor in whether your polish sticks for three days or three minutes. Always follow with a base coat, not because it looks nice but because it bonds the color to your nail and protects the nail plate from staining.
A good cuticle oil used daily through your vacation will also keep your nails flexible and less prone to chipping. Nails that are dry and dehydrated crack and chip much faster in hot climates. Pack a small bottle and use it every night before bed.
If you are planning a gel manicure at home before your trip, the FDA notes that nail care products, including gel systems, contain ingredients that are considered safe when used as directed, but that proper application and, critically, proper removal matter for keeping your natural nails in good shape. Do not peel. Soak off. More on that at the end.
Now, the fun part.
The Beginner-Approved Designs (Start Here if You’re New to This)
1. Jelly Nails
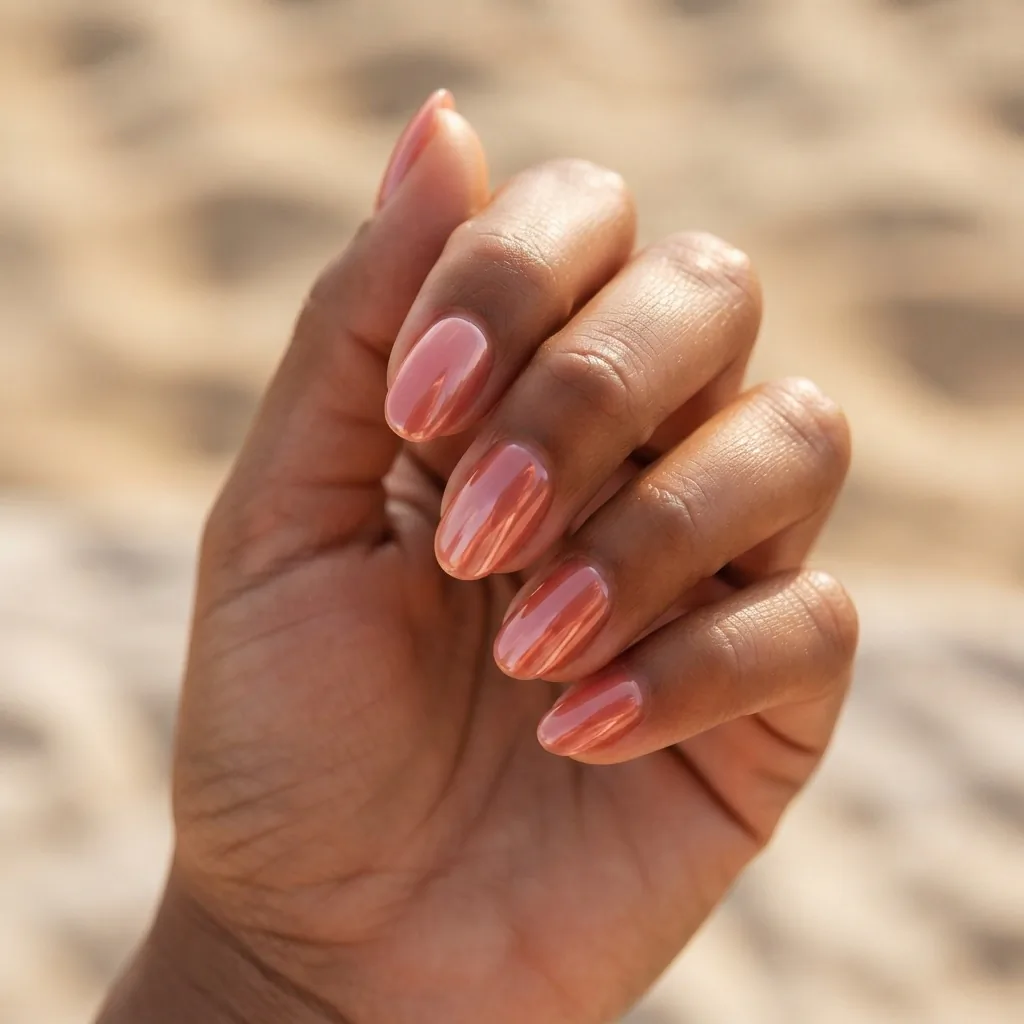
Jelly nails are semi-transparent, slightly squishy-looking nails that glow in the sun and look wildly more intentional than the effort they require. The look comes from applying two or three thin coats of a sheer, gel-finish polish over a bare or lightly tinted nail, then sealing with a high-shine top coat. The translucency is the whole point, so do not try to build opacity. Let the nail show through.
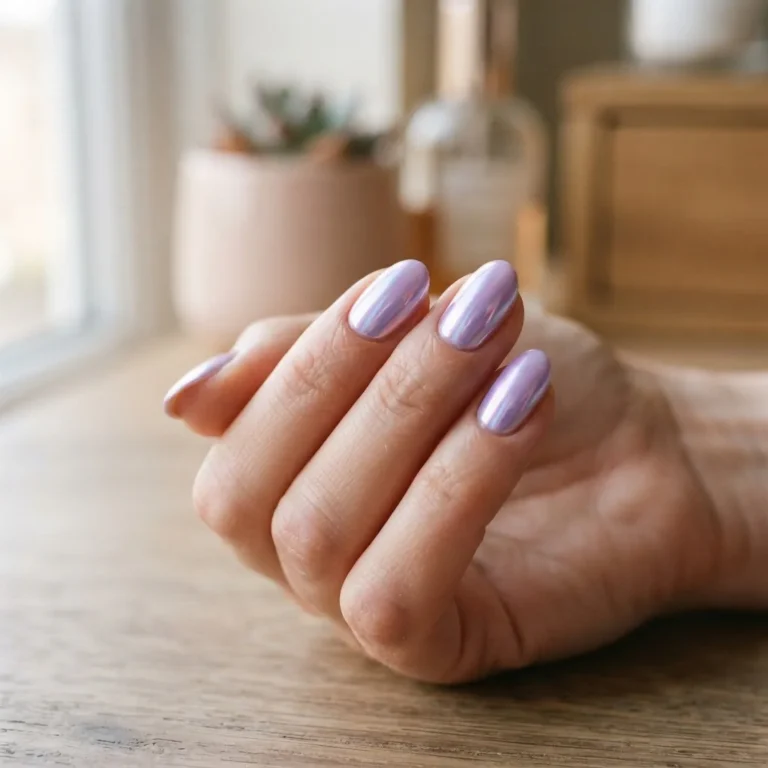
For vacation, anything in the coral, pale pink, peachy nude, or lilac family reads as incredibly summery. This is one of the few designs that actually looks better on short nails because the sheerness flatters shorter nail beds beautifully. If your nails are bitten or uneven, jelly polish is genuinely forgiving.
2. Single-Shade Chrome Nails (Glazed-Donut Style)
The glazed-donut aesthetic that went so viral a few years back is still absolutely everywhere on Pinterest this summer, and it is one of the most impressive-looking things you can do with the least technical skill if you use the right product. The key is a chrome powder, applied onto the sticky layer of a gel top coat using a small silicone applicator or even a soft eyeshadow sponge. You rub the powder in small circular motions until the chrome effect appears, then seal with a no-wipe top coat.
The most beginner-friendly shades for summer are rose gold, pearl white, and champagne gold. These forgive uneven buffing much better than deeper shades like gunmetal or midnight blue. Short nails wear chrome beautifully because the mirror effect makes the whole nail look larger and more polished.
3. French Tips, Modernized
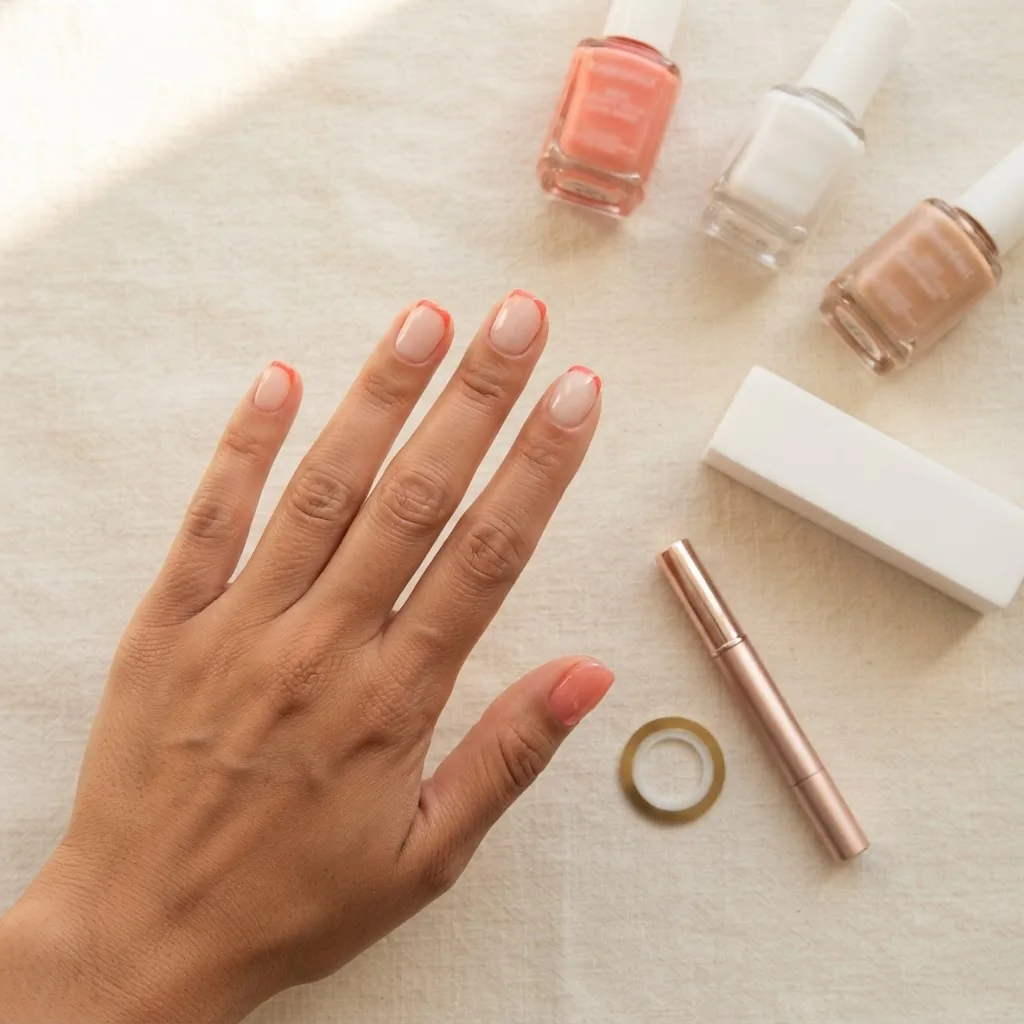
Classic French tips have had their glow-up. Right now the versions getting the most Pinterest saves are thin tips with a colored line (coral, cherry red, sky blue), tips that curve in a baby arch instead of the harsh straight line, and “floating” French tips where the line is slightly detached from the nail edge for an airy effect. All of these are easier than classic French because imperfections in a thin colored line are far less visible than uneven white tips.
Use nail striping tape to get a clean edge if you find freehand difficult. Press the tape across the nail at the tip, paint above it, and remove the tape before the polish dries completely. The result looks like you had a very steady hand whether you did or not.
4. Solid Coral or Bright Tomato Red
I am not going to pretend a single opaque color is a nail art design. But it absolutely earns a spot on this list because it is the single best decision for someone who wants their nails to look intentional on vacation without any additional tools or skills. Coral, bright tomato red, and warm papaya orange are the shades that consistently earn the most compliments poolside. They are universally flattering across skin tones because warm orangey-reds play beautifully against every complexion in natural summer light.
The trick to making a single-shade manicure look polished rather than rushed: two thin coats instead of one thick one, a clean-up brush dipped in acetone to fix any flooding along the cuticle, and a thick gel-formula top coat that gives the mirror shine people associate with salon work.
5. Negative Space Minimalist Nails
Negative space designs use the bare nail itself as part of the design. A classic beginner version is a half-moon at the base of the nail, painted in a contrasting shade, with the rest of the nail left in your base color or bare. For summer, try a peach or coral half-moon over a nude base, or a bright white half-moon over a warm tan polish. The “mistake” zone with negative space designs is much smaller than with full-coverage art, making them genuinely beginner-friendly in a way that looks intentionally minimalist rather than lazy.
The Viral Trends Worth Recreating (These Take One Practice Round)
6. Aura Nails
Aura nails are the blurry, dreamy, watercolor-glow look that has completely dominated Pinterest and TikTok, and they are more achievable than they appear. According to Pinterest’s own trend data, aura nails are one of the top seven summer nail trends for 2025, as reported by Scratch Magazine, and searches have continued climbing through 2026. The good news: you do not need an airbrush. You need a makeup wedge sponge and a little patience.
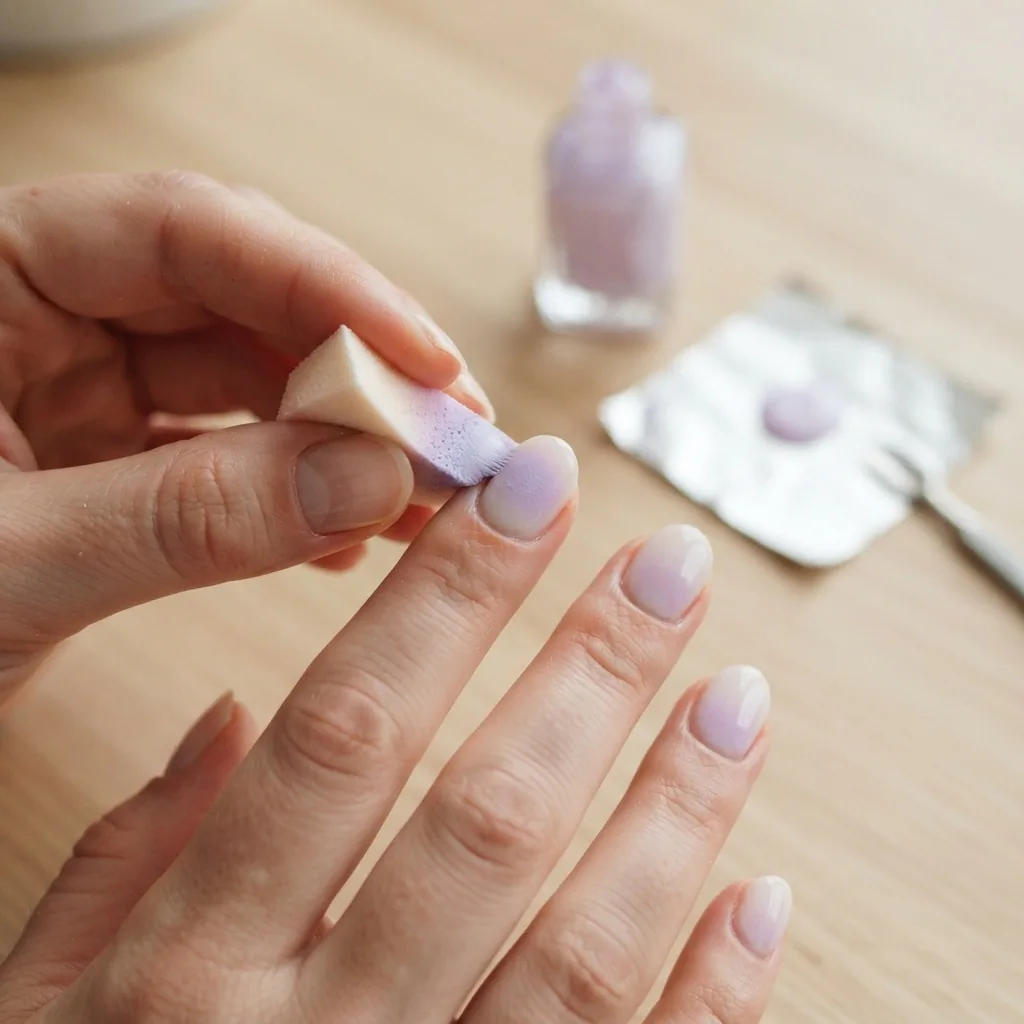
Start with a clean base color, anything from sheer white to soft lilac or warm coral. Let it dry fully. Then dip the corner of a small makeup wedge into a contrasting or lighter shade of polish, just a tiny amount, and dab it into the center of the nail in a soft oval shape. Blend the edges with a nearly dry sponge by lightly tapping outward. The key word is dab, not drag. Dragging smears the base. Dabbing builds up the glow gradually. Seal with a top coat once you are happy with the blend.
Beginner tip: practice on a piece of paper or a spare press-on nail first to get a feel for how much product the sponge is actually holding. Too much product and the blend goes muddy. The combo that gets the cleanest result for beginners is a white base with a sheer pastel color sponged in the center, because the contrast is soft enough to hide any blending wobbles.
7. Ombre and Gradient Nails
Ombre is the cousin of aura nails and uses the exact same sponge technique, just applied across the whole nail instead of concentrating the color in the center. For summer, the most-pinned combos are coral-to-peach, white-to-sky-blue, and sunset orange-to-hot-pink. The sponge method requires a couple of practice nails before it looks clean, but the learning curve is much gentler than people expect because the blended texture is inherently forgiving of small inconsistencies.
Apply both polish colors onto a small piece of foil or a plastic card, overlapping slightly where you want the blend to happen. Press the sponge into both colors at once, then dab it onto the nail. Add several light layers rather than trying to get the gradient in one heavy application. Clean up the skin around the nail with a cleanup brush and acetone after each finger before the polish dries.
8. Cat-Eye Nails
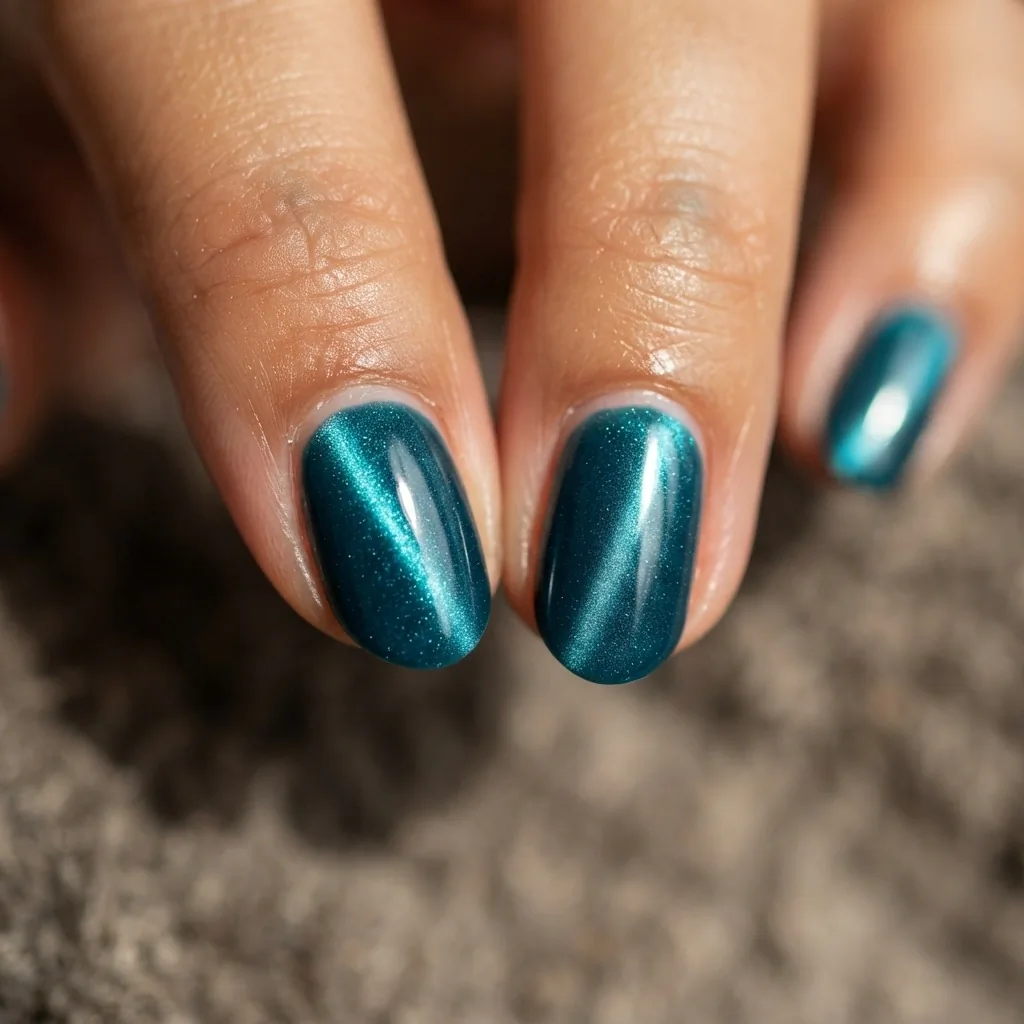
Cat-eye gel polish uses a special magnetic gel formula that contains tiny metalite particles. When you hold a magnet over the wet gel before curing, the particles shift to create a stripe, a wave, or a “cat eye” reflection that runs down the center of the nail. It looks like something that costs $80 at a salon. At home, a cat-eye gel kit costs in the range of $20 to $35 for the polish plus magnet.
The technique is straightforward once you understand the one rule: the magnet must be held close to the nail (within a few millimeters) for around 5 to 10 seconds before you cure, and you must not let the layer cure before you apply the magnet. Work one nail at a time. Apply the cat-eye color, hold the magnet at your desired angle, count to ten slowly, then cure under your lamp. Repeat per nail. Summer-perfect shades in cat-eye formulas include ocean teal, rose gold, champagne, and midnight blue.
9. Watermelon Nails
Fruit nail art is one of Pinterest’s official top summer trends for 2025, and watermelon is the one design in that category that is genuinely beginner-friendly with just a dotting tool and three polishes. Paint the nail in a bright coral-red as your base. Let it dry. Add a thin border of white at the very tip of the nail, then a thin border of green over that. Use a small dotting tool or the very tip of a bobby pin dipped in black polish to add tiny seed dots in the red section. That is the whole design. It looks detailed from any normal viewing distance but requires zero freehand drawing skill.
Short nails actually work beautifully for watermelon art because the design is bold and graphic enough to read clearly on a smaller nail bed.
10. Hibiscus and Tropical Florals with a Dotting Tool
Hibiscus florals are another of Pinterest’s confirmed summer 2025 nail trends, and the version that works for beginners uses the “five-petal dot” method instead of any freehand painting. Place five dots in a loose circle using a medium dotting tool, then drag each dot inward toward the center with the same tool before it dries. This creates a petal shape without any brushwork. Add a tiny yellow dot in the center. The result reads as a proper floral from three feet away.
This design works best on a solid light background: white, pale yellow, or mint green. One accent nail per hand with the rest in a coordinating solid color is a completely valid approach and honestly looks more editorial than all-ten-florals.
The Elevated Looks (For When You Want to Impress Yourself)
11. Italian Summer Nudes and Quiet Luxury Neutrals
“Italian summer” as a nail aesthetic is all about muted, sun-kissed neutrals that look like you have flawless naked nails. Think: warm taupe, terracotta beige, dusty rose, and golden nude. The finish is always high-shine, no matte for this one. These shades are the most universally flattering summer palette across skin tones because they work with the warm undertones the sun adds to your complexion rather than fighting them.
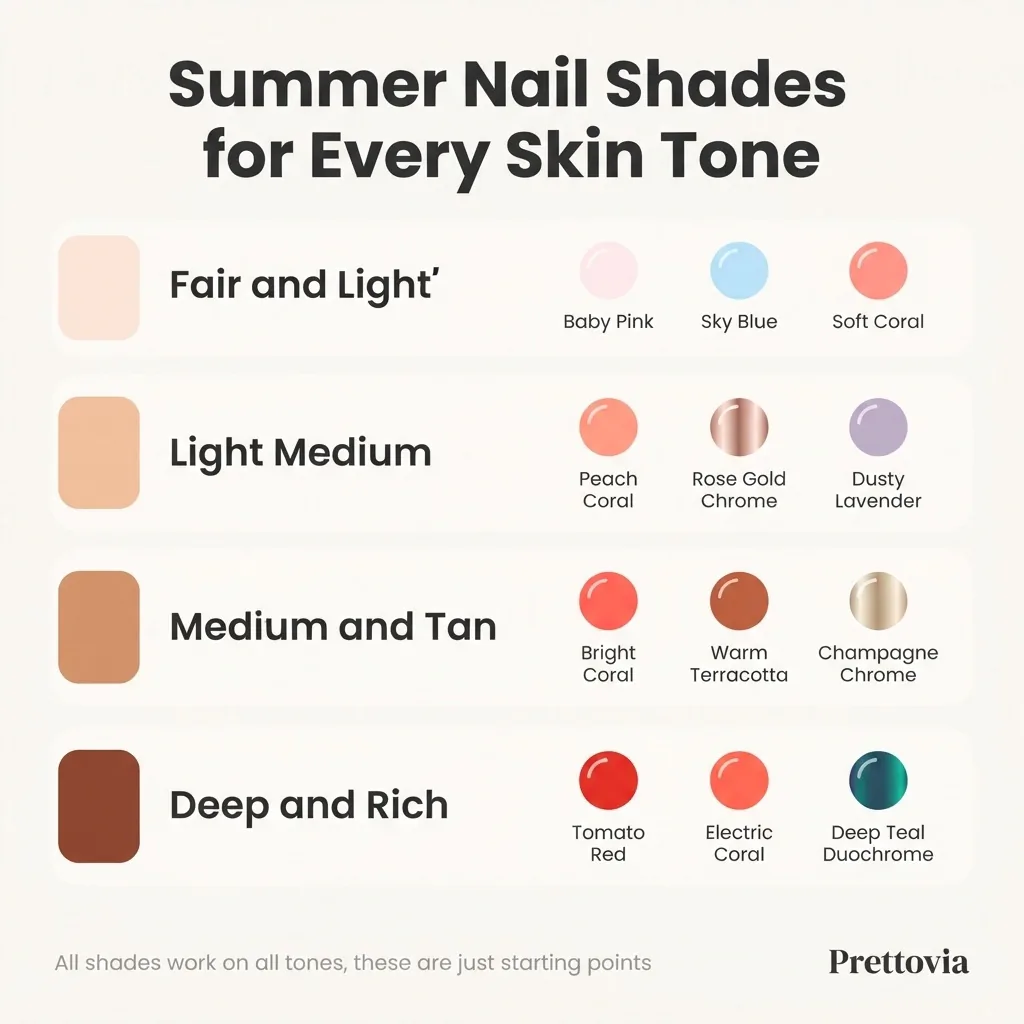
The key to making neutral nails look expensive rather than unfinished is meticulous prep (see above) and a gel-formula top coat that adds real depth. Two thin coats of your nude shade, clean cuticle lines, and a high-gloss top coat will genuinely stop people in their tracks at dinner.
12. Mermaidcore Shimmer and Duochrome
Mermaid nails are having a legitimate moment this summer, and duochrome polishes, the ones that shift between two or three colors depending on the angle, are the quickest way to get there without any complex technique. A duochrome shifts colors as your hand moves in the light, creating that under-the-sea iridescent effect automatically. No layering technique required. Apply two coats of a duochrome, top with a gel-formula or high-gloss regular top coat, and let the polish do the work.
Look for duochrome shades in teal-to-purple, blue-to-green, and pink-to-gold shifts for the most summery results. These are available from indie nail brands and major drugstore polish brands alike.
13. White Chrome French Tips
This is the elevated French tip option for someone who wants to go a little harder. Apply a clean sheer pink or milky white base, then build a traditional or curved French tip at the end of each nail in gel. Before curing the tip fully, apply a small amount of chrome powder to just the tip section using a silicone applicator. Cure fully and seal with no-wipe top coat. The result is a French tip that looks dipped in liquid chrome, glossy and multidimensional.
This design does require an LED lamp and gel products, but the technique itself is one of the easier chrome applications because you are working on a small targeted section rather than the whole nail.
14. Sunset Ombre (Vacation Statement Set)
If you want one design that screams vacation and looks like it was professionally done, sunset ombre is it. You are blending three colors, warm yellow at the base, coral in the middle, and hot pink or magenta at the tips, using the same sponge technique as single-color ombre but with two color transitions instead of one.
Apply the three shades onto your palette, overlapping them slightly. Use a new sponge and dab the full gradient onto the nail in multiple light layers, reloading the sponge each time. The first try may look muddy. The second will look much better. By the third nail you will have it. I genuinely mean this: sunset ombre was one of the first gradient designs I practiced in my nail lab, and the jump between the first nail and the sixth nail in a single session is remarkable. Your hands learn fast.
15. Glazed Chrome with a Colored Base (The Elevated Viral Set)
The original glazed-donut is chrome over a plain base, and it is beautiful. But the design gets far more interesting when you shift the base color. Try chrome powder over a sheer coral for a rose-dipped effect, over a pale blue for an icy summer finish, or over a warm terracotta for a bronzed metallic that looks genuinely unique. The technique is the same as basic chrome (sticky layer, silicone applicator, circular motion, seal with no-wipe top coat), but the color underneath transforms the final look completely. This is a great example of one technique producing fifteen different aesthetics depending on what you put under it.
A Note on Gel Nails for Vacation: What You Should Know
If you are doing any of the gel-based designs above, a quick note on the light. At-home gel kits use LED lamps that cure polish using UV-A light. The exposure per session is short, but it is worth being informed. The Skin Cancer Foundation recommends applying broad-spectrum SPF 30+ sunscreen to your hands at least 20 minutes before UV lamp exposure, and this is a habit worth building whether you are doing gel at home or in a salon. A 2024 systematic review published in the peer-reviewed literature found that the risk of cutaneous malignancy from gel nail lamp use appears low, but repeated long-term exposure is the variable that warrants caution. Fingerless UV-protective gloves are a practical option too, and they are inexpensive. Cure for the time your specific gel system specifies, not more.
On the topic of gel ingredients: some gel polishes contain HEMA (hydroxyethyl methacrylate), an acrylate compound that can cause allergic contact sensitization when uncured gel touches the skin repeatedly. If you ever notice itching, redness, or swelling around your nails after a gel application, stop using that formula and consult a dermatologist. The allergy can worsen with repeated exposure. Avoid flooding your cuticles with gel and cap your free edge to minimize skin contact with uncured product.
For removal, always soak off. The AAD explains that gel manicures are less immediately damaging than acrylics when removed correctly, but peeling or forcing gel off mechanically is what causes the thinning and surface damage people associate with gel. Soak a cotton pad in pure acetone, place it on the nail, wrap each finger in aluminum foil, and wait ten to fifteen minutes.
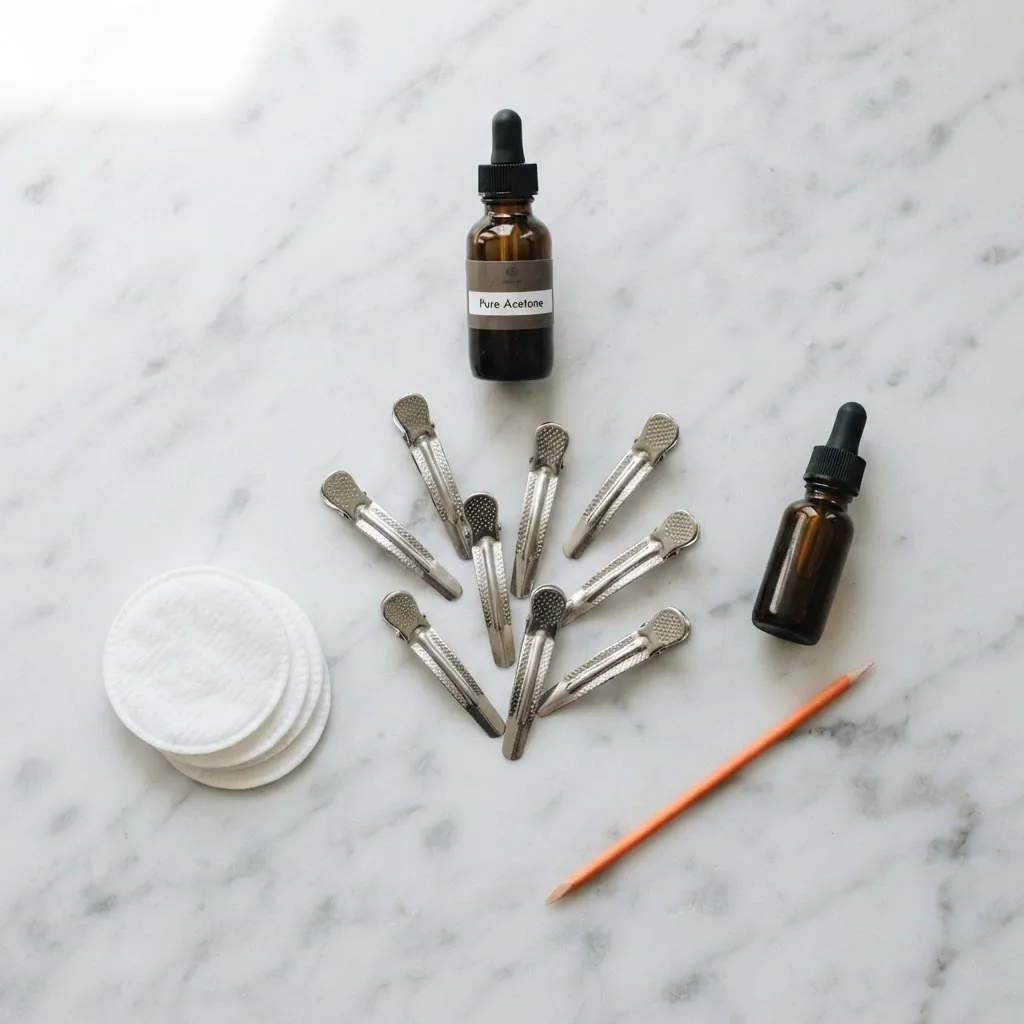
The gel will slide off with a gentle push from an orange stick.
Making Your Manicure Last Through the Whole Trip
Vacation is hard on manicures. Saltwater, chlorine, sand, sunscreen, and heat all attack your polish from different angles. Here are the specific things that make the biggest difference between a manicure that lasts the whole trip and one that chips on day two.
Avoid getting your nails directly in the sun for the first hour after application. UV light from the sun can slightly shift the color of some gel polishes, and it can also cause regular polish to bubble if the nail surface is warm. Let everything cure and set at room temperature first.
Wear rubber gloves when applying sunscreen to your body before the beach. Sunscreen is one of the sneakiest culprits for polish lifting because it coats the edge of the nail and works its way under the tip. Alternatively, apply your sunscreen first, let it absorb, then wash your hands before touching your nails.
Rinse your hands with fresh water after swimming in the ocean or pool, then pat dry and apply cuticle oil. Saltwater and chlorine dry out the nail and the surrounding skin significantly, and that dehydration speeds up chipping.
If you get a small chip on day three, do not panic. A thin coat of the same base color over the chipped area, plus a fresh layer of top coat over the whole nail, will buy you another few days without the whole manicure looking compromised.
Quick Reference: Which Design for Which Skill Level?
For complete beginners who have never done nail art before, jelly nails, single-shade chrome, solid coral, and Italian summer nudes are the most forgiving and most likely to succeed on the first try with no practice. For people who have done a few at-home manicures and want to try something new, modernized French tips, cat-eye gel, and watermelon nails are excellent next steps. For confident DIYers who want a challenge that will genuinely impress, sunset ombre, hibiscus florals, and glazed chrome over a colored base are worth sitting down for. Every single design on this list works on short nails.
And if something goes wrong, that is not failure. That is the first practice nail. The second will be better. The fifth will be the one you photograph.