10 Cornrow Hairstyles Ranked by Beginner Skill Level
Let me be honest with you right at the start: the first time I tried to cornrow my own hair, I made it exactly one section before the whole thing just… dissolved into a fuzzy question mark at the back of my head. I had watched people do this for years in the salon and I genuinely thought I understood what was happening. I did not. There is a difference between watching a technique and knowing a technique, and cornrows are one of those skills where that gap can feel wide when you are first starting out.
But here is the thing I want you to hear before we get into any of the styles below: cornrowing is absolutely a learnable skill. It is not some secret that stylists gatekeep. It is muscle memory, and muscle memory comes with repetition. The reason I am ranking these 10 styles by beginner skill level is because the number-one mistake I see beginners make is starting with the hardest, most complicated version of the look they pinned on Pinterest. If you start at level one and work up, everything clicks faster.
Before we dive in, I also want to say this: cornrows carry real cultural weight. They originated in Africa thousands of years ago as a meaningful form of self-expression and community identity. If you want to read more about that history before you start, Byrdie’s piece on the beautiful Black history of cornrows is a genuinely good place to start. Approaching this style with that knowledge and respect matters.

Now let’s talk about the actual styles, from the easiest to the more adventurous.
What You Need Before You Start:
You do not need a lot of tools, but you do need the right ones. Here is the honest beginner kit:
- A rat-tail comb for clean parting (this is non-negotiable, your parts will look messy without it)
- Duckbill sectioning clips to hold hair out of the way
- A light-hold edge control gel or braid gel for grip (more on this below)
- A spray bottle with water
- Small clear elastics for the ends
- A satin bonnet or scarf for sleeping in your style
For product, the most consistently recommended drugstore option is Eco Styler Gel (usually around $4 to $6 at most drugstores and beauty supply stores). It provides grip without flaking too badly and works across a wide range of hair textures. Got2b Glued Styling Gel is another accessible option that reviewers repeatedly point to for keeping sections smooth and frizz-free. You do not need an expensive salon braid spray to start.
A Quick Note on Tension (Read This, It Matters):
Before we talk about styles, I want to address the tension question because it is genuinely important and most beginner articles skip it. The American Academy of Dermatology explicitly notes that hairstyles that pull tightly, including cornrows, can cause traction alopecia, a form of hair loss that typically starts at the temples and hairline. This is not a reason to avoid cornrows, it is a reason to braid with awareness. A braid should feel snug but never painful. If your scalp is throbbing, your edges are flaking, or you are getting bumps along the hairline, the tension is too high. This is especially important at the hairline where the hair is finer and more vulnerable.
The rule I always came back to while working in the salon: if it hurts, it is too tight. Full stop. Loosen it, even if the braid looks less crisp. Your hair and scalp health are not worth a perfect part.
TIER ONE: Total Beginner (Start Here)
Style 1: Two Cornrow Braids (The Absolute Foundation)
Difficulty: 1 out of 5
If you are brand new to cornrowing, this is your first practice session. Two cornrow braids means parting your hair straight down the middle and creating one cornrow on each side, running from your hairline to the nape of your neck. It is the most forgiving style because you have big, chunky sections, a straightforward path (no angles, no curves), and if one side comes out imperfect you can redo it in ten minutes.
The technique for a cornrow is built on a regular three-strand braid, but with one crucial difference: instead of just crossing strands over each other, you pick up small pieces of hair from the scalp with each crossover, working flat against the head rather than away from it. If you have never done it before, WikiHow’s step-by-step cornrow guide for beginners walks through the grip and pickup motion really clearly with illustrated steps, which can help when video tutorials move too fast.
For your first attempt, dampen your hair slightly and work in small, even sections. The most common beginner mistake on this style is losing tension when you pick up new hair, which makes the braid puff up instead of laying flat. Take your time, keep your hold firm but not painful, and do not worry if the first one looks bumpy.

That is completely normal and it will improve with each practice attempt.
Style 2: Jumbo Cornrows (Two to Four Rows)
Difficulty: 2 out of 5
Once you can execute two clean cornrow braids, jumbo cornrows are the natural next step. This style involves three to four wide, flat cornrow sections running straight back from the forehead to the nape. The sections are thick, so there is a lot of grip and the braid tends to stay together more easily than a thin one. The extra challenge here over Style 1 is creating parallel, even parts, which is where that rat-tail comb really earns its place in your kit.
This style photographs beautifully and is one of the most popular starter cornrow looks on Pinterest right now. The crisp, clean lines give it a polished look that absolutely does not telegraph “I did this myself for the first time,” which is very much the vibe we are going for.
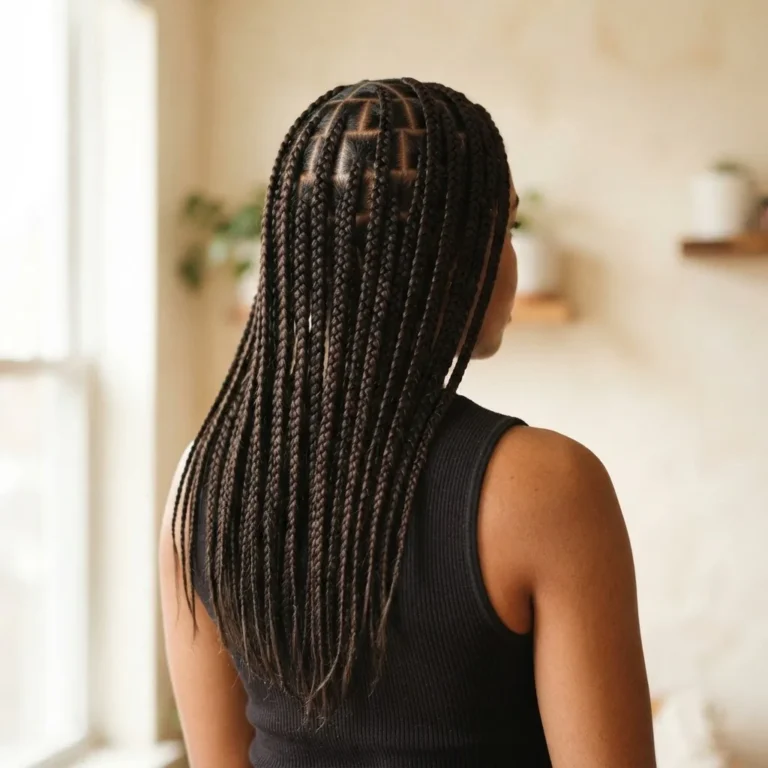
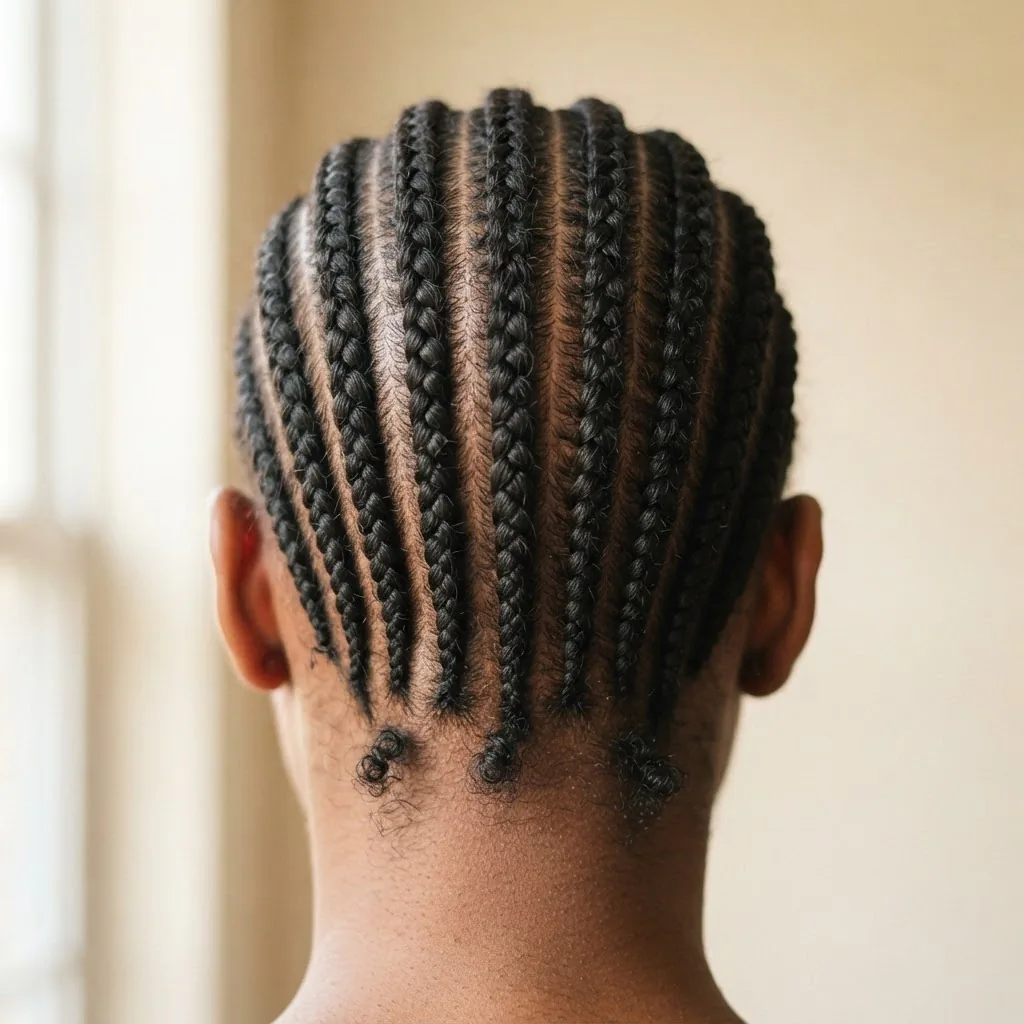
Style 3: Straight-Back Cornrows (Six to Eight Rows)
Difficulty: 2.5 out of 5
This is the classic all-back cornrow style: anywhere from six to eight neat rows running parallel from front to back. The technique is exactly the same as the jumbo version but you are working with thinner sections, which means tighter tension management and more precise parting. This is also where the styling gel becomes your best friend, because finer sections show flyaways more than thick ones.
Give yourself at least two or three full practice sessions before you try this on a day when the result matters. The first time through your parts will probably not be perfectly even. That is fine. Getting comfortable with the motion comes first, then the precision follows.
TIER TWO: Confident Beginner (Once You Have the Basics)
Style 4: Feed-In Braids
Difficulty: 3 out of 5
Feed-in braids are one of the most popular cornrow styles right now, and for good reason, they look incredibly natural and flat against the scalp. The difference between a feed-in braid and a regular cornrow is in how extensions are incorporated. In a regular cornrow you add a knot of extension hair right at the base. In a feed-in braid, you gradually add small pieces of extension hair throughout the braid as it progresses, which creates a seamless build-up from thin at the root to thicker toward the end, with no visible knot.
The result is a much flatter, more natural-looking root that stylists and clients love. If you want a longer, fuller cornrow style without the bulky start, feed-in is the method. Izey Hair’s breakdown of feed-in braids versus regular cornrows shows the difference side by side in photos, and it clicks immediately once you see it visually.

Feed-in braids take a little longer to execute, so budget extra time for your first session.
Style 5: Side-Swept Cornrows
Difficulty: 3 out of 5
Instead of running straight back, side-swept cornrows angle diagonally across the head, usually gathering toward one side or falling into a braid or bun on one shoulder. This style adds a lot of visual dimension with relatively small changes to the technique, but those angled parts are genuinely harder to execute cleanly than straight-back rows. The parting goes diagonal, which means you are fighting the natural direction your hair wants to sit, and the tension management changes slightly as you work at an angle.
This is a beautiful transitional style, meaning it bridges the gap between very casual and polished really well. It works on a wide range of hair textures and is currently one of the more pinned cornrow looks alongside the classic all-backs.
Style 6: Cornrow Bob
Difficulty: 3 out of 5
A cornrow bob stops the braids at the nape of the neck or jaw rather than letting them hang long. The rows themselves are straight-back cornrows or feed-in braids, but the shorter length creates a structured, blunt-ended effect that looks very modern and intentional. For beginners, the shorter ends can actually be a little trickier to finish neatly, because there is less hair to secure at the tip and small elastics need to be placed carefully. But the overall look is very achievable once you have the basic cornrow motion down, and it is a great choice for anyone who wants the cornrow look without the maintenance commitment of longer braids.
TIER THREE: Intermediate Beginner (A Real Stretch Goal)
Style 7: Zig-Zag Part Cornrows
Difficulty: 3.5 out of 5
Everything about this style is the same as straight-back cornrows except the parts themselves. Instead of a clean straight line, each part zigzags from side to side as it runs from front to back. The result is a really intricate-looking finish that suggests much more skill than it actually requires, because the braid technique is identical. The extra challenge is entirely in creating those clean, consistent zig-zag lines with your rat-tail comb, which takes patience and a steady hand.
Practice the parting pattern on dry hair before you start braiding so you can see how even your lines are. A small amount of gel along the part line will help the hair stay separated as you work.
Style 8: Stitch Braids
Difficulty: 4 out of 5
Stitch braids are a specific variation of cornrows where, as you braid, you use a rat-tail comb to create the appearance of horizontal “stitches” or lines running across each braid. The effect is created by lifting and dividing the hair at specific intervals as you work, giving the finished braid a woven, graphic look that photographs really distinctively.
This technique takes a fair amount of hand coordination and rhythm, and it is genuinely harder to teach yourself from scratch than the styles above. That said, if you love the look and you have the patience, it is not out of reach for a determined beginner. Budget time, go slowly, and do not stress if the spacing of your stitches is uneven the first few times.
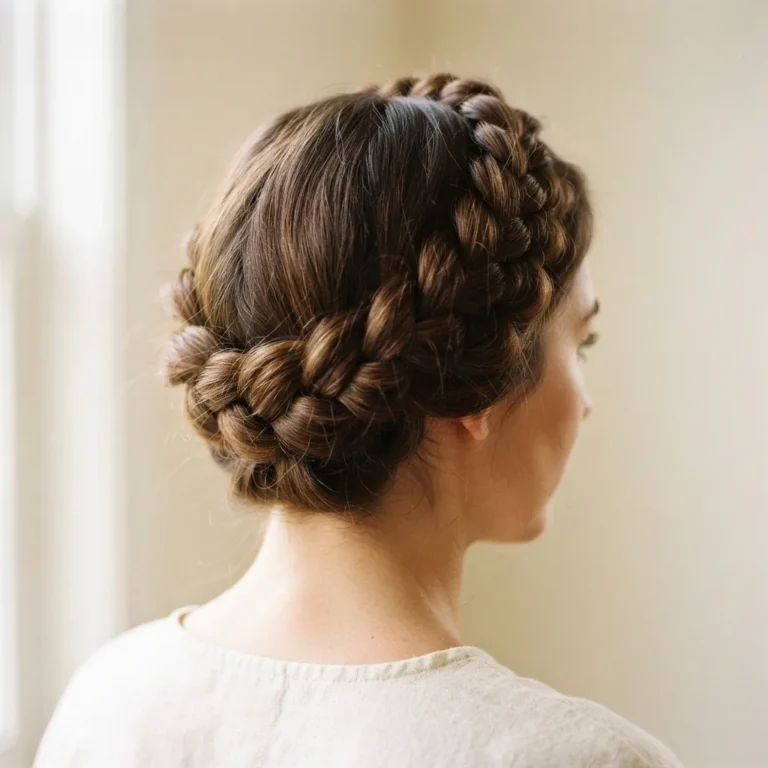
Style 9: Halo Cornrow Braid
Difficulty: 4 out of 5
A halo cornrow follows the perimeter of the head rather than running from front to back. It wraps around the head like a crown or headband, and the result is one of the most elegant, Pinterest-perfect cornrow styles you can do. For beginners, this is genuinely tricky because you are cornrowing in a curved path rather than a straight one, which changes how you hold and feed the sections with each stitch. The tension management is also more demanding because the sections are following the curve of the scalp. I would recommend getting very comfortable with at least Styles 1 through 4 before attempting this one. When it works, it is stunning, but it takes real practice to get there.
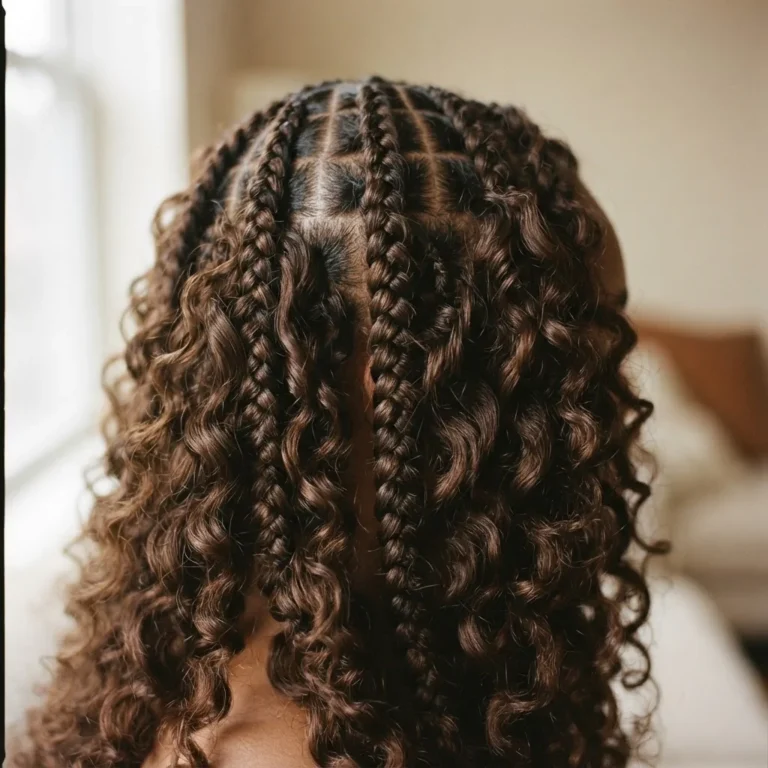
Style 10: Boho Cornrows with Curly Ends
Difficulty: 3.5 to 4 out of 5 depending on execution
This is the cornrow style that is absolutely everywhere on Pinterest right now, and I completely understand why. Boho cornrows are typically a few loose, face-framing cornrow sections that flow into loose wavy or curly ends, often with small braids or strands left out around the face for that effortlessly undone look. The braided sections can be as simple as two to four cornrows running back, which is well within beginner territory. The “boho” element usually comes from leaving wavy or curly hair out at the ends rather than fully braiding to the tip, and sometimes adding synthetic wavy hair blended into the ends for length and texture.
The reason I placed this at the 3.5 to 4 range is that getting the boho effect to look intentional rather than accidental takes a bit of styling knowledge. You want some sections loose around the face, some braided to the crown or nape, and the ends flowing freely. It is more about composition than technique complexity, but that composition judgment does take some practice. When you nail it, it is genuinely one of the most gorgeous and modern cornrow looks available.
Hair Type Adjustments: Making These Styles Work for You
One of the most common questions I get is whether cornrows work on straight or fine hair. The honest answer is yes, with some important adjustments. For straight or fine hair specifically, InStyle’s guide to low-tension braid styles for thin hair is worth a read because it covers the principle really well: low-tension execution is everything when your strands are fine. Keep your sections slightly thicker than you might on thicker hair, use a light grip gel for hold, and lean toward the beginner-tier styles (1 through 3) before attempting the advanced ones. Fine straight hair tends to slip out of cornrows faster than textured hair because it lacks the natural texture that helps braids grip themselves.

A light misting of water and a thin layer of braid gel will help significantly.

For natural hair in the 3c to 4c curl range, cornrows are a genuinely wonderful protective style, and your hair texture will give you natural grip that makes the braid hold beautifully. The key adjustment for very tightly coiled hair is starting on freshly moisturized, stretched hair rather than hair that is fully contracted.
Working in a light leave-in conditioner before you braid will keep the hair pliable and reduce the tension needed to create clean sections. If your hair is very densely coiled, cornrows that are too small or too numerous can also increase tension on the scalp, so start with the larger, fewer-row styles and work up gradually.
Keeping Your Cornrows Looking Fresh
Once your style is in, maintenance is simple but worth doing properly. Sleep in a satin bonnet or on a satin pillowcase every night without exception, because cotton pillowcases create friction that frizzes the braids and drags out the edges.
A light spritz of water or braid spray in the morning helps refresh the look without adding product buildup. Most cornrow styles, depending on hair type and how tightly they were braided, last between one and three weeks before they start to look too fuzzy or grown-out to wear confidently.
On the topic of wearing time: if you are wearing cornrows as a protective style, most stylists and dermatologists recommend not wearing any tight braided style continuously for more than two to four weeks without giving your scalp and hairline a proper rest.
A 2018 peer-reviewed study published in the International Journal of Women’s Dermatology confirmed that prolonged tension from braided hairstyles like cornrows is among the highest-risk patterns for traction alopecia, particularly at the temples and hairline. Take down gently, be generous with your detangling conditioner during takedown, and give your hair at least a week or so between tight braid installs to recover.

Troubleshooting: Where Beginners Most Often Go Wrong
The most common beginner frustration with cornrows is the braid unraveling or puffing up before you reach the nape. This almost always comes down to tension release: when you pick up a new section of hair from the scalp and add it in, it is easy to accidentally loosen your grip on the existing braid. Practice keeping three-point tension on all three strands throughout the pickup motion, not just on the new section you are adding.
The second most common issue is sections that look uneven or crooked. This one is purely a parting problem. Slow down on the part, use your rat-tail comb in one clean stroke rather than multiple dragging attempts, and clip away the sections you are not working on so they do not fall into your working area.
Finally, edges. If your edges are not laying flat or they are frizzing up and escaping the braid, a small amount of edge gel applied with a soft toothbrush or edge brush directly along the hairline and then smoothed with a satin scarf for a few minutes will make a significant difference. This step alone elevates the finished look from “home job” to “polished and intentional” and it takes maybe three minutes.
The Bottom Line
Cornrow hairstyles have a learning curve, and I want to be straightforward about that rather than just cheerleading from the sidelines. But that curve is genuinely not as steep as it looks from the outside when you break the styles down by difficulty and approach them in order. Start with Style 1. Really sit with it. Then Style 2. By the time you are at Style 4, your hands will have started to figure out the motion in a way that no tutorial can fully give you, only practice can.

You will probably have a not-great first session. That is so normal and it means nothing about whether you can eventually nail this. Some of the most gorgeous braiders I watched during my salon years were completely self-taught. They just did not quit after the first messy attempt.
Pick one beginner style, gather your tools, and try it this weekend. I promise the gap between “I could never do that” and “I actually did that” is smaller than you think.