15 Short Square Nail Ideas You Can Actually Do at Home
Let me tell you something I wish someone had told me earlier: short square nails are not the backup shape you pick when your nails break. They are a choice. A clean, modern, intentional one. And once you get the filing right, they become one of the most versatile canvases for nail art you will ever work with.
I know, because this is the shape I practiced on during that long, boring internship with my $4 dotting tool and way too much nervous energy. Short. Square. Wobbly lines and all. And somewhere between the fourth and fifth attempt at a tiny dot pattern on my ring finger, I stopped thinking of my nails as “not long enough” and started seeing them as exactly enough.
So whether you are here because you saved a set on Pinterest and want to actually recreate it, or because you keep getting talked into other shapes at the salon and wonder if square is really for you, this is your guide. Fifteen real designs, honest technique notes, tips for every nail length and hand shape, and zero gatekeeping. Let’s get into it.
First Things First: What Makes Short Square Nails Actually Work
Before we get to the designs, we need to talk about the shape itself, because “square” means different things to different people and a lot of beginners accidentally file their way into a different shape without realizing it.
A true square nail has a flat, straight edge across the top and crisp corners that meet at roughly 90 degrees. The sides of the nail run parallel, straight up from the nail bed, and the free edge is filed completely flat. It looks graphic, precise, and incredibly clean when done right.
The shape people usually end up with by accident is a soft square (also called squoval), where the corners are slightly rounded. That’s not a mistake, it’s actually a beautiful shape in its own right, and plenty of these designs look just as good on a soft square. But if you want true square energy, the corners need to stay crisp.
Here is how to get there: start with nail clippers to get your length consistent, then take a medium-grit file (around 180 grit) and file straight across the top of the nail, keeping the file flat and parallel to the floor. Then, to sharpen the corners, file each side of the tip lightly at a near-90-degree angle, a few strokes, just enough to define the edge without removing too much.

As the American Academy of Dermatology recommends, always file in one direction rather than sawing back and forth, because the back-and-forth motion weakens the nail plate over time and leads to splitting.
One more thing before we move on: push your cuticles back gently with a rubber-tipped pusher after soaking or showering when the skin is soft, but please do not cut them. Cuticles are a protective seal for your nail root and removing them opens the door to infection. Leave them alone, moisturize them, and thank them for doing their job.
Do Short Square Nails Work on Wide Nail Beds?
This is the question I get more than almost any other. The honest answer is yes, but with a caveat about design choice. Square shapes do emphasize the horizontal line of the nail, which can make a wide nail bed look slightly wider. The fix is not to avoid the shape. It is to be smart about color and design.
Vertically-oriented designs (like a single stripe down the center, a thin French tip, or a floral placed at the center rather than spread edge to edge) draw the eye up rather than across. Nude and sheer shades sit closer to your skin tone and minimize the horizontal emphasis. Deep, rich colors like burgundy, forest green, and navy add drama that distracts from width entirely. The designs labeled below will include notes on which work especially well for wider nail beds, so keep an eye on those.
The 15 Designs
1. Classic Square French Tip (Modern Version)
The French tip has been everywhere again, but not the thick, stark-white tips of the early 2000s. The current version is thinner, more precise, and comes in white, off-white, sheer beige, and even pastel pink. On a short square nail, a thin white tip at the very edge of the free edge looks incredibly clean. The trick is to use a striping brush and paint from one corner of the tip to the other in a single confident stroke, rather than trying to freehand a curve (short square has a flat edge, so there is no curve to worry about, which actually makes this easier than a rounded French tip). Seal with a glossy top coat and you have a set that reads expensive at every budget level.
Works especially well for: wide nail beds, office environments, any skin tone.
2. Glazed Donut / Chrome Nails
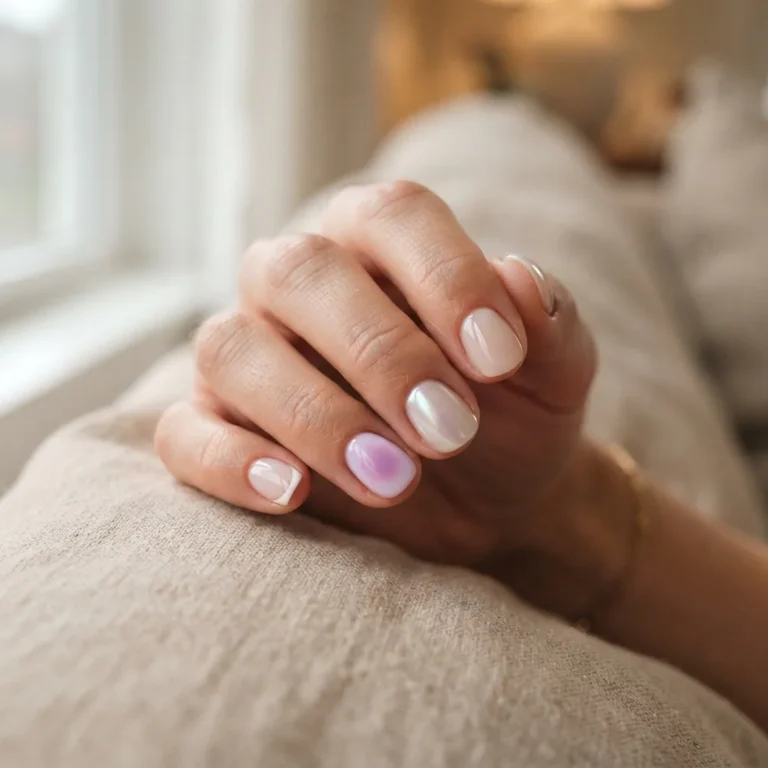
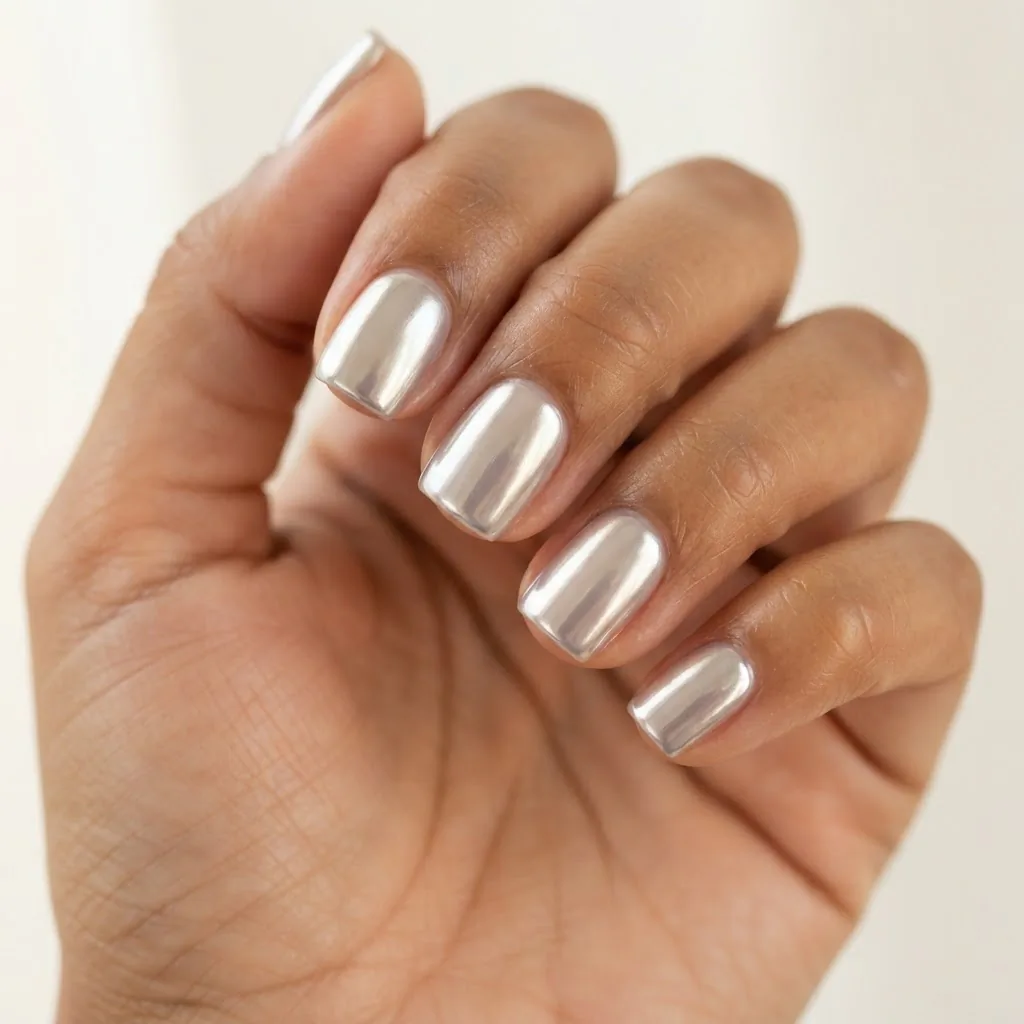
This is the one that launched a thousand saved Pinterest boards, and I am happy to confirm it is genuinely achievable at home on short square nails. The look relies on chrome powder rubbed over a cured, slightly tacky no-wipe gel top coat. You do not need a UV lamp for the regular-polish version: there are gel-effect peel-off base coats that create enough surface tackiness for chrome powder to grab. Apply your base color (milky white, soft champagne, or nude are traditional), cure or let dry, then apply a thin layer of no-wipe top coat, cure briefly, and use a small silicone applicator or a folded eyeshadow brush to buff chrome powder in small circular motions over the nail. The short square shape is honestly perfect for this because the flat canvas gives the chrome nowhere to get distorted.
Works especially well for: all nail bed widths, special occasions, bridal prep.
3. Aura Nails
Aura nails are the soft, blurry gradient design that looks like a sunset living on your fingertip, and they are having a very long moment for good reason. The technique is simpler than it looks: apply a base coat and one coat of a light background color, let it dry, then dab a small amount of a contrasting shade onto the center of the nail using a clean makeup sponge. Tap and blend outward gently until the edges diffuse into the background. A little shimmer polish as the center shade makes the whole thing glow. Two tones that work beautifully on short square: coral-and-white, lavender-and-lilac, and the classic hot pink-and-white.

Works especially well for: nail beds of any width, casual and weekend wear.
4. Negative Space French Outline
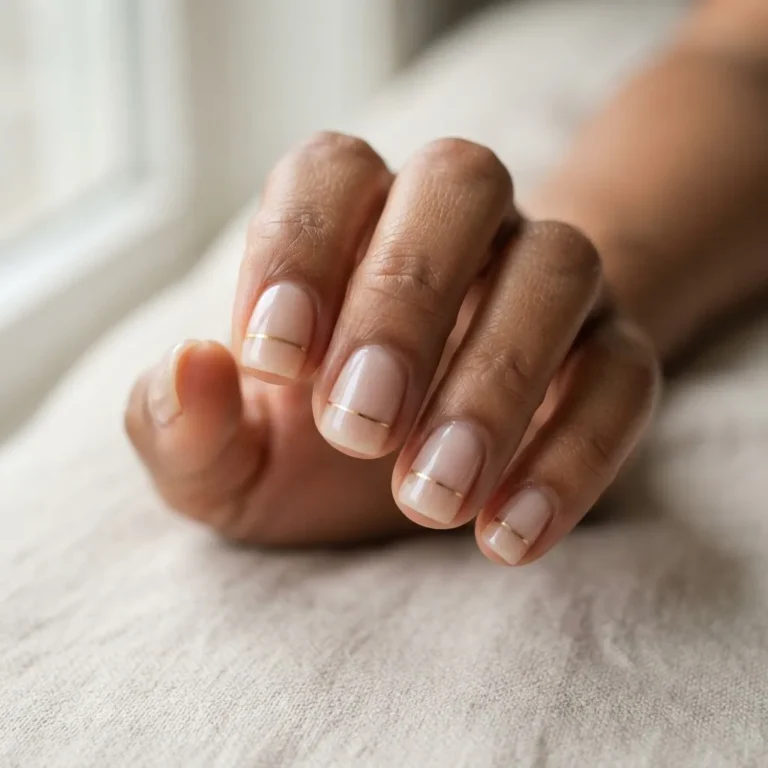
Instead of filling in the French tip area with white, you outline just the tip edge with a fine liner brush in white, black, or a color. The rest of the nail stays bare or gets a clear gloss coat. The result is graphic, modern, and extremely forgiving because an outline is easier to keep neat than a filled shape. This design takes full advantage of the square shape’s crisp corners: the outline traces the straight top edge perfectly, and those 90-degree corners become part of the design.
Works especially well for: wide nail beds (the vertical lines minimize horizontal emphasis), minimalist aesthetics.
5. Solid Deep Burgundy with Glossy Finish
Sometimes the design IS the color. A deeply pigmented burgundy, oxblood, or dark cherry on a short square nail is one of the most polished, timeless looks in existence. The key is application: two thin coats rather than one thick one, capping the free edge (dragging the brush along the very tip of the nail) on each coat, and sealing with a high-gloss top coat. No additional art needed. If you want to elevate it slightly, add a single tiny rhinestone at the base of one accent nail.
Works especially well for: all hand types, fall and winter, anyone who “can’t do nail art” (because this requires zero art).
6. Milk Bath / Floral Encapsulated Look
This is the dreamy, slightly translucent look with tiny dried florals or foil pieces suspended under a thick gel top coat. It looks complex, but the base technique for a regular-polish version is approachable: apply a sheer white or milky nude base, then while it is still slightly tacky (or over a peel-off base coat), place tiny dried flower pieces or foil flakes using tweezers or a dotting tool. Seal with two to three layers of thick clear top coat, curing each layer if using gel. The short square nail suits this look perfectly because the flat edge allows florals to sit right up to the tip without getting cut off or distorted.
7. Abstract Line Art
A thin striping brush loaded with black, white, or a contrast color, dragged across the nail in imperfect, organic lines, is genuinely one of the most beginner-friendly designs that looks like it took serious skill. The secret is that abstract line art is supposed to be imperfect. Wobbly lines are the aesthetic. I practiced this exact design during my internship and it is still one of my go-tos because it takes about three minutes per nail and photographs stunningly. Try it: white base, two thin black lines crossing asymmetrically, one accent dot. That’s it.
8. Tortoiseshell
Tortoiseshell sounds intimidating until you realize it is just blending three colors: amber, dark brown, and black, dabbed with a brush and a sponge in overlapping patches. There is no “wrong” way to do tortoiseshell because the pattern is by nature irregular. A warm amber or honey nude base, patches of brown applied with a flat brush, then dots and streaks of black blended while still wet, sealed with glossy top coat. Short square nails look especially chic with this because the pattern has room to breathe without needing to fit inside a long tapered shape.
9. Colorful Double French Tip
Two thin tip lines in different colors, one layered just inside the other, stacked at the free edge of the square nail. For example: white outer tip, lavender inner tip. Or black outer, white inner. Or coral outer, gold inner. The flat free edge of the square shape makes this far more achievable for beginners than on rounded shapes because you are painting straight horizontal lines, not curves. Use tape (regular scotch tape pressed to your hand first to remove some stickiness, then applied to the nail) to keep your lines crisp while you learn.
Works especially well for: all skill levels, any skin tone.
10. Jelly / Sheer Tinted Nails
Jelly nails are translucent, glass-like, and surprisingly effortless to achieve. Apply a sheer or jelly-formula nail polish in a candy pink, peachy coral, or even a sheer aqua over bare nails and finish with a glossy top coat. The effect looks like a soft gem on your nail. This design flatters every hand shape and every skin tone because it is a “your nail but better” situation rather than a full color statement. Budget tip: mix a tiny drop of regular nail polish into clear polish to DIY your own jelly shade.
11. Simple Floral Dots
Five dots arranged in a flower shape. That is literally the whole design. One center dot, four surrounding dots in a slightly larger size or different color, repeated on each nail or used as an accent. I started with this pattern during my dotting-tool-and-internship era, and the reason I recommend it for absolute beginners is that a slightly imperfect circle reads as intentional when it’s part of a flower shape. Use a toothpick for tiny dots or a pin end for micro dots. Place two flowers at the base of the nail on a nude background and you have a look that will get compliments all week.

12. Sunset Ombre
Ombre sounds scary and it is not. Get a makeup sponge. Apply two colors side by side on the sponge (coral and yellow, pink and orange, terracotta and nude) so they overlap slightly. Dab the sponge onto the nail with light pressure, rotating slightly each time to blend. Wipe away the color that bleeds onto your skin using a small brush dipped in polish remover or acetone. Two to three applications and you have a gradient. The short square shape keeps the ombre compact and crisp, and the flat edge means the color transition lands neatly rather than disappearing into a point.
13. Cat-Eye Magnetic Gel
Cat-eye nails use a special magnetic gel polish and a small magnet wand held close to the wet gel to pull the metalite particles into a streak pattern. The result looks like the reflective shimmer inside a cat’s iris, and it is one of those designs where the tools genuinely matter. You need a magnetic gel polish and a magnet wand (most kits come together, and they are widely available in the $15 to $25 range). Apply one coat, cure briefly, apply a second coat, hold the magnet 1 to 2mm above the wet surface for 10 to 15 seconds before curing, then cure fully. Do not skip the pre-cure step or the magnet will not be able to move the particles. Short square nails look striking with this effect because the square shape frames the streak pattern like a little window.
A quick note on UV/LED curing: research published in a 2025 peer-reviewed study in PubMed Central found that while the UV exposure per gel session is relatively low, cumulative sessions can cause DNA damage in skin cells on the backs of hands. Applying a broad-spectrum SPF 30 or higher to your hands before curing, or using fingerless UV-protective gloves, is a simple habit worth building.
14. Cow Print Accent Nail
The cow print trend refuses to leave, and it honestly belongs in the beginner-friendly category. Paint all nails a solid white or cream. On one accent nail (usually the ring finger), add irregular black blobs of varying sizes and shapes using a dotting tool or a small flat brush. The key word is irregular: no two blobs should look the same, some touching, some isolated, one or two with slightly thicker edges. Seal with matte or glossy top coat. This is a design where imperfection is built into the aesthetic, which makes it genuinely beginner-friendly in a way that geometric designs are not.
15. Minimalist Gold Foil Accent
Apply a nude or soft blush base across all nails. While the base is still slightly tacky (or over a gel base that has been cured), press small fragments of gold or holographic foil onto one or two nails using a dotting tool or tweezers. The foil naturally fragments into organic shapes as you press it, which creates a tortoiseshell-of-light effect. Seal with top coat. This costs almost nothing (foil packs are a few dollars), takes five minutes, and the result photographs like a $60 salon set.
Gel or Regular Polish for Short Square Nails: A Quick Word
Both work beautifully for these designs. Regular polish with a good top coat is lower commitment, easier to remove, and free from any chemical exposure concerns. Gel gives you a harder, shinier finish and longer wear, typically one to three weeks depending on your nail growth and prep habits.
If you are going the gel route, the biggest variable is prep. Short nails have a smaller free edge, which means less surface area for the gel to grip at the tip. Capping the free edge (running the brush along the very top edge of the nail with each coat) is not optional for short nails. It is what keeps the gel from peeling away from the tip first.
It is also worth knowing that gel formulas containing HEMA (hydroxyethyl methacrylate) are common, and while most people have no reaction, repeated exposure to uncured gel on skin can cause sensitization over time. A 2025 dermatology study in PubMed Central identified allergic contact dermatitis as the most common adverse reaction to gel manicures, with HEMA and related acrylate compounds frequently implicated. If you develop itching, redness, or swelling around the nail or elsewhere on your hands or face after a gel manicure, stop use and see a dermatologist. Most people use gel for years with no issues, but knowing what to watch for is just good practice.
The FDA’s nail care products page is also worth a bookmark: it outlines which ingredients in nail products are regulated, which carry known risks, and what “safe as directed” actually means in practical terms.
Making Any of These Designs Last: The Prep Routine That Actually Matters
I spent a long time wondering why some of my designs lasted a week and a half and others started peeling by day three. The answer was almost always prep. Here is what I do now, and it makes a real difference regardless of which design you are trying.
Start with completely clean, dry nails. Remove any old polish fully, wash your hands, and let them dry for at least two minutes before you touch a brush. Any moisture or oil on the nail plate is the enemy of adhesion. Wipe each nail with a lint-free pad and alcohol or acetone to remove the last traces of oil (especially around the cuticle area). Push cuticles back gently, buff the surface lightly with a fine buffer to create a tiny bit of texture for the base coat to grip, and dust away any filing residue.
Then apply a thin, even base coat.

This is the step beginners skip most often, and it is the one that protects your natural nail from staining while simultaneously giving your color something to bond to. Let it dry. Apply your first color coat thinly. Let it dry properly, not “dry enough,” actually dry. Then your second coat. Then your top coat. Cap the free edge every time.
The AAD also has a dedicated page with tips for reducing damage from artificial nail systems that is worth reading if you are planning to use a gel or dip system regularly, because their filing and removal guidance is genuinely practical and based on what dermatologists see in practice.
How to Remove Gel Safely at Home (Without Destroying Your Nails)
This is the section that can prevent a lot of heartbreak. The most common way people damage their natural nails with gel is not the application. It is the removal. Peeling, scraping, or forcibly lifting gel off the nail pulls layers of the natural nail plate with it, leaving your nails thin, soft, and prone to breaking for weeks afterward.
The correct method: lightly buff the surface of the gel to break the shine (this helps the acetone penetrate faster), soak a small cotton pad in pure acetone, press it firmly against the nail, and wrap the whole fingertip in a small square of foil to hold it in place. Leave it for 10 to 15 minutes. When you unwrap it, the gel should have softened and lifted at the edges. Gently push it off with an orange wood stick, working from the cuticle outward. If it does not slide off easily, re-wrap and soak for another five minutes. Never force it. Finish with cuticle oil massaged into the nail and surrounding skin to rehydrate everything.
The AAD has a step-by-step guide for removing gel polish at home that echoes this method, and I genuinely think everyone who does at-home gel should read it once before their first removal session.
A Few Colors That Make Short Square Nails Sing
Color choice is personal, but if you want a starting point, here is what I have found works consistently. For lighter skin tones, peachy nudes, warm mauves, and bright corals make short square nails look fresh and modern. For medium or olive skin tones, terracotta, warm cognac, deep rose, and forest green are stunning. For deeper skin tones, cobalt blue, rich plum, vivid coral-red, and warm gold all photograph beautifully and look incredible in person. Across all skin tones, true red and classic white are reliable classics that never compete with the shape.
If you are nervous about color, a good rule of thumb is that a sheer or jelly version of almost any color is more forgiving than a fully opaque version on short nails because it lets the natural nail show through slightly, keeping the overall effect light and polished rather than heavy.
The Honest Part: What Takes Practice and What Doesn’t
I want to be real with you about the learning curve because I think people give up before they need to.
These designs require zero art skills: solid color (#5), jelly nails (#10), glazed donut chrome (#2), gold foil accent (#15), and the minimalist dot flowers (#11). Pick one of those for your first attempt. Seriously. You will be done in 20 minutes and your nails will look genuinely great.
These designs have a small learning curve but are very doable after one or two tries: aura nails (#3), negative space outline (#4), abstract line art (#7), ombre (#12), and the modern French tip (#1). The technique is simple, but your hands need one practice round to feel comfortable.
These designs need a little investment in tools or materials and a focused first attempt: cat-eye (#13, needs magnetic gel), tortoiseshell (#8, needs color blending confidence), and cow print (#14, just needs patience). None of them require professional training. They just need your full attention the first time.
I learned all of this one shaky dot at a time on my lunch breaks, in bad lighting, with cheap tools. If I can produce a clean set after a 10-hour workday in my Chicago apartment, I promise you can get there too. The only requirement is that you start.