10 Short Nail Designs That Look Hard But Really Aren’t
Here is a thing I hear constantly, and it used to be the thing I told myself: “My nails are too short for nail art.” I said this for years. I said it while scrolling through gorgeous manicures on Pinterest and saving them to a folder I called “someday nails,” like nail art was a destination I would arrive at once my nails finally grew out.
Then I taught myself nail art on short nails, specifically because that is what I had. No acrylics, no extensions, just the slightly ragged nubs I was working with after stress-biting them through an extremely long internship. That same boring internship, that same fidgety desk energy, actually became the reason I picked up a cheap dotting tool and started practicing one wobbly dot at a time.
Turns out, short nails are not a limitation. In a lot of ways, they are actually easier to work with. Less surface area means less to fill, less chance of smearing a wet design when you move your hand, and designs that would look busy on long nails look clean and intentional on short ones. The micro-French that is everywhere right now? Made for short nails. Negative space art? Scales perfectly. Aura nails? Just as dreamy on a tiny canvas.
So I pulled together the 10 short nail designs I recommend most to beginners, ranked loosely from “truly anyone can do this tonight” to “gorgeous but give yourself one afternoon to practice.” For each one, I am going to tell you what you actually need, how to do it, what usually goes wrong, and how to fix it. No gatekeeping, no skipping steps.
Before we get into the designs though, we need to talk about the foundation that makes all of them work.
Before You Start: The Prep That Makes or Breaks Every Design
I will not bore you with a lecture, but I will be honest with you: the number one reason home nail art looks messy and chips in two days is not bad technique. It is skipped prep. The American Academy of Dermatology’s nail care tips for healthy nails include keeping nails clean and dry, filing in one direction rather than back-and-forth sawing, and moisturizing the surrounding skin regularly, all of which also directly affect how well polish adheres and how long it lasts.
Here is the three-minute prep routine I use every single time, whether I am doing a simple solid color or a full nail art design:
Wash your hands and make sure nails are completely dry. Any moisture underneath polish is lift waiting to happen. Push back your cuticles gently with a rubber-tipped cuticle pusher (never cut them unless you are trained, and even then, with caution). Lightly buff the nail surface with a fine-grit buffer to remove any shine and give the base coat something to grip. Wipe each nail with a lint-free wipe soaked in isopropyl alcohol or nail prep dehydrator. Then apply your base coat and let it dry completely before you touch color.

That is it. Five steps, three minutes, and your design will actually stay put.
A note on nail shape before we dive in: the shape of your short nails affects which designs look best. Squoval (square with softly rounded corners) and round shapes are the easiest to maintain and work beautifully with nearly all of the designs here. If you are not sure which shape suits your hand, OPI’s nail shape guide breaks it down clearly by hand type and nail bed width. For wide nail beds, a slightly oval squoval shape is particularly flattering.

Design 1: The Micro-French Tip
Difficulty: Beginner, 2 out of 5
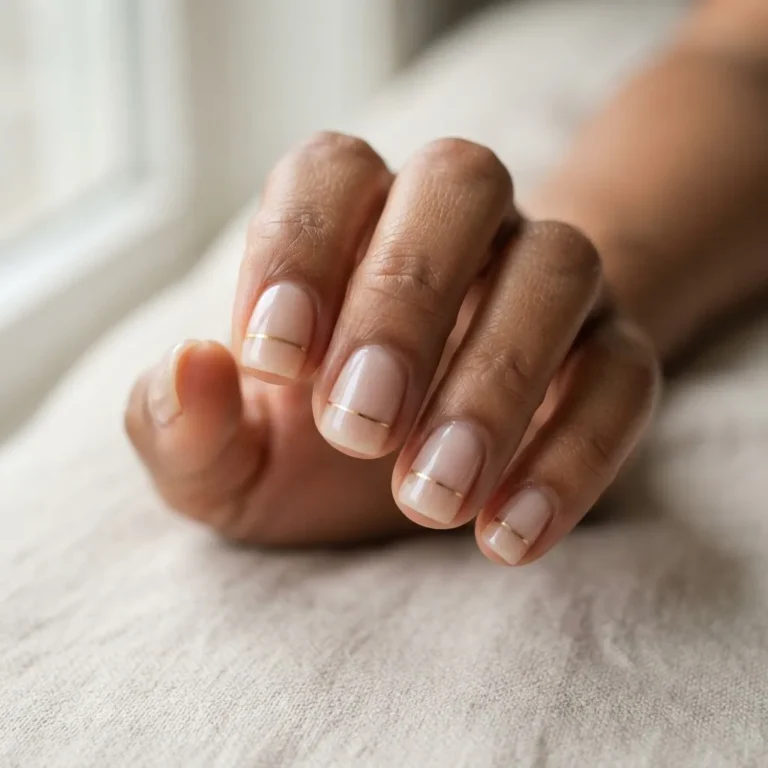
If you have been on Pinterest in the last two years, you know this one. The micro-French is the classic French manicure but with a much thinner, softer tip. Where the traditional French had a thick, bright white band that could look stark and dated, the micro-French uses a whisper of white, cream, or sheer pink, placed right at the very edge of the nail. On short nails it looks impossibly chic and, importantly, it creates the illusion of slightly more length.
Refinery29’s coverage of the micro-French trend confirms what I have seen in my own practice: this look works best with a sheer nude or milky base, not bare nail. The contrast between the soft base and the delicate tip is what makes it look modern rather than retro.
What you need: A sheer nude or milky pink polish for the base. A thin white or off-white polish for the tip. A small, thin nail art brush or even a steadied regular polish brush. A quality top coat.
How to do it: Apply two thin coats of your sheer base and let it dry fully. Dip your thin brush into the white polish and wipe most of it off on the bottle rim, you want almost dry brush. Carefully draw a thin curved line right along the free edge of the nail, following its natural curve. If your tip is very short, even the tiniest sliver of white will read. You do not need much. Seal everything with a glossy top coat.
Where beginners go wrong: The tip ends up too thick or too white, making it look old-fashioned. Less is genuinely more here. If you flood the line, use a clean thin brush dipped in acetone to clean up the edge before it dries.
Design 2: Solid Color Plus a Glossy Top Coat (The “Rich Girl” Single-Color)
Difficulty: True Beginner, 1 out of 5
Hear me out. This one sounds too simple to be on a list, but the reason it is here is that most people do not do it correctly, and when you do it correctly, it looks genuinely expensive. One perfectly applied color with a flawless glass-finish top coat is a real nail design. It is not the fallback. It is the whole point.
What you need: One color you love, in a formula with good pigment. Two thin coats cover better than one thick one. A high-gloss top coat.
How to do it: Apply base coat. Apply your first thin coat of color and let it dry for two to three minutes. Apply a second thin coat. Once that is dry, cap the free edge of the nail with your top coat (this means running the brush along the very tip of the nail edge, not just the flat surface), and then apply top coat over the whole nail. That edge-capping step is what stops tip wear and chipping.
Where beginners go wrong: Thick coats that bubble and take forever to dry. One coat rarely gives full coverage, so people pile on, and then the whole thing dents from a single brush against a countertop. Thin coats, patience, and capping the edge. That is the whole secret.
Design 3: Dot Art Florals and Polka Dots
Difficulty: Beginner, 2 out of 5
The dotting tool was my first nail art tool. Literally. I bought a cheap set on a break from that long internship, sat at my desk, and practiced making dots on paper napkins until I could place them consistently. If I can do this at a crammed desk with slightly shaky hands, you can do it at your kitchen table.
Dotting tools come in multi-size sets, typically five to ten different tips, and they run under ten dollars at most beauty supply shops or online. The large end makes bold dots and petals. The small end makes tiny accent dots and flower centers. That is the whole range you need for florals, polka dots, and even simple daisy designs.
What you need: Your base color, one or two contrasting colors, a dotting tool set, and a top coat.
How to do it for florals: Apply your base and let it dry. Put a small drop of color onto a piece of foil or a silicone palette. Dip the large tip of your dotting tool into the color drop and press it onto the nail to make a petal.

Make five petals in a rough circle. Dip the small tip into a contrasting color and press one dot in the center. Done. That is a flower. It is genuinely that simple, and on short nails, even one flower on one accent nail looks intentional and adorable.
Where beginners go wrong: The dot smears because the base coat underneath is not fully dry. Wait until the base is totally dry before placing dots on top. If a dot goes wrong while it is still wet, you can gently lift it with the dotting tool tip itself and try again.
Design 4: Negative Space Art
Difficulty: Beginner to Intermediate, 3 out of 5
Negative space nail art sounds intimidating and looks genuinely architectural. The trick is that you are not actually painting a design. You are masking off parts of the nail and letting your natural nail (or a clear base) do the work. The unpainted area becomes the design.
What you need: Reinforcement hole-punch stickers (the little white circles used for binder paper, found at any office supply store for about $2 for 200 of them) or thin nail tape. A color you love. Top coat.
How to do it: Apply a clear base coat. While it is still slightly tacky, press your reinforcement stickers or tape strips onto the nail in whatever geometric shape you want, a half-moon at the base, diagonal strips, or a center oval. Press the edges firmly so polish does not bleed under. Apply your color coat over the entire nail including the sticker. Let it dry until it is just slightly not-wet, not fully dry. Peel the stickers off gently from one end. You will have clean, sharp edges revealing the unpainted nail beneath. Top coat over everything to seal.
Where beginners go wrong: Waiting too long to peel the stickers. If the polish dries all the way, it can crack and pull when you remove the tape. Peel when the polish is dry to the touch but not fully cured. If a small edge tears, a fine detail brush dipped in acetone can clean up the line.
Design 5: Aura Nails
Difficulty: Beginner, 2 out of 5
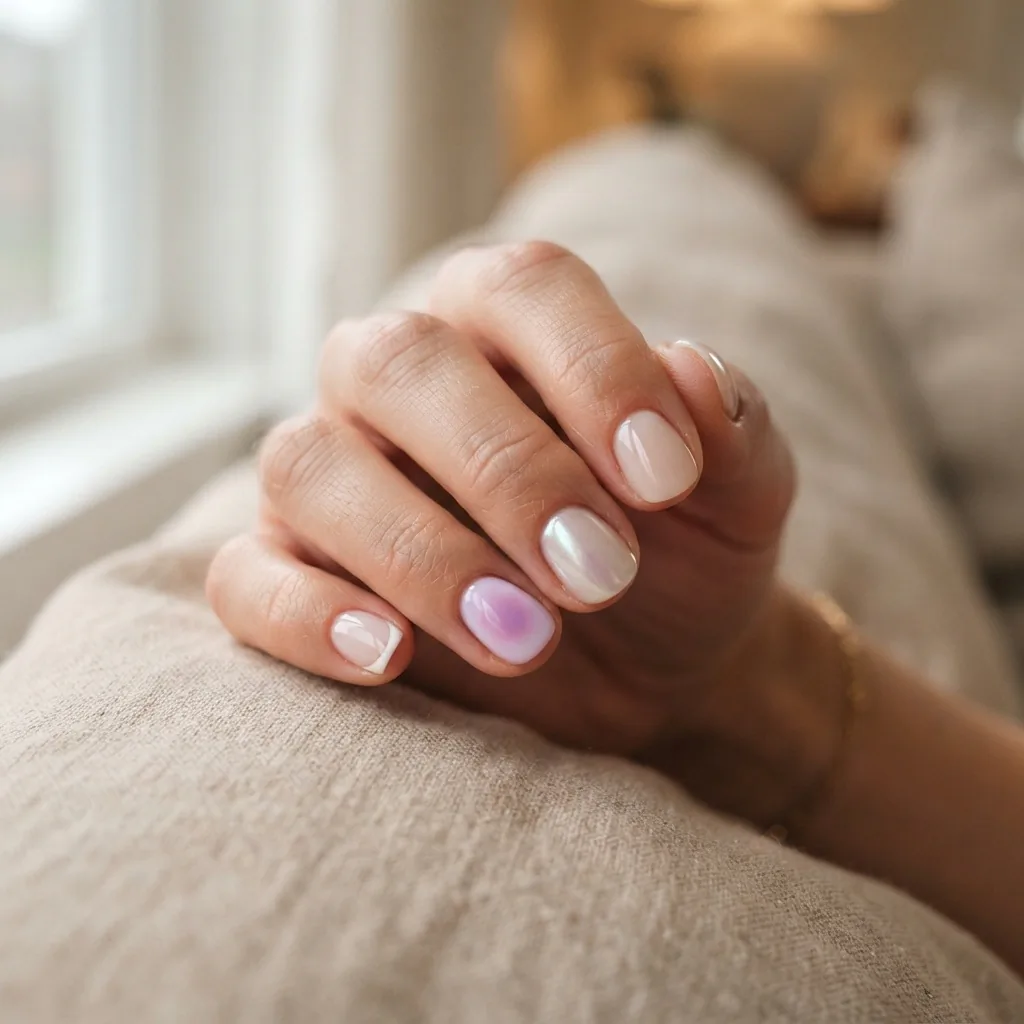
Aura nails are that dreamy, glowing-from-within effect where a soft burst of color sits in the center of the nail, fading into a lighter or sheerer shade around the edges. They look like you used professional equipment. You did not. You used a makeup sponge and two polishes.
The technique is essentially a tiny sponge gradient, but smaller and more centralized than a full ombre. You are creating a soft halo, not a full color fade across the nail.
What you need: A neutral, milky, or sheer base color. One color for the aura glow (coral, lavender, rose, and butter yellow all work beautifully on short nails). A small piece of makeup sponge, the type that comes in wedge packs. Top coat. For a more precise application, BTArtBox’s step-by-step aura nails guide walks through the sponge method with clear visuals.
How to do it: Apply your base and let it dry fully. Apply a small amount of your aura color to the sponge. Dab the sponge lightly onto the center of the nail, pressing and releasing rather than dragging. You want the color densest in the middle and diffusing outward. Repeat two to three times for depth.

The sponge blends the edges automatically. Seal with a glossy top coat, which intensifies the glow.
Where beginners go wrong: Dragging the sponge instead of pressing and releasing. Dragging smears the base and creates a muddy streak. Press, release, press, release. Also, using too much product on the sponge creates a blocky patch rather than a glow. Dab off excess onto paper before touching your nail.
Design 6: The Glazed Donut Chrome Finish
Difficulty: Intermediate, 3 out of 5 (with gel) / 2 out of 5 (with certain polishes)
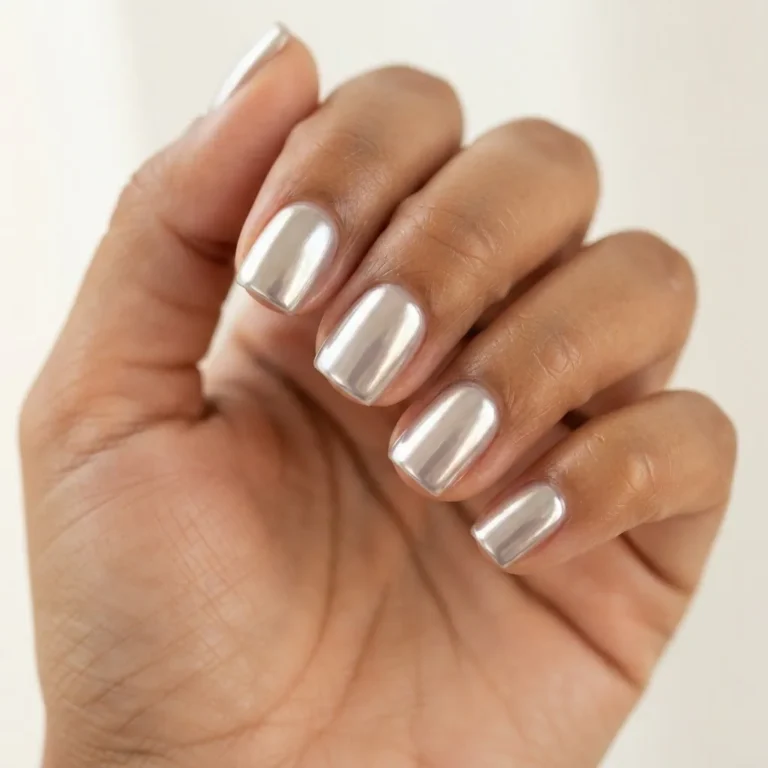
Hailey Bieber made this look famous and it has genuinely not left. The glazed donut finish is that high-shine, almost wet-looking, pearl-like chrome sheen that looks like your nails were dipped in silk. On short nails, it is especially gorgeous because it catches light without needing length to show it off.
The most reliable way to get this effect at home is with chrome powder rubbed over a gel top coat that is cured but still has a slightly tacky surface. The tacky layer is crucial because the chrome powder bonds to it. If you try to apply chrome powder over a fully dry, non-tacky surface, it will not stick.
What you need: A light pink, nude, or white gel base color. A gel top coat that cures with a tacky finish. An LED lamp. Chrome powder in a silver-pearl, rose gold, or iridescent shade (these run roughly $5 to $15 per pot, and a small pot lasts a very long time). A silicone-tipped applicator or a small eyeshadow sponge to press and buff the powder.
How to do it: Apply and cure your gel base. Apply a thin layer of gel top coat and cure for the time specified by your lamp. Do not wipe the tacky layer off. Dip your silicone tip or sponge into the chrome powder and rub it onto the nail in small circular motions. The powder will transfer and build into a mirror-like shine. Once you have even coverage, apply a second layer of gel top coat to seal the powder and cure again.

A word about gel products and safety: the American Academy of Dermatology advises being thoughtful about gel manicures at home, and their tips for healthy nails with gel polish specifically recommend applying a broad-spectrum SPF to your hands before using a UV or LED curing lamp as a precaution against cumulative light exposure. They also advise against picking or peeling gel polish because it removes layers of the natural nail with it. If you experience any itching, redness, or swelling around your nails after using gel products, those can be early signs of sensitivity to acrylate compounds. Stop use and see a dermatologist. This is not meant to scare you, because gel at home is genuinely popular and most people use it without issue, but being informed is part of doing it well.
Where beginners go wrong: Wiping the tacky layer before applying chrome powder. This is the single most common mistake. Leave the tackiness. The other issue is applying too little chrome powder and getting a patchy finish. Build it up in layers, buffing in circles until you get full coverage.
Design 7: Colorblock
Difficulty: Beginner, 2 out of 5
Colorblock is exactly what it sounds like: two or more blocks of contrasting color on the nail, divided by a clean line. On short nails, a diagonal or curved divide across the nail looks modern and intentional. White plus a bold red. Lavender plus cream. Coral plus nude. The contrast does all the work.
What you need: Two contrasting polishes, nail tape or a thin strip of scotch tape, and top coat.
How to do it: Apply your base and your first color as the base coat. Let it dry fully. Lay a strip of tape diagonally or horizontally across the nail at whatever angle you want the divide. Press the edges firmly. Apply your second color over the uncovered portion. Let it dry until just-tacky and peel the tape. Clean up any small bleeds with a thin brush and acetone. Seal with top coat.
Short nails are great for colorblock because the design does not need a large canvas. Even a small diagonal stripe of contrasting color on a short squoval nail looks like you planned it very carefully.
Design 8: Tortoiseshell
Difficulty: Intermediate, 3 out of 5
Tortoiseshell nails are all over fall mood boards and they feel harder than they actually are because the marbling effect looks so organic and fluent. The trick is using a blooming gel or nail art medium, which is a clear gel product that causes other gel polishes placed on top of it to bleed and spread organically. Without it, you are just painting brown shapes that look harsh. With it, the colors move and merge into that genuine tortoiseshell pattern.
What you need: A honey or caramel amber gel base. Blooming gel or nail art medium (these typically run $8 to $15 and a small bottle goes very far). A richer warm brown gel polish. A very deep brown or black gel polish. A thin detail brush. LED lamp and gel top coat.
How to do it: Apply your amber base gel and cure it. Apply a thin layer of blooming gel over the cured base, but do not cure it yet. Drop small amounts of your warm brown onto the uncured blooming gel using your brush, leaving irregular gaps. Add a few drops or strokes of the deep brown or black. Watch them bloom outward into the blooming gel layer. Once you are happy with the spread, cure. Seal with top coat and cure again.
The blooming process happens within a minute or two of placing the color, so work one nail at a time. Short nails are actually ideal for this because smaller surface area means the blooming effect fills the nail without you needing to place too many color drops.
Design 9: Minimalist Line Art
Difficulty: Intermediate, 3 out of 5 (thin brush practice required)
A single curved line, a tiny geometric shape in one corner, or two parallel horizontal stripes across the nail. Line art is the kind of design that looks like it required a professional and actually just requires a thin liner brush and one practice session. The simpler the line art, the better it reads on short nails.
What you need: A nail art liner brush, which is a long-bristled, thin brush that allows for controlled, fluid lines. These run $3 to $8 individually or come in sets. A contrasting color. Base and top coat.
How to do it: Apply your base and let it dry. Load your liner brush with a small amount of color and wipe most of it off so the brush is almost dry. Steady your elbow on a table. Rest the nail you are painting on a flat surface. Draw slowly and continuously in one motion rather than short, hesitant strokes. Short nails work well with abstract curved single lines, a half-moon arc near the base, or simple two-line parallel stripes.
Where beginners go wrong: Lifting the brush mid-stroke, which creates a broken line. Practice the stroke on paper or the back of your hand first. One confident single motion looks better than three cautious, short ones.
Design 10: Stamping
Difficulty: Beginner to Intermediate, 3 out of 5 (with a tiny learning curve)
Stamping is the absolute cheat code for intricate nail art on short nails. You press a metal plate engraved with a design into nail polish, transfer it to a silicone stamper, and press that onto your nail. The result looks detailed and professional. It requires almost no freehand skill.
What you need: A nail stamping kit, which typically includes a stamping plate with multiple designs, a silicone stamp head, and a scraper. These sets run roughly $10 to $20 for a complete beginner kit. A special stamping polish, which is more opaque and pigmented than regular polish so the design transfers cleanly.
How to do it: Apply base color. Apply stamping polish over your chosen design on the plate and immediately scrape off the excess with one clean, swift stroke. Press the stamper onto the design, then lift. Press the stamper onto your nail. Lift. The design should transfer. Seal with top coat immediately because stamped designs can smear before they cure.
The one adjustment for short nails: choose designs that are small enough to fit your nail without cutting off too much of the pattern. Plates often have full-nail designs and individual smaller accent motifs. The smaller accent designs look particularly clean on short nails.
Making These Designs Last: The Top Coat, Base Coat, and Removal Conversation
Whatever designs you choose, two habits will extend the life of your manicure more than anything else: applying top coat every other day to refresh the seal, and removing polish properly without scraping or peeling.
When it comes to gel polish specifically, the most important removal note is to soak off properly rather than picking or peeling. Peeling gel off pulls the topmost layers of your natural nail with it, leaving nails thin, white, and prone to breaking. Soak cotton in pure acetone, place it on the nail, wrap in foil, and wait 10 to 15 minutes. The gel should slide off without force. If it needs scraping, give it more time.
The FDA’s nail care products page notes that while many nail product ingredients are potentially reactive, they are regulated for safe use as directed, which really does mean following proper application and removal instructions matters more than most people realize.
If you are new to gel nail products and want to understand the ingredient side better, it is worth knowing that a compound called HEMA (2-hydroxyethyl methacrylate) is present in many gel polish formulas and is a known cause of allergic contact dermatitis in some people. According to a peer-reviewed study on acrylates and allergic contact dermatitis published in the International Journal of Environmental Research and Public Health, acrylates including HEMA are an increasingly significant cause of contact allergy, particularly among people using gel nail products at home without professional ventilation. If you have never used gel products before, doing a small patch test on one nail or the inside of your wrist and waiting 24 to 48 hours before doing a full set is a sensible precaution. If you ever notice itching, redness, swelling, or peeling that seems out of proportion to normal dryness, stop use and consult a dermatologist.
None of this is meant to make gel feel scary, because most people use it comfortably and happily. It is just good to know.
A Note on Colors and Skin Tones for Short Nails
Short nails and color are a genuinely fun conversation because there are fewer “rules” than people assume. A few things I have found genuinely useful from my own testing and from what tends to photograph and read well across different skin tones:
On deeper and medium-dark skin tones, rich jewel tones (cobalt, emerald, plum, deep burgundy) look absolutely stunning on short nails. Chrome finishes in gold and rose gold are particularly warm and beautiful. Overly sheer nudes can disappear, so look for nudes that are one or two shades lighter or darker than your natural skin tone rather than exact-match.
On fair and medium skin tones, the full color range is available, but pastels, creams, and sheer milky shades look particularly cohesive and chic on short nails. Micro-French on a sheer pink base is practically made for this combination.
On all skin tones, the aura nail technique works because you can choose any base and any glow color that speaks to you. There is no skin-tone rule that applies to aura nails.

Go wild.
Final Thought From My Kitchen Table
When I started all of this, my nails were short, my hands were tired after a long workday, and I genuinely did not think I had any artistic ability. I am standing by what I always say: if I can figure this out on a lunch break with a cheap dotting tool and three napkins worth of practice, so can you.
The ten designs here cover everything from “I have literally never done nail art” to “I am ready for something that impresses people without me having to explain how I did it.” Pick the one that excites you most and start there. You do not need to work through the list in order. You do not need a full professional kit. You need a base coat, one or two colors, and the willingness to let your first attempt be imperfect.
Wobbles are part of it. They were part of it for me. They will stop being part of it sooner than you think.