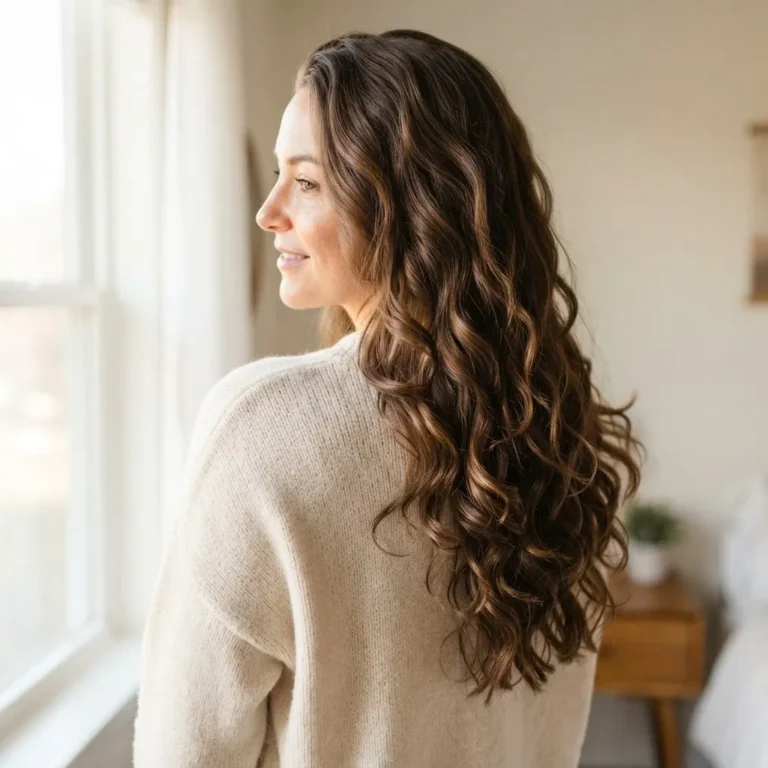
15 Robe Tie Heatless Curls Even Total Beginners Can Do
Okay, real talk. If you have ever saved one of those dreamy overnight curl videos, stared at it for a week, and then never actually tried it because it looked slightly too good to be true, you are exactly who I wrote this for.
I promise you do not need fancy tools. You need the belt from your bathrobe. That is genuinely it. The robe tie is the little hero of heatless styling, and once you learn a few ways to wrap around it, you can pull off soft waves, bouncy ringlets, and everything in between. No curling iron. No 400 degree anything. No smell of slightly singed hair at 7am.
I fell in love with heatless styling for a very personal reason. My early twenties involved a lot of hot tools and one truly regrettable box dye situation in a dorm bathroom that I will never fully live down. When I later worked as a salon assistant in Austin, I watched stylists baby their clients’ hair like it was made of spun sugar, and it rewired my brain. These days, if I can get a look without heat, I will take it every single time.
So here are 15 robe tie curl looks, sorted from “you can do this on your first try tonight” up to “give it a couple practice runs and you will feel like a pro.” I will walk you through the base technique, adjust it for your hair type, and be honest about where beginners usually trip up.
First, The One Move Everything Is Built On
Before the 15 looks, learn the base wrap. Every single style below is a variation of this, so nail this once and you are basically set.
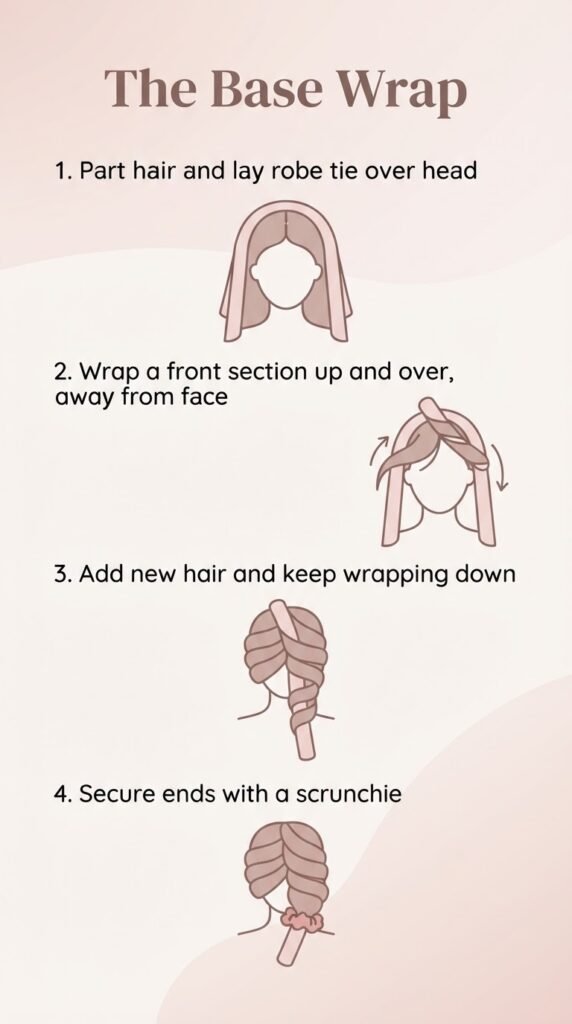
Start with hair that is mostly dry with just a little dampness, or fully dry with a light water and product spritz. This matters more than people think, and I will explain the why in a second. Part your hair down the middle. Lay the robe tie over the top of your head like a giant headband so half hangs down each side.
Take a section of hair from the front, about one to two inches wide, and wrap it up and over the robe tie, away from your face. Add a new piece of hair to that section and wrap again. Keep working down and back, feeding in new hair as you go, almost like you are braiding your hair around the tie instead of into itself. When you reach your ends, secure with a soft scrunchie or a hair tie and leave the very tips out. Repeat on the other side. Editors at Byrdie who tested this exact method rated it a solid four out of five and confirmed what I always say, which is that the results are genuinely bouncy and the only annoying part is when your robe sash is way longer than your hair, so grab a shorter tie or fold it over.
Two things decide your curl shape. Thinner sections and tighter wraps give you tight, springy curls. Thicker sections and looser wraps give you soft, loose waves. That single dial is how you get 15 different looks from one belt.
Now let’s play.
The 5-Minute Beginner Looks (Start Here Tonight)
1. The Classic Robe Wave. The base technique above, done with medium sections and a medium wrap. This is your gateway curl. Soft, natural, undone. If you do nothing else on this list, do this one.
2. The Loose Beachy Wave. Same wrap, but take fat two-inch sections and wrap loosely. You want gentle bends, not spirals. This is the “I woke up like this on vacation” look and it is very forgiving, so it is perfect for a first attempt.
3. The Half-Up Twist. Only wrap the top half of your hair around the tie and leave the bottom loose. You get face-framing curls up top with straighter ends. Great for anyone nervous about committing to a full head of curls.
4. The Low Bun Set. Do the base wrap, then instead of leaving the twisted rope hanging, coil both sides up into a low bun and pin. This is the most comfortable version to sleep in, so if past attempts failed because you tossed all night, start here.
5. The Face-Frame Only. Just wrap the two front sections that frame your face and skip the back entirely. Two minutes, huge payoff. Those front pieces are what everyone sees in selfies anyway.

The “Give It One Practice Run” Looks
6. The Princess Leia Set. After the base wrap, twist each side up and back into two little buns, one on each side of your head. Byrdie’s tester used this exact styling to hold the shape, and it packs the curl in tighter for more volume.
7. The Criss-Cross. Instead of wrapping over and over in one direction, alternate the hair in front of the tie, then behind it, then in front, working down like a fishbone. This gives you a more uniform, all-over curl that reads very polished.
8. The Deep Side Part Glam. Do the base wrap but set your part heavily to one side first. When you release, you get that old-Hollywood asymmetry with a big sweep of curls on the heavy side.
9. The Volume-Boost Root Wrap. Before wrapping, wrap the robe tie snugly at your roots first, almost like a headband pressing your roots up. This adds lift at the crown, which is gold for anyone with flat, fine hair.
10. The Tight Ringlet. Thin, one-inch sections wrapped tightly and left in overnight. This is the most dramatic result and the least forgiving, so save it for when you have a little confidence. Expect to gently separate the ringlets with your fingers after.
The “You’ve Got This Now” Looks
11. The Two-Tie Double Wrap. Use two robe ties, one for the top half of your head and one for the bottom. This gives thick or long hair a much more even curl because no single rope is overloaded. If your hair is dense, this fixes the classic “top curled, underneath flat” problem.
12. The Damp Reset Wave. For second or third day hair that has gone limp, mist it damp, add a little mousse, and do the base wrap for an hour or two. Instant revival without a wash. This is my lazy-Sunday move.
13. The Half Robe, Half Claw. Wrap most of your hair around the tie, then twist the front money pieces up separately with a claw clip for extra control over your most flattering angle. You get precision where it counts.
14. The Overnight Rope Braid. Split hair in two, twist each side away from your face into a rope, then wrap that rope around the robe tie. The pre-twist adds a spiral memory so your curls read a little more defined and last longer.
15. The Textured Undone Look. Do any wrap, then when you release, do not brush. Just rake your fingers through and hit it with a little texture or sea salt spray. This is the cool-girl, lived-in finish that looks effortless because it basically is.

Wet Or Dry Hair? Please Read This Part
Here is the question I get most, and the answer has a real reason behind it.
Do not wrap soaking wet hair. Slightly damp is fine. Bone dry with a light spritz is even safer. The reason is not just about curl hold, it is about your hair’s health. Wet hair is physically weaker and stretchier than dry hair, so hours of tension plus friction while you sleep can stress the strands more than you would expect. Cleveland Clinic dermatologists point out that going to bed with truly wet hair can also leave your scalp damp for hours, which is not ideal for scalp health over time. So aim for that just-barely-damp sweet spot, not dripping.
If you want a deeper dive on why moisture matters here, the folks at University of Utah Health explain clearly how hair becomes more fragile and prone to mechanical damage when it is wet, especially if you toss and turn. Damp, not drenched. That is the whole rule.
Making Your Hair Actually Cooperate (Handling It Gently)
Heatless styling is kinder than hot tools by a mile, but “no heat” does not mean “no care.” How you handle your hair still matters.
When you take the curls out, resist the urge to attack them with a brush. Use your fingers first, then a wide-tooth comb if you need it. The American Academy of Dermatology recommends letting hair partially air dry before combing and being gentle when detangling, because rough handling is one of the sneaky everyday causes of breakage and frizz. Since you are already skipping heat, do not undo that good deed with aggressive brushing.
A tiny bit of product helps too. A pea of leave-in or a light mousse before wrapping gives your hair something to hold the shape with. Skip heavy oils and thick creams before wrapping, though, because they weigh the curl down and it will drop faster.
How To Make Robe Curls Actually Hold
This is where most beginners get discouraged, so let me save you the frustration.
If your curls fall out by lunch, it is almost always one of three things. First, your hair was too wet or, ironically, too dry with no product to grip. Second, you did not leave them in long enough. Overnight is ideal, but even a fully set two to three hours beats twenty rushed minutes. Third, you took them out and immediately brushed the life out of them.
Section size is your other secret. Fine hair holds a curl better with smaller sections. Thick, heavy, or resistant hair often needs more time and a slightly tighter wrap. And if your hair is famously stubborn and drops any curl within the hour, a light mist of flexible-hold hairspray after you release, scrunched in from the ends up, buys you hours.
Quick Adjustments By Hair Type
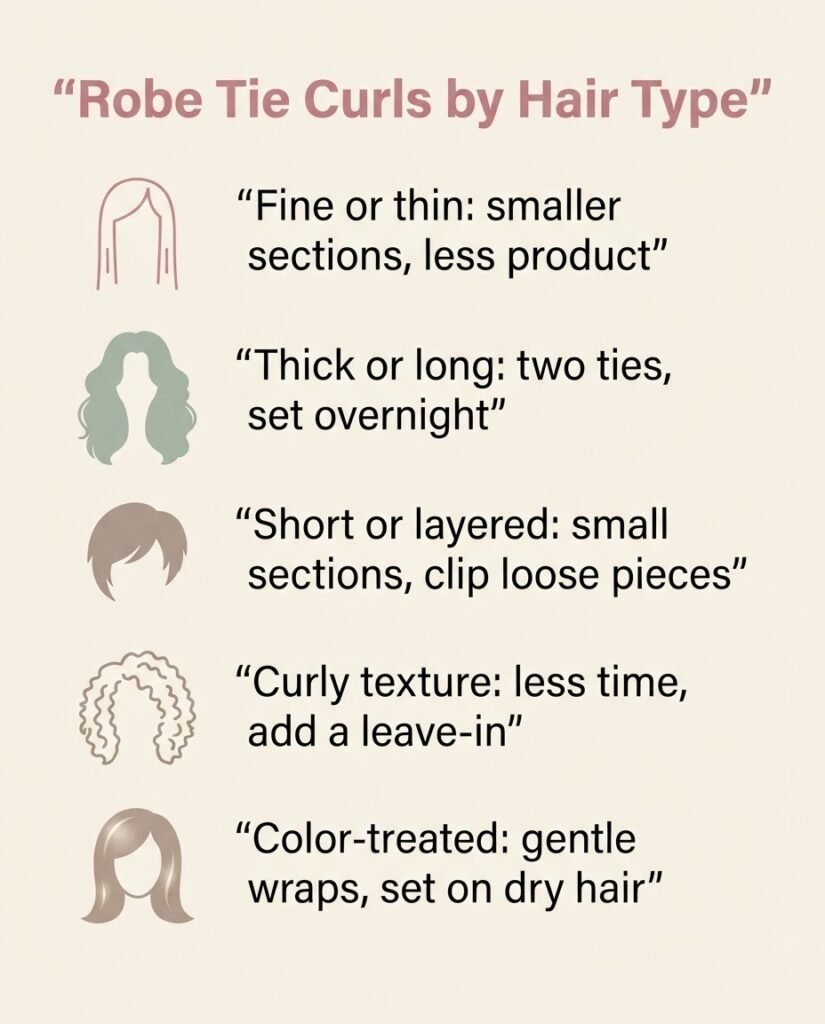
Fine or thin hair: you are the easiest case for hold, honestly. Use smaller sections, add root volume with look number nine, and go light on product so you do not flatten it.
Thick or long hair: use the two-tie method from look eleven so the curl is even top to bottom. Give it the full overnight. Your curls will also last the longest, which is a nice payoff.
Short or layered hair: shorter layers can slip out of the wrap, so use smaller sections, secure with a clip if a piece won’t stay, and lean toward the half-up looks. RobeCurls, the brand behind the popular curling ribbon, notes in their own tutorial that short and layered hair works, it just needs smaller, more careful sections and a good grip at the base.
Coarse or curly-prone texture: you often need less setting time because your hair already wants to bend, but you may want a little more moisture in the form of a leave-in to fight frizz on release.
Color-treated or damaged hair: heatless is already the kind thing to do here. Keep sections gentle, do not wrap tight enough to feel scalp tension, and if your hair is very fragile from processing, wrap on dry hair rather than damp to reduce stress on weak strands.
The Overnight Comfort Problem (And The Fix)
The honest downside of any overnight set is that a lump of twisted hair on your head is not always cozy. Two fixes. Coil the wrap into a low bun at the back, look number four, so nothing is on top of your head. And swap to a satin or silk pillowcase, which reduces the friction that causes frizz and helps your set survive the night. If you want the full breakdown on why the material matters and which is worth it for your budget, Byrdie has a genuinely useful comparison of satin versus silk pillowcases that saves you a lot of guesswork.

Want To See The Motion First?
The wrap is one of those things that clicks instantly once you watch it, even though it reads a little confusing in text. Stylist Shonagh Scott has a clear, calm robe tie tutorial that shows the over-and-under wrap in real time, and watching thirty seconds of it will make everything above make sense.
The Budget vs Upgrade Question
Do you need to buy anything? No. Your robe tie is free and it works. That is the whole beauty of this.
That said, if you fall in love with heatless curling and want something purpose-built, the satin curling ribbons and rods you see everywhere do have advantages. They are shaped to sit better and the satin is gentler on hair than a cotton or terry sash. The tradeoff, which Byrdie’s tester flagged honestly, is that satin is slippery and the rod can slide around while you set. So it is not automatically better for everyone. My take: start with the robe tie you already own, and only upgrade if you are reaching for this technique weekly.
Your First Attempt, Realistically
Here is the encouraging truth. Your first try might be a little uneven. Maybe one side curls tighter than the other, maybe a piece slips out. That is completely normal and it is not a sign you cannot do this. It just means you are learning where to place sections and how tight to wrap for your hair. By your second or third go, your hands know the motion and it takes five minutes flat.
Pick one of the beginner looks tonight. Do the classic wave. Sleep on it, or just wear it around the house for a couple hours. See what your hair does. Then adjust from there. You are not going to break anything, you are not using heat, and worst case you rinse and start over.
You absolutely can do this. Grab that robe tie and go.